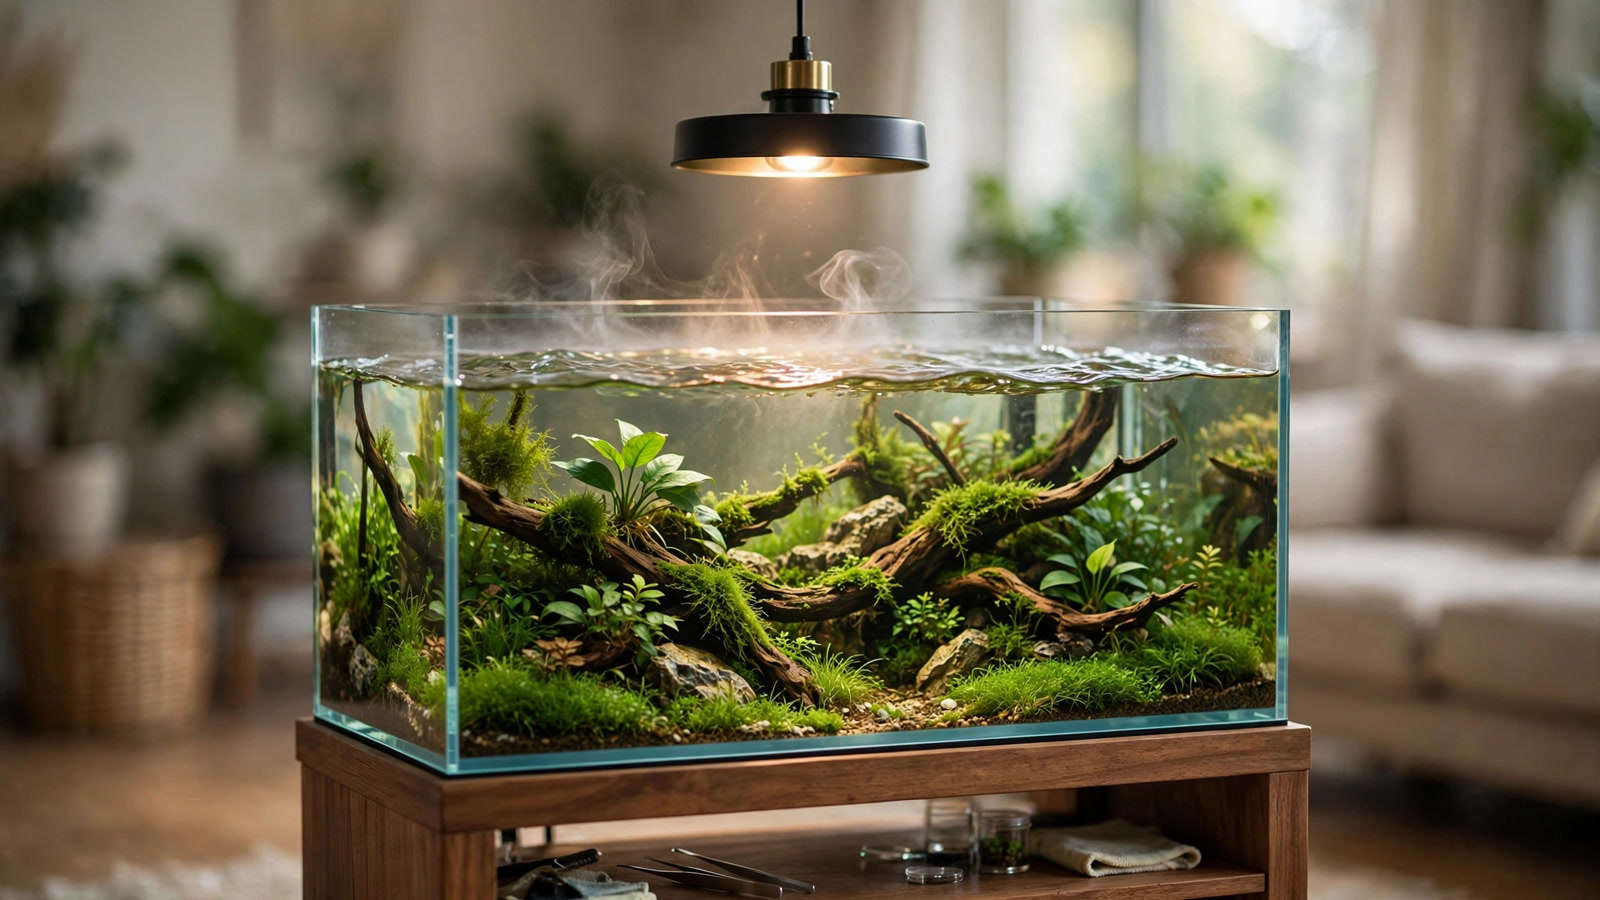
The open top aquarium vs lid debate is one of the first decisions every planted-tank owner faces, and it matters more for planted setups than for fish-only tanks. A cover changes how fast water evaporates, how well injected CO2 stays in solution, how much light actually reaches your carpet plants, and whether a startled fish ends the evening on the carpet. There is no universally right answer — rimless open tops look stunning and cool warm tanks, while lids save CO2, cut evaporation, and keep jumpers alive. This guide lays out the trade-offs factor by factor, with real numbers from standard hobby practice, so you can pick the setup that fits your tank, your stocking, and your lifestyle.
Open Top Aquarium vs Lid: Head-to-Head Comparison
Every factor below cuts both ways. The quickest way to choose is to decide which problems you would rather manage: the open-top problems (evaporation, jumpers, humidity) or the lid problems (condensation, cleaning, heat, lost gas exchange).
| Factor | Open Top | Solid Lid (glass/acrylic) |
|---|---|---|
| Evaporation | High — most hobbyists report roughly 1–2 gallons per week on a 20–40 gallon tank in air-conditioned rooms | Low — condensation recycles most of it back into the tank |
| CO2 retention | Lower — surface exposure and ripples drive faster off-gassing of injected CO2 | Higher — a covered air space slows gas exchange and stretches CO2 further |
| Light reaching plants | Maximum — nothing between the light and the water | Reduced — glass cuts roughly 8–10% of PAR, and condensation/mineral film cuts more over time |
| Jumping fish | Real risk — danios, rasboras, hatchetfish, bettas, and gobies are classic escape artists | Safe — a lid is the only reliable protection |
| Room humidity | Higher — one open tank can noticeably humidify a small closed room | Lower — most moisture stays inside the tank |
| Temperature | Cools the tank 1–3°F via evaporation — helpful in summer | Traps heat — can push tanks over target temp under strong lighting |
| Aesthetics | Clean rimless look; plants can grow out of the water (emersed) | Slightly more hardware visible; blocks top-down viewing |
| Maintenance | Frequent top-offs; salt creep and mineral lines on the glass | Glass lids need regular cleaning; hinges and condensation trays collect gunk |
Evaporation and the Top-Off Workload
Evaporation is the first thing open-top owners notice. The rate depends on room temperature, airflow, surface area, and whether you run an air conditioner or fan. In a warm room with a ceiling fan or AC blowing, a 20-gallon open-top planted tank can lose roughly a half gallon every couple of days; larger tanks and hot climates lose more.
That lost water is pure water — minerals and fertilizers stay behind. Over a week of evaporation without top-offs, your GH, TDS, and fertilizer concentration all creep upward, and a hard waterline ring forms on the glass. This is why a consistent top-off routine matters more for open tops: most hobbyists top off with RO or distilled water a couple of times a week, then do their scheduled water change normally.
How lids change the equation
A glass canopy with most of the surface covered cuts evaporation dramatically — many lid users go from topping off twice a week to barely topping off at all. The condensation that collects on the underside of the glass is your evaporated water, recycled back in. If you travel often or simply hate daily chores, a lid is the honest answer to the evaporation problem.
CO2 Retention vs Gas Exchange
This is the factor that makes the open-top vs lid decision genuinely planted-tank-specific. CO2 injected through a diffuser or reactor wants to escape back into the air wherever the water surface is exposed to fresh air movement. An open top — especially with surface agitation from a hang-on-back filter or powerhead — off-gasses CO2 faster, so you typically run a higher bubble rate to hold your target CO2 level.
A lid creates a semi-sealed air pocket above the water. That pocket quickly equilibrates, and gas exchange slows, so injected CO2 stays in solution longer. Many hobbyists find they can drop their bubble rate by roughly a third after adding a glass canopy — worth knowing if you are weighing the running cost and stability of your CO2 setup.
The gas-exchange trade-off
There is a flip side. Completely sealing a tank can trap oxygen depletion overnight — plants switch from producing oxygen to consuming it after lights-out, and in heavily stocked, densely planted tanks with a tight lid and no surface agitation, morning oxygen dips are possible. This is rarely a problem with a modest gap at the back of a glass lid or a small amount of surface ripple, but a fully airtight canopy with no air exchange is something to avoid. Good practice: leave a small gap, and keep slight surface movement.
Light Loss Through Glass and Condensation
Anything between the light and the water steals light. Clean glass lids transmit most of the light but cut a measurable chunk of PAR — commonly cited in the range of 8–10% — and that penalty grows as condensation beads, dust, and hard-water film accumulate on the glass. In a high-demand carpet tank where every bit of light at the substrate matters, that loss can show up as leggier growth or algae outcompeting foreground plants.
With an open top, 100% of your fixture's output reaches the water. That is one reason rimless open-top tanks are the standard for aquascaping competitions: the light you paid for is the light your plants get.
Keeping lid light loss in check
If you run a lid, wipe the underside of the glass weekly during maintenance — it takes seconds and restores most of the lost light. Also watch for mineral crust forming where evaporation leaves deposits at the waterline, and avoid cheap acrylic lids that warp and yellow, which cut light far more than glass.
Jumping Fish: The Deciding Factor for Many Tanks
This one is binary. Some fish simply jump, and no amount of wishing changes it. Classic jumpers include zebra danios and other danio species, many rasboras, hatchetfish, killifish, bettas, gobies, and many loaches. Startled by a sudden light change, a tank-mate chase, or spawning behavior, they can and do leave open tanks. An open top is not a tank without jumpers; it is a tank without protection.
If your stocking plan includes any known jumpers — or if you ever want the freedom to keep them later — the lid (or at least a mesh top) wins outright. One dried-out fish on the floor is the fastest possible end to the lid debate.
Humidity, Temperature, and the Room Around the Tank
Humidity
An open tank is a slow humidifier. In a large living room this barely registers, but in a small closed bedroom or office with several open-top tanks, humidity can climb enough to fog windows and, over months, encourage mold on nearby walls. Most single-tank setups in ventilated rooms are fine. If the room runs damp, a lid or a dehumidifier solves it — monitor for the real problem signs like persistent condensation on windows rather than guessing.
Temperature
Evaporation cools. Open tops commonly run 1–3°F cooler than lidded tanks under the same lighting, which makes them a genuine advantage in summer when planted tanks are already fighting heat — a point covered in more depth in the summer heat survival guide. Conversely, lids trap heat from strong LED fixtures and HOB motors, so in warm climates a tight lid can push a tank past comfortable temperatures for both fish and plants.
Rimless Aesthetics and Emersed Growth
The rimless open-top look is the dominant aesthetic in aquascaping: clean sightlines, top-down viewing, and the option to let plants like Anubias, Bucephalandra, and Hygrophila grow out of the water into emersed form, with flowers and a humidity gradient no lid can offer — many aquarists get a head start growing the same species emersed before planting them submerged (see Tropica's planted-tank inspiration gallery for what that look can become). Many iwagumi and nature-style layouts are designed open-top from the first sketch — a lid would break the composition.
The cost is practical: open-top tanks collect more dust on the surface, and that waterline needs wiping as part of the regular maintenance routine. If you love the look, budget five minutes a week for it and you keep the best of both worlds.
Mesh Lids: The Middle Ground That Actually Works
A mesh lid — window screen material on a frame, or the clear-mesh kits sold for rimless tanks — splits the difference better than most hobbyists expect. It blocks nearly all light loss (mesh passes 95%+ of PAR versus ~90% through glass), stops jumpers, and still allows most of the evaporation cooling and gas exchange of an open top.
Mesh lids are now the default recommendation for nano planted tanks and open-top rimless setups that keep any livestock: you keep the rimless aesthetic almost intact, your danios stay in the tank, and you lose only a fraction of the light. The main downside is that screen mesh is not crystal-clear — from straight above it softens the view slightly — and fine mesh does need an occasional rinse as dust builds up.
Decision Framework: Which Setup for Which Tank
Choose open top when…
- You run a pure aquascape or shrimp tank with no known jumpers.
- You want emersed growth, top-down viewing, and the rimless look.
- You fight summer heat and want evaporative cooling.
- You are willing to top off water 2–3 times a week and wipe the waterline.
- You run high-light CO2 systems where maximum PAR at the substrate matters most.
Choose a lid when…
- You keep any jumper species — danios, rasboras, hatchetfish, killifish, bettas, gobies.
- You inject CO2 and want to stretch each refill by running a lower bubble rate.
- You travel, work long hours, or simply hate top-off chores.
- The tank is in a small bedroom where humidity and splash matter.
- You have curious cats or a tank in a busy household.
Choose mesh when…
- You want the open-top look and jumper protection.
- Light-hungry carpet plants make glass-lid PAR loss unacceptable.
- You want evaporative cooling without the evaporation headaches going too far.
For the most common beginner setups — a standard 20-gallon planted tank or an iwagumi layout — mesh is often the sweet spot: nearly all the aesthetics, nearly all the safety. For a dramatic jungle tank with hatchetfish, a solid glass lid is simply non-negotiable.
Frequently Asked Questions
Does a lid really reduce CO2 usage in a planted tank?
Yes, in practice. A lid creates a semi-sealed air space above the water, which slows the rate at which injected CO2 off-gasses into the room. Many hobbyists report dropping their bubble rate noticeably after adding a glass canopy while holding the same drop-checker color. The trade-off is reduced gas exchange overall, so leave a small gap at the back of the lid and keep gentle surface movement to protect overnight oxygen levels.
How much water does an open-top tank actually lose?
It depends on tank size, room temperature, and airflow, but a typical 20–40 gallon open-top tank in an air-conditioned room loses roughly 1–2 gallons per week. Because only pure water evaporates, minerals and fertilizers concentrate as the level drops, so top off with RO or distilled water every couple of days rather than letting it go. A lid cuts this to a fraction of the same loss.
Will a glass lid block too much light for carpet plants?
Clean glass cuts roughly 8–10% of PAR, which most plants tolerate fine. The real problem is buildup: condensation beads, dust, and hard-water film on the lid can cut noticeably more over time. Wiping the underside of the glass weekly restores almost all of it. If you run a high-demand carpet and every bit of PAR matters, a mesh lid passes 95%+ of light and is the better compromise.
Do I need a lid if I only keep shrimp and snails?
Generally no — cherry shrimp and snails are not meaningful jumpers, and open-top shrimp tanks are extremely popular in aquascaping for exactly that reason. Just be aware that nerite snails will occasionally climb out of open tanks, especially in new setups. If you have a nerite problem, a lid or mesh cover solves it, but for shrimp alone an open top is perfectly fine.
Does an open-top tank make my room humid?
One open-top tank in a normal ventilated room usually has a modest effect. Multiple open tanks in a small closed room can push humidity high enough to fog windows and encourage mold over time. If you see persistent window condensation, either add lids or run a dehumidifier. Small lidded tanks barely change room humidity at all.
Can plants grow out of the water with a lid on?
Not really — emersed growth needs the open air above the waterline, and a solid lid blocks that space and traps dripping condensation. If the emersed look appeals to you (Anubias flowering above the surface, Hygrophila stems emerging), go open top or mesh. A solid lid commits you to fully submerged growth only.
The Bottom Line
The open top aquarium vs lid choice comes down to which set of chores you prefer. Open tops give you maximum light, evaporative cooling, and that clean rimless look at the cost of top-offs, jumper risk, and humidity. Lids buy you CO2 efficiency, safety, and low maintenance at the cost of some PAR and heat buildup. And the humble mesh lid — cheap, nearly invisible, and protective — is the compromise more planted-tank owners should reach for first. Pick based on your livestock, your light demands, and your willingness to top off, and the tank will reward you either way.
Tissue-culture plants are the exception — they’re grown in sterile gel and adapt with minimal melting, which is part of what you’re paying for. Plants bought submersed from another hobbyist’s tank also transition with little melt, since they’re already in the right form.
Which Plants Melt Most (and Least)
Heavy melters (expect significant leaf loss)
- Cryptocorynes — infamous for “crypt melt,” sometimes dropping every leaf after any disturbance. They almost always recover from the roots within weeks.
- Stem plants grown emersed — rotala, ludwigia, and hygrophila often shed lower emersed leaves while the growing tips transition.
- Amazon swords — emersed-grown swords typically lose their broad oval aerial leaves and replace them with longer submersed ribbon leaves.
Light melters
- Anubias, java fern, bucephalandra — slow-growing rhizome plants transition gradually; occasional old-leaf melt but rarely dramatic.
- Vallisneria — usually transitions well, though it dislikes the move itself and may sulk for a week.
- Floating plants — minimal melt since their leaves were already at the air-water interface.
The Acclimation Protocol
Step 1: Quarantine or dip first
Before acclimating to your tank’s conditions, make sure you’re not acclimating pests along with the plant. Run new arrivals through our quarantine and dip protocol — it adds days upfront but prevents months of regret.
Step 2: Float to temperature-match (30 minutes)
Float the bag or container in your tank for 20–30 minutes to equalize temperature. Plants are less temperature-sensitive than fish, but a 10°F shock on top of transplant stress is an avoidable insult.
Step 3: Trim before planting
Remove any leaves that are already damaged, yellowing, or heavily algae-covered — they won’t recover and they’ll rot in your tank, feeding algae. For stem plants, trim off the bottom inch and any emersed leaves that look unlikely to adapt; the plant wastes energy maintaining leaves it’s going to shed anyway. Keep the healthy growing tips — that’s where recovery starts.
Step 4: Plant correctly the first time
Follow our planting guide — right depth, crown exposed on rosettes, rhizomes unburied on epiphytes. Every uprooting and replanting restarts the acclimation clock, so get placement right on the first attempt. Decide where each plant goes before it goes in the water.
Step 5: Run a gentle first week
For the first 7 days after planting:
- Moderate light — run your normal photoperiod but consider dropping intensity 20–30% if your light is dimmable. Blast-level light on a melting plant grows algae on the dying leaves, not recovery.
- Stable CO2 — if you inject CO2, keep it consistent. Fluctuating CO2 during acclimation is a melt accelerator. If you’re low-tech, this doesn’t apply — see growing without CO2.
- Half-strength fertilizer — new plants with damaged leaves can’t use full dosing, and the excess feeds algae. Ramp to full strength over 2–3 weeks per our fertilizer schedule.
- No disturbance — don’t move, trim, or “check on” new plants for at least two weeks. Every touch resets root establishment. This is especially critical for crypts.
Step 6: Remove melt, keep the base
As emersed leaves melt, remove the mushy material promptly — decaying leaves release ammonia and grow fungus that can spread to healthy tissue. But never discard the plant while the crown, rhizome, or roots are firm and alive. A crypt that’s lost every leaf but has firm roots is a plant that’s about to recover, not a dead plant. Give it 3–4 weeks before judging.
Telling Normal Melt From Real Problems
Normal transition melt:
- Affects oldest/emersed leaves first, newest growth last
- New submersed leaves emerge even as old ones dissolve
- Roots and crown stay firm and white/green
- Timeline: 1–4 weeks, then obvious new growth
Concerning melt (see our full melting diagnosis guide):
- New growth also melts or emerges deformed
- Rhizome or crown turns mushy and brown — this is rot, not transition
- Entire plant dissolves within days with no new growth after 4+ weeks
- Melting spreads to established plants that weren’t recently moved
Buying Tips to Minimize Melt
- Buy submersed-grown when available — hobbyist-grown cuttings transition with almost no melt.
- Choose tissue culture for sensitive species — crypts and delicate stems establish far more reliably from sterile cups.
- Avoid plants already melting in the store tank — some melt is normal, but a plant that’s mostly mush at purchase has less energy for recovery.
- Transport carefully — keep plants damp and out of direct sun/heat. A plant that dries out or cooks in a hot car melts far worse than one transported properly.
The First-Month Timeline: What to Expect Week by Week
Knowing what’s normal when removes most acclimation anxiety. Here’s the typical timeline for a healthy plant adapting to a new tank:
Week 1: The quiet week
Almost nothing visible happens. The plant is growing roots you can’t see and assessing its new environment. Some species (vallisneria, stem plants) may start shedding their lowest leaves. This is normal. Resist the urge to “help” — no moving, no extra fertilizer, no light changes. The most common beginner mistake is intervening during a week when the correct action is nothing.
Week 2: Melt peaks
This is when emersed leaves give up in earnest. Crypts may drop everything; swords shed their broad aerial leaves; stem plants lose lower foliage. It looks catastrophic and it’s usually fine. Keep removing mushy material, keep conditions stable, and watch the crown and growing tips — if those are firm and green, recovery is already underway.
Week 3: The turn
New submersed-adapted leaves emerge — smaller, thinner, often a slightly different shade of green than the emersed foliage. Stem plant tips start growing visibly; crypts push tiny curled leaves from the crown; swords unfurl narrow ribbon leaves. This is the moment most beginners exhale for the first time.
Week 4+: Established
New growth outpaces melt, and the plant is functionally yours. You can resume full-strength fertilizer, normal trimming, and stop treating it as fragile. Some slow growers (anubias, bucephalandra) take 6–8 weeks to show obvious progress — that’s their normal speed, not a problem.
Acclimating Different Plant Formats
Tissue-culture cups
Sterile, pest-free, and already adapted to high-humidity (not emersed) growth — tissue cultures melt the least of any format. Rinse the agar gel off gently (leftover gel rots and feeds fungus), split the portion into small plantlets, and plant per our planting guide. They establish slowly for the first two weeks, then accelerate. No dip needed, minimal acclimation stress — this is the premium experience you’re paying for.
Potted plants
Remove the pot and strip away the rockwool completely — leftover rockwool traps debris and rots. Tease the root mass apart gently; if it’s a dense mat, splitting it into 2–3 smaller portions actually establishes faster than planting one big clump (more growing points, better water flow around roots). Potted plants are usually emersed-grown, so expect the standard 2–4 week melt cycle.
Bare-root / bunched stems
Typically sold as weighted bunches. Remove any bands, foam, or weights, strip the lower leaves, and plant stems individually or in small groups. Bunched stems from the store are often already transitioning — check for new submersed growth at the tips, which tells you the plant is mid-adaptation and will settle quickly.
Hobbyist cuttings
Already submersed-grown and the fastest to establish — often showing new growth within days. The main acclimation factor is water-parameter difference between the two tanks. Float to temperature-match, plant promptly, and they’ll usually take off with minimal melt. This is why experienced hobbyists prefer trading cuttings over buying potted plants.
Frequently Asked Questions
Should I use a “plant starter” or transplant fertilizer?
Products marketed for transplant shock are mostly B-vitamins and mild hormones. They don’t hurt, but there’s no strong evidence they help aquarium plants specifically. Stable conditions and patience outperform any bottle. Save the money for more plants.
My new plant melted completely — bare crown, no leaves. Is it dead?
Probably not, if the crown or rhizome is firm. Crypts and swords routinely lose 100% of their leaves and regrow from the base within a month. The test is firmness: firm and pale/green means alive; mushy and brown/black means rot. Give firm-but-leafless plants a full 4 weeks before declaring them dead.
Can I speed up acclimation with extra light or CO2?
No — and trying usually backfires. A melting plant can’t use extra light; the excess just grows algae on its dying leaves. Keep light moderate and CO2 stable (not boosted) during acclimation. Growth speed comes from the plant’s own adaptation timeline, which you can’t rush, only avoid delaying.
Should new plants go straight into my main display tank?
After quarantine/dipping, yes — there’s no benefit to a separate “growing-in” tank for most plants. They acclimate to your water fastest in the tank they’ll live in. The exception is very delicate species going into a tank with boisterous fish; give those a few weeks in a calm corner or breeder box first.
The Patience Rule
The single most important acclimation skill is restraint: plant it right, set gentle conditions, remove decay, and then leave it alone for a month. The hobbyists with the best plant growth aren’t doing something clever in week one — they’re simply not interfering in weeks two through four while the plants do what they’ve evolved to do. Melt looks like failure and feels like failure, but in most cases it’s the visible part of a plant successfully becoming yours.