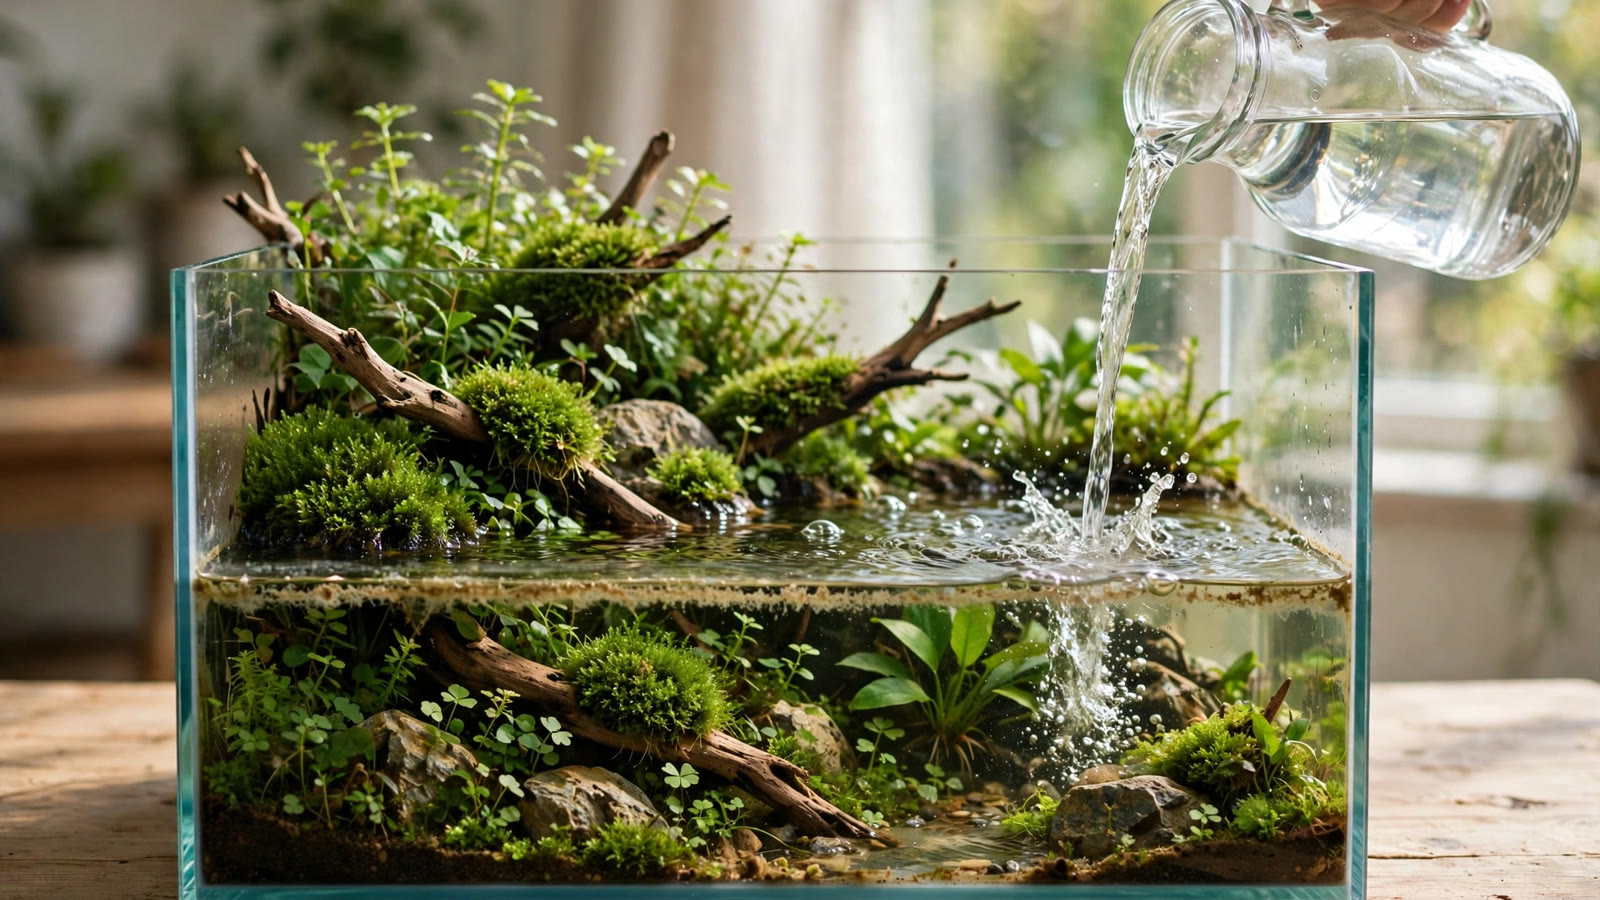
If you keep a planted tank long enough, you will eventually stare at the waterline and ask the same question every aquarist asks: is it enough to just refill what evaporated, or do I still need a real water change? The debate of topping off aquarium vs water change is not a matter of opinion — the two jobs are physically different, and confusing them is how tanks slowly drift into mineral-heavy, algae-prone water. Topping off replaces water volume. A water change removes waste. This guide explains that chemistry, when plain tap water is fine for refills, when RO or distilled water is needed, and how to manage open-top evaporation without letting parameters creep out of range.
What Actually Leaves the Tank When Water Evaporates
Only pure water escapes into the air
Evaporation is distilled by nature. When water leaves your tank surface as vapor, it takes essentially nothing with it — the calcium, magnesium, nitrates, phosphates, fertilizers, and fish waste all stay behind. This is the single most important fact in aquarium maintenance chemistry: the water that disappears was the purest water in the tank, while everything dissolved stays concentrated in a shrinking volume.
This is why tanks develop a crusty white mineral line at the waterline over time. That chalky residue is visible proof that minerals never evaporated — they accumulated, then crystallized where water kept disappearing. If your glass looks filthy even when the water looks clear, evaporation chemistry is the reason.
The bathtub math: how TDS and GH creep upward
Here is the slow-motion mechanism. Suppose your 20-gallon planted tank loses one gallon a week to evaporation — very normal for an open-top tank under bright lights. That gallon was pure H2O. The minerals that were dissolved in it, plus all the minerals in the 19 gallons that stayed, are now squeezed into 19 gallons of water instead of 20.
Now you top off that missing gallon with tap water containing minerals — say 150 ppm total dissolved solids. You have added a gallon of new minerals on top of the minerals that never left. Repeat this weekly with no water changes, and total dissolved solids (TDS) and general hardness (GH) climb steadily — the water literally gets harder over time, and every plant and animal experiences a slow, invisible chemistry drift.
Understanding your starting point matters. If you know your tap water's baseline parameters — see the guide to planted tank water parameters — you can predict how fast the creep will happen in your setup. Soft-water regions may barely notice; hard-water regions will feel it within weeks.
Topping Off Your Aquarium vs Water Changes: What Each One Really Does
The confusion between topping off and water changes comes from the fact that both involve pouring water into a tank. But they solve opposite problems.
| Topping off | Water change | |
|---|---|---|
| Purpose | Restore lost water volume so equipment and waterlines stay correct | Remove dissolved waste and dilute accumulated substances |
| What it adds | Water (ideally low-mineral or mineral-free) | Fresh water that dilutes everything in the tank |
| What it removes | Nothing — waste stays | Nitrates, dissolved organics, excess minerals, hormones |
| Effect on TDS/GH | Keeps or raises TDS (depends on refill water) | Lowers TDS toward the refill water's level |
| Frequency | Whenever evaporation drops the level — often weekly | Weekly to monthly in planted tanks |
| Can replace the other? | No — never removes waste | No — leaves the tank short on volume between changes |
The key takeaway: a water change is the only maintenance that actually exports waste from the system. Nitrates from fish food, dissolved organic compounds from decaying leaves, plant hormones that stunt growth, the minerals concentrated by evaporation — all of them only leave the tank when water physically leaves the tank. Topping off cannot do any of that. Thinking of refills as "mini water changes" is the mistake that slowly turns a healthy aquascape into an algae farm.
This distinction matters most in soil-based, low-maintenance setups. Many Walstad method planted tank keepers run infrequent or minimal water changes by design — and that philosophy only works when they understand exactly what is accumulating. Topping off in a Walstad tank still concentrates minerals; the method relies on heavy plant uptake, not on evaporation physics, so the refill-water rules in this article apply there too.
When Tap Water Top-Offs Are Perfectly Fine
Not every tank needs fancy refill water. Tap water top-offs are fine when all of these are true:
- Your tap water is soft to moderately hard (under roughly 8 dGH / 150 ppm TDS). If your tap already contains few minerals, each top-off adds very little, and the creep is slow enough that regular water changes easily reset it.
- You do regular water changes. A 25–30% weekly change — the standard rhythm for a low-tech planted tank setup — continuously dilutes accumulated minerals back toward your tap's baseline. The top-off creep gets erased before it matters.
- Your livestock tolerates moderate hardness. Livebearers, most tetras, guppies, and common algae eaters like the members of a standard planted tank cleanup crew are flexible about gradual hardness shifts.
- Evaporation is modest. A lidded tank in a humid room might lose very little; if you are topping off a cup or two a week, the mineral contribution is trivial.
Even then, treat tap water before it goes in. Dechlorinate every top-off — chlorine and chloramine damage plant tissue and beneficial bacteria just as badly in small volumes as large ones. And match temperature loosely; a gallon of cold tap water poured into a small nano tank can swing the temperature several degrees.
When You Should Top Off With RO or Distilled Water
When the conditions above don't hold, refill with water that adds nothing: reverse-osmosis (RO), distilled, or rainwater (collected cleanly). The rule of thumb is simple — top off with the purest water you can reasonably get, because only pure water evaporated.
Your tap water is hard or very hard
If your tap tests above about 12 dGH, every top-off is a meaningful dose of new minerals on top of minerals that never left. This is the classic TDS-creep trap: hard tap plus evaporation plus top-off with the same hard tap, and parameters march upward week after week. Switching refills to RO or distilled water stops the creep cold — you replace the pure water that evaporated with pure water, and net mineral content stays flat.
The U.S. Geological Survey's water hardness guide explains how calcium and magnesium define hardness and how regions differ enormously — worth a look if you have never checked your local water's character.
You keep shrimp, soft-water fish, or demanding plants
Cherry shrimp colonies breed best in stable, moderate parameters, and crystal shrimp are genuinely sensitive to hardness swings. Many popular aquascaping plants — Tonina, Eriocaulon, soft-water Rotala species — grow far better in soft, mineral-stable water. For these tanks, tap top-offs are a slow sabotage: the parameters your livestock thrived in on day one are not the parameters they are living in by month three. RO top-offs preserve the conditions you chose.
Never use pure RO water for the actual water change unless you remineralize it — fish and plants need some minerals, and zero-mineral water swings pH unpredictably. Remineralizing products let you rebuild exactly the GH/KH you want.
Managing Evaporation in Open-Top Aquascapes
The open-top look is everywhere in modern aquascaping — and it is an evaporation engine. No lid means maximum air exchange, which is great for gas exchange and CO2 off-gassing but means the waterline drops fast. A 20-gallon open-top tank under strong light with a filter creating surface agitation can lose a gallon or more per week.
Know your actual evaporation rate
Mark the waterline with a small piece of tape and check it after exactly one week. That number is your refill requirement, and it tells you how aggressively the TDS-creep math applies to your tank. A tank losing 5% of its volume weekly to evaporation is adding 5% more tap minerals weekly if you top off with tap — significant. A tank losing 1% is barely worth thinking about.
Heaters, hang-on-back filters, and strong lighting all accelerate loss. Winter heating makes indoor air dry, so expect noticeably more evaporation in winter than summer — many hobbyists report nearly double.
Practical ways to slow it down
- Partial lids and glass covers: a clear cover with a small gap preserves the open look while cutting evaporation dramatically. Full covers also stop jumpers.
- Floaters and surface cover: dense floating plants reduce air movement at the surface and noticeably slow water loss, though they also shade the tank.
- A surface skimmer: these remove the oily surface film that some aquarists believe slightly slows evaporation — the real benefit is cleaner gas exchange. See the surface skimmer planted tank guide for sizing and placement.
- Auto top-off (ATO) units: float-sensor + pump hardware from the reef world that now serves planted tanks well. A sensor in the tank and a pump in an RO water reservoir keep the level constant automatically — the most consistent fix for fast-evaporating tanks.
A Practical Top-Off + Water Change Routine
Here is a routine that keeps both jobs distinct and your chemistry stable:
- Weekly: top off to your marked waterline with dechlorinated tap water (if your tap is soft and you change water regularly) or RO/distilled water (if hard, or for sensitive livestock). Keep a dedicated refill container so it is effortless.
- Weekly or biweekly: perform your real water change — 25–30% for most planted tanks, siphoning debris from the substrate as you go. This is the step that exports nitrates, organics, and accumulated minerals.
- Monthly: test GH, KH, and TDS and compare against your baseline. If TDS is climbing between water changes, either increase change frequency or switch top-offs to RO water. Catching creep early is a five-minute fix; catching it at 600 ppm is a rescue operation.
- Seasonally: re-check your evaporation rate. When winter heating kicks in and loss doubles, that is the moment hard-tap top-offs start causing trouble.
Tanks built on nutrient-rich soil substrates deserve a special note: a fresh dirted tank setup releases a surge of nutrients in its first weeks, and that is when disciplined water changes (not just top-offs) matter most to prevent algae outbreaks. Once the soil settles, the routine above keeps everything stable.
Frequently Asked Questions
Can I just top off my tank instead of doing water changes?
No — and this is the core confusion this guide addresses. Topping off replaces evaporated water volume but removes nothing: nitrates, dissolved organics, excess minerals, and plant-growth-inhibiting compounds all stay in the tank. Only a water change physically exports waste. A tank that is topped off but never water-changed slowly accumulates everything, which is why long-term "top-off only" tanks develop chronic algae, mineral crust, and unexplained livestock problems. Both tasks are necessary; they are not interchangeable.
How do I know if my tap water is safe for topping off?
Test it once: measure GH, KH, and TDS of your tap, then test your tank water before a water change. If the tank reads meaningfully higher than your tap — say 100+ ppm more TDS — evaporation creep is happening and your tap is contributing. Tap under ~150 ppm TDS with regular water changes is usually fine for hardy setups. Above that, or for shrimp and soft-water species, switch refills to RO or distilled water.
Does topping off with RO water lower my pH or hurt my fish?
Not when done correctly. RO water used as a top-off simply replaces the pure water that evaporated, so tank chemistry stays roughly where it was — it does not swing anything. Problems only arise if you do large water changes with pure, unremineralized RO water, which dilutes buffers and can destabilize pH. For top-offs, pure RO is the safest possible refill. Just remineralize RO used for the water change itself.
How much does an open-top planted tank evaporate?
It varies enormously, but a typical 20-gallon open-top tank under bright light loses roughly 1–3% of its volume per day in dry indoor conditions — up to a gallon or more per week. Heaters, hang-on-back filters, strong lighting, and winter heating all increase it. Measure your own tank: mark the waterline with tape, wait a week, and measure the drop. That single number tells you how seriously to take the top-off-water question.
Will a lid fix my evaporation problem?
Largely, yes. A cover cuts evaporation by 70–90% in most setups, which makes the tap-vs-RO question nearly irrelevant for many tanks. Glass or acrylic covers also block jumping fish, reduce dust, and slightly warm the tank. The trade-off is reduced gas exchange and, for high-tech setups, faster CO2 buildup — you may need to adjust injection slightly. If you love the open-top aesthetic, a partial cover or an auto top-off unit with RO water is the best compromise.
The Takeaway: Top Off the Water, Change the Water
Evaporation only steals pure water, so every top-off should put pure-ish water back — and every water change should take dirty water out. Keep the two jobs separate in your head and in your routine: refill the level with dechlorinated tap or RO water as needed, and still siphon out a quarter of the tank on schedule. Do both, and your planted tank's chemistry will stay where you set it — month after month, algae-free and stable.
Tissue-culture plants are the exception — they’re grown in sterile gel and adapt with minimal melting, which is part of what you’re paying for. Plants bought submersed from another hobbyist’s tank also transition with little melt, since they’re already in the right form.
Which Plants Melt Most (and Least)
Heavy melters (expect significant leaf loss)
- Cryptocorynes — infamous for “crypt melt,” sometimes dropping every leaf after any disturbance. They almost always recover from the roots within weeks.
- Stem plants grown emersed — rotala, ludwigia, and hygrophila often shed lower emersed leaves while the growing tips transition.
- Amazon swords — emersed-grown swords typically lose their broad oval aerial leaves and replace them with longer submersed ribbon leaves.
Light melters
- Anubias, java fern, bucephalandra — slow-growing rhizome plants transition gradually; occasional old-leaf melt but rarely dramatic.
- Vallisneria — usually transitions well, though it dislikes the move itself and may sulk for a week.
- Floating plants — minimal melt since their leaves were already at the air-water interface.
The Acclimation Protocol
Step 1: Quarantine or dip first
Before acclimating to your tank’s conditions, make sure you’re not acclimating pests along with the plant. Run new arrivals through our quarantine and dip protocol — it adds days upfront but prevents months of regret.
Step 2: Float to temperature-match (30 minutes)
Float the bag or container in your tank for 20–30 minutes to equalize temperature. Plants are less temperature-sensitive than fish, but a 10°F shock on top of transplant stress is an avoidable insult.
Step 3: Trim before planting
Remove any leaves that are already damaged, yellowing, or heavily algae-covered — they won’t recover and they’ll rot in your tank, feeding algae. For stem plants, trim off the bottom inch and any emersed leaves that look unlikely to adapt; the plant wastes energy maintaining leaves it’s going to shed anyway. Keep the healthy growing tips — that’s where recovery starts.
Step 4: Plant correctly the first time
Follow our planting guide — right depth, crown exposed on rosettes, rhizomes unburied on epiphytes. Every uprooting and replanting restarts the acclimation clock, so get placement right on the first attempt. Decide where each plant goes before it goes in the water.
Step 5: Run a gentle first week
For the first 7 days after planting:
- Moderate light — run your normal photoperiod but consider dropping intensity 20–30% if your light is dimmable. Blast-level light on a melting plant grows algae on the dying leaves, not recovery.
- Stable CO2 — if you inject CO2, keep it consistent. Fluctuating CO2 during acclimation is a melt accelerator. If you’re low-tech, this doesn’t apply — see growing without CO2.
- Half-strength fertilizer — new plants with damaged leaves can’t use full dosing, and the excess feeds algae. Ramp to full strength over 2–3 weeks per our fertilizer schedule.
- No disturbance — don’t move, trim, or “check on” new plants for at least two weeks. Every touch resets root establishment. This is especially critical for crypts.
Step 6: Remove melt, keep the base
As emersed leaves melt, remove the mushy material promptly — decaying leaves release ammonia and grow fungus that can spread to healthy tissue. But never discard the plant while the crown, rhizome, or roots are firm and alive. A crypt that’s lost every leaf but has firm roots is a plant that’s about to recover, not a dead plant. Give it 3–4 weeks before judging.
Telling Normal Melt From Real Problems
Normal transition melt:
- Affects oldest/emersed leaves first, newest growth last
- New submersed leaves emerge even as old ones dissolve
- Roots and crown stay firm and white/green
- Timeline: 1–4 weeks, then obvious new growth
Concerning melt (see our full melting diagnosis guide):
- New growth also melts or emerges deformed
- Rhizome or crown turns mushy and brown — this is rot, not transition
- Entire plant dissolves within days with no new growth after 4+ weeks
- Melting spreads to established plants that weren’t recently moved
Buying Tips to Minimize Melt
- Buy submersed-grown when available — hobbyist-grown cuttings transition with almost no melt.
- Choose tissue culture for sensitive species — crypts and delicate stems establish far more reliably from sterile cups.
- Avoid plants already melting in the store tank — some melt is normal, but a plant that’s mostly mush at purchase has less energy for recovery.
- Transport carefully — keep plants damp and out of direct sun/heat. A plant that dries out or cooks in a hot car melts far worse than one transported properly.
The First-Month Timeline: What to Expect Week by Week
Knowing what’s normal when removes most acclimation anxiety. Here’s the typical timeline for a healthy plant adapting to a new tank:
Week 1: The quiet week
Almost nothing visible happens. The plant is growing roots you can’t see and assessing its new environment. Some species (vallisneria, stem plants) may start shedding their lowest leaves. This is normal. Resist the urge to “help” — no moving, no extra fertilizer, no light changes. The most common beginner mistake is intervening during a week when the correct action is nothing.
Week 2: Melt peaks
This is when emersed leaves give up in earnest. Crypts may drop everything; swords shed their broad aerial leaves; stem plants lose lower foliage. It looks catastrophic and it’s usually fine. Keep removing mushy material, keep conditions stable, and watch the crown and growing tips — if those are firm and green, recovery is already underway.
Week 3: The turn
New submersed-adapted leaves emerge — smaller, thinner, often a slightly different shade of green than the emersed foliage. Stem plant tips start growing visibly; crypts push tiny curled leaves from the crown; swords unfurl narrow ribbon leaves. This is the moment most beginners exhale for the first time.
Week 4+: Established
New growth outpaces melt, and the plant is functionally yours. You can resume full-strength fertilizer, normal trimming, and stop treating it as fragile. Some slow growers (anubias, bucephalandra) take 6–8 weeks to show obvious progress — that’s their normal speed, not a problem.
Acclimating Different Plant Formats
Tissue-culture cups
Sterile, pest-free, and already adapted to high-humidity (not emersed) growth — tissue cultures melt the least of any format. Rinse the agar gel off gently (leftover gel rots and feeds fungus), split the portion into small plantlets, and plant per our planting guide. They establish slowly for the first two weeks, then accelerate. No dip needed, minimal acclimation stress — this is the premium experience you’re paying for.
Potted plants
Remove the pot and strip away the rockwool completely — leftover rockwool traps debris and rots. Tease the root mass apart gently; if it’s a dense mat, splitting it into 2–3 smaller portions actually establishes faster than planting one big clump (more growing points, better water flow around roots). Potted plants are usually emersed-grown, so expect the standard 2–4 week melt cycle.
Bare-root / bunched stems
Typically sold as weighted bunches. Remove any bands, foam, or weights, strip the lower leaves, and plant stems individually or in small groups. Bunched stems from the store are often already transitioning — check for new submersed growth at the tips, which tells you the plant is mid-adaptation and will settle quickly.
Hobbyist cuttings
Already submersed-grown and the fastest to establish — often showing new growth within days. The main acclimation factor is water-parameter difference between the two tanks. Float to temperature-match, plant promptly, and they’ll usually take off with minimal melt. This is why experienced hobbyists prefer trading cuttings over buying potted plants.
Frequently Asked Questions
Should I use a “plant starter” or transplant fertilizer?
Products marketed for transplant shock are mostly B-vitamins and mild hormones. They don’t hurt, but there’s no strong evidence they help aquarium plants specifically. Stable conditions and patience outperform any bottle. Save the money for more plants.
My new plant melted completely — bare crown, no leaves. Is it dead?
Probably not, if the crown or rhizome is firm. Crypts and swords routinely lose 100% of their leaves and regrow from the base within a month. The test is firmness: firm and pale/green means alive; mushy and brown/black means rot. Give firm-but-leafless plants a full 4 weeks before declaring them dead.
Can I speed up acclimation with extra light or CO2?
No — and trying usually backfires. A melting plant can’t use extra light; the excess just grows algae on its dying leaves. Keep light moderate and CO2 stable (not boosted) during acclimation. Growth speed comes from the plant’s own adaptation timeline, which you can’t rush, only avoid delaying.
Should new plants go straight into my main display tank?
After quarantine/dipping, yes — there’s no benefit to a separate “growing-in” tank for most plants. They acclimate to your water fastest in the tank they’ll live in. The exception is very delicate species going into a tank with boisterous fish; give those a few weeks in a calm corner or breeder box first.
The Patience Rule
The single most important acclimation skill is restraint: plant it right, set gentle conditions, remove decay, and then leave it alone for a month. The hobbyists with the best plant growth aren’t doing something clever in week one — they’re simply not interfering in weeks two through four while the plants do what they’ve evolved to do. Melt looks like failure and feels like failure, but in most cases it’s the visible part of a plant successfully becoming yours.