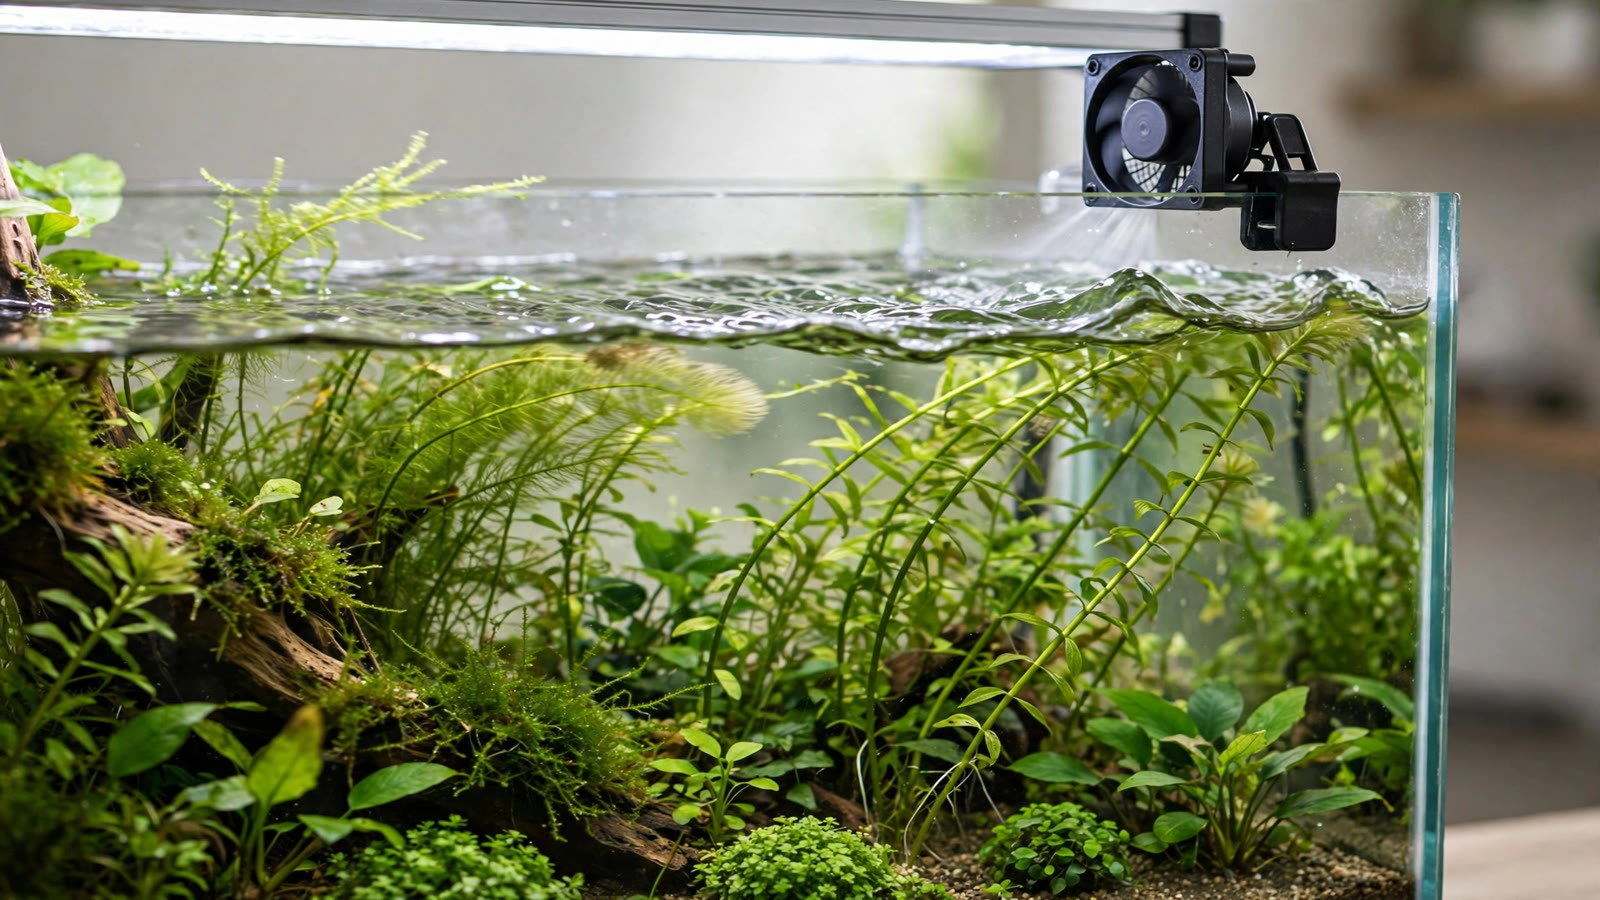
When summer arrives, your planted tank feels it before you do. By mid-afternoon, the thermometer strip reads 30 or 31°C, the water looks a little hazier, and that algae you had under control starts testing you again. Learning how to cool a planted aquarium in summer is one of the highest-leverage skills an aquarist can learn — not because heat is exotic, but because almost every summer tank crash traces back to the same few physics problems that most keepers never see coming.
This guide is strictly practical. You will find the actual cooling methods that work — clip-on fans, evaporative tricks, chillers, room positioning, ice bottles, and the light-and-CO₂ adjustments that multiply everything else — with the math, the limits, and the emergency protocol for heat waves. For the deeper plant-physiology side of heat stress, see our companion piece on temperature swings and plant stress; here we focus on equipment and action.
What Summer Heat Actually Does to a Planted Tank
Heat does not hurt plants directly the way most people imagine. The damage comes through three indirect mechanisms. First, warm water holds less dissolved oxygen — at 30°C water carries roughly 10% less than at 24°C — while fish, bacteria, and plant respiration all consume oxygen faster. Second, heat drives CO₂ out of solution, starving plants while their metabolism runs hotter. Third, it accelerates nutrient cycling and bacterial activity: the classic algae-bloom recipe. The fix is not more fertilizer or more water changes — it is temperature.
Know Your Numbers: Target Temperature Ranges
Not every planted tank needs arctic conditions. Most common setups run happiest in a fairly narrow band, and knowing your band tells you how aggressively you need to cool.
| Tank type | Ideal range | Cooling urgency above |
|---|---|---|
| Tropical community with stems and carpeting plants | 24–27°C (75–80°F) | 29°C (84°F) |
| High-tech CO₂-injected aquascape | 23–26°C (73–79°F) | 28°C (82°F) |
| Shrimp breeding colony | 22–25°C (72–77°F) | 27°C (81°F) |
| Betta planted tank | 25–27°C (77–81°F) | 30°C (86°F) |
| Temperate / low-light low-tech | 20–25°C (68–77°F) | 28°C (82°F) |
Two rules matter more than the exact numbers: stability beats perfection (a steady 28°C is safer than swinging between 26 and 31), and the closer you are to the top of your band, the faster you should act. Measure these against your target water parameters for a planted tank, and check a digital probe at the hottest hour of the day, not the morning.
How to Cool a Planted Aquarium in Summer
Everything that works falls into three buckets: moving heat off the water surface, reducing the heat you are putting in, and buying colder room air. They stack — a fan plus shorter photoperiod beats either alone. Work through them in order of cost and effort, starting with the cheapest.
1. Clip-On Cooling Fans: Your First Line of Defense
Clip-on aquarium fans are the best value in the hobby. They work by blowing room air across the water surface, which accelerates evaporation, and evaporation carries away the latent heat of vaporization — each liter of evaporated water pulls about 2,260 kJ of heat out of the tank. To put that in practical terms: evaporating roughly a liter a day off a 40-gallon tank removes enough heat to hold the water about 2–4°F (1–2.5°C) below what it would otherwise reach, and the effect scales with airflow and surface area.
The trade-off is evaporation itself. A fan can double or triple your daily water loss — plan on topping off every day or two with dechlorinated water. Run the fan on a timer or temperature controller so it kicks in at your threshold rather than overcooling at night. For tanks under 15 gallons, one small fan is often all you ever need; larger tanks may want two, angled to sweep the surface diagonally.
2. Go Lidless: Removing the Heat Trap
Glass lids are heat traps — they block evaporation, which is the tank's natural cooling mechanism. Going lidless during a heat wave immediately boosts the fan's effectiveness and lets the warm boundary layer above the water escape. The cost is more evaporation and the risk of jumpers, so only go lidless if your livestock is not prone to jumping, and keep up with daily top-offs.
With a lidless tank, surface film becomes more noticeable, and a surface skimmer keeps the air-water interface clean so gas exchange — and evaporation — stays efficient. If you keep the lid for evaporation control, at least prop it open a few centimeters on the hottest days.
3. Aquarium Chillers: Serious, Sized Cooling
When fans cannot close the gap — room temperatures above 33°C, delicate shrimp colonies, or a heat wave that will not break — an aquarium chiller is the only method that cools on demand regardless of ambient conditions. Chillers are essentially small refrigerators plumbed inline with your filtration, usually through a canister filter loop or a dedicated pump.
Sizing rule of thumb: multiply your total water volume in gallons by 8.33, then by the temperature drop in Fahrenheit you need — that is the BTU/hr of cooling required, then add about 20% headroom for equipment heat. A 50-gallon tank needing a 4°F drop: 50 × 8.33 × 4 ≈ 1,666 BTU/hr, so a 1/10 HP unit fits. Broadly, 1/15–1/10 HP covers tanks up to ~40 gallons, 1/10 HP covers 40–80, and 1/5 HP covers 80–125, depending on the needed drop and room temperature. The Bulk Reef Supply chiller selection guide has the full sizing charts to check your math before buying.
When is a chiller worth it? If your room routinely exceeds 32°C for weeks, if you keep expensive crystal shrimp or rare plants, or if you have already fought this battle for two summers and lost. Thermoelectric (peltier) mini-chillers are a quieter, cheaper option for nano tanks under 10 gallons, but they only shave a few degrees — treat them as fan-plus, not chiller-minus. One practical note: chillers dump their waste heat into the room, so ventilate the space around the unit or you will warm the room that warms the tank.
4. Cool the Room, Not Just the Tank
Air conditioning is technically the most efficient aquarium cooling there is: every degree off the room air is a degree off the tank, with zero evaporation and zero gear in the water. If you run a room AC anyway, keep the room around 26–28°C and do not blast the vent directly at the glass — localized cold spots stress fish and cause condensation.
Placement matters too. A tank against a west-facing wall absorbs afternoon heat; an interior wall or shaded corner can drop water temperature 1–2°C with no equipment. Our guide to direct sunlight on a planted tank covers placement trade-offs, and they matter twice as much in summer.
5. Frozen Water Bottles: The Emergency Method Done Right
Frozen bottles are the classic stopgap, and they work — briefly — if you do them safely. Fill 1- or 2-liter plastic bottles three-quarters full with dechlorinated water, leave headspace for ice expansion, cap them tight, and float one in the tank or sump. A 2-liter bottle in a 40-gallon tank typically shaves 1–2°F for about an hour or two before it melts.
The limits are real: short-lived relief, temperature swings as bottles melt and get swapped, and condensation dripping into the tank. Never drop loose ice cubes in — tap-water ice can carry chlorine, and unbagged ice creates brutal localized cold shock. Rotate two or three bottles in a freezer cycle and treat this as a bridge to a fan or chiller, not a strategy.
6. Dim the Lights and Shorten the Photoperiod
Lights are heaters that happen to grow plants. During a heat wave, dialing your light down 20–30% and trimming the photoperiod from 8 hours to 6 cuts heat input, slows plant metabolism, and denies algae the extra light it would exploit. If your light is not dimmable, raising it a few centimeters achieves a similar effect. This is especially powerful in a high-tech planted tank, and small tanks like a 10-gallon planted tank heat up fastest from the same light.
7. Adjust CO₂ and Feeding for Hot Water
Hot water holds less CO₂ and less oxygen simultaneously, which is a nasty combination for injected tanks. Do not chase bubbles-per-second; instead, re-check your drop checker as temperatures rise and accept that you may need to nudge CO₂ up slightly to maintain the same concentration — while watching fish closely, because their oxygen margin is thinner too. Extra surface agitation helps here: it off-gasses some CO₂ but buys oxygen, and oxygen is the non-negotiable.
Feed lighter. Fish metabolism runs faster in heat, but so does waste production, and warm water's lower oxygen leaves less buffer for a bacterial bloom after a heavy feeding. Skipping a day or feeding half rations during the worst week of summer is one of the simplest crash-prevention moves — and summer is the season to be early on water changes in your planted tank maintenance schedule, not late.
Plants That Cope: Heat-Tolerant vs. Heat-Sensitive Choices
No plant loves a heat wave, but some shrug it off and some melt. If you live somewhere with genuinely hot summers, weighting your scape toward the tolerant list pays off every year.
| Holds up well in heat | Struggles above ~28°C |
|---|---|
| Anubias and Java fern (slow, tough rhizome plants) | Most carpeting plants (HC Cuba, dwarf hairgrass thins out) |
| Java moss and other hardy mosses | Rotala wallichii and other delicate fine-leaf stems |
| Vallisneria and sagittaria (fast background growers) | Bucephalandra can stall, though established plants usually survive |
| Amazon swords and crypts (established specimens) | Newly planted tissue-culture cups — heat plus transition melt is brutal |
| Hornwort and other fast-growing stems that outpace algae | Red plants needing strong light and CO₂ — dimming hits them hardest |
Practical takeaways: do not plant delicate new stems during a heat wave — wait it out. If a plant starts melting, trim the affected growth immediately so decay does not fuel algae, and resist the urge to replant until temperatures stabilize. A low-tech planted tank setup with hardy plants is inherently the most heat-resilient configuration there is.
Emergency Heatwave Protocol: The Checklist
When the forecast says 40°C and rising, work this list top to bottom — ordered by impact per minute of your time. It overlaps with grid-failure prep, so see our power outage survival guide if the grid is part of the problem.
- Check the tank thermometer at the hottest hour (usually 3–5 PM), not the morning. Record it — decisions need data.
- Maximize surface cooling: fans on, lid off or propped, surface film skimmed. This is your biggest lever.
- Dim lights 30% and cut photoperiod to 6 hours. Less heat in, less demand out.
- Increase surface agitation — raise the filter outlet or add an airstone. Oxygen is the emergency currency.
- Float one frozen 2-liter bottle (dechlorinated water, capped tight) while you set up longer-term cooling. Rotate bottles from the freezer.
- Feed half rations or skip feeding for the day. Less waste, less oxygen demand.
- Do a 15–20% water change with slightly cooler water — no more than 2–3°C below tank temperature to avoid shock.
- Close curtains and move heat sources away: block direct sun, keep the tank away from exterior walls and appliances.
- Trim any melting leaves immediately so decay does not spike ammonia and feed algae.
- If temperatures will not drop below 30°C for days and livestock is at risk, this is the week a chiller earns its price — or temporarily rehome sensitive shrimp to the coolest room in the house.
Frequently Asked Questions
Can I just use my air conditioner instead of buying aquarium gear?
Yes — room AC is genuinely one of the most effective cooling methods because every degree off the room is a degree off the tank, with zero evaporation. If you already run AC, keep the room around 26–28°C and you may not need anything else. Just do not aim the vent directly at the glass, and remember that power bills make a clip-on fan far cheaper if AC is not already running.
How many degrees will a clip-on fan actually drop my tank?
Expect 2–4°F (about 1–2.5°C) on a typical setup, more on tanks with large surface area and dry room air — each liter that evaporates carries away a large amount of latent heat. The trade-off is water loss, which can double or triple, so top off regularly with dechlorinated water.
Are frozen water bottles safe for fish and shrimp?
Yes, when done right: use sealed bottles filled with dechlorinated water, float them rather than pouring ice in, and swap them on rotation. The real risks are temperature swings and over-reliance — each bottle only buys an hour or two of 1–2°F relief in a medium tank. Never drop loose ice cubes in, since tap-water ice can introduce chlorine and creates harsh local cold shock.
What size chiller do I need for a 55-gallon planted tank?
Use the BTU rule: gallons × 8.33 × desired temperature drop in °F = BTU/hr needed, then add ~20% headroom. A 55-gallon tank needing a 4°F drop requires roughly 1,800 BTU/hr plus headroom — a 1/10 HP chiller handles it. Check the Bulk Reef Supply chiller sizing guide against your room temperature and equipment heat load before buying.
Should I turn off CO₂ during a heat wave?
Do not shut it off entirely — plants still need carbon — but re-check your drop checker, since warm water holds less CO₂ and you may need to adjust the bubble rate. Prioritize oxygen: extra surface agitation off-gasses some CO₂ but protects fish, and fish are the first casualties when oxygen drops in hot water.
Why is my tank getting algae every summer even though nothing changed?
Heat is the change. Warmer water holds less oxygen and CO₂, speeds up fish and bacterial metabolism, and accelerates nutrient cycling — all of which favor algae over plants. Cooling the tank, dimming lights, and feeding lighter during heat waves addresses the root cause far better than adding algaecides or extra fertilizer.
Keep Your Cool, Literally
Summer tank trouble is almost never mysterious once you know the mechanism: heat steals oxygen and CO₂, metabolism runs hotter, and algae moves into the gap. Start with a fan and a thermometer, dim the lights when the mercury climbs, adjust CO₂ and feeding to match, and bring out the chiller math only when the room itself will not cooperate. A planted betta tank on a shaded interior wall may need nothing more than a clip-on fan all season — while a high-tech show tank in a 35°C apartment may justify a chiller as cheap insurance. Either way, the keepers whose tanks sail through August are not the ones with the most gear. They are the ones who checked the thermometer at 4 PM and acted on it.
Tissue-culture plants are the exception — they’re grown in sterile gel and adapt with minimal melting, which is part of what you’re paying for. Plants bought submersed from another hobbyist’s tank also transition with little melt, since they’re already in the right form.
Which Plants Melt Most (and Least)
Heavy melters (expect significant leaf loss)
- Cryptocorynes — infamous for “crypt melt,” sometimes dropping every leaf after any disturbance. They almost always recover from the roots within weeks.
- Stem plants grown emersed — rotala, ludwigia, and hygrophila often shed lower emersed leaves while the growing tips transition.
- Amazon swords — emersed-grown swords typically lose their broad oval aerial leaves and replace them with longer submersed ribbon leaves.
Light melters
- Anubias, java fern, bucephalandra — slow-growing rhizome plants transition gradually; occasional old-leaf melt but rarely dramatic.
- Vallisneria — usually transitions well, though it dislikes the move itself and may sulk for a week.
- Floating plants — minimal melt since their leaves were already at the air-water interface.
The Acclimation Protocol
Step 1: Quarantine or dip first
Before acclimating to your tank’s conditions, make sure you’re not acclimating pests along with the plant. Run new arrivals through our quarantine and dip protocol — it adds days upfront but prevents months of regret.
Step 2: Float to temperature-match (30 minutes)
Float the bag or container in your tank for 20–30 minutes to equalize temperature. Plants are less temperature-sensitive than fish, but a 10°F shock on top of transplant stress is an avoidable insult.
Step 3: Trim before planting
Remove any leaves that are already damaged, yellowing, or heavily algae-covered — they won’t recover and they’ll rot in your tank, feeding algae. For stem plants, trim off the bottom inch and any emersed leaves that look unlikely to adapt; the plant wastes energy maintaining leaves it’s going to shed anyway. Keep the healthy growing tips — that’s where recovery starts.
Step 4: Plant correctly the first time
Follow our planting guide — right depth, crown exposed on rosettes, rhizomes unburied on epiphytes. Every uprooting and replanting restarts the acclimation clock, so get placement right on the first attempt. Decide where each plant goes before it goes in the water.
Step 5: Run a gentle first week
For the first 7 days after planting:
- Moderate light — run your normal photoperiod but consider dropping intensity 20–30% if your light is dimmable. Blast-level light on a melting plant grows algae on the dying leaves, not recovery.
- Stable CO2 — if you inject CO2, keep it consistent. Fluctuating CO2 during acclimation is a melt accelerator. If you’re low-tech, this doesn’t apply — see growing without CO2.
- Half-strength fertilizer — new plants with damaged leaves can’t use full dosing, and the excess feeds algae. Ramp to full strength over 2–3 weeks per our fertilizer schedule.
- No disturbance — don’t move, trim, or “check on” new plants for at least two weeks. Every touch resets root establishment. This is especially critical for crypts.
Step 6: Remove melt, keep the base
As emersed leaves melt, remove the mushy material promptly — decaying leaves release ammonia and grow fungus that can spread to healthy tissue. But never discard the plant while the crown, rhizome, or roots are firm and alive. A crypt that’s lost every leaf but has firm roots is a plant that’s about to recover, not a dead plant. Give it 3–4 weeks before judging.
Telling Normal Melt From Real Problems
Normal transition melt:
- Affects oldest/emersed leaves first, newest growth last
- New submersed leaves emerge even as old ones dissolve
- Roots and crown stay firm and white/green
- Timeline: 1–4 weeks, then obvious new growth
Concerning melt (see our full melting diagnosis guide):
- New growth also melts or emerges deformed
- Rhizome or crown turns mushy and brown — this is rot, not transition
- Entire plant dissolves within days with no new growth after 4+ weeks
- Melting spreads to established plants that weren’t recently moved
Buying Tips to Minimize Melt
- Buy submersed-grown when available — hobbyist-grown cuttings transition with almost no melt.
- Choose tissue culture for sensitive species — crypts and delicate stems establish far more reliably from sterile cups.
- Avoid plants already melting in the store tank — some melt is normal, but a plant that’s mostly mush at purchase has less energy for recovery.
- Transport carefully — keep plants damp and out of direct sun/heat. A plant that dries out or cooks in a hot car melts far worse than one transported properly.
The First-Month Timeline: What to Expect Week by Week
Knowing what’s normal when removes most acclimation anxiety. Here’s the typical timeline for a healthy plant adapting to a new tank:
Week 1: The quiet week
Almost nothing visible happens. The plant is growing roots you can’t see and assessing its new environment. Some species (vallisneria, stem plants) may start shedding their lowest leaves. This is normal. Resist the urge to “help” — no moving, no extra fertilizer, no light changes. The most common beginner mistake is intervening during a week when the correct action is nothing.
Week 2: Melt peaks
This is when emersed leaves give up in earnest. Crypts may drop everything; swords shed their broad aerial leaves; stem plants lose lower foliage. It looks catastrophic and it’s usually fine. Keep removing mushy material, keep conditions stable, and watch the crown and growing tips — if those are firm and green, recovery is already underway.
Week 3: The turn
New submersed-adapted leaves emerge — smaller, thinner, often a slightly different shade of green than the emersed foliage. Stem plant tips start growing visibly; crypts push tiny curled leaves from the crown; swords unfurl narrow ribbon leaves. This is the moment most beginners exhale for the first time.
Week 4+: Established
New growth outpaces melt, and the plant is functionally yours. You can resume full-strength fertilizer, normal trimming, and stop treating it as fragile. Some slow growers (anubias, bucephalandra) take 6–8 weeks to show obvious progress — that’s their normal speed, not a problem.
Acclimating Different Plant Formats
Tissue-culture cups
Sterile, pest-free, and already adapted to high-humidity (not emersed) growth — tissue cultures melt the least of any format. Rinse the agar gel off gently (leftover gel rots and feeds fungus), split the portion into small plantlets, and plant per our planting guide. They establish slowly for the first two weeks, then accelerate. No dip needed, minimal acclimation stress — this is the premium experience you’re paying for.
Potted plants
Remove the pot and strip away the rockwool completely — leftover rockwool traps debris and rots. Tease the root mass apart gently; if it’s a dense mat, splitting it into 2–3 smaller portions actually establishes faster than planting one big clump (more growing points, better water flow around roots). Potted plants are usually emersed-grown, so expect the standard 2–4 week melt cycle.
Bare-root / bunched stems
Typically sold as weighted bunches. Remove any bands, foam, or weights, strip the lower leaves, and plant stems individually or in small groups. Bunched stems from the store are often already transitioning — check for new submersed growth at the tips, which tells you the plant is mid-adaptation and will settle quickly.
Hobbyist cuttings
Already submersed-grown and the fastest to establish — often showing new growth within days. The main acclimation factor is water-parameter difference between the two tanks. Float to temperature-match, plant promptly, and they’ll usually take off with minimal melt. This is why experienced hobbyists prefer trading cuttings over buying potted plants.
Frequently Asked Questions
Should I use a “plant starter” or transplant fertilizer?
Products marketed for transplant shock are mostly B-vitamins and mild hormones. They don’t hurt, but there’s no strong evidence they help aquarium plants specifically. Stable conditions and patience outperform any bottle. Save the money for more plants.
My new plant melted completely — bare crown, no leaves. Is it dead?
Probably not, if the crown or rhizome is firm. Crypts and swords routinely lose 100% of their leaves and regrow from the base within a month. The test is firmness: firm and pale/green means alive; mushy and brown/black means rot. Give firm-but-leafless plants a full 4 weeks before declaring them dead.
Can I speed up acclimation with extra light or CO2?
No — and trying usually backfires. A melting plant can’t use extra light; the excess just grows algae on its dying leaves. Keep light moderate and CO2 stable (not boosted) during acclimation. Growth speed comes from the plant’s own adaptation timeline, which you can’t rush, only avoid delaying.
Should new plants go straight into my main display tank?
After quarantine/dipping, yes — there’s no benefit to a separate “growing-in” tank for most plants. They acclimate to your water fastest in the tank they’ll live in. The exception is very delicate species going into a tank with boisterous fish; give those a few weeks in a calm corner or breeder box first.
The Patience Rule
The single most important acclimation skill is restraint: plant it right, set gentle conditions, remove decay, and then leave it alone for a month. The hobbyists with the best plant growth aren’t doing something clever in week one — they’re simply not interfering in weeks two through four while the plants do what they’ve evolved to do. Melt looks like failure and feels like failure, but in most cases it’s the visible part of a plant successfully becoming yours.