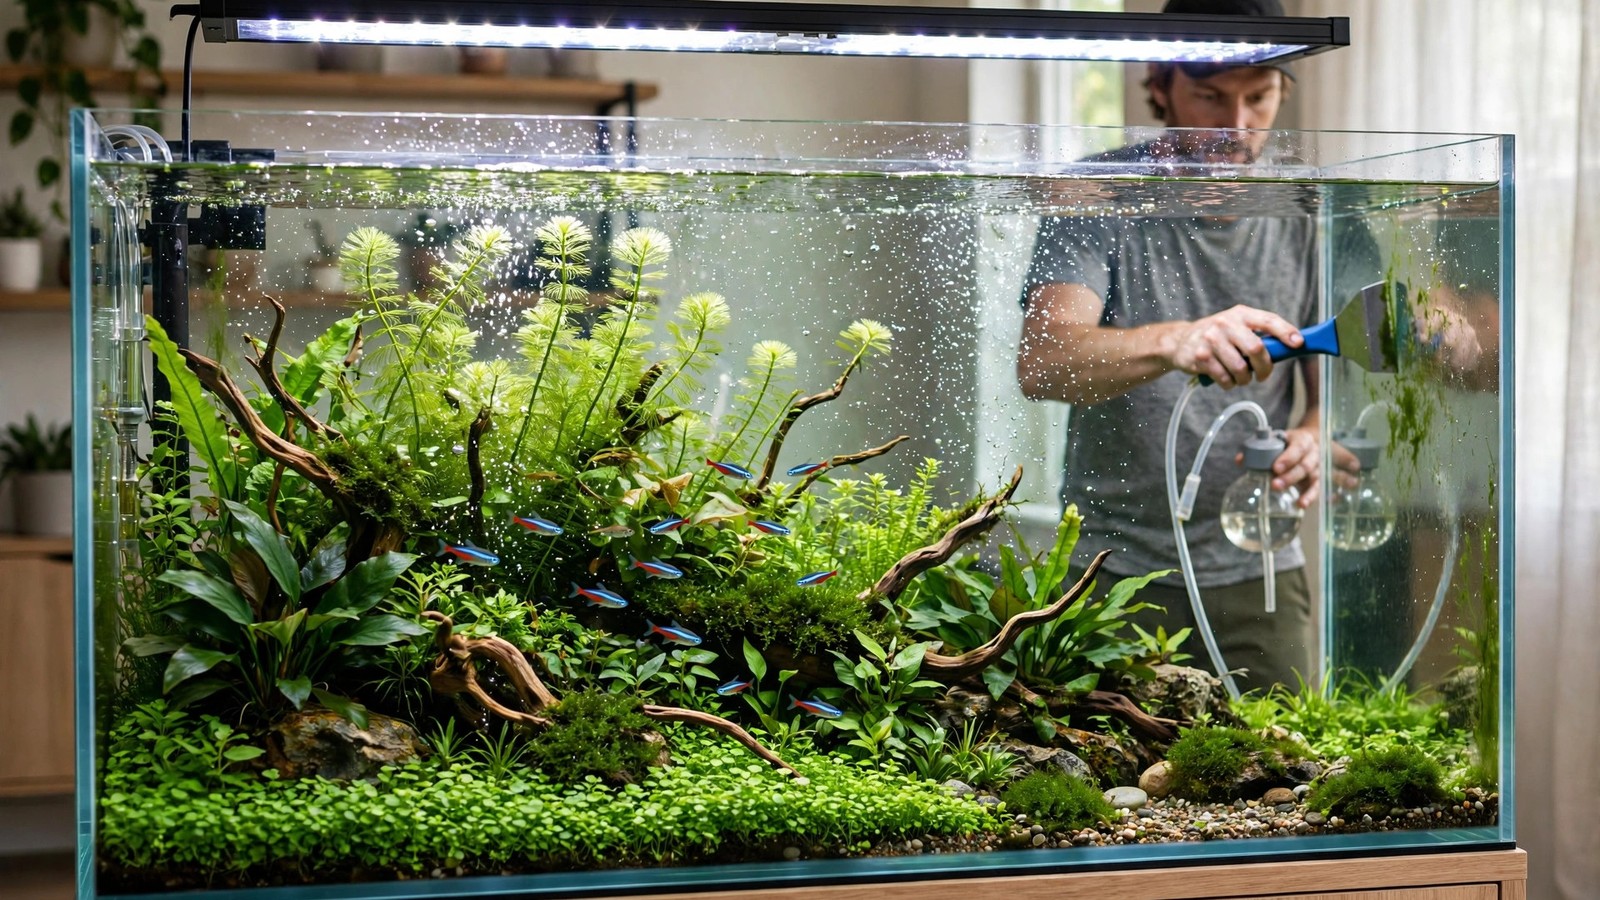
A planted tank is not a decoration you set up and forget — it is a living system that rewards a little consistent care far more than occasional heroic deep cleans. The secret most long-term hobbyists eventually learn is that a clear, predictable planted tank maintenance schedule does more for plant health and algae control than any expensive piece of gear. Whether you run a high-tech showpiece with pressurized CO2 or a relaxed low-tech jungle, a routine built around daily glances, weekly water changes, and monthly tune-ups keeps everything growing the way you imagined it would.
This guide lays out exactly that: daily five-minute checks, weekly water changes and dosing reviews, monthly equipment tune-ups, how routines differ between high-tech and low-tech setups, and — for the ambitious — an intensive contest-prep variant for tanks heading to a photo submission or show.
Why a Schedule Beats Random Maintenance
Plant growth, algae, nutrient levels, and livestock health all move on their own clocks. Without a schedule, maintenance happens only when something visibly goes wrong — by which point algae has a foothold or a filter is half-clogged. A routine intervenes before problems become visible: weekly water changes export the organic buildup algae feed on, regular dosing keeps nutrients from swinging, and monthly equipment checks catch a dying pump before it ruins a Sunday.
The second payoff is consistency for your plants. Aquatic plants, like garden plants, respond to stable conditions. Wild swings in CO2, nutrients, or water parameters stall growth and trigger the melting and deficiency symptoms that send hobbyists hunting for cures.
The Daily Routine: Five Minutes of Prevention
Daily maintenance sounds excessive until you realize it is mostly looking, not doing. Five minutes of observation catches most problems early — build these checks into feeding time:
- Equipment check (1 minute): Confirm the filter is running, the heater's indicator light agrees with the thermometer, and — if you inject CO2 — the bubble counter is bubbling and the solenoid timer followed its schedule. A CO2 system that fails silently is the most common cause of sudden algae blooms.
- Livestock glance (1 minute): Watch your fish and shrimp during feeding. Healthy livestock eat eagerly; fish hanging at the surface gasping or shrimp climbing the glass are early warnings of low oxygen or a CO2 problem, not laziness.
- Plant scan (1–2 minutes): Look for new yellowing leaves, algae starting on glass edges or slow-growing leaves, and floating stems that have uprooted overnight. Catching algae at the "few spots" stage means a finger wipe; catching it a week later means a teardown.
- Dosing and feeding (1 minute): Dose your daily fertilizers if your regimen calls for it, feed livestock only what they finish in two to three minutes, and remove any uneaten food. Overfeeding is the number-one nutrient source in low-tech tanks.
That's it. Five minutes, done alongside feeding, and you'll notice drift — a slowing filter, a browning leaf, a drop checker turning yellow — days before it becomes a crisis.
The Weekly Planted Tank Maintenance Schedule
The weekly session is where the real work happens. Plan 30–60 minutes depending on tank size and tech level. Skipping weeks occasionally won't sink a tank, but two skipped weeks in a row is where algae timelines typically start.
Water Changes: 30–50% Weekly
A weekly water change is the single highest-leverage item on any planted tank maintenance schedule. It exports accumulated organic waste, resets nutrient ratios before they drift, and dilutes algae spores — consistent changes are also the backbone of green water algae bloom prevention once a bloom has been treated. How much depends on your setup:
- High-tech, fertilized tanks: 40–50% weekly. Heavier dosing (like full Estimative Index routines) deliberately oversupplies nutrients, so the large water change resets them each week.
- Low-tech, lean-dosed tanks: 25–35% weekly is plenty; some mature, lightly stocked low-tech tanks do fine on 20%. Smaller, less aggressive changes protect the stable conditions low-tech setups rely on.
- New tanks (first 8–12 weeks): 30–50% twice weekly if the tank is cycling, because leaching aquasoil dumps ammonia early on. Once parameters stabilize, drop to the normal weekly rhythm.
Match temperature within a couple of degrees, dose a dechlorinator, and pour the new water in gently — over the palm of your hand, a plate, or a piece of driftwood — so you don't blast aquasoil into the water column or uproot foreground plants. If you run a filterless planted tank, water changes matter even more, since there's no mechanical media trapping waste between sessions.
Glass, Walls, and Decor Wipe-Down
Wipe the inside of the front glass every week with an algae magnet or a dedicated (never soap-touched) sponge. This takes thirty seconds while the water is low during a water change, and it removes the algae film before it calcifies into spots. Skip the back and side glass if you like — many aquascapers leave them to host a thin algae film that shrimp and otos graze on, or to keep the background visually dark.
Brush visible algae off hardscape and slow-growing leaves (Anubias, Buce, ferns) with a soft toothbrush reserved for the tank. For trimming routines for your aquascape, a separate session is worth reading, since pruning technique deserves more detail than fits here — but weekly, pull off any dead or melting leaves by hand so they don't rot and feed algae.
Fertilizer Dosing Review
Once a week, check that your dosing plan still matches the tank's reality. Are you dosing all-in-one liquid, dry salts, root tabs, or a mix? Refill dosing pump reservoirs if you use auto-dosers. This is also when you dose root tabs if they're on a monthly schedule — push them deep into the substrate near heavy root feeders like swords and Crypts.
Look at your plants as your guide: pale or stunted new growth means your fertilizer balance may need adjusting, while lush growth and spreading runners say the current regimen is working. If thriving plants suddenly stall after months of stability, the culprit is often light aging (see the monthly section) rather than fertilizer.
Filter Maintenance: Rinse, Don't Replace
Every week or two — never on the same day as a big substrate disturbance if you can help it — rinse mechanical filter media (sponges, floss) in old tank water siphoned during the water change. Squeeze until the water runs mostly clear, then put it back. Never rinse biological media (ceramic rings, bio balls, sponge blocks) under tap water, and don't clean every filter compartment at once; you want to keep the beneficial bacteria colony intact.
Check filter flow output weekly. A filter that used to push a visible current and now barely ripples is clogged or the intake sponge is choked — both are common algae catalysts because poor circulation lets detritus settle and starves plants of CO2 and nutrients in dead zones.
The Monthly Routine: Deep Session
Set aside an hour or two once a month for the tasks that don't need weekly attention but quietly determine long-term success.
Substrate and Deep Detritus Cleaning
Use a gravel vacuum in open substrate areas — especially behind hardscape and in dead-flow corners — to pull out trapped detritus. In aquasoil tanks, hover the vacuum just above the surface rather than jamming it in, so you don't break down the soil granules. Deep-vacuuming the entire substrate every month is overkill (plant roots use that organic matter), but clearing the obvious dead spots keeps hydrogen sulfide pockets from forming in deep sand beds.
Filter Media Replacement and Inspection
Chemical media — activated carbon, Purigen, phosphate absorbers — have fixed lifespans and stop working silently, so recharge or replace them on a monthly reminder. Inspect impellers and intake tubes for buildup, check O-rings and hoses for salt-crust-like mineral deposits that signal slow leaks, and confirm that heater and thermometer agree within a degree or two. Thermometers drift; heaters fail on; catching either early is the point of the monthly once-over.
Light Aging and Photoperiod Review
LEDs don't burn out like old fluorescent tubes, but their output shifts and dims over years of use. Monthly, note your photoperiod (6–8 hours is typical for high-tech, 7–9 for low-tech) and whether algae patterns suggest too much light. If plants at the edges grow tall and leggy toward the center while the carpet stalls, the fixture may be undersized for the current planting — a sign to reassess the light rather than the fertilizer.
Full Parameter Check
Daily and weekly care runs on observation; monthly, run the actual test kits: ammonia, nitrite, nitrate, pH, GH, and KH. Log the results — a notebook or a phone note — because the trend matters more than any single reading. Rising nitrates despite unchanged habits means something shifted: a hidden dead spot, a livestock increase, or a filter losing efficiency. If you use a drop checker for CO2, confirm it still reads lime green during the photoperiod and returns to blue overnight.
High-Tech vs Low-Tech: How the Routines Differ
The structure is the same; the intensity isn't. Here's the practical difference:
| Task | High-tech (CO2 injected) | Low-tech (no CO2) |
|---|---|---|
| Water change | 40–50% weekly | 25–35% weekly (20% OK when mature) |
| Dosing | Daily or every other day; larger doses | Weekly all-in-one or occasional root tabs |
| CO2 checks | Daily bubble count + drop checker; timer verified | Not applicable — one less failure point |
| Trimming/pruning | Weekly — fast growth demands it | Monthly or as needed — slow growth is the point |
| Glass cleaning | Weekly (fast algae pressure) | Every 2 weeks usually sufficient |
| Filter cleaning | Weekly rinse of mechanical media | Every 2–3 weeks |
High-tech tanks are race cars: they reward precision and punish neglect quickly, because high light plus injected CO2 plus heavy fertilization grows algae just as fast as it grows plants when balance slips. Low-tech tanks are bicycles: slower, more forgiving, and perfectly happy with a lighter touch — which is exactly why community favorites and contest winners so often run simple low-tech planted tank setups.
Neither approach is "less maintenance" — they're just different distributions of effort. Choose the tech level that matches the time you'll actually spend, because the tank that fits your life is the one that thrives.
The Contest-Prep Intensive Variant
Preparing a tank for a photo submission, competition entry, or show display? For the 4–6 weeks before shoot day, shift into an intensive variant of the schedule:
- Daily (15 minutes): Remove any algae spots by hand, siphon detritus visible on the foreground, wipe the front glass inside and out, and trim any stray stem that breaks the scape's silhouette. Consistency beats intensity here.
- Weekly (expanded): Increase water changes to 50% twice weekly for maximum water clarity, do a full trim and replant of stems 2–3 weeks before the shoot (they need time to regrow into shape), and deep-clean filter media one week before so flow is perfect on the day.
- Two weeks out: Lock the scape — no major rescapes or new plants after this point; they need to root and settle. Dial in the CO2 and lighting so the tank is at its peak growth and color.
- Day before: Big water change, clean glass inside and out, remove equipment from the frame (heaters, drop checkers, intake tubes — hide or temporarily remove anything that will appear in the photo), do a final equipment check, and skip feeding so livestock are calm and water stays pristine.
- Shoot day: Turn off filters briefly during the shoot for glass-smooth water (keep livestock in mind — short off-periods are fine), and let the tank's maturity show. Most winning entries are tanks that have run the normal schedule diligently for months, then simply looked their best.
The intensive variant doesn't replace the standard routine — it sharpens it. A tank that's been neglected all year can't be contest-ready in a month, no matter how many water changes you do.
Frequently Asked Questions
How often should I do water changes in a planted tank?
Once a week is the standard: 40–50% for high-tech, CO2-injected, heavily fertilized tanks, and 25–35% for low-tech setups (20% is fine for mature, lightly stocked tanks). New tanks cycling with fresh aquasoil may need twice-weekly changes for the first two months. Consistency matters more than exact percentages — a steady 30% every week beats a heroic 70% once a month.
Do I need to vacuum the substrate in a planted tank?
Lightly and selectively. Unlike bare fish tanks, planted tanks benefit from some organic matter in the substrate, since plant roots feed on it. Vacuum open areas, dead-flow corners, and visible detritus during weekly water changes, but avoid deep-vacuuming densely planted zones or jamming the siphon into aquasoil — you'll damage roots and break down the soil granules.
How do I know when my filter needs cleaning?
Watch the flow, not the calendar. Reduced output, visible debris on the intake sponge, or a humming motor working harder than usual all signal a cleaning is due — typically weekly to biweekly for mechanical media in high-tech tanks, less often in low-tech. Always rinse media in old tank water, never under the tap, to protect your beneficial bacteria.
Should I change my routine in winter or summer?
Mostly you adjust for temperature, not season. Summer heat can push tank temperatures up, lowering oxygen and speeding metabolism (and algae) — consider a fan, shorter photoperiods, or lighter feeding. Winter's main risk is a failing heater, so check that thermometer-to-heater agreement in your monthly routine. The daily/weekly/monthly skeleton stays the same year-round.
What is the single biggest maintenance mistake beginners make?
Two, tied for first: over-cleaning and under-observing. Beginners often scrub everything sterile — killing biofilms, disturbing substrate, and replacing all filter media at once — while skipping the daily look that would have shown the filter slowing down a week earlier. Think gardener pruning and watering, not janitor deep-cleaning.
Can I go on vacation without maintenance?
Yes, for one to two weeks with preparation. Do a water change and full routine the day before you leave, clean the filter, top up the water to allow for evaporation, and put lights on a timer if they aren't already. Use an auto-feeder with a conservative amount (or skip feeding entirely for under 10 days — healthy fish are fine). High-tech tanks should be as stable as possible before you go, and an experienced fish-sitter for anything longer than two weeks is worth it.
Your Routine, Your Tank
A planted tank maintenance schedule isn't a cage — it's a framework. Start with the daily five minutes, the weekly water change, and the monthly tune-up, then adapt to what your tank tells you. The tanks that look effortless are almost never maintained effortlessly; they just run on a routine so practiced it's become invisible. For authoritative species-specific care data, browse Tropica's aquarium plant database, and consult the Planted Tank forums for long-running, hobbyist-tested maintenance discussions. Build your schedule, trust it, and enjoy watching the tank reward you.
Tissue-culture plants are the exception — they’re grown in sterile gel and adapt with minimal melting, which is part of what you’re paying for. Plants bought submersed from another hobbyist’s tank also transition with little melt, since they’re already in the right form.
Which Plants Melt Most (and Least)
Heavy melters (expect significant leaf loss)
- Cryptocorynes — infamous for “crypt melt,” sometimes dropping every leaf after any disturbance. They almost always recover from the roots within weeks.
- Stem plants grown emersed — rotala, ludwigia, and hygrophila often shed lower emersed leaves while the growing tips transition.
- Amazon swords — emersed-grown swords typically lose their broad oval aerial leaves and replace them with longer submersed ribbon leaves.
Light melters
- Anubias, java fern, bucephalandra — slow-growing rhizome plants transition gradually; occasional old-leaf melt but rarely dramatic.
- Vallisneria — usually transitions well, though it dislikes the move itself and may sulk for a week.
- Floating plants — minimal melt since their leaves were already at the air-water interface.
The Acclimation Protocol
Step 1: Quarantine or dip first
Before acclimating to your tank’s conditions, make sure you’re not acclimating pests along with the plant. Run new arrivals through our quarantine and dip protocol — it adds days upfront but prevents months of regret.
Step 2: Float to temperature-match (30 minutes)
Float the bag or container in your tank for 20–30 minutes to equalize temperature. Plants are less temperature-sensitive than fish, but a 10°F shock on top of transplant stress is an avoidable insult.
Step 3: Trim before planting
Remove any leaves that are already damaged, yellowing, or heavily algae-covered — they won’t recover and they’ll rot in your tank, feeding algae. For stem plants, trim off the bottom inch and any emersed leaves that look unlikely to adapt; the plant wastes energy maintaining leaves it’s going to shed anyway. Keep the healthy growing tips — that’s where recovery starts.
Step 4: Plant correctly the first time
Follow our planting guide — right depth, crown exposed on rosettes, rhizomes unburied on epiphytes. Every uprooting and replanting restarts the acclimation clock, so get placement right on the first attempt. Decide where each plant goes before it goes in the water.
Step 5: Run a gentle first week
For the first 7 days after planting:
- Moderate light — run your normal photoperiod but consider dropping intensity 20–30% if your light is dimmable. Blast-level light on a melting plant grows algae on the dying leaves, not recovery.
- Stable CO2 — if you inject CO2, keep it consistent. Fluctuating CO2 during acclimation is a melt accelerator. If you’re low-tech, this doesn’t apply — see growing without CO2.
- Half-strength fertilizer — new plants with damaged leaves can’t use full dosing, and the excess feeds algae. Ramp to full strength over 2–3 weeks per our fertilizer schedule.
- No disturbance — don’t move, trim, or “check on” new plants for at least two weeks. Every touch resets root establishment. This is especially critical for crypts.
Step 6: Remove melt, keep the base
As emersed leaves melt, remove the mushy material promptly — decaying leaves release ammonia and grow fungus that can spread to healthy tissue. But never discard the plant while the crown, rhizome, or roots are firm and alive. A crypt that’s lost every leaf but has firm roots is a plant that’s about to recover, not a dead plant. Give it 3–4 weeks before judging.
Telling Normal Melt From Real Problems
Normal transition melt:
- Affects oldest/emersed leaves first, newest growth last
- New submersed leaves emerge even as old ones dissolve
- Roots and crown stay firm and white/green
- Timeline: 1–4 weeks, then obvious new growth
Concerning melt (see our full melting diagnosis guide):
- New growth also melts or emerges deformed
- Rhizome or crown turns mushy and brown — this is rot, not transition
- Entire plant dissolves within days with no new growth after 4+ weeks
- Melting spreads to established plants that weren’t recently moved
Buying Tips to Minimize Melt
- Buy submersed-grown when available — hobbyist-grown cuttings transition with almost no melt.
- Choose tissue culture for sensitive species — crypts and delicate stems establish far more reliably from sterile cups.
- Avoid plants already melting in the store tank — some melt is normal, but a plant that’s mostly mush at purchase has less energy for recovery.
- Transport carefully — keep plants damp and out of direct sun/heat. A plant that dries out or cooks in a hot car melts far worse than one transported properly.
The First-Month Timeline: What to Expect Week by Week
Knowing what’s normal when removes most acclimation anxiety. Here’s the typical timeline for a healthy plant adapting to a new tank:
Week 1: The quiet week
Almost nothing visible happens. The plant is growing roots you can’t see and assessing its new environment. Some species (vallisneria, stem plants) may start shedding their lowest leaves. This is normal. Resist the urge to “help” — no moving, no extra fertilizer, no light changes. The most common beginner mistake is intervening during a week when the correct action is nothing.
Week 2: Melt peaks
This is when emersed leaves give up in earnest. Crypts may drop everything; swords shed their broad aerial leaves; stem plants lose lower foliage. It looks catastrophic and it’s usually fine. Keep removing mushy material, keep conditions stable, and watch the crown and growing tips — if those are firm and green, recovery is already underway.
Week 3: The turn
New submersed-adapted leaves emerge — smaller, thinner, often a slightly different shade of green than the emersed foliage. Stem plant tips start growing visibly; crypts push tiny curled leaves from the crown; swords unfurl narrow ribbon leaves. This is the moment most beginners exhale for the first time.
Week 4+: Established
New growth outpaces melt, and the plant is functionally yours. You can resume full-strength fertilizer, normal trimming, and stop treating it as fragile. Some slow growers (anubias, bucephalandra) take 6–8 weeks to show obvious progress — that’s their normal speed, not a problem.
Acclimating Different Plant Formats
Tissue-culture cups
Sterile, pest-free, and already adapted to high-humidity (not emersed) growth — tissue cultures melt the least of any format. Rinse the agar gel off gently (leftover gel rots and feeds fungus), split the portion into small plantlets, and plant per our planting guide. They establish slowly for the first two weeks, then accelerate. No dip needed, minimal acclimation stress — this is the premium experience you’re paying for.
Potted plants
Remove the pot and strip away the rockwool completely — leftover rockwool traps debris and rots. Tease the root mass apart gently; if it’s a dense mat, splitting it into 2–3 smaller portions actually establishes faster than planting one big clump (more growing points, better water flow around roots). Potted plants are usually emersed-grown, so expect the standard 2–4 week melt cycle.
Bare-root / bunched stems
Typically sold as weighted bunches. Remove any bands, foam, or weights, strip the lower leaves, and plant stems individually or in small groups. Bunched stems from the store are often already transitioning — check for new submersed growth at the tips, which tells you the plant is mid-adaptation and will settle quickly.
Hobbyist cuttings
Already submersed-grown and the fastest to establish — often showing new growth within days. The main acclimation factor is water-parameter difference between the two tanks. Float to temperature-match, plant promptly, and they’ll usually take off with minimal melt. This is why experienced hobbyists prefer trading cuttings over buying potted plants.
Frequently Asked Questions
Should I use a “plant starter” or transplant fertilizer?
Products marketed for transplant shock are mostly B-vitamins and mild hormones. They don’t hurt, but there’s no strong evidence they help aquarium plants specifically. Stable conditions and patience outperform any bottle. Save the money for more plants.
My new plant melted completely — bare crown, no leaves. Is it dead?
Probably not, if the crown or rhizome is firm. Crypts and swords routinely lose 100% of their leaves and regrow from the base within a month. The test is firmness: firm and pale/green means alive; mushy and brown/black means rot. Give firm-but-leafless plants a full 4 weeks before declaring them dead.
Can I speed up acclimation with extra light or CO2?
No — and trying usually backfires. A melting plant can’t use extra light; the excess just grows algae on its dying leaves. Keep light moderate and CO2 stable (not boosted) during acclimation. Growth speed comes from the plant’s own adaptation timeline, which you can’t rush, only avoid delaying.
Should new plants go straight into my main display tank?
After quarantine/dipping, yes — there’s no benefit to a separate “growing-in” tank for most plants. They acclimate to your water fastest in the tank they’ll live in. The exception is very delicate species going into a tank with boisterous fish; give those a few weeks in a calm corner or breeder box first.
The Patience Rule
The single most important acclimation skill is restraint: plant it right, set gentle conditions, remove decay, and then leave it alone for a month. The hobbyists with the best plant growth aren’t doing something clever in week one — they’re simply not interfering in weeks two through four while the plants do what they’ve evolved to do. Melt looks like failure and feels like failure, but in most cases it’s the visible part of a plant successfully becoming yours.