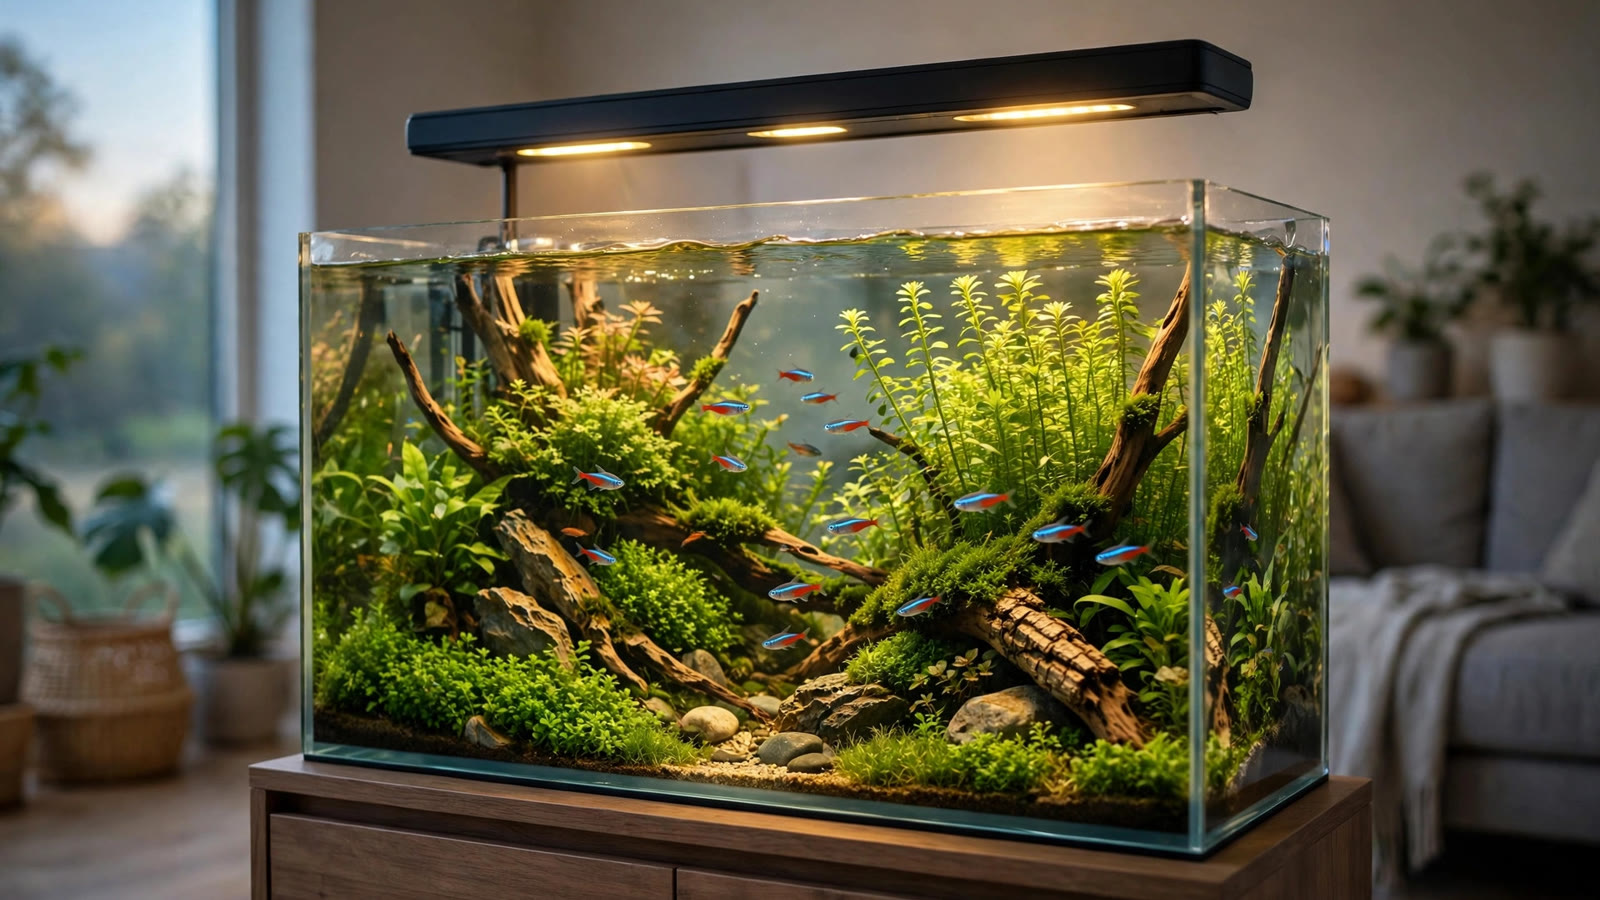
A smart aquarium promises to run your planted tank from your phone: lights that mimic sunrise, feeders that portion food while you travel, and sensors that text you when the temperature drifts. After the IFA 2026 unveilings put app-controlled tanks back in the spotlight, the market is suddenly full of Wi-Fi lights, Bluetooth dosers, and all-in-one smart tanks. The honest question for a planted-tank keeper is simpler than the marketing: which of these features measurably help your plants grow, and which are expensive distractions? This guide separates the signal from the gimmicks, shows what the science actually supports, and lays out sensible smart setups at three budgets.
What "Smart" Actually Covers in a Planted Tank
"Smart" is not one product. It is four different jobs that got bundled under one buzzword, and each one affects your plants differently.
App-controlled lighting
This is the most important smart feature for plant growth. App-controlled WRGB or full-spectrum LED fixtures let you program a 24-hour light cycle: a gentle sunrise ramp, a full-intensity midday peak, a sunset fade, and sometimes a dim moonlight phase. You control intensity channel by channel, set the total photoperiod to the minute, and often save multiple presets for different growth stages. Because high-tech planted tank setups live or die by light consistency, this is where smart gear earns its keep: the light runs the same program every day, whether you remember to touch it or not.
Automatic feeders
App-connected feeders dispense pre-measured portions on a schedule. From the plants' perspective, feeders matter indirectly: consistent, measured feeding means consistent nutrient input and less uneaten food rotting into algae fuel. In a heavily stocked planted tank, feeding discipline is quietly an algae-prevention strategy.
Automatic dosers
Peristaltic dosing pumps connected to an app deliver milliliters of liquid fertilizer or water conditioner on a schedule — daily micro-doses instead of one weekly dump. Plants respond better to steady, small nutrient availability than to a feast-or-famine cycle, and micro-dosing macros on alternating days is one of the most proven routines in the hobby. For reference, Tropica's plant care FAQ explains how balanced fertilization and algae prevention fit together. If you keep a low-tech planted tank, a doser handling a lean daily dose can quietly outperform a manual routine you skip half the time.
Sensors and monitors
Temperature probes, pH monitors, water-level sensors, and leak detectors form the monitoring layer. Most do not control anything — they watch and alert. A temperature probe that pings your phone when the heater sticks on is worth more to your plants than any lighting show mode: a week of 30°C water can melt a carpet and stall stem plants, and early warning is the difference between a bad day and a lost scape. pH monitors are most useful in CO2-injected tanks, where pH swing tracks CO2 concentration and a controller can even switch the solenoid on and off.
What Measurably Helps Plants vs. What Is a Gimmick
Strip away the marketing and only three mechanisms actually move the needle for plant health.
1. Photoperiod consistency
Plants run on circadian clocks. A stable 6–8 hour photoperiod, identical day after day, lets plants time photosynthesis and respiration efficiently and — crucially — denies algae the irregular light windows it exploits. App-controlled lights deliver this perfectly because the schedule lives in the fixture, not in your memory. A basic mechanical timer does the same job for light on/off, but the app light adds ramping, which brings us to the second mechanism.
2. Gradual light transitions
Abrupt full-intensity light startles both plants and livestock; the sudden blast favors algae, which colonizes new surfaces faster than higher plants can adapt. A 30–60 minute sunrise ramp lets plant photosystems spin up gradually and gives fish a calm wake-up. Sunset ramps work the same way in reverse. This is not a gimmick — it is one of the few smart features with a clear biological rationale, and it costs you nothing once the fixture supports it.
3. Dosing and feeding discipline
The best fertilizer is the one that actually goes in on schedule. Auto-dosers remove the human failure mode — the forgotten Tuesday dose, the double-dosed Friday — and keep nutrient levels stable instead of spiky. Stable nutrients plus stable light is the entire formula for an algae-free planted tank. Feeders contribute the same way through the livestock side.
The gimmick list
- Voice control: telling your tank to turn blue is entertainment, not horticulture. No plant grows faster because you used a voice assistant.
- Disco and storm modes: lightning simulations are fun for guests and neutral-to-bad for plants.
- Remote camera viewing: watching your tank from the office is delightful and useless for growth — unless it catches a heater failure, in which case the temperature alert did the work, not the video.
- "AI" feeding or growth prediction: most of this is a schedule with a fancier name. Ask what the device actually measures before paying for the label.
- Full automation with no manual checks: the most expensive failure mode of all. A doser with an empty reservoir, a feeder jammed with humidity-clumped food, or a sensor with a drifted probe will quietly undo weeks of growth. Smart gear needs dumb, human verification.
Stability Is the Real Product
If you take one principle from this guide, it is this: plants do not care about your phone. They care about stability — of light, nutrients, temperature, and water chemistry. Every smart feature is worth judging by one question: does it make some parameter more stable or more consistent than the manual alternative? App lights pass this test. Dosers pass it. Temperature alerts pass it. Storm modes and voice commands fail it.
This is also why smart gear pairs so well with a mature, biologically stable tank. A deep substrate method bed or a seasoned low-tech setup already buffers nutrients and pH; adding app-controlled light and a doser on top gives you a tank that practically runs itself. Conversely, bolting smart gadgets onto a brand-new, uncycled tank with three sad stems will not save it. Get the biology right first — our guide to planted tank water parameters covers the targets — then automate the routine.
Monitoring deserves special emphasis because disasters, not averages, kill planted tanks. Heaters fail. CO2 runs out mid-photoperiod and pH spikes. A leak soaks the stand. One alert at 2 a.m. that wakes you to a stuck heater is worth more than a year of perfect dosing graphs. If you buy exactly one smart device, make it the one that watches for catastrophe — or at minimum, read our power outage planted tank guide so a dead outlet does not silently reset every schedule you programmed. For deeper reading on plant light and nutrient needs, WetWebMedia's aquarium plant FAQs are a long-standing, no-nonsense reference.
Smart Planted Tank Setups by Budget
You do not need a flagship all-in-one tank to get 90% of the benefit. Most of the plant-growth value sits in the first two tiers.
| Tier | What to buy | Typical cost | What it actually does for plants |
|---|---|---|---|
| Budget (~$20–40) | Wi-Fi smart plug + your existing LED on a timer app; manual dosing | $20–40 | Perfect photoperiod consistency — the single highest-value upgrade. No ramping, but rock-solid on/off scheduling with vacation override. |
| Mid-range (~$120–250) | App-controlled WRGB light with sunrise/sunset programs + app feeder | $120–250 | Adds gradual transitions and feeding discipline. The sweet spot for most planted tanks. |
| Premium (~$350–700+) | App light + peristaltic auto-doser + temperature/pH monitor | $350–700+ | Full nutrient stability plus disaster alerts. Best for high-tech CO2 tanks and frequent travelers. |
Budget tier: the smart plug trick
A $15 Wi-Fi plug turns any "dumb" light into a schedule-keeping light. Program your photoperiod in the plug's app, add a second plug for the CO2 solenoid timed to start an hour before lights-on, and you have the core stability loop for the price of dinner. If money is tight overall, our planted aquarium cost breakdown shows where a smart plug fits into a realistic 2026 budget — it is one of the cheapest upgrades with the biggest payoff.
Mid-range: where the value peaks
An app-controlled WRGB fixture in the $100–180 range with proper sunrise/sunset programming and channel dimming is the single best smart purchase for a planted tank. Add an app feeder ($30–50) if you travel or keep heavy feeders, and you have covered light consistency, transitions, and feeding discipline — the three mechanisms that matter. Skip the doser at this tier unless you already dose liquids religiously; a mid-range doser is where budgets start buying convenience instead of results.
Premium: full ecosystem or smart tank
This is where all-in-one smart tanks (the kind unveiled at IFA 2026) and component ecosystems compete. A peristaltic doser ($80–150) handling daily micro-doses, a temperature controller with phone alerts ($40–70), and a pH controller for CO2 tanks ($60–120) together create a genuinely self-regulating system. The premium tier shines for high-tech tanks with demanding carpets and stems, and for anyone who travels for weeks — though even frequent travelers should read our notes on topping off vs water changes, because evaporation still needs a human or an auto-top-off, and no app fixes that alone.
Costs, Privacy, and Caveats Before You Buy
Smart gear has failure modes that dumb gear does not. Know them before the credit card comes out.
- App abandonment: budget smart devices live or die by their app. If the manufacturer stops updating it, your $120 light becomes a manual light with extra steps. Prefer devices with on-device schedule storage (programs survive Wi-Fi outages) and, ideally, open or local control options.
- Wi-Fi dependency: many cheap smart plugs and feeders need a constant 2.4 GHz connection and cloud servers. If the cloud goes down or your router reboots, schedules can freeze or reset. Check whether the device keeps its program offline before buying.
- Subscriptions and paywalled features: some ecosystems lock advanced programs, history graphs, or multi-tank dashboards behind monthly fees. Add the subscription to the real price before comparing.
- Privacy: tank cameras and always-on microphones feed cloud servers; even simple smart plugs phone home with usage data. Read the privacy policy, keep firmware updated, and put aquarium gadgets on a guest network if your router supports it.
- Probe drift and sensor maintenance: pH probes need regular calibration, temperature sensors drift, and doser tubing wears out. A sensor you never calibrate is a random number generator with a nicer display. Budget 15 minutes a month for maintenance — and if you are going fully automated, reconsider whether a no-filter planted tank setup philosophy (fewer failure points, biology doing the work) suits your temperament better than a gadget stack.
- More points of failure: every smart device is another thing that can fail. A mechanical timer fails once a decade; a cloud-connected feeder can fail on a Tuesday because of a server migration. Automation should reduce your workload, not transfer your anxiety to an app.
Frequently Asked Questions
Do app-controlled lights actually grow plants better than a timer and a good LED?
The LEDs do the growing; the app does the consistency. An app-controlled light with the same diodes and PAR as a manually switched fixture grows plants identically — until you forget the timer, leave town, or blast full intensity at 6 a.m. The app's real advantages are the unchanging daily schedule, sunrise/sunset ramps that reduce algae-favoring light shock, and intensity tuning when algae appears. Buy the app for the routine, not for magic diodes.
Can a smart tank replace water changes and maintenance?
No, and be suspicious of any product that implies it can. Automation handles dosing, lighting, and feeding schedules beautifully, but it cannot remove dissolved organics, trim stem plants, clean filters, or reset a crashed cycle. Think of smart gear as a reliable assistant, not a replacement keeper. The biology still needs your eyes on the tank weekly — automated top-off and dosing just make that weekly session shorter and calmer.
Are automatic feeders safe to use while on vacation?
Yes, with two precautions. First, test the feeder for at least a week before you leave — portion size, jam resistance, and whether humidity clumps the food. Second, slightly underfeed rather than overfeed; hungry fish survive two weeks easily, while a jammed feeder dumping a week's food at once can spike ammonia. For planted tanks, stable light and dosing schedules matter more than perfect feeding while you are away.
Do I need a pH controller for a CO2-injected planted tank?
Not strictly, but it is the most defensible premium purchase for high-tech tanks. A pH controller switches your CO2 solenoid to hold a target pH, which smooths CO2 levels through the photoperiod and protects livestock from end-of-tank dumps. It requires a calibrated probe and a properly sized CO2 system to work well. For low-tech or liquid-carbon tanks, it is unnecessary — save the money for better lighting or more plants.
What happens to my smart devices during a power outage?
It depends on the device. Quality app lights and dosers store schedules on-device and resume automatically; cheap cloud-dependent plugs may need the app to re-push the schedule after power returns. Feeders with battery backup keep feeding; those without simply stop. This is why disaster planning matters more than gadget choice — keep a battery air pump, know your tank's thermal mass, and have a written recovery plan rather than assuming the app will sort it out.
Is a smart all-in-one tank worth it for a beginner?
Usually not as a first tank. All-in-one smart tanks are convenient but expensive, lock you into one ecosystem, and can teach you to watch an app instead of learning to read your plants. A beginner learns faster — and spends less — with a standard tank, a smart plug for the light, and the discipline of weekly observation. Once you can spot nutrient deficiency by leaf color, then automation becomes a tool instead of a crutch.
The Bottom Line: Buy Consistency, Not Gadgets
A smart aquarium earns its place in a planted tank when it makes light, nutrients, or parameters more consistent than you would manage by hand — and fades into the background doing it. An app-controlled light with sunrise ramps, a doser that never forgets Tuesday, a temperature alert that catches a stuck heater: these are real, measurable upgrades to plant health. Voice control, storm modes, and growth-predicting AI are not. Start with a $20 smart plug and perfect your photoperiod, spend the mid-range money on a programmable light, and only go premium when travel or a high-tech scape genuinely demands it. The plants will never know the difference between a phone app and a timer — they will only ever feel the stability.
Tissue-culture plants are the exception — they’re grown in sterile gel and adapt with minimal melting, which is part of what you’re paying for. Plants bought submersed from another hobbyist’s tank also transition with little melt, since they’re already in the right form.
Which Plants Melt Most (and Least)
Heavy melters (expect significant leaf loss)
- Cryptocorynes — infamous for “crypt melt,” sometimes dropping every leaf after any disturbance. They almost always recover from the roots within weeks.
- Stem plants grown emersed — rotala, ludwigia, and hygrophila often shed lower emersed leaves while the growing tips transition.
- Amazon swords — emersed-grown swords typically lose their broad oval aerial leaves and replace them with longer submersed ribbon leaves.
Light melters
- Anubias, java fern, bucephalandra — slow-growing rhizome plants transition gradually; occasional old-leaf melt but rarely dramatic.
- Vallisneria — usually transitions well, though it dislikes the move itself and may sulk for a week.
- Floating plants — minimal melt since their leaves were already at the air-water interface.
The Acclimation Protocol
Step 1: Quarantine or dip first
Before acclimating to your tank’s conditions, make sure you’re not acclimating pests along with the plant. Run new arrivals through our quarantine and dip protocol — it adds days upfront but prevents months of regret.
Step 2: Float to temperature-match (30 minutes)
Float the bag or container in your tank for 20–30 minutes to equalize temperature. Plants are less temperature-sensitive than fish, but a 10°F shock on top of transplant stress is an avoidable insult.
Step 3: Trim before planting
Remove any leaves that are already damaged, yellowing, or heavily algae-covered — they won’t recover and they’ll rot in your tank, feeding algae. For stem plants, trim off the bottom inch and any emersed leaves that look unlikely to adapt; the plant wastes energy maintaining leaves it’s going to shed anyway. Keep the healthy growing tips — that’s where recovery starts.
Step 4: Plant correctly the first time
Follow our planting guide — right depth, crown exposed on rosettes, rhizomes unburied on epiphytes. Every uprooting and replanting restarts the acclimation clock, so get placement right on the first attempt. Decide where each plant goes before it goes in the water.
Step 5: Run a gentle first week
For the first 7 days after planting:
- Moderate light — run your normal photoperiod but consider dropping intensity 20–30% if your light is dimmable. Blast-level light on a melting plant grows algae on the dying leaves, not recovery.
- Stable CO2 — if you inject CO2, keep it consistent. Fluctuating CO2 during acclimation is a melt accelerator. If you’re low-tech, this doesn’t apply — see growing without CO2.
- Half-strength fertilizer — new plants with damaged leaves can’t use full dosing, and the excess feeds algae. Ramp to full strength over 2–3 weeks per our fertilizer schedule.
- No disturbance — don’t move, trim, or “check on” new plants for at least two weeks. Every touch resets root establishment. This is especially critical for crypts.
Step 6: Remove melt, keep the base
As emersed leaves melt, remove the mushy material promptly — decaying leaves release ammonia and grow fungus that can spread to healthy tissue. But never discard the plant while the crown, rhizome, or roots are firm and alive. A crypt that’s lost every leaf but has firm roots is a plant that’s about to recover, not a dead plant. Give it 3–4 weeks before judging.
Telling Normal Melt From Real Problems
Normal transition melt:
- Affects oldest/emersed leaves first, newest growth last
- New submersed leaves emerge even as old ones dissolve
- Roots and crown stay firm and white/green
- Timeline: 1–4 weeks, then obvious new growth
Concerning melt (see our full melting diagnosis guide):
- New growth also melts or emerges deformed
- Rhizome or crown turns mushy and brown — this is rot, not transition
- Entire plant dissolves within days with no new growth after 4+ weeks
- Melting spreads to established plants that weren’t recently moved
Buying Tips to Minimize Melt
- Buy submersed-grown when available — hobbyist-grown cuttings transition with almost no melt.
- Choose tissue culture for sensitive species — crypts and delicate stems establish far more reliably from sterile cups.
- Avoid plants already melting in the store tank — some melt is normal, but a plant that’s mostly mush at purchase has less energy for recovery.
- Transport carefully — keep plants damp and out of direct sun/heat. A plant that dries out or cooks in a hot car melts far worse than one transported properly.
The First-Month Timeline: What to Expect Week by Week
Knowing what’s normal when removes most acclimation anxiety. Here’s the typical timeline for a healthy plant adapting to a new tank:
Week 1: The quiet week
Almost nothing visible happens. The plant is growing roots you can’t see and assessing its new environment. Some species (vallisneria, stem plants) may start shedding their lowest leaves. This is normal. Resist the urge to “help” — no moving, no extra fertilizer, no light changes. The most common beginner mistake is intervening during a week when the correct action is nothing.
Week 2: Melt peaks
This is when emersed leaves give up in earnest. Crypts may drop everything; swords shed their broad aerial leaves; stem plants lose lower foliage. It looks catastrophic and it’s usually fine. Keep removing mushy material, keep conditions stable, and watch the crown and growing tips — if those are firm and green, recovery is already underway.
Week 3: The turn
New submersed-adapted leaves emerge — smaller, thinner, often a slightly different shade of green than the emersed foliage. Stem plant tips start growing visibly; crypts push tiny curled leaves from the crown; swords unfurl narrow ribbon leaves. This is the moment most beginners exhale for the first time.
Week 4+: Established
New growth outpaces melt, and the plant is functionally yours. You can resume full-strength fertilizer, normal trimming, and stop treating it as fragile. Some slow growers (anubias, bucephalandra) take 6–8 weeks to show obvious progress — that’s their normal speed, not a problem.
Acclimating Different Plant Formats
Tissue-culture cups
Sterile, pest-free, and already adapted to high-humidity (not emersed) growth — tissue cultures melt the least of any format. Rinse the agar gel off gently (leftover gel rots and feeds fungus), split the portion into small plantlets, and plant per our planting guide. They establish slowly for the first two weeks, then accelerate. No dip needed, minimal acclimation stress — this is the premium experience you’re paying for.
Potted plants
Remove the pot and strip away the rockwool completely — leftover rockwool traps debris and rots. Tease the root mass apart gently; if it’s a dense mat, splitting it into 2–3 smaller portions actually establishes faster than planting one big clump (more growing points, better water flow around roots). Potted plants are usually emersed-grown, so expect the standard 2–4 week melt cycle.
Bare-root / bunched stems
Typically sold as weighted bunches. Remove any bands, foam, or weights, strip the lower leaves, and plant stems individually or in small groups. Bunched stems from the store are often already transitioning — check for new submersed growth at the tips, which tells you the plant is mid-adaptation and will settle quickly.
Hobbyist cuttings
Already submersed-grown and the fastest to establish — often showing new growth within days. The main acclimation factor is water-parameter difference between the two tanks. Float to temperature-match, plant promptly, and they’ll usually take off with minimal melt. This is why experienced hobbyists prefer trading cuttings over buying potted plants.
Frequently Asked Questions
Should I use a “plant starter” or transplant fertilizer?
Products marketed for transplant shock are mostly B-vitamins and mild hormones. They don’t hurt, but there’s no strong evidence they help aquarium plants specifically. Stable conditions and patience outperform any bottle. Save the money for more plants.
My new plant melted completely — bare crown, no leaves. Is it dead?
Probably not, if the crown or rhizome is firm. Crypts and swords routinely lose 100% of their leaves and regrow from the base within a month. The test is firmness: firm and pale/green means alive; mushy and brown/black means rot. Give firm-but-leafless plants a full 4 weeks before declaring them dead.
Can I speed up acclimation with extra light or CO2?
No — and trying usually backfires. A melting plant can’t use extra light; the excess just grows algae on its dying leaves. Keep light moderate and CO2 stable (not boosted) during acclimation. Growth speed comes from the plant’s own adaptation timeline, which you can’t rush, only avoid delaying.
Should new plants go straight into my main display tank?
After quarantine/dipping, yes — there’s no benefit to a separate “growing-in” tank for most plants. They acclimate to your water fastest in the tank they’ll live in. The exception is very delicate species going into a tank with boisterous fish; give those a few weeks in a calm corner or breeder box first.
The Patience Rule
The single most important acclimation skill is restraint: plant it right, set gentle conditions, remove decay, and then leave it alone for a month. The hobbyists with the best plant growth aren’t doing something clever in week one — they’re simply not interfering in weeks two through four while the plants do what they’ve evolved to do. Melt looks like failure and feels like failure, but in most cases it’s the visible part of a plant successfully becoming yours.