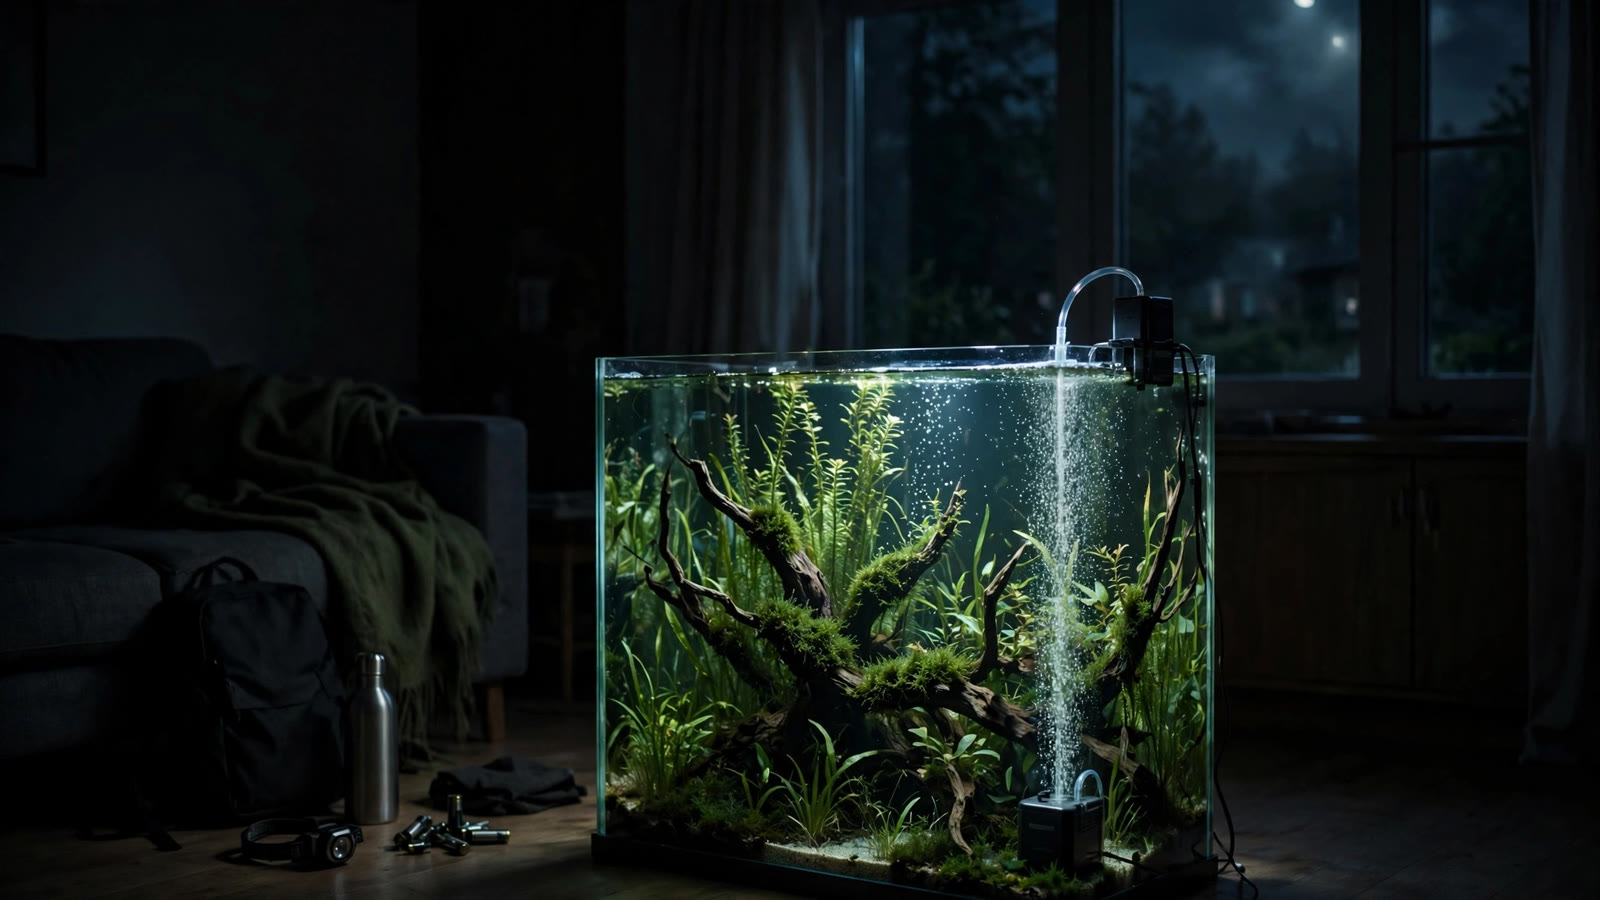
When the lights go out and your filters fall silent, a planted aquarium is in a very different position than a bare fish-only tank. Most hobbyists preparing for a power outage planted tank scenario find that plants are allies for the first several hours — buffering oxygen, taking up ammonia, and buying time. But there is a catch that surprises almost every beginner: plants switch sides at night. Knowing when your planted tank helps you, when it works against you, and what to do hour by hour is the difference between a scary evening and a genuine disaster.
Why Planted Tanks Handle Short Outages Better Than Fish-Only Tanks
During daylight, a moderately to heavily planted aquarium is one of the most forgiving setups you can own during a blackout. Photosynthesis keeps adding dissolved oxygen as long as ambient room light reaches the tank, and the plant mass acts as a chemical buffer — absorbing ammonia and nitrate while the filter sits idle. A low-tech planted tank, with its slower metabolism and modest livestock load, can coast through a two- to four-hour daytime outage with almost nothing required of you beyond calm.
There is also a hidden workforce most people forget: the oxygenated zones around plant roots. Much of the tank's beneficial bacteria colony lives on root surfaces and substrate grains, not just inside the filter media. Losing filter flow therefore hurts less in a planted tank than in a bare-bottom or fish-only tank, where nearly all biological filtration sits inside the equipment that just stopped.
The Nighttime Twist: When Plants Consume Oxygen
Here is the part that catches people off guard. Photosynthesis stops the moment light drops, but respiration does not. In darkness, every plant in your tank — like your fish — is consuming dissolved oxygen and producing carbon dioxide. A tank that felt bulletproof at 3 p.m. can become the most oxygen-hungry aquarium in the house by 3 a.m. This is why the danger scales so sharply with darkness and duration: a six-hour daytime blackout is usually a non-event, while the same six hours overnight can push a heavily planted, heavily stocked tank toward real trouble. In any outage stretching past sunset, surface agitation becomes the single most important thing you can do.
The Real Risks During an Extended Blackout
Oxygen depletion overnight. The leading cause of livestock losses in long outages. Fish, shrimp, snails, bacteria, and plants all draw from the same oxygen supply once photosynthesis stops. Small tanks, warm water, heavy stocking, and dense plant growth all make the drop faster. Watch for the warning sign: fish hanging at the surface, gulping air.
Filter bacteria die-off. Nitrifying bacteria need oxygen and flow. Inside a sealed canister with no circulation, trapped water goes anaerobic within hours — a few hours to half a day depending on temperature and bioload. If that colony dies, the tank is effectively uncycled, and ammonia can spike within a day or two of restart. Handle the filter correctly during the outage (below); leaving it sealed and hoping is not a strategy.
Temperature swings. Heaters and chillers stop with everything else. In winter, a tropical tank can lose several degrees in a few hours, especially a small glass tank in a cold room; in summer, a tank near a sun-facing window can overheat. Most common tropical plants tolerate roughly 65–80°F (18–27°C), but swings are worse than a steady cool temperature, and livestock feels the change sooner than plants do.
CO2 equipment misbehavior. A CO2 solenoid is normally held closed by electricity and opens when powered — so on most setups, losing power stops injection, which is the safe direction. The risky setup is a regulator without a solenoid, a needle valve left open, or a DIY yeast generator that keeps producing gas regardless of power. With circulation stopped, CO2 can accumulate and displace oxygen. Know which type you own before you ever need the knowledge.
The First Hour: Immediate Actions When the Power Dies
Do these in order — the whole list takes ten minutes:
- Confirm what you are dealing with. Check whether the outage is your home or the whole street, and look for any utility restoration estimate — that decides whether you use the short or long playbook.
- Agitate the surface. Fill a clean jug with tank water, lift it a couple of feet up, and pour it back in. Repeat every 20–30 minutes. Gas exchange happens at the surface, and breaking it manually is free aeration.
- Start your battery air pump. If you keep one in your aquarium emergency supplies, set it up now with an airstone.
- Deal with the canister filter. If the outage may last more than a couple of hours, do not leave a sealed canister stagnant — move the media into a bucket of tank water to keep it exposed to air. For hang-on-back filters, raise the intake so the filter cannot back-siphon water out of the tank.
- Leave lights off when power flickers. Plants and fish handle darkness better than strobe-like flickering. Switch the light timer off until power is stable.
- Do not feed. Feeding adds ammonia to water that is not being filtered. Livestock can go days without food; missing a meal costs nothing.
- Insulate for temperature. In cold weather, wrap the tank's sides and back in blankets (not over the top, where air must circulate). In heat, shade the tank and float a sealed bottle of cool — not icy — water if temperatures climb.
Short Outages (Under 6–8 Hours) vs. Long Outages (24–72 Hours)
The Short-Outage Playbook
For anything under roughly six to eight hours, a healthy planted tank usually needs very little: keep up manual agitation or a battery air pump, do not feed, and do not open the filter or perform water changes. Most hobbyists report zero losses and zero chemistry spikes from a daytime outage of this length. When power returns, confirm the filter primes, and test the water the next day. If ammonia reads anything above zero, treat it as a mini-cycle and dose a conditioner that detoxifies ammonia while bacteria recover.
The Long-Outage Playbook
Past 24 hours, move from "wait it out" to active management. Priorities: oxygen, temperature, and ammonia control.
- Aerate on a schedule. Run the battery air pump continuously and rotate spare batteries. With one pump and multiple tanks, rotate between them every few hours, prioritizing the smallest and most heavily stocked.
- Open the filter media to air. Spread canister media in a bucket of tank water so air reaches it — this keeps much of your beneficial colony alive. Rinse gently in old tank water (never tap water) when power returns.
- Remove melting plant matter. Stressed plants may melt; decaying leaves dump ammonia into a tank with no filtration. Trim and net out rot daily.
- Test water daily. If ammonia or nitrite climbs, do a 20–30% water change with temperature-matched, dechlorinated water. Never use untreated tap water during an outage.
- Feed nothing. Fish can go three to five days without food; shrimp and snails graze on biofilm. Resume feeding gradually after power returns.
- Protect temperature overnight. Long winter outages often cost livestock through a tank that has fallen into the 50s°F overnight, not through oxygen. Insulate, replenish sealed warm-water bottles, and move the tank away from exterior walls.
Backup Power Options Compared
| Option | Typical Runtime | Approx. Cost | What It Can Run |
|---|---|---|---|
| Battery air pump | 24–48 hrs per set of batteries | $10–$30, plus batteries | Air stone only — oxygen, no filtration or heat |
| UPS | 30 min–2 hrs | $60–$150 | Filters and small pumps; covers most short outages but not long ones |
| Portable power station | 5–20+ hrs, capacity-dependent | $200–$800+ | Air pump, filter, and small heater on rotation — a small tank's essentials for a full day |
| Generator | Hours to days (fuel-limited) | $400–$1,500+ | Everything, including heaters and lights — overkill for one tank, sensible for a fish room |
Battery air pumps are the best value-per-dollar purchase in this entire guide. Run one continuously rather than intermittently — steady aeration beats bursts. Models with an auto-switchover feature that starts the pump when power is lost are worth a few dollars more if you are away during the day. As a rule of thumb, a UPS sized for roughly double your filter's wattage buys an hour or two of continued circulation, which covers the large majority of real-world outages.
What NOT to Do During a Blackout
- Do not do water changes with untreated water. Stress plus chlorine or chloramine kills faster than ammonia. Always dose dechlorinator.
- Do not open the canister "just to check" and leave it stagnant. Either leave it sealed for a genuinely short outage or commit to exposing the media to air — half-measures trap stagnant water without helping.
- Do not pour hot water into the tank. Localized scalding kills livestock. Use sealed bottles of warm water and keep shifts gradual — a few degrees per hour at most.
- Do not dose medications or heavy fertilizers. In stagnant, low-oxygen water, dosing changes chemistry unpredictably. The tank can wait.
- Do not overreact to cloudy water. A bacterial bloom after an outage is common and usually resolves once filtration restarts.
- Do not leave a DIY CO2 generator running. Without circulation to disperse it, disconnect it until power is back.
Recovery Checklist: When the Power Returns
- Restart the filter first. Confirm it primes fully. If you removed canister media during the outage, replace the trays and refill with tank water before sealing.
- Smell the filter water. A rotten-egg smell means the media went anaerobic — rinse it in old tank water before restarting, then test parameters daily for a week.
- Do not feed for 24 hours. Then resume at half portions for a few days while you monitor.
- Test ammonia, nitrite, and pH. Any ammonia after a long outage suggests the cycle took a hit. Follow standard guidance on recycling a planted tank and use a conditioner that detoxifies ammonia meanwhile.
- Trim melt and dead foliage. Melting Cryptocoryne or similar sensitive leaves after stress is normal; new growth usually follows from the roots. Do not uproot anything until you are sure it is gone.
- Restart CO2 carefully. On pressurized setups, confirm the solenoid opens normally and re-check your bubble rate over the next day — regulator behavior can drift after a power cycle.
- Watch livestock for a week. Stress suppresses immunity, so secondary issues sometimes appear days later.
- Compare water parameters to your baseline. A shifted pH or elevated nitrate shows how much biological capacity was lost.
Build Your Outage Prep Kit Now (Not During the Storm)
The difference between a calm outage and a panic is a small box of supplies. Assemble this once and check it twice a year:
- Battery-powered air pump with airstone, tubing, and spare batteries — one per tank, ideally.
- A UPS sized for roughly double your filter's wattage, for your most valuable or sensitive tank.
- Insulated blankets or towels for winter, and a thermometer you can read at a glance.
- Water conditioner / dechlorinator plus an ammonia-detoxifying product for post-outage cycling hiccups.
- Sealed bottles for warm or cool water temperature control.
- A jug or pitcher dedicated to manual surface agitation.
- A liquid test kit for ammonia, nitrite, pH, and nitrate.
- Trimming tools and a net for removing melt during a long outage.
If you are building a new tank, fold the outage question into the design from day one: a Walstad-style natural tank with no powered filter simply has no filter to die, and on a high-tech CO2-driven tank verify solenoid behavior before storm season, not during it.
Generator Safety Basics
Generators are the only backup that can run heaters and filters indefinitely — and the only option that can kill you if used wrong. Never run a generator indoors, in a garage, or near windows — not even briefly. Carbon monoxide is colorless and odorless and can incapacitate within minutes. Place it outdoors at least 20 feet from the house with exhaust pointed away from doors and windows, let it cool before refueling, and have a qualified electrician install a transfer switch rather than improvising connections.
Frequently Asked Questions
How long can a planted tank survive without power?
A healthy, moderately stocked planted tank typically handles a daytime outage of 6–8 hours with no losses. Overnight or multi-day outages are different — oxygen depletion becomes the main threat, and heavily stocked or warm tanks may need active aeration within the first night. Beyond 24 hours: aerate, watch temperature, and test water daily.
Will my plants die if the lights are out for a few days?
Most common aquarium plants tolerate several days of darkness — they go dormant and fast growers simply pause. What kills plants during outages is usually temperature shock or rot from decaying matter rather than darkness. Expect sensitive species like Cryptocoryne to melt after stress; new growth typically follows from the roots within a week or two.
Should I unplug my filter during a power outage?
For short outages under a few hours, leave it plugged in so it restarts on its own. For longer outages, a sealed canister's trapped water can go anaerobic and kill beneficial bacteria — remove the media into a bucket of tank water so it stays exposed to air. For hang-on-back filters, raise the intake so the filter cannot back-siphon water out.
What happens to my CO2 system when the power goes out?
On a standard pressurized setup with a solenoid valve, the solenoid fails closed without electricity, so injection stops automatically — the safe direction. Verify this is how your regulator behaves before you need it. Disconnect DIY CO2 generators and any regulator without a solenoid, since they keep producing gas into stagnant water where it can accumulate.
Can I feed my fish during a blackout?
No — skip feeding for the duration of the outage and for about 24 hours after power returns. Fish easily go several days without food, and uneaten food adds ammonia to water that is not being filtered. Resume at half portions once the filter is running and tests look stable.
Do I need to re-cycle my tank after a long power outage?
Possibly, if the filter bacteria died off. Test ammonia and nitrite daily for at least a week after a 24+ hour outage. Any detectable ammonia means the cycle took a hit — dose an ammonia-detoxifying conditioner, reduce feeding, and let the colony rebuild over days to a couple of weeks. Planted tanks recover faster because the plants themselves absorb a meaningful share of ammonia.
The Calm Before the Storm Is the Whole Game
A power outage planted tank survival story is almost never written during the outage — it is written in the calm weeks before it, when you bought the battery pump, learned your filter's siphon behavior, and found out whether your CO2 solenoid fails open or closed. Assemble the prep kit, walk your tank through a mental drill once, and the next blackout becomes an inconvenience rather than an emergency.
Tissue-culture plants are the exception — they’re grown in sterile gel and adapt with minimal melting, which is part of what you’re paying for. Plants bought submersed from another hobbyist’s tank also transition with little melt, since they’re already in the right form.
Which Plants Melt Most (and Least)
Heavy melters (expect significant leaf loss)
- Cryptocorynes — infamous for “crypt melt,” sometimes dropping every leaf after any disturbance. They almost always recover from the roots within weeks.
- Stem plants grown emersed — rotala, ludwigia, and hygrophila often shed lower emersed leaves while the growing tips transition.
- Amazon swords — emersed-grown swords typically lose their broad oval aerial leaves and replace them with longer submersed ribbon leaves.
Light melters
- Anubias, java fern, bucephalandra — slow-growing rhizome plants transition gradually; occasional old-leaf melt but rarely dramatic.
- Vallisneria — usually transitions well, though it dislikes the move itself and may sulk for a week.
- Floating plants — minimal melt since their leaves were already at the air-water interface.
The Acclimation Protocol
Step 1: Quarantine or dip first
Before acclimating to your tank’s conditions, make sure you’re not acclimating pests along with the plant. Run new arrivals through our quarantine and dip protocol — it adds days upfront but prevents months of regret.
Step 2: Float to temperature-match (30 minutes)
Float the bag or container in your tank for 20–30 minutes to equalize temperature. Plants are less temperature-sensitive than fish, but a 10°F shock on top of transplant stress is an avoidable insult.
Step 3: Trim before planting
Remove any leaves that are already damaged, yellowing, or heavily algae-covered — they won’t recover and they’ll rot in your tank, feeding algae. For stem plants, trim off the bottom inch and any emersed leaves that look unlikely to adapt; the plant wastes energy maintaining leaves it’s going to shed anyway. Keep the healthy growing tips — that’s where recovery starts.
Step 4: Plant correctly the first time
Follow our planting guide — right depth, crown exposed on rosettes, rhizomes unburied on epiphytes. Every uprooting and replanting restarts the acclimation clock, so get placement right on the first attempt. Decide where each plant goes before it goes in the water.
Step 5: Run a gentle first week
For the first 7 days after planting:
- Moderate light — run your normal photoperiod but consider dropping intensity 20–30% if your light is dimmable. Blast-level light on a melting plant grows algae on the dying leaves, not recovery.
- Stable CO2 — if you inject CO2, keep it consistent. Fluctuating CO2 during acclimation is a melt accelerator. If you’re low-tech, this doesn’t apply — see growing without CO2.
- Half-strength fertilizer — new plants with damaged leaves can’t use full dosing, and the excess feeds algae. Ramp to full strength over 2–3 weeks per our fertilizer schedule.
- No disturbance — don’t move, trim, or “check on” new plants for at least two weeks. Every touch resets root establishment. This is especially critical for crypts.
Step 6: Remove melt, keep the base
As emersed leaves melt, remove the mushy material promptly — decaying leaves release ammonia and grow fungus that can spread to healthy tissue. But never discard the plant while the crown, rhizome, or roots are firm and alive. A crypt that’s lost every leaf but has firm roots is a plant that’s about to recover, not a dead plant. Give it 3–4 weeks before judging.
Telling Normal Melt From Real Problems
Normal transition melt:
- Affects oldest/emersed leaves first, newest growth last
- New submersed leaves emerge even as old ones dissolve
- Roots and crown stay firm and white/green
- Timeline: 1–4 weeks, then obvious new growth
Concerning melt (see our full melting diagnosis guide):
- New growth also melts or emerges deformed
- Rhizome or crown turns mushy and brown — this is rot, not transition
- Entire plant dissolves within days with no new growth after 4+ weeks
- Melting spreads to established plants that weren’t recently moved
Buying Tips to Minimize Melt
- Buy submersed-grown when available — hobbyist-grown cuttings transition with almost no melt.
- Choose tissue culture for sensitive species — crypts and delicate stems establish far more reliably from sterile cups.
- Avoid plants already melting in the store tank — some melt is normal, but a plant that’s mostly mush at purchase has less energy for recovery.
- Transport carefully — keep plants damp and out of direct sun/heat. A plant that dries out or cooks in a hot car melts far worse than one transported properly.
The First-Month Timeline: What to Expect Week by Week
Knowing what’s normal when removes most acclimation anxiety. Here’s the typical timeline for a healthy plant adapting to a new tank:
Week 1: The quiet week
Almost nothing visible happens. The plant is growing roots you can’t see and assessing its new environment. Some species (vallisneria, stem plants) may start shedding their lowest leaves. This is normal. Resist the urge to “help” — no moving, no extra fertilizer, no light changes. The most common beginner mistake is intervening during a week when the correct action is nothing.
Week 2: Melt peaks
This is when emersed leaves give up in earnest. Crypts may drop everything; swords shed their broad aerial leaves; stem plants lose lower foliage. It looks catastrophic and it’s usually fine. Keep removing mushy material, keep conditions stable, and watch the crown and growing tips — if those are firm and green, recovery is already underway.
Week 3: The turn
New submersed-adapted leaves emerge — smaller, thinner, often a slightly different shade of green than the emersed foliage. Stem plant tips start growing visibly; crypts push tiny curled leaves from the crown; swords unfurl narrow ribbon leaves. This is the moment most beginners exhale for the first time.
Week 4+: Established
New growth outpaces melt, and the plant is functionally yours. You can resume full-strength fertilizer, normal trimming, and stop treating it as fragile. Some slow growers (anubias, bucephalandra) take 6–8 weeks to show obvious progress — that’s their normal speed, not a problem.
Acclimating Different Plant Formats
Tissue-culture cups
Sterile, pest-free, and already adapted to high-humidity (not emersed) growth — tissue cultures melt the least of any format. Rinse the agar gel off gently (leftover gel rots and feeds fungus), split the portion into small plantlets, and plant per our planting guide. They establish slowly for the first two weeks, then accelerate. No dip needed, minimal acclimation stress — this is the premium experience you’re paying for.
Potted plants
Remove the pot and strip away the rockwool completely — leftover rockwool traps debris and rots. Tease the root mass apart gently; if it’s a dense mat, splitting it into 2–3 smaller portions actually establishes faster than planting one big clump (more growing points, better water flow around roots). Potted plants are usually emersed-grown, so expect the standard 2–4 week melt cycle.
Bare-root / bunched stems
Typically sold as weighted bunches. Remove any bands, foam, or weights, strip the lower leaves, and plant stems individually or in small groups. Bunched stems from the store are often already transitioning — check for new submersed growth at the tips, which tells you the plant is mid-adaptation and will settle quickly.
Hobbyist cuttings
Already submersed-grown and the fastest to establish — often showing new growth within days. The main acclimation factor is water-parameter difference between the two tanks. Float to temperature-match, plant promptly, and they’ll usually take off with minimal melt. This is why experienced hobbyists prefer trading cuttings over buying potted plants.
Frequently Asked Questions
Should I use a “plant starter” or transplant fertilizer?
Products marketed for transplant shock are mostly B-vitamins and mild hormones. They don’t hurt, but there’s no strong evidence they help aquarium plants specifically. Stable conditions and patience outperform any bottle. Save the money for more plants.
My new plant melted completely — bare crown, no leaves. Is it dead?
Probably not, if the crown or rhizome is firm. Crypts and swords routinely lose 100% of their leaves and regrow from the base within a month. The test is firmness: firm and pale/green means alive; mushy and brown/black means rot. Give firm-but-leafless plants a full 4 weeks before declaring them dead.
Can I speed up acclimation with extra light or CO2?
No — and trying usually backfires. A melting plant can’t use extra light; the excess just grows algae on its dying leaves. Keep light moderate and CO2 stable (not boosted) during acclimation. Growth speed comes from the plant’s own adaptation timeline, which you can’t rush, only avoid delaying.
Should new plants go straight into my main display tank?
After quarantine/dipping, yes — there’s no benefit to a separate “growing-in” tank for most plants. They acclimate to your water fastest in the tank they’ll live in. The exception is very delicate species going into a tank with boisterous fish; give those a few weeks in a calm corner or breeder box first.
The Patience Rule
The single most important acclimation skill is restraint: plant it right, set gentle conditions, remove decay, and then leave it alone for a month. The hobbyists with the best plant growth aren’t doing something clever in week one — they’re simply not interfering in weeks two through four while the plants do what they’ve evolved to do. Melt looks like failure and feels like failure, but in most cases it’s the visible part of a plant successfully becoming yours.