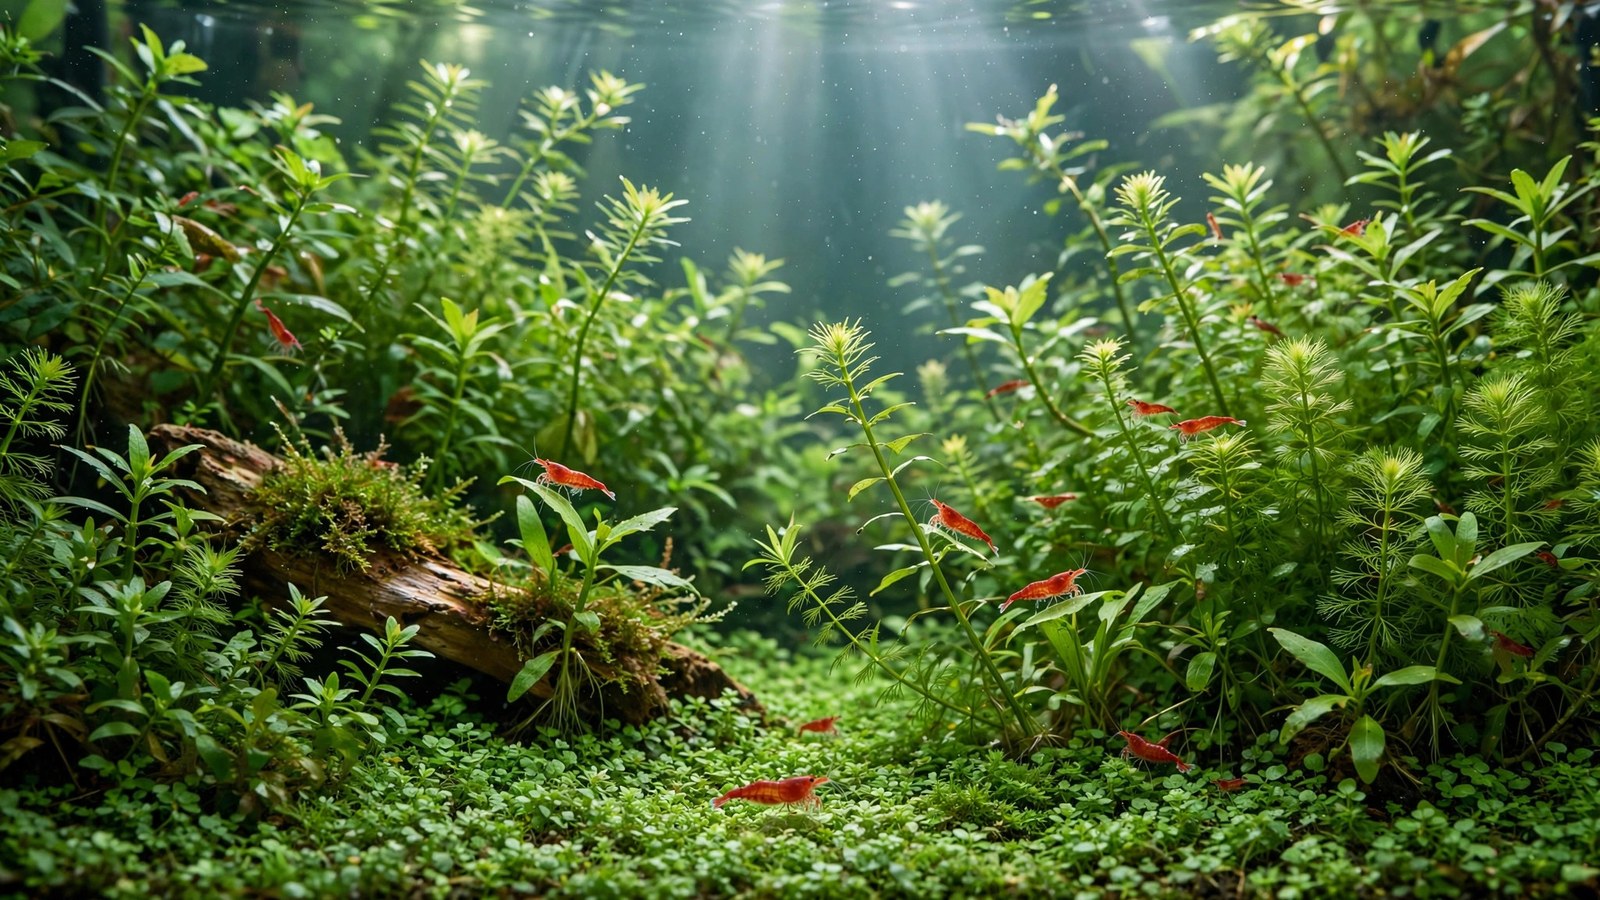
A no filter planted tank sounds like a contradiction — aren't filters the first thing every beginner is told to buy? Yet thousands of hobbyists quietly run thriving filterless aquariums. The trick is a shift in thinking: instead of relying on a plastic box humming on the back glass, you let plants, substrate, and the bacteria living on them do the filtering. This guide explains the biology behind it, who it suits, and how to build a filterless planted tank that actually works long-term.
How a Filterless Tank Stays Alive: The Biology
In a conventional aquarium, the filter's media houses colonies of nitrifying bacteria that convert toxic ammonia (from fish waste and uneaten food) into nitrite and then into far less toxic nitrate. But those bacteria don't care what surface they live on. Gravel, soil, driftwood, plant leaves, and especially the huge surface area of a planted substrate all host the same microbes.
A heavily planted tank therefore has a built-in biofilter distributed across the entire tank instead of concentrated in one cartridge. The plants add a second layer of filtration: they directly absorb ammonia and nitrate as fertilizer, often preferring ammonia before bacteria even get to it. This dual system — bacteria on surfaces plus hungry plants — is what makes a filterless setup possible. You're not removing filtration; you're replacing mechanical filtration with biology.
One honest caveat: a filterless tank has no mechanical stage. Particulate waste and mulm won't be swept up by anything — your plants, cleanup crew, and maintenance routine absorb that slack.
Who Should (and Shouldn't) Try This
It's a great fit if you…
- Keep shrimp colonies (neocaridina, caridina) and snails — the classic, most forgiving filterless setup
- Want a desktop or nano tank (5–10 gallons) with a few small fish like ember tetras, chili rasboras, or a single betta
- Are moving toward the Walstad method planted tank approach, which is closely related
- Value silence, simplicity, and low equipment cost
- Already enjoy tinkering and testing water rather than trusting gadgets blindly
Skip it if you…
- Keep messy or high-bioload fish — goldfish, large cichlids, oscars, plecos: these produce far more waste than plants alone can process
- Want a heavily stocked display tank with schools of fish and generous feeding
- Are a brand-new aquarist unwilling to test water and practice feeding discipline — filterless tanks punish overfeeding faster than filtered ones
- Live somewhere with frequent long power outages and warm nights (more on oxygen below)
The Non-Negotiable Rule: Light Stocking
Every part of this setup hinges on bioload — the total waste your livestock produces. Plants and substrate bacteria have a finite processing capacity. Cross it, and there's no canister filter to compensate.
Conservative guidelines that many hobbyists report working well:
| Tank size | Filterless-safe stocking (examples) | Avoid |
|---|---|---|
| 5 gal | 20–30 cherry shrimp + snails, OR 1 betta + snails | Schooling tetras in groups; guppies (breeding overload) |
| 10 gal | 6–8 ember tetras + shrimp colony, OR 8–10 chili rasboras + snails | Cichlids; livebearers without population control |
| 20 gal long | 12–15 small tetras/rasboras + shrimp + snails | Goldfish; large catfish; heavily fed juveniles |
These numbers are conservative on purpose. A filterless tank that runs slightly "empty" looks lush and stays stable; a filterless tank that's slightly overstocked turns into a water-change treadmill. Feed sparingly — only what the animals eat in about a minute, once or twice daily — because overfeeding crashes filterless systems faster than filtered ones. Every uneaten flake becomes ammonia that nothing mechanical removes.
Building the Tank: Substrate, Plants, Hardscape, Light
Substrate: your primary biofilter
Choose a substrate with maximum surface area and some nutrient content. A nutrient-rich dirted base capped with sand or fine gravel is the traditional choice — see our guide to the dirted tank setup for step-by-step layering. Aquasoil products work too. What you don't want is a thin, coarse, inert layer of large pebbles — it offers little surface for bacteria and little food for roots.
Aim for 1.5–2.5 inches of depth so root zones develop and the lower layer can support some denitrification. Malaysian trumpet snails are excellent tankmates here: their burrowing gently turns the substrate and prevents gas pockets.
Planting density: heavy from day one
This is the step beginners skimp on, and it's the one that matters most. Plant heavily from day one — 60–75% of the substrate covered at setup, ideally more. Sparse planting means the bacteria have little backup and algae face no competition.
A reliable planting mix:
- Fast growers (the engine): hornwort, water sprite, guppy grass, anacharis — these devour ammonia and outcompete algae during the startup phase
- Rooted plants: cryptocorynes, swords, vallisneria — long-term nutrient sinks that stabilize the substrate
- Epiphytes: anubias, java fern, bucephalandra on driftwood — extra surface area and they thrive in the gentle flow of a filterless tank
- Floating plants (with restraint): frogbit or red root floaters in a ring — great nutrient sponges, but keep them corralled to a portion of the surface so gas exchange isn't blocked
If you're unsure how much is enough, read our rule-of-thumb guide on how many plants a new aquarium needs — err toward the high end for filterless builds.
Hardscape and layout
Driftwood and porous rock add enormous bacterial surface area, so a well-hardscape filterless tank is more robust than a bare one. Arrange hardscape to create varied zones: open swimming space, dense plant thickets for shy animals, and at least one open patch of substrate for feeding. Avoid a sealed lid — you need a gap for gas exchange at the surface.
Light
Keep it simple: a full-spectrum LED on a timer, 6–8 hours daily. Longer photoperiods grow more algae than plants in a filterless tank, where nutrient balance is delicate. For lighting, fertilizers, and dosing detail, see our low-tech planted tank setup guide.
Oxygen: Day vs. Night
This is the filterless question that worries people most, and the answer is genuinely reassuring — with one condition.
During the photoperiod, healthy growing plants oxygenate the water, often to saturation and beyond; you'll see pearling (tiny oxygen bubbles on leaves) in a thriving tank. At night, photosynthesis stops and plants plus animals all consume oxygen. Overnight, the tank relies on surface gas exchange — the same mechanism that oxygenates ponds.
That means the water surface is sacred: keep it mostly clear of floating plants (a corralled patch is fine, a full carpet is not), keep the lid ventilated, and keep the room from baking the tank — warm water holds less oxygen. Gentle circulation helps enormously: a small powerhead or air stone on low moves oxygen-rich surface water downward. Many hobbyists run a tiny air stone only at night on a timer.
If you stock lightly and follow the surface rule, dissolved oxygen stays in safe ranges around the clock. Watch livestock at dawn — fish gasping at the surface in the early morning is your early warning that oxygen is dipping overnight.
Cycling a Filterless Tank
Cycling still applies. The bacteria need time to colonize the substrate and plant surfaces, and plants need a few weeks to establish roots and start growing vigorously. The process is familiar:
- Set up substrate, hardscape, and plants. Fill, dechlorinate, and start the light cycle.
- Run the tank plant-only for 2–4 weeks. Add a tiny ammonia source (a pinch of fish food every few days) so bacteria have something to colonize around.
- Test ammonia and nitrite weekly. When both read zero for several consecutive days and plants show new growth, the tank is cycled.
- Add livestock gradually — shrimp first, then fish a few at a time over weeks, testing between additions.
Planted tanks often cycle faster than bare ones because plants absorb ammonia directly. For safe acceleration, see our tips to cycle a planted tank faster. Some aquarists run a temporary small sponge filter during the cycle and remove it later — a perfectly legitimate head start. You can also start fully fishless and plant-first with this guide, which pairs beautifully with the filterless philosophy.
The Maintenance Routine
Filterless does not mean maintenance-free. Plants don't remove everything: nitrates accumulate, minerals deplete, and organic mulm settles. A steady routine keeps the biology balanced:
- Water changes: 20–30% weekly for the first two months, then 20% weekly once stable — this exports nitrates and replenishes trace minerals.
- Feeding discipline: tiny amounts, once or twice daily. Remove uneaten food after a few minutes with a turkey baster.
- Gentle substrate vacuuming: skim the surface of the substrate lightly during water changes, but don't deep-vacuum planted areas — you'll disturb roots and the bacterial colonies you depend on.
- Pruning: trim fast growers regularly and remove dead leaves promptly. Decaying plant matter is a bioload too.
- Glass and hardscape: wipe viewing panels as needed; thin biofilm on hardscape is beneficial, so leave it.
- Water testing: weekly for the first month (ammonia, nitrite, nitrate, pH), then monthly once stable. Know your baseline — see our reference for planted tank water parameters.
- Fertilizer: lightly stocked filterless tanks often need a small dose of all-in-one liquid fertilizer, since fewer fish means fewer waste-nutrients. Dose conservatively.
Troubleshooting Filterless Tanks
Algae blooms
With no mechanical backup, algae outbreaks must be solved at the root: light and nutrients. Shorten the photoperiod to 6 hours, add more fast-growing plants if the current ones are struggling, cut back fertilizer, and do a couple of larger water changes. Nerite snails and amano shrimp earn their keep here. Resist blacking out the tank for days — extended darkness starves your plants, which are the actual filter.
Oily surface film
A protein/oil film on the surface is the signature filterless-tank cosmetic issue — there's no skimmer or filter outflow to break it up. It's usually harmless but it blocks gas exchange if it gets thick. Fixes: lay a paper towel flat on the surface for a few seconds to blot it up, add a tiny air stone to ripple the surface, reduce overfeeding, and keep floating plants corralled so part of the surface stays open.
Ammonia or nitrite blips
If tests show ammonia above zero after the tank was stable, suspect a recent change: overfeeding, a dead snail behind hardscape, disturbed substrate, or new livestock added too fast. Do an immediate 30–50% water change, skip feeding for a day, remove the cause, and test daily until readings are zero. There's no filter-media reserve to absorb the spike — you are the backup filter.
Plants melting or stalling
If plants stall, the biofilter weakens. Check the basics: consistent light timer, exhausted root tabs (replace every few months under heavy root feeders), and temperature. Newly planted crypts and swords often "melt" old leaves and regrow — normal adaptation, as long as new growth follows.
Honest Comparison: Filterless vs. Filtered vs. Walstad
| Factor | No-filter planted | Conventional filtered | Walstad-style |
|---|---|---|---|
| Equipment | None (maybe tiny air stone) | HOB or canister filter | None or minimal, soil substrate |
| Noise / power use | Silent, near-zero | Humming pump, constant draw | Silent, near-zero |
| Best stocking | Shrimp, snails, few small fish | Wide range incl. heavier bioloads | Similar light stocking |
| Forgiveness of overfeeding | Low — crashes fast | Moderate — media absorbs spikes | Low to moderate |
| Power outage risk | Nighttime oxygen is the worry | Oxygen + bacteria die-off | Same as no-filter |
| Maintenance | Water changes + pruning | Water changes + filter cleaning | Minimal once mature |
| Algae backup | Only plants + water changes | UV, polishing pads, flow | Heavy plant mass + soil |
A no-filter planted tank and a Walstad tank are close cousins — both rely on soil, heavy planting, and light stocking, and many filterless tanks are Walstad-inspired. The main difference is emphasis: Walstad specifies a soil-under-gravel substrate and typically no water changes once mature, while a generic filterless setup can use any substrate and keeps a regular water-change routine. Shrimp keepers specifically should also see our planted shrimp tank setup guide, since shrimp are the ideal filterless livestock.
Frequently Asked Questions
Can a planted tank really survive with no filter?
Yes — many hobbyists report thriving filterless tanks for years. Plants and substrate host the same nitrifying bacteria a filter would, and plants absorb ammonia and nitrate directly. It only works with light stocking, heavy planting from day one, and regular water changes. It is a biological system with real limits — messy or heavily stocked tanks still need conventional filtration.
Do I need an air stone in a no-filter tank?
Not strictly, but gentle circulation helps a lot. A small air stone or powerhead on low moves oxygenated surface water through the tank and prevents stagnant zones — most important overnight, when plants stop producing oxygen. Many keepers run a tiny air stone only at night on a timer.
How often should I do water changes without a filter?
Plan on 20–30% weekly for the first two months, then 20% weekly or 30% every two weeks once the tank is mature and tests are stable. Plants don't remove everything — nitrates accumulate and minerals deplete — so water changes remain essential. Skipping them is the most common reason filterless tanks slowly decline after a promising start.
What fish work best in a filterless planted tank?
Small, low-waste species: ember tetras, chili rasboras, endlers, celestial pearl danios, a single betta, or better yet a shrimp and snail colony. Keep groups small and the total bioload light. Avoid goldfish, large cichlids, plecos, and prolific livebearers — their waste output overwhelms what plants and substrate bacteria can process without mechanical filtration.
What happens to a filterless tank during a power outage?
During the day it's usually fine, since plants keep producing oxygen in ambient light. The risk is at night: with no air stone running and no filter agitating the surface, oxygen can dip in warm, heavily stocked tanks. Keep stocking light, the surface clear, and the lid ventilated, and short outages are typically uneventful. For long outages, manually agitate the surface periodically or pour water from a height to aerate.
Can I convert my existing filtered tank to filterless?
You can, but do it gradually. First ensure the tank is heavily planted and lightly stocked, then reduce filter flow over a week or two while testing ammonia and nitrite daily. Only remove the filter once readings stay at zero with strong plant growth. Keep the old media wet and running in a bucket for a couple of weeks as insurance — if a spike appears, you can put it back immediately.
The Bottom Line
A no-filter planted tank is not a shortcut and not a stunt — it's a deliberate, biology-first way to keep an aquarium. Plant heavily, stock lightly, feed with discipline, change water on schedule, and respect the surface. Do those five things and the tank largely runs itself, silent and self-regulating. Skip any one of them and the same tank teaches you, quickly, exactly why filters were invented. Start with shrimp, learn the rhythm, and you'll understand your aquarium's biology better than most filter owners ever will.
Tissue-culture plants are the exception — they’re grown in sterile gel and adapt with minimal melting, which is part of what you’re paying for. Plants bought submersed from another hobbyist’s tank also transition with little melt, since they’re already in the right form.
Which Plants Melt Most (and Least)
Heavy melters (expect significant leaf loss)
- Cryptocorynes — infamous for “crypt melt,” sometimes dropping every leaf after any disturbance. They almost always recover from the roots within weeks.
- Stem plants grown emersed — rotala, ludwigia, and hygrophila often shed lower emersed leaves while the growing tips transition.
- Amazon swords — emersed-grown swords typically lose their broad oval aerial leaves and replace them with longer submersed ribbon leaves.
Light melters
- Anubias, java fern, bucephalandra — slow-growing rhizome plants transition gradually; occasional old-leaf melt but rarely dramatic.
- Vallisneria — usually transitions well, though it dislikes the move itself and may sulk for a week.
- Floating plants — minimal melt since their leaves were already at the air-water interface.
The Acclimation Protocol
Step 1: Quarantine or dip first
Before acclimating to your tank’s conditions, make sure you’re not acclimating pests along with the plant. Run new arrivals through our quarantine and dip protocol — it adds days upfront but prevents months of regret.
Step 2: Float to temperature-match (30 minutes)
Float the bag or container in your tank for 20–30 minutes to equalize temperature. Plants are less temperature-sensitive than fish, but a 10°F shock on top of transplant stress is an avoidable insult.
Step 3: Trim before planting
Remove any leaves that are already damaged, yellowing, or heavily algae-covered — they won’t recover and they’ll rot in your tank, feeding algae. For stem plants, trim off the bottom inch and any emersed leaves that look unlikely to adapt; the plant wastes energy maintaining leaves it’s going to shed anyway. Keep the healthy growing tips — that’s where recovery starts.
Step 4: Plant correctly the first time
Follow our planting guide — right depth, crown exposed on rosettes, rhizomes unburied on epiphytes. Every uprooting and replanting restarts the acclimation clock, so get placement right on the first attempt. Decide where each plant goes before it goes in the water.
Step 5: Run a gentle first week
For the first 7 days after planting:
- Moderate light — run your normal photoperiod but consider dropping intensity 20–30% if your light is dimmable. Blast-level light on a melting plant grows algae on the dying leaves, not recovery.
- Stable CO2 — if you inject CO2, keep it consistent. Fluctuating CO2 during acclimation is a melt accelerator. If you’re low-tech, this doesn’t apply — see growing without CO2.
- Half-strength fertilizer — new plants with damaged leaves can’t use full dosing, and the excess feeds algae. Ramp to full strength over 2–3 weeks per our fertilizer schedule.
- No disturbance — don’t move, trim, or “check on” new plants for at least two weeks. Every touch resets root establishment. This is especially critical for crypts.
Step 6: Remove melt, keep the base
As emersed leaves melt, remove the mushy material promptly — decaying leaves release ammonia and grow fungus that can spread to healthy tissue. But never discard the plant while the crown, rhizome, or roots are firm and alive. A crypt that’s lost every leaf but has firm roots is a plant that’s about to recover, not a dead plant. Give it 3–4 weeks before judging.
Telling Normal Melt From Real Problems
Normal transition melt:
- Affects oldest/emersed leaves first, newest growth last
- New submersed leaves emerge even as old ones dissolve
- Roots and crown stay firm and white/green
- Timeline: 1–4 weeks, then obvious new growth
Concerning melt (see our full melting diagnosis guide):
- New growth also melts or emerges deformed
- Rhizome or crown turns mushy and brown — this is rot, not transition
- Entire plant dissolves within days with no new growth after 4+ weeks
- Melting spreads to established plants that weren’t recently moved
Buying Tips to Minimize Melt
- Buy submersed-grown when available — hobbyist-grown cuttings transition with almost no melt.
- Choose tissue culture for sensitive species — crypts and delicate stems establish far more reliably from sterile cups.
- Avoid plants already melting in the store tank — some melt is normal, but a plant that’s mostly mush at purchase has less energy for recovery.
- Transport carefully — keep plants damp and out of direct sun/heat. A plant that dries out or cooks in a hot car melts far worse than one transported properly.
The First-Month Timeline: What to Expect Week by Week
Knowing what’s normal when removes most acclimation anxiety. Here’s the typical timeline for a healthy plant adapting to a new tank:
Week 1: The quiet week
Almost nothing visible happens. The plant is growing roots you can’t see and assessing its new environment. Some species (vallisneria, stem plants) may start shedding their lowest leaves. This is normal. Resist the urge to “help” — no moving, no extra fertilizer, no light changes. The most common beginner mistake is intervening during a week when the correct action is nothing.
Week 2: Melt peaks
This is when emersed leaves give up in earnest. Crypts may drop everything; swords shed their broad aerial leaves; stem plants lose lower foliage. It looks catastrophic and it’s usually fine. Keep removing mushy material, keep conditions stable, and watch the crown and growing tips — if those are firm and green, recovery is already underway.
Week 3: The turn
New submersed-adapted leaves emerge — smaller, thinner, often a slightly different shade of green than the emersed foliage. Stem plant tips start growing visibly; crypts push tiny curled leaves from the crown; swords unfurl narrow ribbon leaves. This is the moment most beginners exhale for the first time.
Week 4+: Established
New growth outpaces melt, and the plant is functionally yours. You can resume full-strength fertilizer, normal trimming, and stop treating it as fragile. Some slow growers (anubias, bucephalandra) take 6–8 weeks to show obvious progress — that’s their normal speed, not a problem.
Acclimating Different Plant Formats
Tissue-culture cups
Sterile, pest-free, and already adapted to high-humidity (not emersed) growth — tissue cultures melt the least of any format. Rinse the agar gel off gently (leftover gel rots and feeds fungus), split the portion into small plantlets, and plant per our planting guide. They establish slowly for the first two weeks, then accelerate. No dip needed, minimal acclimation stress — this is the premium experience you’re paying for.
Potted plants
Remove the pot and strip away the rockwool completely — leftover rockwool traps debris and rots. Tease the root mass apart gently; if it’s a dense mat, splitting it into 2–3 smaller portions actually establishes faster than planting one big clump (more growing points, better water flow around roots). Potted plants are usually emersed-grown, so expect the standard 2–4 week melt cycle.
Bare-root / bunched stems
Typically sold as weighted bunches. Remove any bands, foam, or weights, strip the lower leaves, and plant stems individually or in small groups. Bunched stems from the store are often already transitioning — check for new submersed growth at the tips, which tells you the plant is mid-adaptation and will settle quickly.
Hobbyist cuttings
Already submersed-grown and the fastest to establish — often showing new growth within days. The main acclimation factor is water-parameter difference between the two tanks. Float to temperature-match, plant promptly, and they’ll usually take off with minimal melt. This is why experienced hobbyists prefer trading cuttings over buying potted plants.
Frequently Asked Questions
Should I use a “plant starter” or transplant fertilizer?
Products marketed for transplant shock are mostly B-vitamins and mild hormones. They don’t hurt, but there’s no strong evidence they help aquarium plants specifically. Stable conditions and patience outperform any bottle. Save the money for more plants.
My new plant melted completely — bare crown, no leaves. Is it dead?
Probably not, if the crown or rhizome is firm. Crypts and swords routinely lose 100% of their leaves and regrow from the base within a month. The test is firmness: firm and pale/green means alive; mushy and brown/black means rot. Give firm-but-leafless plants a full 4 weeks before declaring them dead.
Can I speed up acclimation with extra light or CO2?
No — and trying usually backfires. A melting plant can’t use extra light; the excess just grows algae on its dying leaves. Keep light moderate and CO2 stable (not boosted) during acclimation. Growth speed comes from the plant’s own adaptation timeline, which you can’t rush, only avoid delaying.
Should new plants go straight into my main display tank?
After quarantine/dipping, yes — there’s no benefit to a separate “growing-in” tank for most plants. They acclimate to your water fastest in the tank they’ll live in. The exception is very delicate species going into a tank with boisterous fish; give those a few weeks in a calm corner or breeder box first.
The Patience Rule
The single most important acclimation skill is restraint: plant it right, set gentle conditions, remove decay, and then leave it alone for a month. The hobbyists with the best plant growth aren’t doing something clever in week one — they’re simply not interfering in weeks two through four while the plants do what they’ve evolved to do. Melt looks like failure and feels like failure, but in most cases it’s the visible part of a plant successfully becoming yours.