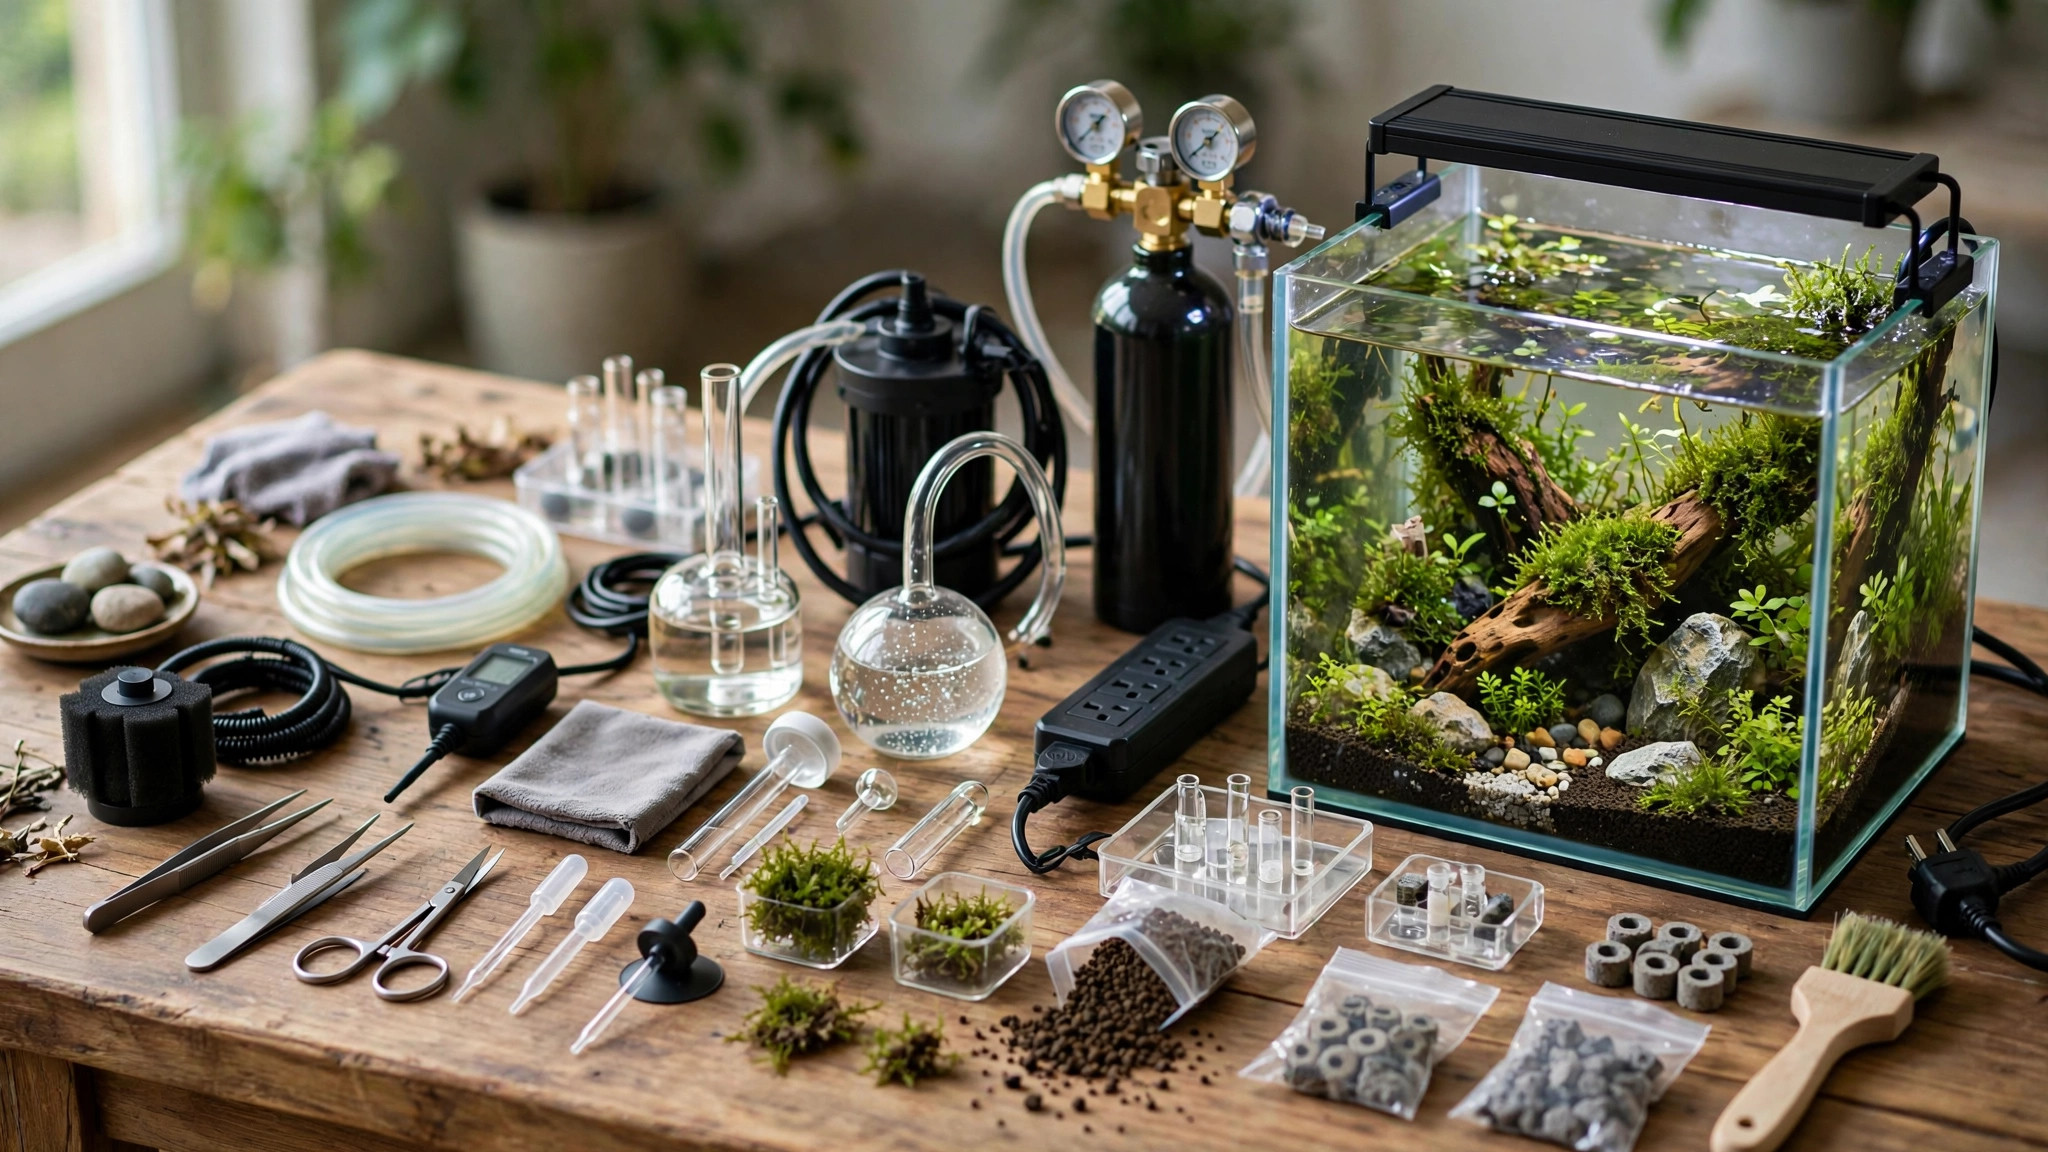
Asking how much does a planted aquarium cost is one of the smartest first questions in this hobby, because the honest answer — "it depends, but here are the real numbers" — can save you from buying twice. Prices swing wildly: a thriving planted nano tank can be built for under $200, a mid-size setup for $500–$900, and a high-tech showpiece for well over $2,000. This guide breaks down every cost category with realistic 2026 hobby ranges in USD, shows you three complete priced builds, and flags the monthly costs most beginners never budget for.
The Short Answer: How Much Does a Planted Aquarium Cost?
If you want the quick version before we dig into the details, here is where most builds land:
- Nano planted tank (5–10 gallons): $175–$350 all-in.
- Mid-size planted tank (20 gallons): $600–$1,100 all-in.
- High-tech showpiece (60–90 liters / 15–25 gallons, rimless): $1,800–$3,000+ all-in.
Those are complete, working setups — tank, light, filter, substrate, hardscape, plants, fertilizers, and the tools you need to run them. The ranges exist because every category has a budget option and a premium option, and — crucially — because some of the most expensive equipment (like CO2 injection) is completely optional depending on what you want to grow. The single biggest cost driver is not tank size; it is whether you go low-tech (easy plants, no CO2) or high-tech (demanding plants, pressurized CO2, strong light). That one decision can double your budget.
The Full Equipment Breakdown
Let us walk through every line item so you can see exactly where the money goes — and where it does not need to.
Tank and Stand: $25–$650
A standard 10-gallon glass tank from a big-box pet store runs $25–$60, especially during the popular "$1-per-gallon" sales, and bigger standard sizes like a 20-gallon long usually cost $60–$100. Rimless tanks — the clean, braceless look you see in aquascaping contests — are a different price universe: a quality 90P (roughly 25 gallons) from a premium brand runs $350–$650, and the matching cabinet adds another $250–$500. For a first planted tank, a standard tank is the smart money; rimless glass is a luxury, not a necessity.
Lighting: $30–$450
Light is the engine of a planted tank, and it is one of the few places where spending a bit more genuinely pays off. A decent LED bar for a nano tank costs $30–$60; mid-range fixtures from well-regarded planted-tank brands run $90–$180 for a 20-gallon; and high-end programmable fixtures with app control, sunrise/sunset ramps, and color tuning can hit $250–$450. Avoid the cheapest no-name LEDs — weak or patchy light causes algae and dead plants, and you will replace them anyway.
Filtration: $15–$250
A small hang-on-back (HOB) filter for a nano tank costs $15–$30, and a canister filter for a 20-gallon runs $70–$130. High-tech setups often use premium canisters at $150–$250 for better flow, quieter operation, and inline CO2 diffusion. Sponge filters ($8–$15 plus a $15–$25 air pump) are a legitimate, ultra-cheap option for small planted tanks — the plants do much of the biological filtration anyway.
Substrate and Hardscape: $25–$430
This is where beginners are often surprised. A bag of inert gravel costs $10–$15, but a true planted tank usually wants aquasoil — nutrient-rich baked soil that feeds roots and buffers pH — at $35–$45 per bag, with a 20-gallon needing two to three bags ($70–$130). Hardscape adds up too: dragon stone and spider wood run $5–$12 per pound, and a well-composed layout can easily consume $40–$80 in rock and wood; showpiece scapes use $100–$250 of hand-selected stone. If you are shopping on a strict budget, our first planted tank shopping list shows where each dollar should go.
Plants: $30–$250
A beginner's day-one plant order for a 20-gallon typically runs $60–$120 — and you should plant heavily from the start, since dense planting is the single best algae prevention. Individual potted plants cost $6–$14, tissue-culture cups $8–$15, and easy foreground/midground species are the cheapest per unit. Rare cultivars, red plants, and tissue-culture carpets for showpiece scapes can push this to $150–$250. If you are unsure how many plants a new aquarium needs, err on the side of more.
CO2 System: $0–$300
Here is the fork in the road. Low-tech tanks cost $0 on CO2 — easy plants grow fine without injected carbon dioxide, which is exactly what our low-tech planted tank setup guide covers. A basic DIY yeast CO2 setup costs under $20 but is inconsistent and fiddly. A proper pressurized system — regulator with solenoid, diffuser or inline reactor, and a refillable cylinder — runs $150–$300. Refills run $12–$25 and last 2–4 months on a mid-size tank. Tropica's fertiliser and CO2 guide is the authoritative reference on whether your plant list actually needs injected CO2 before you spend a dollar on it.
Fertilizers and Test Kits: $30–$80
All-in-one liquid fertilizer costs $12–$20 per bottle and lasts months on a small tank; root tabs for heavy root-feeders add $10–$15. Dry fertilizer salts (the EI dosing method) cost $20–$35 and last a year or more — the cheapest long-term option. A liquid master test kit runs $20–$35, and a GH/KH kit another $10–$15. Budget around $30–$80 total for your first year of water chemistry.
Fish and Other Livestock: $0–$150
Plants can come first — many aquarists plant and cycle for weeks before adding fish. A school of neon tetras costs $2–$4 per fish, cherry shrimp $2–$5 each, a betta $5–$25, and a modest 20-gallon community might total $40–$80. Budget $0 for a plants-only start (a beautiful, valid choice) up to $150 for a fully stocked showpiece community.
Heater, Tools, and Accessories: $50–$150
A reliable adjustable heater runs $15–$35 depending on wattage. The "boring" stuff adds up: long aquascaping tweezers and curved scissors ($20–$40 for a decent set), a timer for the light ($8–$12), a thermometer ($3–$6), a siphon/gravel vacuum ($10–$15), a 5-gallon bucket and water conditioner ($12–$18). Plan $50–$150 here and buy the tools once — they last for years.
Three Real-World Builds, Priced Out
Theory is nice; let us put real tanks together. Here are three complete builds at the price points most people actually pay, assuming you buy new (used gear can cut 30–50% off these, covered below).
| Component | Nano Budget (5–10 gal, low-tech) | 20-Gallon Mid (low-to-mid tech) | High-Tech Showpiece (90P, ~25 gal) |
|---|---|---|---|
| Tank | $25–$60 | $60–$100 | $350–$650 |
| Stand / cabinet | $0 (desk/table) | $80–$150 | $250–$500 |
| Light | $30–$60 | $90–$150 | $250–$450 |
| Filter | $15–$30 (HOB) | $70–$130 (canister) | $150–$250 (premium canister) |
| Heater | $15–$25 | $20–$35 | $30–$40 |
| Substrate | $10–$20 (inert + root tabs) | $70–$130 (aquasoil) | $120–$180 (aquasoil) |
| Hardscape | $10–$30 | $40–$80 | $100–$250 |
| Plants | $30–$60 | $60–$120 | $150–$250 |
| CO2 system | $0 | $0–$200 | $150–$300 |
| Ferts + test kits | $20–$35 | $35–$60 | $50–$90 |
| Tools + accessories | $20–$35 | $40–$70 | $60–$100 |
| First fish/shrimp | $5–$25 | $40–$80 | $80–$150 |
| Total | $180–$380 | $605–$1,225 | $1,800–$3,100+ |
The nano column is the proof that this hobby does not require deep pockets: around $250 buys you a fully planted, beautifully aquascaped planted betta tank or shrimp nano. The 20-gallon is the hobby's sweet spot — big enough for real aquascaping but small enough to keep equipment sane, and our 20-gallon planted tank setup guide prices out the exact equipment list. The showpiece column is honest about premium territory: our high-tech planted tank setup guide explains what that CO2 system and premium lighting actually buy you. The budget tier stretches further than most beginners expect.
The Ongoing Monthly Costs
The tank is the headline cost, but the hobby has a subscription you should know about. Realistic monthly numbers:
- Electricity: $5–$15/month. LED lighting, a filter, and a heater on a 20-gallon draw roughly 60–120 watts combined; actual cost depends on your local rate and heater runtime.
- Liquid fertilizer: $5–$12/month if you dose bottled all-in-one (much less with dry salts).
- CO2 refills: $0–$20/month averaged out — a $15–$25 refill every 2–4 months on a mid-size tank.
- Fish food and water conditioner: $5–$10/month.
- Replacement test reagents, filter media, plant replacements: $3–$8/month averaged across the year.
All told, a running planted tank costs roughly $15–$45 per month to maintain — less than most streaming subscriptions plus a coffee. The Walstad method (soil substrate, no filter, no CO2) pushes this to the very bottom of the range, which is part of why it remains so popular.
Where to Save Money — and Where Never to Skimp
Not all dollars are equal in this hobby. Here is how experienced keepers would cut $300 from a build, and the three things they would never cheap out on.
Smart savings
- Buy used gear. Tanks, filters, lights, and CO2 regulators from local aquarium club sales and marketplace listings typically go for 30–50% off retail. Glass does not wear out; inspect silicone seams and test electronics before buying.
- Skip CO2 at first. An easy-plant tank without injected CO2 costs roughly half as much to set up and far less to run. You can always add CO2 later.
- Buy plants from other hobbyists. Trimming packs on forums and club auctions often cost a third of retail per stem, and locally grown plants are already adapted to tap water.
- Use dry fertilizers. A $25 set of dry salts lasts a year or more versus $12–$20 bottles that vanish in a few months.
- Propagate, do not repurchase. One $10 stem plant becomes dozens within months — trimming and replanting is free plants forever.
- Choose inert substrate plus root tabs instead of aquasoil for budget builds; the difference is real but small for easy plants.
Never skimp on these
- Light quality. The cheapest LEDs grow algae better than plants. This is the single most common "buy twice" item.
- Heater reliability. A failed cheap heater can cook or chill a tank overnight; a reputable adjustable heater with a guard costs little more.
- Test kits. You cannot fix what you cannot measure — cycling and diagnosing a planted tank blind is how money gets wasted on chemicals and replacement plants. Our guide on how to cycle a planted tank shows what to actually test for.
Hidden Costs That Catch Beginners
Three expenses ambush almost every first-time planted tank keeper. First, electricity and water — not per se expensive, but weekly 30–50% water changes on a big tank add up in water bills and time, so factor the routine into your commitment budget. Second, replacement plants: your first order will have casualties while you learn, and budgeting a second $30–$50 plant order three months in is realistic. Third, the "upgrade itch" — most keepers spend another $100–$200 in their first year on better scissors, a nicer light, or the CO2 kit they swore they did not need. Sketching your full plan before buying anything is the cheapest anti-impulse tool there is.
Frequently Asked Questions
Can I start a planted aquarium for under $150?
Yes, with trade-offs. A 5-gallon tank with a sponge filter, a basic but decent LED, inert gravel with root tabs, a few easy plants, and one bottle of all-in-one fertilizer can land around $120–$150 if you shop sales and skip the heater (in a warm climate) or use used gear. Keep the plant list to bulletproof species, accept slower growth, and your tank will still look genuinely good within a few months.
Is CO2 worth the extra cost for a beginner?
Usually not at first. Pressurized CO2 adds $150–$300 up front plus ongoing refill costs, and it mainly benefits demanding, colorful, or carpeting plants. Beginners do better spending that money on good light, quality substrate, and a heavy first plant order. Once you can keep easy plants thriving and algae-free for a few months, adding CO2 later unlocks the next tier of the hobby with far less frustration.
What is the cheapest tank size to start with?
Counterintuitively, a 10-gallon is cheaper per gallon than a 5-gallon because equipment for nano tanks carries a premium, and a 20-gallon long often costs less in total equipment-per-gallon than either. The real sweet spot is the 10–20 gallon range: stable water parameters (fewer expensive mistakes), affordable equipment, and plant orders that do not break the bank. Nanos look cheap until you price a quality nano-specific light and filter.
How much does it cost per month to run a planted tank?
Expect $15–$45 per month for a typical 10–20 gallon planted tank: electricity ($5–$15), liquid fertilizer ($5–$12), fish food and water conditioner ($5–$10), and averaged costs for CO2 refills, test reagents, and replacement plants. Low-tech setups without CO2 sit at the low end; high-tech tanks with heavy dosing and CO2 sit at the high end.
Is a planted tank more expensive than a regular fish tank?
Slightly — usually 30–50% more up front. A basic fish-only tank needs just a tank, filter, heater, and gravel; the planted version adds a proper light ($30–$150 more), plants ($30–$120), substrate upgrades, and fertilizer. But plants reduce long-term costs too: they improve water quality, cut down on water-change frequency, and grow into free replacements. Over a year, a well-run planted tank often costs less to maintain than a bare fish tank.
Where should a beginner's first $300 go?
Prioritize in this order: a quality LED light sized to your tank ($60–$100), enough substrate to plant heavily (aquasoil for a 20-gallon or inert plus root tabs for a nano, $30–$80), a big day-one plant order ($50–$80), a liquid test kit ($25–$35), and basic tools ($20–$30). Spend what remains on hardscape. Skip CO2, premium filters, and livestock until the plants are growing — the tank will reward you for it.
The Bottom Line
A planted aquarium can be a $200 weekend project or a $3,000 showpiece, and — here is the secret the hobby rarely says out loud — both can be stunning. The money that matters goes to light, substrate, plants, and patience; everything else is optional upgrades on your own timeline. Decide low-tech or high-tech first, budget the real totals above rather than the optimistic ones, and you will never join the ranks of keepers who spent twice by buying cheap first. Start where your budget allows, plant heavily from day one, and let the tank grow with you.
Tissue-culture plants are the exception — they’re grown in sterile gel and adapt with minimal melting, which is part of what you’re paying for. Plants bought submersed from another hobbyist’s tank also transition with little melt, since they’re already in the right form.
Which Plants Melt Most (and Least)
Heavy melters (expect significant leaf loss)
- Cryptocorynes — infamous for “crypt melt,” sometimes dropping every leaf after any disturbance. They almost always recover from the roots within weeks.
- Stem plants grown emersed — rotala, ludwigia, and hygrophila often shed lower emersed leaves while the growing tips transition.
- Amazon swords — emersed-grown swords typically lose their broad oval aerial leaves and replace them with longer submersed ribbon leaves.
Light melters
- Anubias, java fern, bucephalandra — slow-growing rhizome plants transition gradually; occasional old-leaf melt but rarely dramatic.
- Vallisneria — usually transitions well, though it dislikes the move itself and may sulk for a week.
- Floating plants — minimal melt since their leaves were already at the air-water interface.
The Acclimation Protocol
Step 1: Quarantine or dip first
Before acclimating to your tank’s conditions, make sure you’re not acclimating pests along with the plant. Run new arrivals through our quarantine and dip protocol — it adds days upfront but prevents months of regret.
Step 2: Float to temperature-match (30 minutes)
Float the bag or container in your tank for 20–30 minutes to equalize temperature. Plants are less temperature-sensitive than fish, but a 10°F shock on top of transplant stress is an avoidable insult.
Step 3: Trim before planting
Remove any leaves that are already damaged, yellowing, or heavily algae-covered — they won’t recover and they’ll rot in your tank, feeding algae. For stem plants, trim off the bottom inch and any emersed leaves that look unlikely to adapt; the plant wastes energy maintaining leaves it’s going to shed anyway. Keep the healthy growing tips — that’s where recovery starts.
Step 4: Plant correctly the first time
Follow our planting guide — right depth, crown exposed on rosettes, rhizomes unburied on epiphytes. Every uprooting and replanting restarts the acclimation clock, so get placement right on the first attempt. Decide where each plant goes before it goes in the water.
Step 5: Run a gentle first week
For the first 7 days after planting:
- Moderate light — run your normal photoperiod but consider dropping intensity 20–30% if your light is dimmable. Blast-level light on a melting plant grows algae on the dying leaves, not recovery.
- Stable CO2 — if you inject CO2, keep it consistent. Fluctuating CO2 during acclimation is a melt accelerator. If you’re low-tech, this doesn’t apply — see growing without CO2.
- Half-strength fertilizer — new plants with damaged leaves can’t use full dosing, and the excess feeds algae. Ramp to full strength over 2–3 weeks per our fertilizer schedule.
- No disturbance — don’t move, trim, or “check on” new plants for at least two weeks. Every touch resets root establishment. This is especially critical for crypts.
Step 6: Remove melt, keep the base
As emersed leaves melt, remove the mushy material promptly — decaying leaves release ammonia and grow fungus that can spread to healthy tissue. But never discard the plant while the crown, rhizome, or roots are firm and alive. A crypt that’s lost every leaf but has firm roots is a plant that’s about to recover, not a dead plant. Give it 3–4 weeks before judging.
Telling Normal Melt From Real Problems
Normal transition melt:
- Affects oldest/emersed leaves first, newest growth last
- New submersed leaves emerge even as old ones dissolve
- Roots and crown stay firm and white/green
- Timeline: 1–4 weeks, then obvious new growth
Concerning melt (see our full melting diagnosis guide):
- New growth also melts or emerges deformed
- Rhizome or crown turns mushy and brown — this is rot, not transition
- Entire plant dissolves within days with no new growth after 4+ weeks
- Melting spreads to established plants that weren’t recently moved
Buying Tips to Minimize Melt
- Buy submersed-grown when available — hobbyist-grown cuttings transition with almost no melt.
- Choose tissue culture for sensitive species — crypts and delicate stems establish far more reliably from sterile cups.
- Avoid plants already melting in the store tank — some melt is normal, but a plant that’s mostly mush at purchase has less energy for recovery.
- Transport carefully — keep plants damp and out of direct sun/heat. A plant that dries out or cooks in a hot car melts far worse than one transported properly.
The First-Month Timeline: What to Expect Week by Week
Knowing what’s normal when removes most acclimation anxiety. Here’s the typical timeline for a healthy plant adapting to a new tank:
Week 1: The quiet week
Almost nothing visible happens. The plant is growing roots you can’t see and assessing its new environment. Some species (vallisneria, stem plants) may start shedding their lowest leaves. This is normal. Resist the urge to “help” — no moving, no extra fertilizer, no light changes. The most common beginner mistake is intervening during a week when the correct action is nothing.
Week 2: Melt peaks
This is when emersed leaves give up in earnest. Crypts may drop everything; swords shed their broad aerial leaves; stem plants lose lower foliage. It looks catastrophic and it’s usually fine. Keep removing mushy material, keep conditions stable, and watch the crown and growing tips — if those are firm and green, recovery is already underway.
Week 3: The turn
New submersed-adapted leaves emerge — smaller, thinner, often a slightly different shade of green than the emersed foliage. Stem plant tips start growing visibly; crypts push tiny curled leaves from the crown; swords unfurl narrow ribbon leaves. This is the moment most beginners exhale for the first time.
Week 4+: Established
New growth outpaces melt, and the plant is functionally yours. You can resume full-strength fertilizer, normal trimming, and stop treating it as fragile. Some slow growers (anubias, bucephalandra) take 6–8 weeks to show obvious progress — that’s their normal speed, not a problem.
Acclimating Different Plant Formats
Tissue-culture cups
Sterile, pest-free, and already adapted to high-humidity (not emersed) growth — tissue cultures melt the least of any format. Rinse the agar gel off gently (leftover gel rots and feeds fungus), split the portion into small plantlets, and plant per our planting guide. They establish slowly for the first two weeks, then accelerate. No dip needed, minimal acclimation stress — this is the premium experience you’re paying for.
Potted plants
Remove the pot and strip away the rockwool completely — leftover rockwool traps debris and rots. Tease the root mass apart gently; if it’s a dense mat, splitting it into 2–3 smaller portions actually establishes faster than planting one big clump (more growing points, better water flow around roots). Potted plants are usually emersed-grown, so expect the standard 2–4 week melt cycle.
Bare-root / bunched stems
Typically sold as weighted bunches. Remove any bands, foam, or weights, strip the lower leaves, and plant stems individually or in small groups. Bunched stems from the store are often already transitioning — check for new submersed growth at the tips, which tells you the plant is mid-adaptation and will settle quickly.
Hobbyist cuttings
Already submersed-grown and the fastest to establish — often showing new growth within days. The main acclimation factor is water-parameter difference between the two tanks. Float to temperature-match, plant promptly, and they’ll usually take off with minimal melt. This is why experienced hobbyists prefer trading cuttings over buying potted plants.
Frequently Asked Questions
Should I use a “plant starter” or transplant fertilizer?
Products marketed for transplant shock are mostly B-vitamins and mild hormones. They don’t hurt, but there’s no strong evidence they help aquarium plants specifically. Stable conditions and patience outperform any bottle. Save the money for more plants.
My new plant melted completely — bare crown, no leaves. Is it dead?
Probably not, if the crown or rhizome is firm. Crypts and swords routinely lose 100% of their leaves and regrow from the base within a month. The test is firmness: firm and pale/green means alive; mushy and brown/black means rot. Give firm-but-leafless plants a full 4 weeks before declaring them dead.
Can I speed up acclimation with extra light or CO2?
No — and trying usually backfires. A melting plant can’t use extra light; the excess just grows algae on its dying leaves. Keep light moderate and CO2 stable (not boosted) during acclimation. Growth speed comes from the plant’s own adaptation timeline, which you can’t rush, only avoid delaying.
Should new plants go straight into my main display tank?
After quarantine/dipping, yes — there’s no benefit to a separate “growing-in” tank for most plants. They acclimate to your water fastest in the tank they’ll live in. The exception is very delicate species going into a tank with boisterous fish; give those a few weeks in a calm corner or breeder box first.
The Patience Rule
The single most important acclimation skill is restraint: plant it right, set gentle conditions, remove decay, and then leave it alone for a month. The hobbyists with the best plant growth aren’t doing something clever in week one — they’re simply not interfering in weeks two through four while the plants do what they’ve evolved to do. Melt looks like failure and feels like failure, but in most cases it’s the visible part of a plant successfully becoming yours.