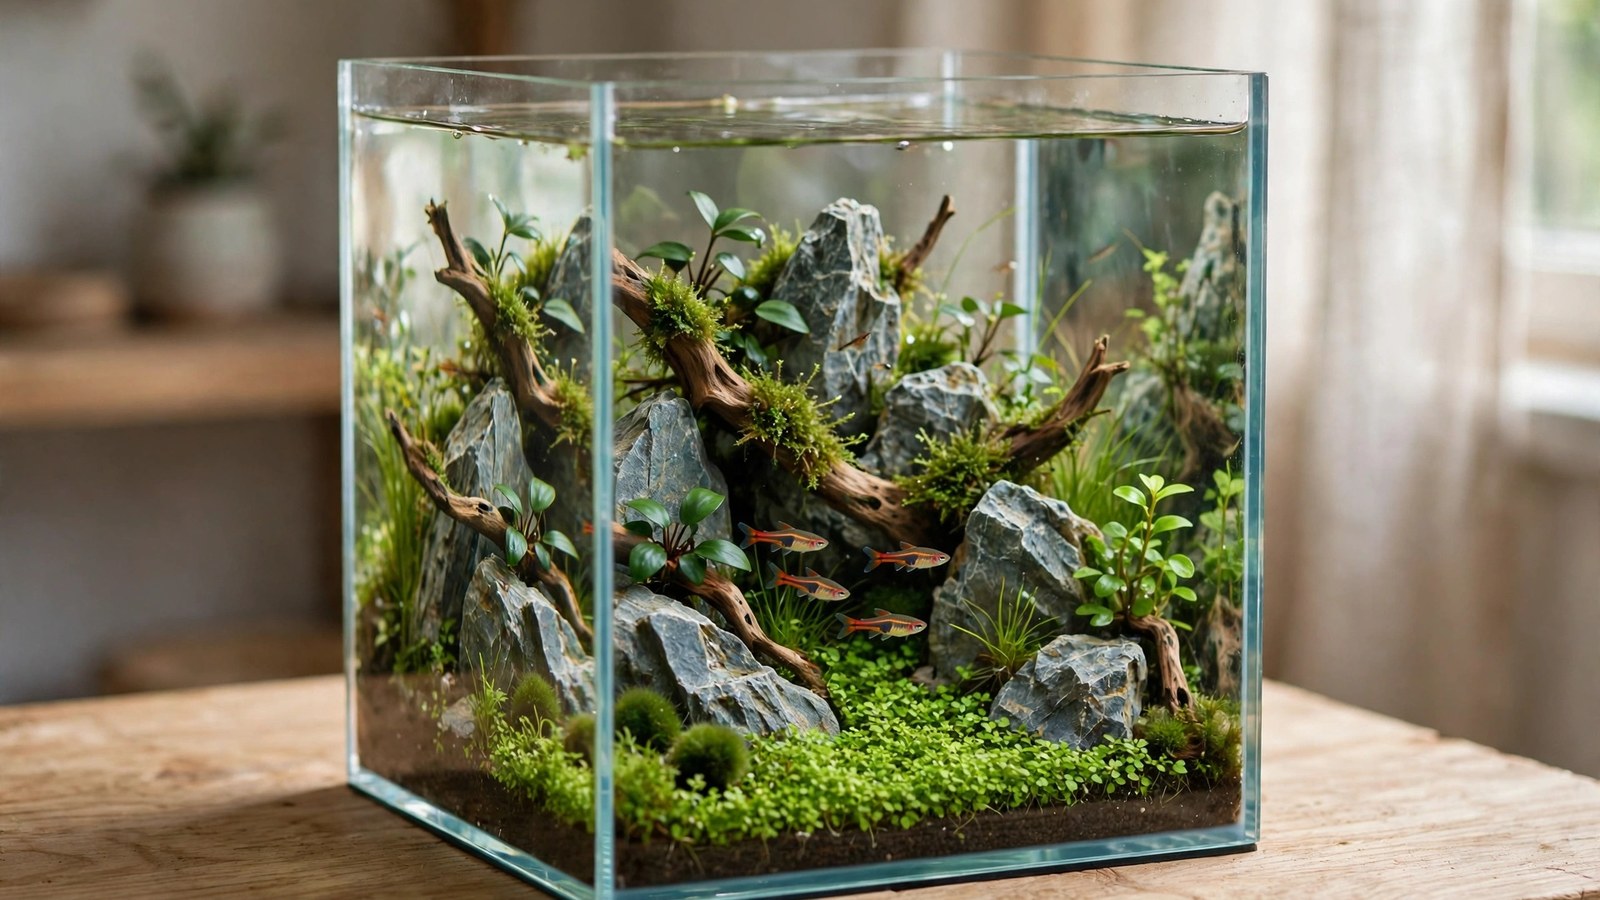
Most aquascapers burn through a 60-centimeter rectangle and call it a day. A cube is a different animal: 45 centimeters tall, 45 wide, and just as deep, with 91 liters that punish lazy layouts and reward one perfect, deliberate composition. Get it right and you get a tiny world with real depth — the most satisfying nano build you'll ever own. This guide walks you through the complete planted cube tank setup, from picking the size to the week-eight photo you'll be proud of.
Why a Cube Plays by Different Rules
In a long rectangle, you can line up a row of stem plants, stick some rocks at the ends, and it still photographs decently. A cube exposes that approach instantly. Every face of the tank is a viewing face — a guest standing at the side sees the whole layout, not just the front glass. That means your scape has to work in three dimensions, from the top and both sides, not just head-on.
Height is your second enemy and your best tool. A 45cm cube is as tall as it is wide, so the winning layouts all lean on one trick: a single bold decision — an island rising in the center, or a dramatic slope climbing into one corner, with breathing space everywhere else. Forget symmetrical flanks; in a cube, symmetry reads as static and flat from every angle.
The third difference is access. Every square centimeter is within arm's reach, which means your planting and trimming plan has to fit inside the footprint — leave yourself a path to reach the back of the scape with tongs before you plant a single stem.
Picking Your Cube Size
Three sizes dominate the market, and the choice shapes everything downstream — filter size, light spread, and what livestock you can keep. Bigger cubes are more stable, not harder: a 91-liter cube swings less on temperature and ammonia than a 28-liter one.
| Size | Footprint | Water volume | Best for | Skill level |
|---|---|---|---|---|
| 12" cube | 30 × 30 cm | ~28 L | Desk displays, shrimp, single betta | Intermediate (tight margins) |
| 30 cm cube | 30 × 30 cm | ~27 L | Beginner nano projects | Beginner-friendly |
| 45 cm cube | 45 × 45 cm | ~91 L | Showpiece scapes, small schools | Beginner to advanced |
| 60 cm cube | 60 × 60 cm | ~216 L | Statement tanks | Advanced (heavy equipment) |
If you're unsure, the 45cm cube is the answer. A single clip light covers the whole footprint evenly, standard nano filters fit it, and you can keep a school of 12–15 chili rasboras. Beginners often assume smaller is easier — in planted tanks, the opposite is true.
The Equipment List
Cube equipment has one hard constraint: everything must fit the compact footprint or hang off the back without dominating the view. You need less gear than you think, but it has to be the right size — in 45 centimeters of height, you need enough turnover to push CO2 and nutrients down to the substrate.
| Equipment | 45cm cube spec | 12" / 30cm cube spec | Notes |
|---|---|---|---|
| Light | Clip-on LED, 25–30 W | Clip-on LED, 15–20 W | Full-spectrum, 6500–7500K, dimmable preferred |
| Filter | Nano canister or HOB rated 60–100 L | HOB or sponge rated 30–60 L | Aim for 5–8× hourly turnover |
| Heater | 100 W in-line or internal | 50 W internal | Only needed below 22°C rooms |
| CO2 | Paintball or 2 kg cylinder + diffuser | Liquid carbon or small cartridge kit | Optional — but transforms growth |
| Substrate | 9 L aquasoil | 3 L aquasoil | 3–4 cm front, 8–10 cm back slope |
| Lily pipes / outflow | 13 mm set | Not needed (HOB) | Keep flow gentle — cubes trap debris in dead corners |
Budget reality check: a solid 45cm cube build lands around $250–350 before plants and livestock — tank, clip light, nano filter, aquasoil, and hardscape. You can also start with a pre-matched planted aquarium kit if you'd rather not spec every part yourself.
The nutrient-rich aquasoil substrate this build assumes; one bag covers a 12-inch cube's sloped bed: a bag of Fluval Stratum.
The guide specs a clip-on light around 20-30 watts for cubes; this size of the ClassicLED Plus is the value pick in that class: a NICREW ClassicLED Plus.
Square-Footprint Scaping: One Decision, Done Well
Every great cube picks exactly one composition: the central island or the corner triangle. Forget symmetrical flanks — in a cube, symmetry reads as static and flat.
The central island
Pile your hardscape into the middle third of the footprint and let the substrate fall away to open foreground on all four sides. A mound of dragon stone with epiphytes, or a single sculptural driftwood root, gives the eye one place to land — and the open space around it is what makes the island look deliberate instead of crowded. This layout is the most forgiving for beginners and the easiest to maintain.
The corner triangle
Build a high slope in one back corner — substrate rising 12–15 cm above the front — and stack stone and tall plants into it, then let the scape cascade diagonally toward the opposite front corner. The eye travels from a tall, dense corner across open carpet to the far low corner, which reads as real depth. The trade-off is maintenance: the high corner sits against two glass panels, so trimming back there takes care.
Faking depth in a square
Depth in a cube is an illusion you have to construct. Three techniques do the heavy lifting: size-graduated planting (tall at the back, fine carpet at the front), forced perspective with stone (largest stones at the focal point, smaller ones receding), and spotless glass — algae haze on side panels kills the depth illusion faster than any planting mistake.
Step-by-Step Setup
Build day takes three to four hours for a 45cm cube, and the order of operations matters. Rushing the hardscape is how you end up draining the tank on week two to rearrange rocks.
- Wash and lay substrate. Rinse aquasoil lightly (don't grind it), then build your slope dry: 3–4 cm at the front glass rising to 8–10 cm at the back. Use mesh bags of lava rock under steep slopes so they don't avalanche over months.
- Place hardscape. Set your stones and wood on the dry substrate and photograph it from all four sides. Adjust until it reads well from every angle, not just the front.
- Plant heavy on day one. This is the most important step. Plant 70–80% of final density — stems in bunches of 5–8, carpet plugs every 3 cm. Dense planting outcompetes algae; buy plants in one batch using our first planted tank shopping list rather than trickling them in over weeks.
- Flood slowly. Pour water over plastic wrap laid on the substrate, not onto the substrate itself. If it's cloudy, drain and refill once — aquasoil dust settles fast.
- Install equipment. Light on top, filter running, heater set to 24°C. Aim for 5–8× turnover per hour and a 6-hour photoperiod for the first two weeks.
- Start CO2 immediately (if using it). One bubble per second for a 45cm cube, on an hour before lights and off an hour before lights-out; aim for a light-green drop checker by mid-photoperiod.
- Dose lightly. Start fertilizer at half the label dose for the first two weeks, then step up to full dose as growth accelerates.
A Planting Plan That Works in Cubes
Cubes reward a simple palette — six to eight species max. More than that and the small footprint turns into visual noise. Pick one carpet, two to three midground plants, two to three background stems, and one epiphyte, then let each do its job.
| Zone | Plants | Spacing / notes |
|---|---|---|
| Carpet (foreground) | Monte Carlo or dwarf hairgrass | Plugs every 3 cm; fills in 5–7 weeks with CO2 |
| Midground | Anubias nana petite, Staurogyne repens | Attach Anubias to stone — never bury the rhizome |
| Background | Rotala rotundifolia, Ludwigia super red | 5–8 stems per bunch; trim tops replant cuttings |
| Epiphyte on wood | Java fern 'Windeløv', Bucephalandra | Superglue gel or thread; keep out of substrate |
| Accent | Alternanthera reineckii mini | One small group near the focal point for color contrast |
Cubes also suit emergent growth at the rim beautifully — combine submerged planting with plant holders for emergent growth to turn the waterline into a second scape.
Long tweezers make planting carpet plugs every 3 cm into a deep cube practical without crushing neighboring stems: long aquascaping tweezers ★4.6.
Stocking: The Cube Has a Hard Ceiling
A 45cm cube holds 91 liters, but its footprint limits territory far more than a long 90-liter tank would. Small, calm schooling fish that use the mid-water column are ideal; territorial bottom-dwellers and boisterous swimmers are not. Stock for the footprint, not the volume.
| Tank | Centerpiece option | Schooling option | Cleanup crew |
|---|---|---|---|
| 45 cm cube | 1 honey gourami or 1 betta | 12–15 chili rasboras or ember tetras | 8–10 Amano shrimp + 5 nerite snails |
| 30 cm / 12" cube | 1 betta | 8–10 chili rasboras | 10 cherry shrimp + 3 nerite snails |
| Shrimp-only cube | — | — | 20–30 cherry shrimp colony |
Shrimp-only cubes are the sleeper pick: a colony of 20–30 cherry shrimp is self-sustaining and nearly impossible to overstock. Cubes grow the biofilm shrimp graze on fast across four glass walls — free food.
Add livestock in stages: cleanup crew in week 3–4 once ammonia reads zero, the school a week later, and a centerpiece fish last — never everything at once.
The First 8 Weeks: Your Timeline
Weeks one through eight decide whether the tank becomes a showcase or an algae farm. Follow this schedule and you'll stay ahead of every common new-tank problem. Run a 6-hour photoperiod for weeks 1–2, adding 30 minutes per week up to 8 hours.
| Week | Water changes | Plant tasks | Livestock |
|---|---|---|---|
| 1 | 50% daily | Trim melting leaves; replant floaters | None — cycle only |
| 2 | 50% every other day | First carpet trim if runners reach 2 cm | None |
| 3 | 50% twice | Trim stem tops; replant cuttings to thicken | Add shrimp + snails if ammonia is 0 |
| 4 | 50% twice | Full-dose fertilizer; spot-treat any algae | Add schooling fish (half the school) |
| 5–6 | 50% weekly | Reshape midground; thin carpet edges from glass | Add rest of school + centerpiece |
| 7–8 | 50% weekly | Scape is established; maintenance trims only | Fully stocked |
Diatoms (brown dust on glass) in weeks 2–4 are normal and clear on their own. Early hair algae usually traces back to three causes: too much light too soon, inconsistent CO2, or flow too weak to carry nutrients around. Check flow and circulation before you reach for algaecides.
Weekly Maintenance Once Established
A mature cube takes about 30–40 minutes a week. Do the water change and glass cleaning every week without exception — skipped weeks show on all four panels at once.
- 50% water change weekly, vacuuming open substrate lightly. Re-dose fertilizer after the change.
- Trim stems every 1–2 weeks — cut above a node, replant the tops.
- Thin the carpet monthly; pull it back 1 cm from the glass so you can clean the panels properly.
- Clean filter media every 3–4 weeks in old tank water, never tap water.
- Check the CO2 diffuser monthly — misting instead of fine bubbles means it needs a soak or replacement.
If you ever fancy the opposite challenge, a low-boy shallow tank swaps the cube's vertical puzzle for a wide, low carpet canvas.
Frequently Asked Questions
What is the best size for a planted cube tank?
For most people, the 45cm cube (~91L) is the best choice. It takes standard nano equipment, fits a small school of fish, and forgives beginner mistakes thanks to its stable water volume. A 12-inch cube works as a shrimp-only or betta display, but its 28 liters demand more careful monitoring of temperature and chemistry.
Do I need CO2 for a planted cube?
Not strictly, but CO2 is the single biggest upgrade you can make. Without it, stick to slow growers — Anubias, Java fern, Bucephalandra, mosses — and keep light moderate to avoid algae. With CO2, carpets like Monte Carlo fill in within 5–7 weeks. Either way, plant heavily from day one so plants outcompete algae.
How many fish can I keep in a 45cm cube?
A safe ceiling is 12–15 small schooling fish (chili rasboras, ember tetras), one calm centerpiece like a honey gourami, plus 8–10 Amano shrimp and a few nerites. Stock for the footprint rather than the volume — cubes offer less swimming length than a long tank of the same liters, so skip active swimmers like danios.
How do I make a cube tank look deeper than it is?
Slope the substrate 8–10cm from front to back, grade plant size from tall at the back to fine carpet at the front, and place smaller stones toward the back for forced perspective. Keep all four glass panels spotless — haze on side glass flattens the illusion. A corner-triangle composition naturally creates more depth than a centered layout.
Can I put a betta in a planted cube?
Yes — a betta is an excellent centerpiece for a 12-inch or 45cm planted cube. Keep the water calm, since bettas dislike strong current: baffle the filter outflow or use a gentle sponge filter. Add floating plants or broad-leaf plants near the surface for resting spots, and skip fin-nipping tankmates.
Your Cube Is a Tiny World — Treat It Like One
A planted cube tank asks one thing of you that a long tank doesn't: make a single compositional decision and commit to it — island or corner triangle, six to eight plant species, equipment sized to the footprint, and an eight-week launch schedule you follow. Do that, and by week eight you'll have a three-dimensional scape that holds its own from every angle in the room. For authoritative plant parameters, the Tropica plant database is the gold standard; for what's happening in your filter during those first weeks, Fishlore's nitrogen cycle guide explains the cycle step by step.