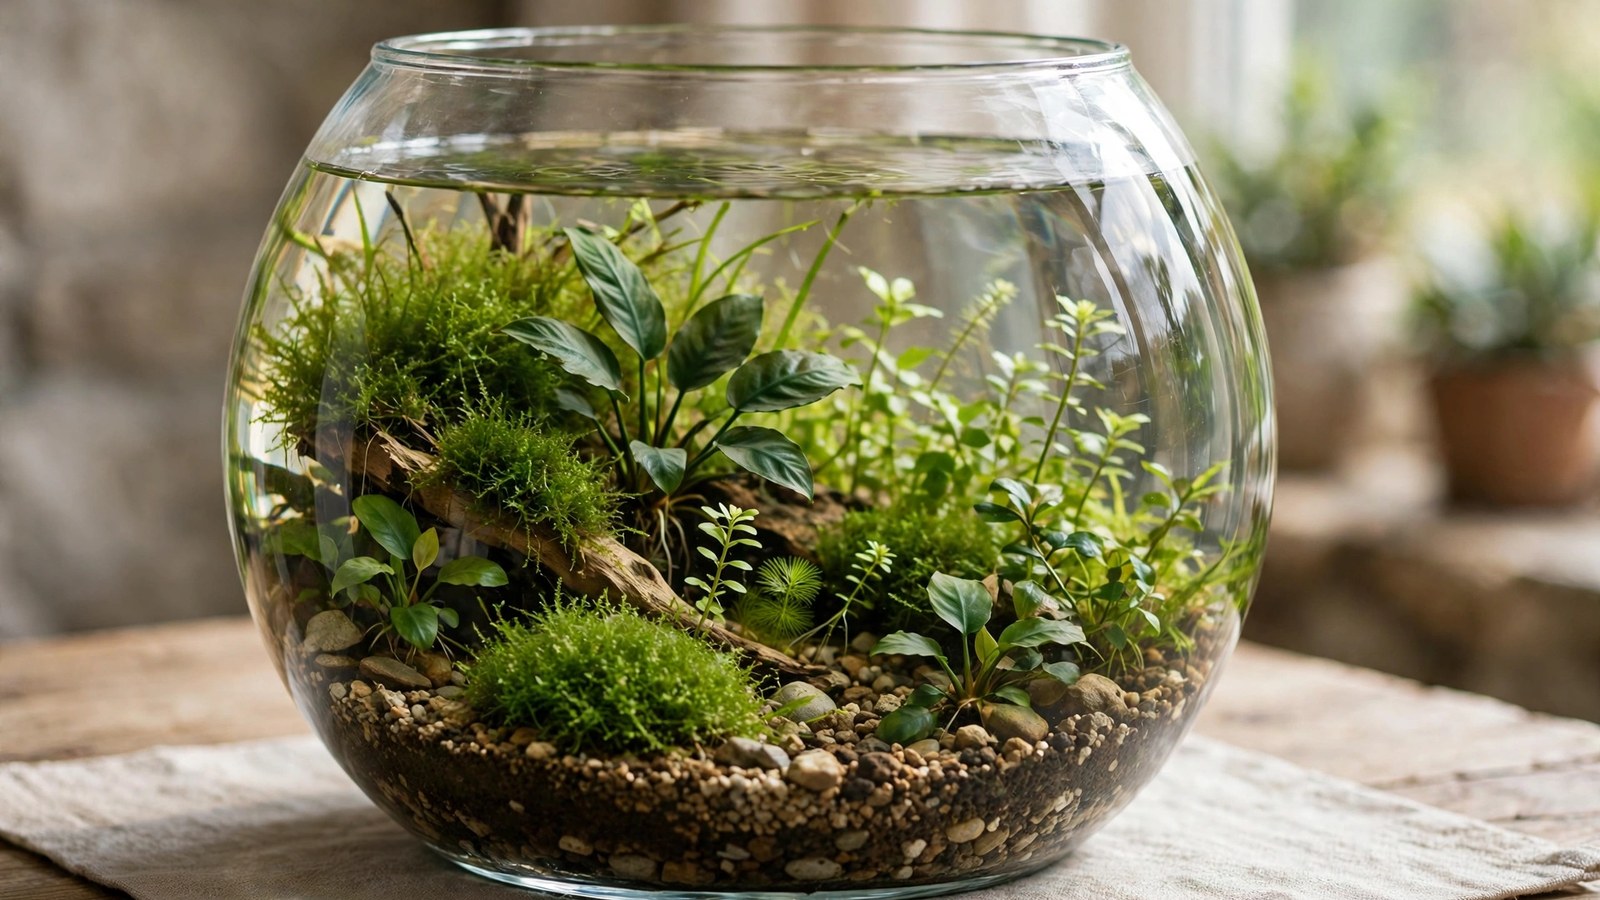
A planted fishbowl setup with no filter is the smallest living aquarium you can build — a sphere of water on your desk that runs on plant biology instead of equipment. No filter hum, no airline tubing, no power cord: just glass, soil, plants, light, and a handful of cherry shrimp. If your dorm bans plugged-in appliances, your desk has one outlet already spoken for, or you simply want the purest version of a planted tank, the bowl is where the hobby's minimalist dreams live. But accept one truth before you buy the glass: here, the plants are not decoration — they are the filter. Get the biology right and a bowl stays crystal clear for months. Get it wrong and you own algae soup. This guide shows you how to make it the first kind.
How a No-Filter Planted Fishbowl Setup Replaces Filtration
A filter does three jobs: it moves water for gas exchange, it houses beneficial bacteria that process nitrogen waste, and it traps particles. A planted bowl replaces each with a living equivalent — but only under specific conditions.
Plant biomass is the engine
Fast-growing plants absorb ammonia, nitrite, and nitrate directly through leaves and roots — the same job a bacteria colony performs. The catch is biomass density: a bowl needs plants packed like a salad bar, not artfully spaced like a show tank. Aim for 70–80% of the substrate planted on day one. The Walstad method — soil under gravel, heavy planting, tiny livestock loads — is the scientific godparent of every working bowl; bowls are simply the method pushed to its most extreme, equipment-free form. The underlying chemistry is the familiar nitrogen cycle: livestock produces ammonia, bacteria convert it to nitrite and then nitrate, and fast-growing plants absorb all three forms directly through leaves and roots.
Surface area is your aeration
A bowl's round shape gives it less surface area per gallon than a rectangle, and the surface is where oxygen enters and CO₂ escapes. Never fill a bowl to the brim — leaving 2–3 inches of air at the top dramatically improves gas exchange, and that diffusion is your entire aeration system. This is also why wide-mouthed bowls outperform narrow-necked jars: more open surface, more oxygen, and your hand actually fits inside for planting.
Water changes are the mechanical filter
With no filter pad trapping particles, detritus settles onto the substrate. Your replacement is a weekly 30–50% water change using a length of airline tubing as a siphon. This removes dissolved organics before they rot into algae fuel. The rhythm is the system: skip water changes for three weeks and no amount of plants will save a bowl. That's the trade — no equipment, but you become the maintenance.
The Honest Rule on Stocking
Shrimp and snails: yes. Fish: almost always no.
Bowls are for shrimp and snails, not fish. Cherry shrimp (Neocaridina) and a nerite snail or two have tiny bioloads, tolerate still water, and graze biofilm and algae off every surface — genuinely useful work. Fish need dissolved oxygen levels still bowl water struggles to maintain, swimming room a sphere can't provide, and temperature stability small volumes can't hold. The classic "betta in a bowl" is a survivorship narrative, not a care standard. The internet is full of pretty bowl photos with a betta; it is not full of those bettas at age four. Don't learn this from a floating fish. If you want fish, a small rectangular nano tank with a sponge filter gives you everything a bowl gives plus ethical swimming room.
| Creature | Bowl suitability | Why |
|---|---|---|
| Cherry / ghost shrimp (3–8) | ✅ Ideal | Tiny bioload, graze algae and biofilm, thrive in still water |
| Nerite or ramshorn snails (1–3) | ✅ Ideal | Cleanup crew; nerites can't breed in freshwater |
| Thai micro crabs | ⚠️ Advanced | Need established biofilm and stable parameters |
| Betta fish | ❌ No | Needs oxygen, heat stability, and swim space a bowl can't give |
| Schooling fish | ❌ No | Need horizontal swim room and stable water |
| Goldfish | ❌ Absolutely not | Massive bioload — a bowl is a death sentence |
The 60-Minute Setup Walkthrough
You'll need: the bowl, organic potting soil or aquasoil, a sand/gravel cap, plants, dechlorinated water, and a small desk lamp. Shrimp come later — patience is part of the method. For the larger low-tech approach this scales down from, see the low-tech planted tank setup guide.
Step 1 — Choose the right bowl
Minimum: 2 gallons (about 8 liters). One-gallon bowls photograph beautifully, but their chemistry swings like a pendulum — one overfeeding can spike ammonia faster than bacteria catch up. Two to three gallons is the sweet spot: forgiving enough for mistakes, small enough for a desk. Pick a wide mouth — better gas exchange and easier planting. Gorgeous narrow-necked apothecary jars are terrible bowls. Flat-sided "bubble" bowls and wide-mouth cylinders both work well.
Step 2 — The soil-cap method, scaled down
Add ½ to ¾ inch of organic potting soil (no added fertilizers, no perlite — read the bag), then cap with 1 inch of coarse sand or fine gravel. The cap stops the soil clouding the water and gives roots grip. Keep layers thin: thick soil in still water can develop anaerobic pockets that burp hydrogen sulfide. If you're weighing substrate options, the Walstad vs. dirted tank comparison breaks down how these behave long-term.
Step 3 — Plant it densely
This step determines success. Plant before adding water, misting the soil so stems stay put. Bowl-scale species — small, low-light tolerant, fast nutrient uptake:
- Anubias nana 'petite' — glue to a small stone; nearly indestructible.
- Java moss — drape over hardscape; shrimp graze it constantly and it shelters baby shrimp.
- Dwarf sagittaria — the carpet layer; spreads by runners.
- Anacharis (Egeria densa) — the workhorse stem: fast growth, drinks ammonia, oxygenates water.
- Salvinia minima — floating plants are the secret weapon, with unlimited atmospheric CO₂ making them nutrient sponges. Thin to ~50% surface coverage so light reaches below.
- Cryptocoryne parva — mid-ground rosette; expect melt, then regrowth.
Skip anything labeled "large" or "background" — Amazon swords will try to eat your bowl. Tropica's plant care guide is a reliable reference for each species' light and size needs. If you buy tissue-culture plants, rinse the gel thoroughly; quarantining new aquarium plants is worth the extra day, since one hitchhiking algae strain has nowhere to hide in two gallons.
Step 4 — Flood slowly, light gently
Lay a plastic bag over the substrate and pour dechlorinated water onto it — a hard pour blasts the cap apart. Fill to 2–3 inches below the rim (that air gap is your aeration). Lighting: a 6500K desk lamp, 6–8 hours daily on a timer. Bowls need less light than you'd think — too much light on fresh soil is the fastest route to green water. No heater needed if your room stays 68–78°F (20–26°C), the shrimp comfort zone — but keep the bowl away from windows, where daily temperature swings stress everything.
Step 5 — Wait, then add livestock
The hardest step: do nothing for 2–4 weeks. Plants will melt, water may haze, then one morning it'll be clear. Add shrimp only when ammonia and nitrite test at zero — or when you see new growth and the water smells like nothing. Start with 3–5 cherries; they'll breed to the bowl's carrying capacity on their own. One nerite can join at stocking time.
A nano clip-on light fits the bowl's scale: a nano clip-on light like the Lominie Asta 20.
The First-Month Calendar
Your bowl's first month follows a predictable arc. Knowing what's normal prevents the panic that kills more bowls than algae — most beginners tear down a healthy cycling bowl in week two because nobody told them melting is fine. The beginner planted tank mistakes guide covers the classic errors; here's the bowl timeline.
Week 1 — The melting week
Many plants, especially crypts and tissue-culture stems, will melt: leaves turn translucent and dissolve. This looks like death and is almost always adaptation — the plant is shedding leaves grown in different conditions and rebuilding for your bowl. Do a 30% mid-week water change, tweeze out fully mushy leaves (don't uproot — the roots are fine), and change nothing else. The bowl looks its worst right now, and that is completely normal.
Week 2 — The haze
Milky water means a bacterial bloom as free-floating bacteria colonize — also normal. Keep light at 6 hours, do your weekly change, and don't add livestock yet. If the haze is green instead of white, cut light to 4–5 hours and add more floating plants: they're your emergency nutrient export.
Week 3 — The turn
Water clears; you spot new growth — a fresh anacharis tip, a sagittaria runner, tiny oxygen bubbles pearling on leaves in the afternoon. The biology has engaged. If ammonia and nitrite read zero for several days, add your first 3–5 shrimp. Feed a crumb every other day at most — a shrimp's stomach is the size of its eye, and overfeeding is the number-one bowl killer.
Week 4 — The rhythm
Settle into the permanent routine: weekly 30–50% water change, a wipe of the glass, thinning the floaters, trimming stems that shade neighbors. Shrimp spend 90% of their time grazing biofilm anyway. A running bowl needs maybe 15 minutes a week — most of it watching the shrimp, which is the entire point.
3 Signs the Bowl Is Failing (Before It Crashes)
Bowls fail slowly, then suddenly. Catch these early and recovery is a water change; miss them and you're restarting.
1. Persistent surface film
An oily sheen that returns within a day of a water change means dissolved organics are outpacing your plants — usually overfeeding or rotting leaves hidden under floaters. Skim it with a paper towel laid flat on the surface, halve feeding, remove dead leaves. If it keeps returning, your bioload exceeds your plant mass: add fast growers or reduce stocking.
2. Algae shifts from dust to hair or black beard
A little green dust on the glass is healthy — shrimp eat it. But hair algae threading through moss or black beard algae on anubias means the nutrient/light balance tipped. Never use algaecide in a bowl (it'll nuke the shrimp). Instead: cut light by an hour, change water twice weekly for two weeks, remove algae manually. Algae is a symptom, not the disease.
3. Shrimp behavior changes
Shrimp are your canary. Healthy ones graze constantly and scatter when startled. Shrimp that sit motionless, cluster at the surface, or stop breeding are reporting bad water — usually low oxygen or an ammonia spike from something rotting. Do an immediate 50% change with temperature-matched dechlorinated water, then investigate: sniff the substrate (rotten-egg smell means anaerobic soil — poke it gently with a skewer to release gas), check for a dead snail, review feeding. Shrimp grazing again within hours were caught in time.
Long-Term Care
Once established, a planted bowl is one of the lowest-maintenance aquariums in existence. Monthly, poke the cap gently with a chopstick during water changes to prevent anaerobic pockets, and top off evaporation with dechlorinated water between changes. Every 6–12 months, push a root tab or two under heavy root feeders like crypts — soil nutrients deplete slowly. Expect the scape to evolve: anacharis needs monthly haircuts, floaters try to conquer the surface weekly, and your shrimp colony finds its own equilibrium, usually 15–25 in a 2–3 gallon bowl. For a larger take on the same philosophy, the emersed-grown aquarium plants guide shows how far low-tech planting can go.
Frequently Asked Questions
Can I really keep a planted bowl with no filter and no water changes?
No — anyone promising that is selling you a future algae farm. Plants replace the filter's biological job, but nothing in a closed bowl removes accumulating dissolved organics. Weekly 30–50% water changes are the mechanical-filtration substitute. A zero-maintenance bowl is a myth; a 15-minutes-a-week bowl is very real.
What is the smallest bowl size that actually works?
Two gallons (about 8 liters) is the practical minimum for a stable no-filter bowl. Smaller volumes swing in temperature and chemistry too fast for livestock, and there's not enough room for the plant biomass needed to process waste. A wide-mouthed 2–3 gallon bowl hits the sweet spot between stability and desk footprint.
Why did all my plants melt in the first week?
Melting is adaptation, not death. Plants shed leaves grown in different conditions — emersed farm growth, different water chemistry — and regrow foliage suited to your bowl. Remove mushy leaves, keep roots planted, hold your water-change rhythm, and wait. New growth within 2–3 weeks confirms survival; only uproot if the rhizome or crown itself is mushy.
Can I put a betta fish in a planted bowl?
You shouldn't. Bettas need warm, stable temperatures, oxygenated water with surface agitation, and horizontal swimming space — none of which a still bowl provides reliably. A betta may survive in a bowl, but survival isn't thriving. Shrimp and snails are the ethical stocking; a 5-gallon filtered tank is the humane minimum for a betta.
How much light does a no-filter bowl need?
Less than you think: 6–8 hours daily from a simple 6500K desk lamp is plenty. Bowls have shallow water columns so light penetrates efficiently, and excess light on fresh soil is the top cause of green-water blooms. Start at 6 hours in month one, use a timer, and only increase if plants grow leggy and pale.
Do I need to add CO₂ to a planted fishbowl?
No. Low light and slow-growing plant selections are deliberately matched to the CO₂ available from surface exchange and livestock respiration. Added CO₂ would push growth beyond what the bowl's nutrient balance supports and invite algae. Floating plants, with unlimited atmospheric CO₂ access, already serve as your high-performance growers.
The Bowl Is a Promise
A planted fishbowl with no filter is a promise to the biology inside the glass: I'll give you light, I'll change your water, I'll stock you honestly. Keep it, and the bowl repays you with something no filter hum can match — a silent, self-running little world on your desk. Start with the 2-gallon minimum, plant it like you mean it, respect the cycling wait, and let the shrimp do the rest.