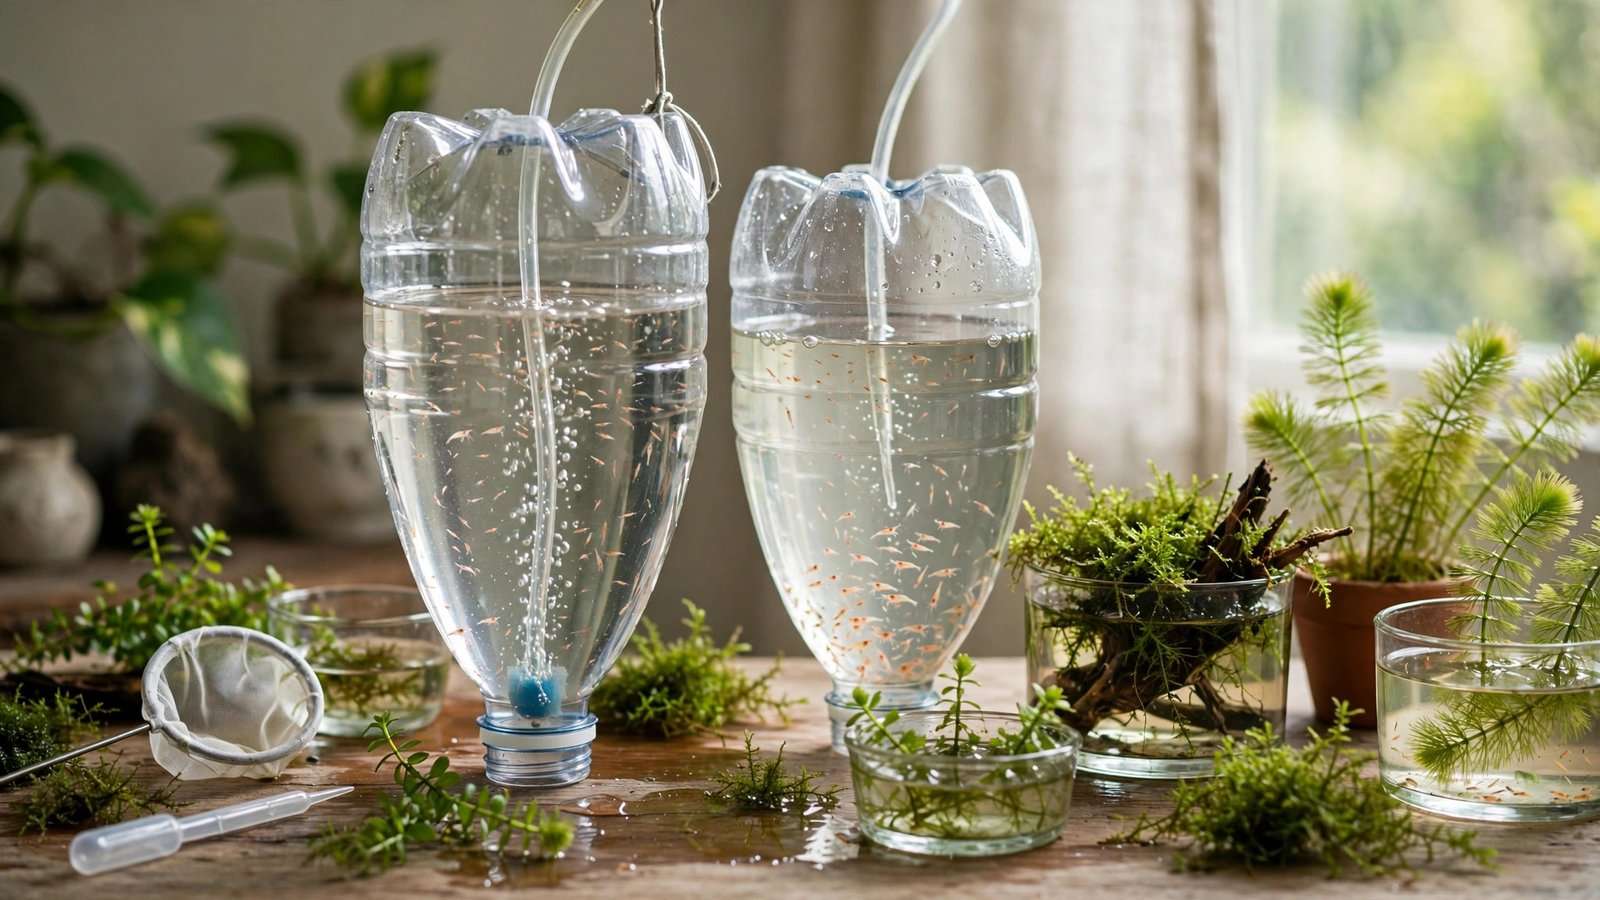
Newly hatched fry are starving from the moment their yolk sacs run out — and crushed flakes won't trigger their feeding instinct. The breeder's fix: baby brine shrimp, living wiggling prey nearly every freshwater fry will chase. With a 2-liter bottle, an airline, and some salt, you can set up a baby brine shrimp hatchery DIY-style on your kitchen counter and feed live food within 24 hours. Here's the build, the exact salt recipe, and the light-trick harvest that separates babies from shells in minutes.
Why baby brine shrimp are the #1 first food for fry
Fry of guppies, tetras, corydoras, and angelfish hatch with mouths measured in fractions of a millimeter — and newly hatched Artemia nauplii, at 0.4–0.5 mm, are small enough to be swallowed whole. Their jerky swimming motion provokes the predatory strike reflex that lifeless powdered food never triggers, and fry that start eating within the first day of free-swimming survive in far higher numbers.
Freshly hatched nauplii are also a nutritional bullseye: they still carry their yolk sac, a package of lipids and protein that degrades within hours of hatching. Hatch, harvest, and feed on the same schedule and your fry get the full benefit. Hatching in saltwater also means the nauplii carry almost no risk of introducing freshwater parasites into your breeding tank setup for fry survival, where delicate fry are at their most vulnerable.
What you need: the equipment list
The classic hatchery cone is just an inverted bottle — the conical bottom keeps cysts and nauplii circulating. A complete build:
- A 2-liter clear soda bottle, base cut off and inverted so the cap-end points down (the "cone"). Purpose-made hatchery cone kits include a stand and valve — handy if you'll hatch continuously.
- An air pump with rigid airline tubing to the cone's bottom. A basic 1–2 watt single-outlet pump is plenty; add a check valve to stop backflow.
- Non-iodized salt — plain aquarium salt or kosher/sea salt without iodine or anti-caking agents. Iodine is toxic to the hatch.
- Brine shrimp eggs (cysts) from a reputable aquatics supplier — refrigerate the opened canister. Good cysts hatch at 70–90%.
- A small thermometer to hold the temperature window, and a flashlight or desk lamp for the harvest step.
Baby brine shrimp hatchery DIY: the 24-hour build and hatch recipe
Follow it exactly — orange clouds of nauplii tomorrow:
- Prep the cone. Rinse thoroughly (no soap residue), peel off the label, and mount inverted — cap-down — in a stand or a cardboard box with a hole cut in it.
- Mix the saltwater. Fill with dechlorinated water and add 2 tablespoons of non-iodized salt per liter (~4 tbsp per 2-liter bottle). Stir until dissolved.
- Add the eggs. Sprinkle in 1–1.5 teaspoons of cysts (2–3 g) per 2 liters — overcrowded eggs crash the hatch rate.
- Start the air. Run the rigid airline to the cone's bottom and crank the pump — a rolling boil of bubbles keeps every cyst tumbling. Keep the cone lit; light improves hatching.
- Hold the temperature. Aim for 25–28°C: hatching slows below 24°C, stalls below 20°C, and above 30°C the nauplii die quickly. In a cold room, set a small aquarium heater near the cone — this matches published Artemia hatching guidelines for temperature, aeration, and light.
- Wait 24–36 hours. Most hatches start producing swimming nauplii around hour 18–24 and peak by hour 36.
| Parameter | Value |
|---|---|
| Salt per liter | 2 tbsp (≈35 g) non-iodized salt |
| Cysts per 2 L | 1–1.5 tsp (≈2–3 g) |
| Temperature | 25–28°C |
| Aeration | Continuous, vigorous bubbling |
| First hatch | 18–24 hours |
| Peak harvest | 24–36 hours |
| Best feeding window | Within 6 hours of hatching |
The eggs the hatch recipe calls for; exact-match product: San Francisco Bay brine shrimp eggs ★4.2.
Harvesting: the light-attract method for shell-free babies
A raw hatch is a soup of live nauplii, empty brown shells, and unhatched cysts — shells can clog fry guts, so don't skip this five-minute cleanup:
- Turn off the air and let the cone rest 5–10 minutes: shells float, unhatched cysts sink.
- Darken the top, light the bottom. Cover the upper cone with a towel and shine a flashlight at the lower third. Live nauplii swim toward light and gather into a bright orange cloud within 5–10 minutes.
- Siphon the swarm with a short airline tube into a brine shrimp net or fine coffee filter, leaving shells and cysts behind — the same settle-and-siphon technique in the zebrafish-lab Artemia hatching protocol.
- Rinse gently with dechlorinated freshwater, then release the babies into the fry tank.
How much to feed, and how to store extras
Feed fry only what they can eat in 10–15 minutes, twice a day — a small orange cloud of nauplii per feeding for a typical batch of guppy or tetra fry. Uneaten brine shrimp die within hours and rot fast, so underfeed: in a small fry tub, leftovers can spike ammonia overnight. Gauge by bellies — well-fed fry show visible orange fullness through their translucent bodies.
If the hatch outruns your fry, refrigerate concentrated nauplii (2–4°C) in shallow saltwater — alive but sluggish up to 48 hours. For fry in their first days still too small for nauplii, a microworm culture for aquarium fry covers the stage before BBS, and an auto top-off for your aquarium keeps parameters steadier through heavy-feeding weeks.
Frequently Asked Questions
Can I hatch brine shrimp without a cone?
Yes — a straight-sided jar or bottle works, but hatch rates drop because cysts settle into dead spots without circulation. Stir the water a few times a day to compensate. The inverted-bottle cone is simply the cheapest shape that keeps everything tumbling in the bubble column, which is why almost every DIY design uses one.
How long do brine shrimp eggs last in storage?
Unopened cyst canisters keep 1–2 years at room temperature; once opened, seal the canister and refrigerate it, where eggs stay viable for 6–12 months. Keep them dry — moisture triggers premature hatching attempts inside the canister. Buy quantities you'll use within a season rather than bulk cans that degrade before you finish them.
Why aren't my brine shrimp eggs hatching?
Check three things in order: temperature (below 24°C stalls the hatch), salt type (iodized table salt is toxic — switch to plain aquarium or kosher salt), and egg quality (old or moisture-damaged cysts hatch poorly). Weak aeration is the fourth culprit — cysts that settle to the bottom suffocate. Fix these and most "dead" hatches come back to life within a day.
Can fry eat adult brine shrimp?
Newly free-swimming fry cannot — adults are far too large. Fry generally handle newly hatched nauplii (0.4–0.5 mm) for the first 1–2 weeks, then need progressively larger foods like crushed flake and daphnia. (Microworms suit the first days, before fry are big enough for nauplii.) Juveniles of larger species such as angelfish can take frozen adult brine shrimp once they're a few weeks old and visibly larger.
Is a baby brine shrimp hatchery worth it for a single batch of fry?
Absolutely — the whole build costs less than one jar of premium fry powder and takes under an hour to set up. One teaspoon of cysts hatches thousands of nauplii, far more than a single spawn needs, and the leftovers refrigerate for 48 hours. Breeders consistently report visibly faster growth in the first two weeks on live nauplii versus any prepared food.
Start your first hatch tonight
Breeding success is mostly a food problem, and this solves it: one evening of setup buys you a self-renewing supply of the best first food in the hobby. For the full picture, read our breeding tank plants setup guide for fry survival alongside this build, plus our complete guide to aquarium plants for fish tanks and the easiest aquarium plants for beginner community tanks to keep your fry's planted home thriving. Hatch tonight, feed live tomorrow — your fry will show the difference within days.