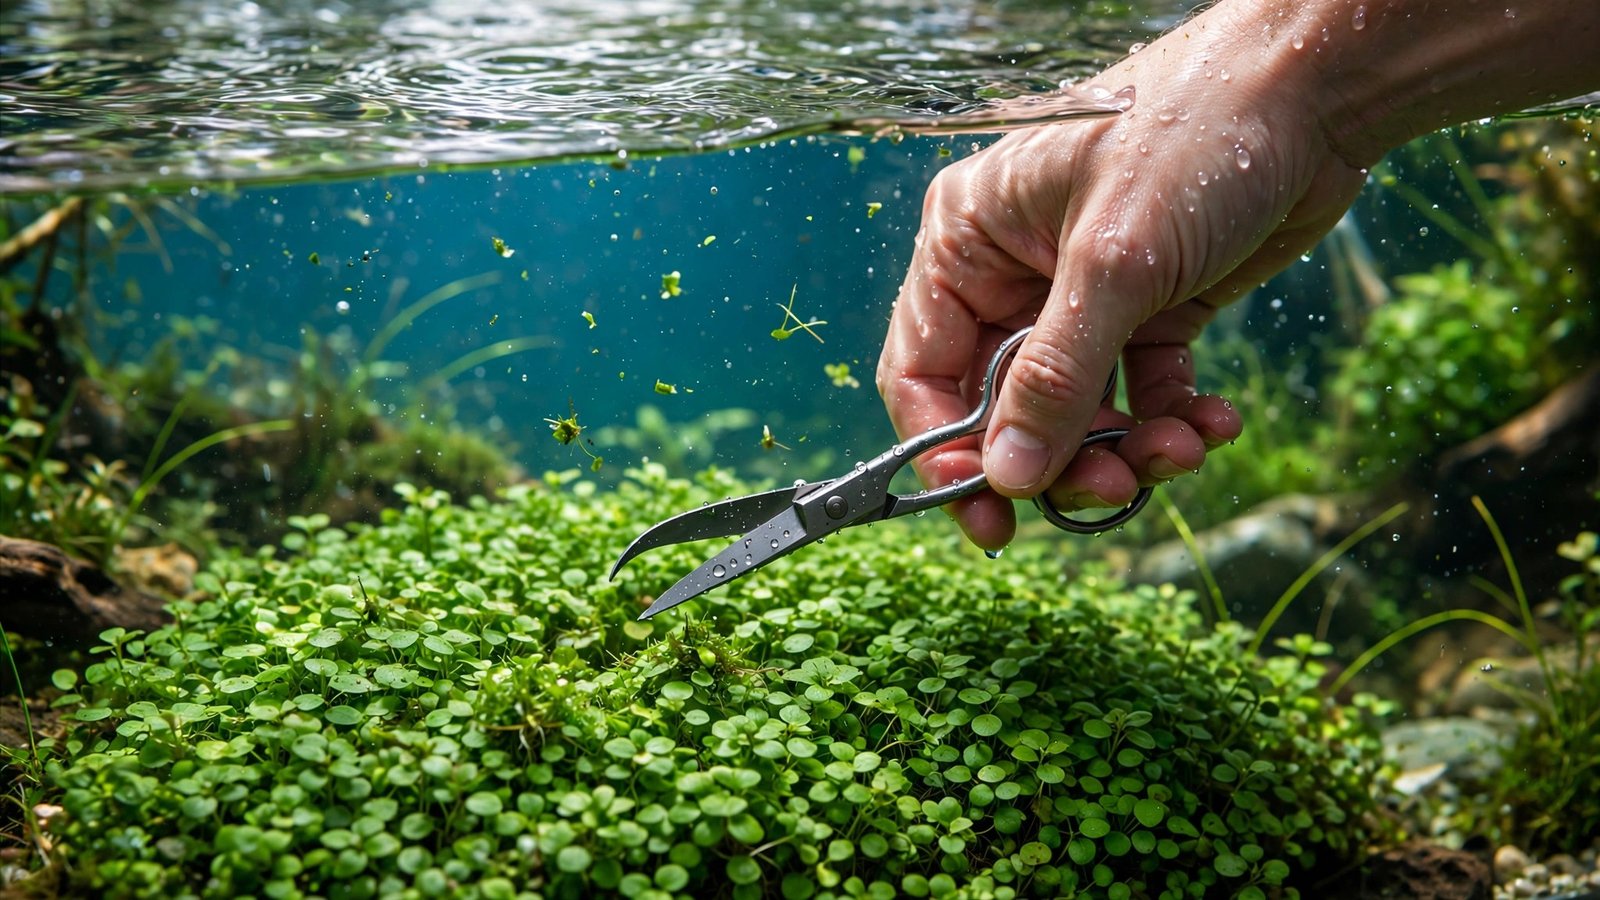
A lush green carpet is the crown jewel of any planted aquascape, but keeping it low, dense, and healthy is a skill in itself. If you're learning how to trim carpeting plants, the good news is that the technique is simple once you understand what each species needs. Monte Carlo, dwarf hairgrass, and HC Cuba — the three most popular carpeting plants — each respond to the scissors a little differently, and trimming them the wrong way can set your carpet back by weeks. This guide walks you through the exact tools, timing, and cutting techniques for all three, so your foreground stays velvet-smooth instead of thinning, floating, or melting from the bottom up.
Why Trimming Your Carpet Is Non-Negotiable
A carpeting plant left to grow unchecked doesn't just look scruffy — it slowly destroys itself. As the top layer thickens, it shades out the lower growth, starving it of light and flow. Those shaded lower leaves die, decompose, and trap detritus, and eventually the whole mat loses its grip on the substrate and peels off in ugly brown sheets. Aquascapers call this "lifting," and it's the number one reason established carpets fail.
Regular trimming solves all of this at once. Cutting the top growth lets light and water circulation reach the base of the carpet, which triggers the plant to send out more runners and side shoots. The result is denser, lower, more resilient growth — exactly the compact carpet you're after. If you've already worked through a general guide on how to trim aquarium plants, think of carpet trimming as the specialized version of those principles, applied at ground level where precision matters most.
Trimming also keeps the scape in proportion. A foreground plant that creeps past two inches tall stops reading as "lawn" and starts reading as "bush," throwing off the depth and scale of the entire layout. Professional contest tanks are trimmed relentlessly in the final weeks before a photograph — sometimes every seven to ten days — specifically to hold that crisp, low profile.
How to Trim Carpeting Plants: Tools You Need
Carpet trimming happens close to the substrate, often underwater, so the right tools make a dramatic difference. Here's a short kit list:
- Curved wave scissors (16–25 cm): The essential tool. The curved blade lets you cut parallel to the substrate without your hand blocking the view, and the wavy edge prevents plants from sliding out of the jaws mid-cut.
- Straight spring scissors: Useful for detail work around hardscape edges and for snipping individual runners.
- Long planting tweezers: For pressing trimmed sections back into the substrate and replanting runners after a trim.
- Fine net or siphon hose: Loose leaf bits are nutrient bombs. Net them out or siphon them immediately — don't let them drift into the filter or settle behind rocks.
- Soft toothbrush: Gently brush the carpet surface before trimming to lift trapped mulm so you can siphon it away.
Rinse your tools before and after each session, and keep the blades sharp. Dull scissors crush stems instead of cutting them, and crushed tissue is an open door for algae and rot. If you keep trimming on a routine, pair it with your existing habit of removing dead plant leaves — the five minutes you spend cleaning up now saves hours of rescue work later.
How to Trim Monte Carlo (Micranthemum tweediei)
Monte Carlo is the forgiving crowd-pleaser of the carpet world: fast-growing, tolerant of moderate light, and quick to recover. It spreads through creeping stems that root at the nodes, so trimming it mostly means shearing the canopy to keep light reaching the base. Check the species details in Tropica's plant database entry for Micranthemum 'Monte Carlo' if you want the official growth parameters.
When to trim Monte Carlo
In a healthy tank, Monte Carlo needs a haircut every two to four weeks. The visual cue is simple: when the carpet starts looking pillowy — individual stems rising more than about an inch above the runners — it's time. If you can no longer see the substrate between stems, or the top leaves look noticeably larger and leggier than the compact growth underneath, you're overdue.
How to cut it
- Lower the water level by about a third if your tank is deep; trimming in shallower water gives you much better control.
- Hold the curved scissors flat, blades angled slightly upward, about half an inch above the substrate.
- Cut in long, smooth, sweeping passes — like mowing a lawn, not chopping vegetables. Short snips leave an uneven, chewed look.
- Cut deeper over the densest patches and lighter near the front edge, so the carpet keeps a gentle, natural slope toward the glass.
- Net or siphon out every floating fragment as you go. Monte Carlo leaf bits are notorious for settling into stem-plant thickets and rotting there.
Don't panic if the carpet looks sparse and stemmy right after a hard trim. Monte Carlo stores energy in its runner network, and within five to seven days new nodes will push up a fresh, tighter canopy. The trimmings themselves are perfectly good plants — you can press healthy pieces into bare spots or start a new patch, just as our guide to what to do with aquarium plant trimmings explains.
How to Trim Dwarf Hairgrass (Eleocharis spp.)
Dwarf hairgrass (Eleocharis acicularis 'Mini' and E. parvula are the usual suspects) grows like a lawn of tiny green blades connected by underground runners. It tolerates aggressive cutting better than almost any aquarium plant, which makes it ideal for the true "mowing" technique.
The mowing method
Hairgrass is the one carpet you can cut hard — down to half an inch or even less — without fear. Each blade is an independent leaf growing from a basal crown, so cutting a blade never kills the plant; it simply regrows from the base. This is exactly how high-end aquascapers keep hairgrass carpets at a uniform, velvety height.
- Turn off your filter flow temporarily so cut blades don't get blasted everywhere.
- Comb through the carpet with your fingers or a soft brush first — this lifts trapped debris and stands the blades upright for an even cut.
- With curved scissors, cut the entire carpet down to your target height (½–1 inch is typical) in broad, overlapping passes.
- Skim the surface immediately with a fine net. Hairgrass blades float stubbornly and will clog a filter intake within minutes.
- Restart flow and do a water change — a big trim releases a surprising amount of organic dust.
Trim hairgrass every three to five weeks in a high-energy tank, or less often in low-tech setups. The regrowth often comes in thicker than before because cutting breaks the plant's apical dominance, prompting the runner network to send up new blades. For trimming principles that carry over to taller plants, compare with the approach in how to trim aquarium stem plants, which uses the same pinch-and-cut logic at a bigger scale.
Thinning crowded runners
Old hairgrass carpets develop a dense thatch of runners that can choke new growth. If your carpet looks healthy on top but new blades are sparse, the base is probably matted. Once or twice a year, comb the carpet aggressively with a fork or a stiff toothbrush, pulling up loose runner mass, then trim hard. It looks brutal for a week, then explodes with fresh blades.
How to Trim HC Cuba (Hemianthus callitrichoides)
HC Cuba — dwarf baby tears — is the most demanding of the three: it wants strong light, CO2, and steady nutrients, and it rewards care with the tightest, most jewel-like carpet in the hobby. But its tiny leaves and delicate stems make trimming a precision job. One careless yank can uproot an entire section.
Precision trimming, not mowing
Unlike hairgrass, HC should never be hacked down to the substrate. Its stems are fine and its root system shallow, so the technique is a careful top-shear:
- Wait until the carpet is at least ¾ inch thick and fully rooted — trimming a freshly planted HC mat (younger than three to four weeks) risks uprooting it.
- Use small, sharp spring scissors rather than big wave shears. You want to nip the top third of the growth, no deeper.
- Work in small sections, and anchor loose areas with tweezers as you cut — HC mats love to detach mid-trim.
- Never pull. If a section lifts while you cut, stop, press it back down with tweezers, and trim around it.
- Remove every fragment. HC leaves are so small they slip through coarse nets; use a brine-shrimp net or siphon them directly.
Trim HC every two to three weeks in a CO2-injected tank. Because it grows in stacked layers, a light, frequent trim produces a far denser carpet than an occasional hard one. If you spot algae filming on the tiny leaves, address it promptly — the fine foliage traps debris easily, and our guide to cleaning algae off plant leaves covers the gentlest methods for delicate species.
Carpet Trimming Cheat Sheet: The Three Species Compared
| Monte Carlo | Dwarf Hairgrass | HC Cuba | |
|---|---|---|---|
| Difficulty | Easy | Easy | Advanced |
| Trim frequency (high-tech) | Every 2–4 weeks | Every 3–5 weeks | Every 2–3 weeks |
| Cutting style | Canopy shear | Hard mow | Light top-shear |
| Safe cut depth | ~½ inch above substrate | Down to ½ inch or less | Top third only |
| Best tool | Curved wave scissors | Curved wave scissors | Small spring scissors |
| Recovery time | 5–7 days | 7–10 days | 10–14 days |
| Main trimming risk | Lifting if neglected | Filter clogs from blades | Uprooting delicate mat |
| Trimmings reuse | Excellent — replant | Poor — discard | Good — press into gaps |
What to Do Right After Trimming
The ten minutes after a trim matter as much as the cut itself. Follow this routine and your carpet will rebound faster and cleaner:
- Remove all debris immediately. Siphon the carpet surface gently and skim floaters. Rotting fragments spike ammonia and invite algae exactly when the plants are most stressed.
- Do a water change. A 30–40% change after a heavy trim dilutes the organic soup the cutting releases. Our water changes for planted tanks guide has the technique dialed in for aquascapes.
- Replant healthy trimmings. Press Monte Carlo and HC pieces into thin spots with tweezers — carpets self-repair fastest when you fill gaps the same day. Tissue-culture starters benefit from the same gentle handling described in how to plant tissue culture aquarium plants.
- Hold off on fertilizing for a day. Trimmed plants photosynthesize less until they regrow; dosing a full load of nutrients into a tank with reduced uptake is an algae invitation. Resume your normal aquarium plant fertilizer schedule the next day.
- Watch for melting over 48 hours. A few pale leaves are normal stress; spreading brown mush is not. If melting spreads, check CO2 stability and flow first — trimming rarely causes melt, but it can expose a weakness that was already there.
Common Carpet-Trimming Mistakes
- Waiting too long between trims. The number one error. An overgrown carpet is already dying underneath by the time you cut it; the trim then reveals a brown, algae-covered base instead of fresh green growth.
- Cutting too deep on HC or Monte Carlo. Hairgrass forgives a buzz cut; the other two don't. Leave enough leaf mass to photosynthesize.
- Leaving fragments in the tank. Tiny leaf bits rot fast in warm water. If your filter intake clogs or you see a bacterial film the next day, leftover debris is the likely culprit.
- Trimming right before lights-out. Plants heal and seal cut tissue during the photoperiod. Trim in the first half of the light cycle so the wounds close under light.
- Neglecting the edges. Carpets creep up hardscape and glass over time. Trim a clean border along rocks, wood, and the front glass every session — it frames the scape and stops the carpet climbing where it shouldn't.
Frequently Asked Questions
How often should I trim carpeting plants?
In a high-tech tank with CO2 and strong light, expect to trim Monte Carlo every two to four weeks, HC Cuba every two to three weeks, and dwarf hairgrass every three to five weeks. Low-tech tanks grow slower, so double those intervals. The real trigger is visual: trim when the carpet looks pillowy or exceeds about an inch in height. Regular light trims beat occasional hard ones — they keep light reaching the base and prevent the carpet from lifting off the substrate.
Can I trim carpeting plants without draining the tank?
Yes — most trimming is done fully submerged, and that's actually preferable because the water supports the plants and keeps cut tissue from drying out. Lowering the water level by a third makes deep-tank trimming easier, but it's optional. The one thing you should never do is trim a carpet "dry" and then flood it; emersed-grown leaves will melt regardless. Always trim underwater, remove the debris, and finish with a water change.
Why is my carpet turning brown after trimming?
Browning right after a trim usually means the cut exposed a base layer that was already dying from light starvation — the trim didn't cause it, it revealed it. Trim more frequently and less aggressively going forward. If browning spreads to previously healthy areas, suspect a CO2 fluctuation, a clogged filter reducing flow, or nutrient deficiency rather than the trim itself. A brown base that never recovers may need to be replanted with fresh trimmings.
Should I replant carpet trimmings or throw them away?
Replant the good ones. Monte Carlo and HC Cuba trimmings root readily — press healthy green pieces into thin spots or bare substrate with tweezers and they'll establish within two weeks. Dwarf hairgrass blades don't replant well, so those can be discarded or composted. Only reuse firm, green, algae-free material; anything brown, slimy, or algae-covered goes in the trash, since planting it just spreads problems around your tank.
Is it normal for a carpet to look bad right after a hard trim?
Completely normal. A freshly mowed carpet often looks thin, stemmy, and patchy — sometimes alarmingly so. Monte Carlo typically fills back in within five to seven days, hairgrass within a week or two, and HC Cuba within two weeks. What isn't normal is spreading melt, a foul smell, or the mat detaching from the substrate; those signal underlying issues with CO2, flow, or root health that the trim merely exposed.
Keep It Low, Keep It Lush
Trimming carpeting plants isn't a chore you endure — it's the main lever you have for shaping how your foreground looks. Monte Carlo wants a regular canopy shear, dwarf hairgrass begs to be mowed like a lawn, and HC Cuba rewards a gentle, frequent touch with the densest carpet in the hobby. Pick up the scissors on a schedule, clean up after yourself, and replant the good trimmings. Do that consistently, and your carpet will stay low, dense, and rooted for years instead of lifting, browning, or melting out from underneath.
Tissue-culture plants are the exception — they’re grown in sterile gel and adapt with minimal melting, which is part of what you’re paying for. Plants bought submersed from another hobbyist’s tank also transition with little melt, since they’re already in the right form.
Which Plants Melt Most (and Least)
Heavy melters (expect significant leaf loss)
- Cryptocorynes — infamous for “crypt melt,” sometimes dropping every leaf after any disturbance. They almost always recover from the roots within weeks.
- Stem plants grown emersed — rotala, ludwigia, and hygrophila often shed lower emersed leaves while the growing tips transition.
- Amazon swords — emersed-grown swords typically lose their broad oval aerial leaves and replace them with longer submersed ribbon leaves.
Light melters
- Anubias, java fern, bucephalandra — slow-growing rhizome plants transition gradually; occasional old-leaf melt but rarely dramatic.
- Vallisneria — usually transitions well, though it dislikes the move itself and may sulk for a week.
- Floating plants — minimal melt since their leaves were already at the air-water interface.
The Acclimation Protocol
Step 1: Quarantine or dip first
Before acclimating to your tank’s conditions, make sure you’re not acclimating pests along with the plant. Run new arrivals through our quarantine and dip protocol — it adds days upfront but prevents months of regret.
Step 2: Float to temperature-match (30 minutes)
Float the bag or container in your tank for 20–30 minutes to equalize temperature. Plants are less temperature-sensitive than fish, but a 10°F shock on top of transplant stress is an avoidable insult.
Step 3: Trim before planting
Remove any leaves that are already damaged, yellowing, or heavily algae-covered — they won’t recover and they’ll rot in your tank, feeding algae. For stem plants, trim off the bottom inch and any emersed leaves that look unlikely to adapt; the plant wastes energy maintaining leaves it’s going to shed anyway. Keep the healthy growing tips — that’s where recovery starts.
Step 4: Plant correctly the first time
Follow our planting guide — right depth, crown exposed on rosettes, rhizomes unburied on epiphytes. Every uprooting and replanting restarts the acclimation clock, so get placement right on the first attempt. Decide where each plant goes before it goes in the water.
Step 5: Run a gentle first week
For the first 7 days after planting:
- Moderate light — run your normal photoperiod but consider dropping intensity 20–30% if your light is dimmable. Blast-level light on a melting plant grows algae on the dying leaves, not recovery.
- Stable CO2 — if you inject CO2, keep it consistent. Fluctuating CO2 during acclimation is a melt accelerator. If you’re low-tech, this doesn’t apply — see growing without CO2.
- Half-strength fertilizer — new plants with damaged leaves can’t use full dosing, and the excess feeds algae. Ramp to full strength over 2–3 weeks per our fertilizer schedule.
- No disturbance — don’t move, trim, or “check on” new plants for at least two weeks. Every touch resets root establishment. This is especially critical for crypts.
Step 6: Remove melt, keep the base
As emersed leaves melt, remove the mushy material promptly — decaying leaves release ammonia and grow fungus that can spread to healthy tissue. But never discard the plant while the crown, rhizome, or roots are firm and alive. A crypt that’s lost every leaf but has firm roots is a plant that’s about to recover, not a dead plant. Give it 3–4 weeks before judging.
Telling Normal Melt From Real Problems
Normal transition melt:
- Affects oldest/emersed leaves first, newest growth last
- New submersed leaves emerge even as old ones dissolve
- Roots and crown stay firm and white/green
- Timeline: 1–4 weeks, then obvious new growth
Concerning melt (see our full melting diagnosis guide):
- New growth also melts or emerges deformed
- Rhizome or crown turns mushy and brown — this is rot, not transition
- Entire plant dissolves within days with no new growth after 4+ weeks
- Melting spreads to established plants that weren’t recently moved
Buying Tips to Minimize Melt
- Buy submersed-grown when available — hobbyist-grown cuttings transition with almost no melt.
- Choose tissue culture for sensitive species — crypts and delicate stems establish far more reliably from sterile cups.
- Avoid plants already melting in the store tank — some melt is normal, but a plant that’s mostly mush at purchase has less energy for recovery.
- Transport carefully — keep plants damp and out of direct sun/heat. A plant that dries out or cooks in a hot car melts far worse than one transported properly.
The First-Month Timeline: What to Expect Week by Week
Knowing what’s normal when removes most acclimation anxiety. Here’s the typical timeline for a healthy plant adapting to a new tank:
Week 1: The quiet week
Almost nothing visible happens. The plant is growing roots you can’t see and assessing its new environment. Some species (vallisneria, stem plants) may start shedding their lowest leaves. This is normal. Resist the urge to “help” — no moving, no extra fertilizer, no light changes. The most common beginner mistake is intervening during a week when the correct action is nothing.
Week 2: Melt peaks
This is when emersed leaves give up in earnest. Crypts may drop everything; swords shed their broad aerial leaves; stem plants lose lower foliage. It looks catastrophic and it’s usually fine. Keep removing mushy material, keep conditions stable, and watch the crown and growing tips — if those are firm and green, recovery is already underway.
Week 3: The turn
New submersed-adapted leaves emerge — smaller, thinner, often a slightly different shade of green than the emersed foliage. Stem plant tips start growing visibly; crypts push tiny curled leaves from the crown; swords unfurl narrow ribbon leaves. This is the moment most beginners exhale for the first time.
Week 4+: Established
New growth outpaces melt, and the plant is functionally yours. You can resume full-strength fertilizer, normal trimming, and stop treating it as fragile. Some slow growers (anubias, bucephalandra) take 6–8 weeks to show obvious progress — that’s their normal speed, not a problem.
Acclimating Different Plant Formats
Tissue-culture cups
Sterile, pest-free, and already adapted to high-humidity (not emersed) growth — tissue cultures melt the least of any format. Rinse the agar gel off gently (leftover gel rots and feeds fungus), split the portion into small plantlets, and plant per our planting guide. They establish slowly for the first two weeks, then accelerate. No dip needed, minimal acclimation stress — this is the premium experience you’re paying for.
Potted plants
Remove the pot and strip away the rockwool completely — leftover rockwool traps debris and rots. Tease the root mass apart gently; if it’s a dense mat, splitting it into 2–3 smaller portions actually establishes faster than planting one big clump (more growing points, better water flow around roots). Potted plants are usually emersed-grown, so expect the standard 2–4 week melt cycle.
Bare-root / bunched stems
Typically sold as weighted bunches. Remove any bands, foam, or weights, strip the lower leaves, and plant stems individually or in small groups. Bunched stems from the store are often already transitioning — check for new submersed growth at the tips, which tells you the plant is mid-adaptation and will settle quickly.
Hobbyist cuttings
Already submersed-grown and the fastest to establish — often showing new growth within days. The main acclimation factor is water-parameter difference between the two tanks. Float to temperature-match, plant promptly, and they’ll usually take off with minimal melt. This is why experienced hobbyists prefer trading cuttings over buying potted plants.
Frequently Asked Questions
Should I use a “plant starter” or transplant fertilizer?
Products marketed for transplant shock are mostly B-vitamins and mild hormones. They don’t hurt, but there’s no strong evidence they help aquarium plants specifically. Stable conditions and patience outperform any bottle. Save the money for more plants.
My new plant melted completely — bare crown, no leaves. Is it dead?
Probably not, if the crown or rhizome is firm. Crypts and swords routinely lose 100% of their leaves and regrow from the base within a month. The test is firmness: firm and pale/green means alive; mushy and brown/black means rot. Give firm-but-leafless plants a full 4 weeks before declaring them dead.
Can I speed up acclimation with extra light or CO2?
No — and trying usually backfires. A melting plant can’t use extra light; the excess just grows algae on its dying leaves. Keep light moderate and CO2 stable (not boosted) during acclimation. Growth speed comes from the plant’s own adaptation timeline, which you can’t rush, only avoid delaying.
Should new plants go straight into my main display tank?
After quarantine/dipping, yes — there’s no benefit to a separate “growing-in” tank for most plants. They acclimate to your water fastest in the tank they’ll live in. The exception is very delicate species going into a tank with boisterous fish; give those a few weeks in a calm corner or breeder box first.
The Patience Rule
The single most important acclimation skill is restraint: plant it right, set gentle conditions, remove decay, and then leave it alone for a month. The hobbyists with the best plant growth aren’t doing something clever in week one — they’re simply not interfering in weeks two through four while the plants do what they’ve evolved to do. Melt looks like failure and feels like failure, but in most cases it’s the visible part of a plant successfully becoming yours.