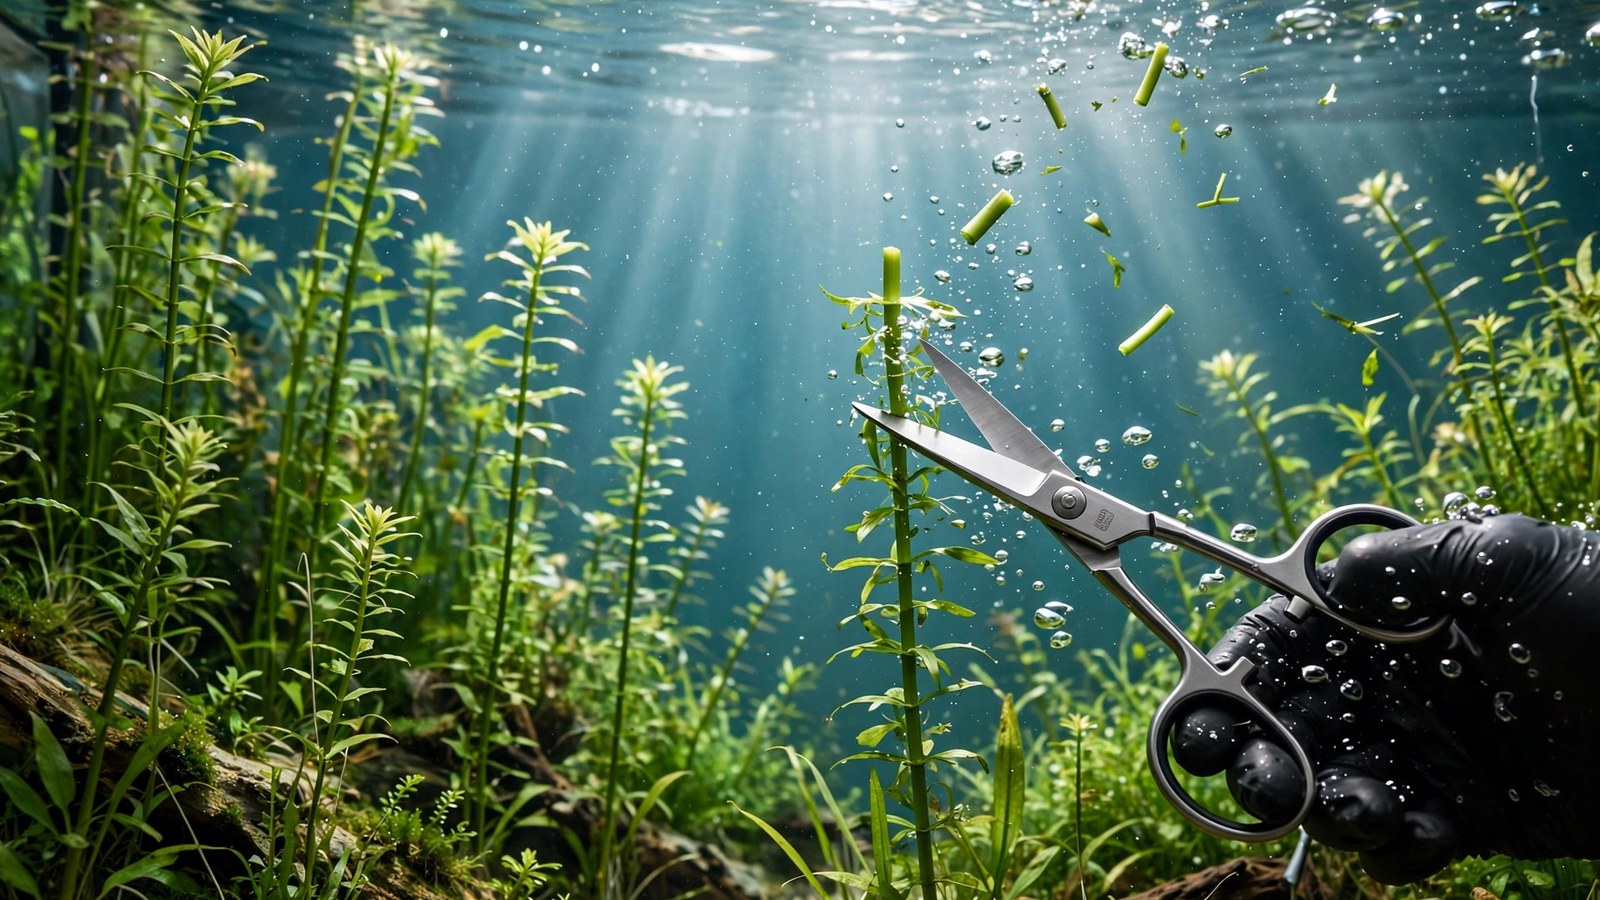
Learning how to trim aquarium stem plants is the skill that separates a tank of leggy, bare-bottomed stems from one with lush, bushy growth. Stem plants like rotala, ludwigia, and hygrophila grow upward relentlessly — without regular cutting, they lose their lower leaves, shade each other out, and become tangled rat's nests of bare stems. The good news: trimming is also free propagation. Nearly every cutting you remove can become a new plant. This guide covers exactly where to cut, which technique to use, and what to do with the pieces.
How Stem Plants Grow: Nodes, Internodes, and Apical Dominance
A stem is a series of segments separated by nodes — the joints where leaves, roots, and side shoots emerge. The stretches between nodes are internodes. Long internodes (wide gaps between leaf pairs) mean the plant is stretching for light; short, tight internodes mean it's getting enough.
At the tip of each stem sits the apical bud (the growing tip), which produces auxins — hormones that suppress side shoots below it. This is apical dominance: one stem grows straight up while the buds at the lower nodes stay dormant. When you trim off the tip, auxin production stops, and those dormant buds wake up. That is why a cut stem so often splits into two or more branches below the cut. Pruning doesn't just shorten a plant — it physically rewrites its shape into something bushier.
Hidden inside every node is a meristem — cells that can become roots, shoots, or leaves depending on conditions. That is the biological reason a severed piece can grow roots from its lowest node and become a whole new plant. Every offcut is potential stock, not waste.
Tools: Curved Scissors vs. Pinching
The aquascaping standard is a pair of curved trimming scissors (16–25 cm). The curved blades reach into dense bunches at an angle without smashing neighboring stems. Rinse them after use and let them dry to prevent rust. For thick-stemmed plants like large hygrophila, standard aquascaping scissors are plenty — just never use craft scissors with nicked or serrated edges, which crush rather than slice.
Pinching means nipping the stem between your thumbnail and forefinger to sever it. It works on soft, thin stems like Rotala rotundifolia and Ludwigia palustris, and it's fast and easy in a crowded foreground. The downside: it crushes slightly rather than slicing cleanly, and on woody stems it can tear downward into the node and damage the bud tissue you want to keep. Rule of thumb: pinch the soft stuff, cut the thick stuff.
How to Trim Aquarium Stem Plants: Cut vs. Pinch
The cut method (top-and-replant)
This is the classic approach for tall background stems. Let the stem grow until it crowds the area, then cut it roughly halfway with scissors. You now have a top and a bottom.
The top cutting is the prize. Strip leaves from the lowest node or two, then push the stem into the substrate deep enough that the bare node is buried — that node will grow roots, and the top establishes as a fresh, healthy plant, often faster than the original. This is the core of propagating aquarium plants from cuttings.
The bottom stub usually survives. Within a week or two, buds at the upper remaining nodes push out side shoots, each becoming a new vertical stem. Cut one stem, get two; cut both of those, get four. Three cycles turn one stem into eight growing tips. The catch: bottoms that are already leggy — bare of leaves along their lower half from shading — may respond slowly or not at all. More on legginess below.
The pinch (hedge-trimming) method
For dense stands like a Rotala wall or a patch of pearl weed, the faster approach is to trim like a hedge: work across the canopy and pinch or snip every growing tip to one level, as if giving the whole bush a haircut. This strips apical dominance from dozens of stems at once, and each one branches just below the cut. Repeated over several weeks, this produces the dense, compact growth that wins aquascaping contests — every cut forks the stems, every fork gets cut, and the bunch compounds.
| Factor | Cut method (scissors) | Pinch method (fingers) |
|---|---|---|
| Best for | Tall background stems, thick stems, propagation | Delicate foreground, dense bushes, hedge shaping |
| Precision | High — exact node placement | Lower — approximate |
| Wound quality | Clean slice, fast healing | Slightly crushed; fine on soft stems |
| Propagation | Excellent tops for replanting | Tops usable but short |
| Risk | Low | Tearing on woody stems |
Where Exactly to Cut
- Cut just above a node. Leave 0.5–1 cm of stem above a leaf pair so the node tissue stays intact — that node is where new side shoots emerge. Cutting through a node damages the meristem you're relying on.
- Cut at a slight angle. An angled cut sheds debris and heals cleanly. Avoid ragged cuts that leave shredded tissue.
- Keep at least two healthy leaf pairs on the bottom stub. A stub with leaves can photosynthesize and recover quickly; a leafless stub runs on stored energy and often stalls.
- For hedge trimming, cut across the canopy at your target level. With dozens of stems, the law of averages handles node placement.
- Remove floating debris promptly. Loose trimmings rot in corners and foul the water — skim them with a net.
For a natural look rather than a flat top, stagger cut heights: cut some stems shorter and leave neighbors taller to create a stepped canopy.
Replanting the Tops
Strip leaves from the bottom 2–3 nodes so no foliage is buried (buried leaves rot and can trigger melt in the new planting). With planting tweezers, push the stem 3–4 cm into the substrate at a slight angle and release gently — the tweezers should slide out without pulling the stem back up. Space replanted stems 2–3 cm apart so light and flow reach every stem; cramming them together recreates the shading problem you just solved. For the full planting technique, see how to plant aquarium plants.
Top cuttings often shed a few older leaves during the first week as they adjust — normal transition behavior, not a crisis. New root and shoot growth from the buried nodes is the sign that establishment is working.
Dealing With Leggy Lower Sections
Legginess — long bare stems with leaves only at the top — is the most common stem-plant complaint, and it's caused by shading, not genetics. As the canopy thickens, light at the base drops to near zero, and the plant abandons its lower leaves to invest in the growing tip. The decision tree:
- Bottoms still have a few leaf pairs: cut at mid-height and let them resprout. New side shoots will leaf out normally.
- Bottoms are bare but firm: cut off the tops, replant them as fresh plants, and compost the bare bases. Then fix the cause — thin the bunch so light penetrates, or raise intensity if the whole tank is under-lit.
- Bottoms are bare, mushy, or rotting: don't try to save them. Cut well above the rot line (rot travels upward inside the stem), replant only firm healthy tops, and remove rotted bases so they don't foul the water.
- Whole bunch repeatedly goes leggy: the stand is too dense or the light too weak for that spot. Space stems wider permanently, move the species to a brighter zone, or pick a slower grower for that position.
Prevention trick: replant tops in a loose staggered arrangement rather than one tight clump. Gaps let light hit the lower nodes, keeping lower leaves alive far longer.
Timing and Frequency
Trim when stems reach roughly two-thirds of the water surface, or when the bunch is so dense that inner stems are losing lower leaves. Don't wait until stems flatten against the surface — by then the lower sections are already dying back, and you'll be cutting damaged plants instead of healthy ones.
- High-tech tanks (CO2 + strong light): fast stems like Rotala and Ludwigia may need trimming every 1–2 weeks.
- Low-tech tanks (no CO2, moderate light): the same species grow 3–5× slower, so trimming every 4–8 weeks is normal. Slow species like Bacopa caroliniana may go months between trims.
- Newly planted tanks: hold off. During the first 90 days, let stems build strong root systems before stressing them with pruning — trim only melting or rotting material.
Consider trimming in stages: cut half the bunch this week and the other half next week. This keeps photosynthesis at full capacity, avoids a nutrient-demand shock, and gives you a built-in visual reference. Staged trimming is especially wise in low-tech tanks, where recovery is slower and stored reserves matter more.
Species Differences Worth Knowing
- Rotala species: branch aggressively after every cut — the classic hedge-trimming genus. R. wallichii and R. macrandra are fussier about stability, so avoid hard cuts during the first month.
- Ludwigia species: thick stems, best cut with scissors. Bottoms regrow reliably and tops root fast. Red varieties keep their best color with regular trimming — see pruning red plants for bushier growth.
- Hygrophila species: extremely vigorous; cut hard without fear. The main job is stopping them from swamping everything else.
- Bacopa species: slower and less eager to branch. Cut above a node and be patient — side shoots can take two to three weeks in low-tech tanks.
- Myriophyllum and Cabomba: fine, feathery stems that respond well to pinch trimming but dislike transplanting — trim in place and replant tops gently.
- Limnophila sessiliflora: one of the fastest stems in the hobby; trim early and often, or it shades out its own base within days in high-tech setups.
Trimming in Low-Tech vs. High-Tech Tanks
The technique is identical; the recovery speed is what differs. In a CO2-injected tank with strong light and regular fertilization, trimmed stems show new shoots in days. In a low-tech tank without CO2, the same response takes one to three weeks, and the plant leans harder on stored reserves.
- Trim less aggressively in low-tech tanks — take a third of the height rather than half, keeping more photosynthetic capacity.
- Always leave healthy leaf pairs on the bottom stub; a leafless stub in low light may never recover.
- Trim in stages rather than all at once.
- Keep fertilization steady after trimming. When dosing, start low and observe your livestock before increasing. If you use an all-in-one fertilizer, a regular conservative dose supports recovery without drama.
Post-Trim Care and Melt Prevention
- Do a partial water change after big trims. Cutting releases organics into the water column; a 20–30% change clears them before algae can exploit the moment.
- Don't change anything else. Keep light, CO2, and fertilizer schedules exactly as they were. A stressed plant recovers best in stable conditions.
- Expect some melt on replanted tops. Shedding a few older leaves is normal adaptation; new growth at buried nodes or the tip within two weeks means the plant is settling in.
- Resist re-trimming too soon. Let side shoots grow several nodes long before cutting again — trimming baby shoots repeatedly exhausts the plant's reserves.
- Sanitize tools between tanks. Rinse or dip scissors between aquariums to avoid transferring algae or pathogens.
Frequently Asked Questions
Can I trim stem plants with my fingers instead of scissors?
Yes, for soft thin-stemmed species like Rotala rotundifolia, Ludwigia palustris, and pearl weed, pinching between your thumbnail and forefinger works well and is fast. Use scissors for thick or woody stems like large Hygrophila, where pinching can tear the stem into the node and damage the buds needed for regrowth. Sharp, clean cuts always heal fastest.
Where exactly should I cut a stem plant?
Cut just above a node — the joint where a leaf pair grows — leaving about 0.5 to 1 cm of stem above it, ideally at a slight angle. Never cut through a node, since the meristem tissue inside it produces the new side shoots. Keep at least two healthy leaf pairs on the remaining bottom stub so it can photosynthesize during recovery.
Will the bottom half grow back after I cut the top off?
Usually, yes. Removing the growing tip stops apical dominance, so dormant buds at the upper nodes wake up and push out two or more side shoots within one to two weeks. The exception is a bottom that is bare of leaves, mushy, or rotting — those rarely recover and are better composted, with the healthy tops replanted as new plants.
How do I stop stem plants from going leggy at the bottom?
Legginess comes from shading, so the fix is structural: space replanted stems 2–3 cm apart instead of cramming them together, trim before stems reach the surface, and thin dense canopies so light reaches the lower nodes. If the whole bunch repeatedly goes leggy, the spot may simply be too dim for that species — move it somewhere brighter or choose a slower grower.
How often should I trim stem plants?
It depends on your setup. Fast stems in high-tech CO2 tanks may need trimming every one to two weeks, while the same species in a low-tech tank typically need it every four to eight weeks. Trim when stems reach about two-thirds of the water surface or when inner stems start losing lower leaves — don't wait until they're flattening against the lid.
Should I fertilize right after trimming?
Keep your normal routine unchanged rather than adding extra fertilizer. Trimming doesn't increase nutrient demand — if anything, it briefly reduces it, since there's less plant mass photosynthesizing. If you already dose regularly, a standard conservative dose supports recovery fine. Always start low and observe your livestock before any increase, especially in a freshly trimmed tank.
Make Trimming a Habit, Not a Rescue Mission
Stem plants are forgiving, generous plants: they branch when cut, multiply when replanted, and ask only for light, stable conditions, and a regular haircut. The aquarists with the lushest stem bushes aren't doing anything exotic — they're simply trimming a little, often, before problems start. Cut every couple of weeks, replant the tops, give the bottoms room to breathe, and one bunch of rotala will quietly become a forest.
Tissue-culture plants are the exception — they’re grown in sterile gel and adapt with minimal melting, which is part of what you’re paying for. Plants bought submersed from another hobbyist’s tank also transition with little melt, since they’re already in the right form.
Which Plants Melt Most (and Least)
Heavy melters (expect significant leaf loss)
- Cryptocorynes — infamous for “crypt melt,” sometimes dropping every leaf after any disturbance. They almost always recover from the roots within weeks.
- Stem plants grown emersed — rotala, ludwigia, and hygrophila often shed lower emersed leaves while the growing tips transition.
- Amazon swords — emersed-grown swords typically lose their broad oval aerial leaves and replace them with longer submersed ribbon leaves.
Light melters
- Anubias, java fern, bucephalandra — slow-growing rhizome plants transition gradually; occasional old-leaf melt but rarely dramatic.
- Vallisneria — usually transitions well, though it dislikes the move itself and may sulk for a week.
- Floating plants — minimal melt since their leaves were already at the air-water interface.
The Acclimation Protocol
Step 1: Quarantine or dip first
Before acclimating to your tank’s conditions, make sure you’re not acclimating pests along with the plant. Run new arrivals through our quarantine and dip protocol — it adds days upfront but prevents months of regret.
Step 2: Float to temperature-match (30 minutes)
Float the bag or container in your tank for 20–30 minutes to equalize temperature. Plants are less temperature-sensitive than fish, but a 10°F shock on top of transplant stress is an avoidable insult.
Step 3: Trim before planting
Remove any leaves that are already damaged, yellowing, or heavily algae-covered — they won’t recover and they’ll rot in your tank, feeding algae. For stem plants, trim off the bottom inch and any emersed leaves that look unlikely to adapt; the plant wastes energy maintaining leaves it’s going to shed anyway. Keep the healthy growing tips — that’s where recovery starts.
Step 4: Plant correctly the first time
Follow our planting guide — right depth, crown exposed on rosettes, rhizomes unburied on epiphytes. Every uprooting and replanting restarts the acclimation clock, so get placement right on the first attempt. Decide where each plant goes before it goes in the water.
Step 5: Run a gentle first week
For the first 7 days after planting:
- Moderate light — run your normal photoperiod but consider dropping intensity 20–30% if your light is dimmable. Blast-level light on a melting plant grows algae on the dying leaves, not recovery.
- Stable CO2 — if you inject CO2, keep it consistent. Fluctuating CO2 during acclimation is a melt accelerator. If you’re low-tech, this doesn’t apply — see growing without CO2.
- Half-strength fertilizer — new plants with damaged leaves can’t use full dosing, and the excess feeds algae. Ramp to full strength over 2–3 weeks per our fertilizer schedule.
- No disturbance — don’t move, trim, or “check on” new plants for at least two weeks. Every touch resets root establishment. This is especially critical for crypts.
Step 6: Remove melt, keep the base
As emersed leaves melt, remove the mushy material promptly — decaying leaves release ammonia and grow fungus that can spread to healthy tissue. But never discard the plant while the crown, rhizome, or roots are firm and alive. A crypt that’s lost every leaf but has firm roots is a plant that’s about to recover, not a dead plant. Give it 3–4 weeks before judging.
Telling Normal Melt From Real Problems
Normal transition melt:
- Affects oldest/emersed leaves first, newest growth last
- New submersed leaves emerge even as old ones dissolve
- Roots and crown stay firm and white/green
- Timeline: 1–4 weeks, then obvious new growth
Concerning melt (see our full melting diagnosis guide):
- New growth also melts or emerges deformed
- Rhizome or crown turns mushy and brown — this is rot, not transition
- Entire plant dissolves within days with no new growth after 4+ weeks
- Melting spreads to established plants that weren’t recently moved
Buying Tips to Minimize Melt
- Buy submersed-grown when available — hobbyist-grown cuttings transition with almost no melt.
- Choose tissue culture for sensitive species — crypts and delicate stems establish far more reliably from sterile cups.
- Avoid plants already melting in the store tank — some melt is normal, but a plant that’s mostly mush at purchase has less energy for recovery.
- Transport carefully — keep plants damp and out of direct sun/heat. A plant that dries out or cooks in a hot car melts far worse than one transported properly.
The First-Month Timeline: What to Expect Week by Week
Knowing what’s normal when removes most acclimation anxiety. Here’s the typical timeline for a healthy plant adapting to a new tank:
Week 1: The quiet week
Almost nothing visible happens. The plant is growing roots you can’t see and assessing its new environment. Some species (vallisneria, stem plants) may start shedding their lowest leaves. This is normal. Resist the urge to “help” — no moving, no extra fertilizer, no light changes. The most common beginner mistake is intervening during a week when the correct action is nothing.
Week 2: Melt peaks
This is when emersed leaves give up in earnest. Crypts may drop everything; swords shed their broad aerial leaves; stem plants lose lower foliage. It looks catastrophic and it’s usually fine. Keep removing mushy material, keep conditions stable, and watch the crown and growing tips — if those are firm and green, recovery is already underway.
Week 3: The turn
New submersed-adapted leaves emerge — smaller, thinner, often a slightly different shade of green than the emersed foliage. Stem plant tips start growing visibly; crypts push tiny curled leaves from the crown; swords unfurl narrow ribbon leaves. This is the moment most beginners exhale for the first time.
Week 4+: Established
New growth outpaces melt, and the plant is functionally yours. You can resume full-strength fertilizer, normal trimming, and stop treating it as fragile. Some slow growers (anubias, bucephalandra) take 6–8 weeks to show obvious progress — that’s their normal speed, not a problem.
Acclimating Different Plant Formats
Tissue-culture cups
Sterile, pest-free, and already adapted to high-humidity (not emersed) growth — tissue cultures melt the least of any format. Rinse the agar gel off gently (leftover gel rots and feeds fungus), split the portion into small plantlets, and plant per our planting guide. They establish slowly for the first two weeks, then accelerate. No dip needed, minimal acclimation stress — this is the premium experience you’re paying for.
Potted plants
Remove the pot and strip away the rockwool completely — leftover rockwool traps debris and rots. Tease the root mass apart gently; if it’s a dense mat, splitting it into 2–3 smaller portions actually establishes faster than planting one big clump (more growing points, better water flow around roots). Potted plants are usually emersed-grown, so expect the standard 2–4 week melt cycle.
Bare-root / bunched stems
Typically sold as weighted bunches. Remove any bands, foam, or weights, strip the lower leaves, and plant stems individually or in small groups. Bunched stems from the store are often already transitioning — check for new submersed growth at the tips, which tells you the plant is mid-adaptation and will settle quickly.
Hobbyist cuttings
Already submersed-grown and the fastest to establish — often showing new growth within days. The main acclimation factor is water-parameter difference between the two tanks. Float to temperature-match, plant promptly, and they’ll usually take off with minimal melt. This is why experienced hobbyists prefer trading cuttings over buying potted plants.
Frequently Asked Questions
Should I use a “plant starter” or transplant fertilizer?
Products marketed for transplant shock are mostly B-vitamins and mild hormones. They don’t hurt, but there’s no strong evidence they help aquarium plants specifically. Stable conditions and patience outperform any bottle. Save the money for more plants.
My new plant melted completely — bare crown, no leaves. Is it dead?
Probably not, if the crown or rhizome is firm. Crypts and swords routinely lose 100% of their leaves and regrow from the base within a month. The test is firmness: firm and pale/green means alive; mushy and brown/black means rot. Give firm-but-leafless plants a full 4 weeks before declaring them dead.
Can I speed up acclimation with extra light or CO2?
No — and trying usually backfires. A melting plant can’t use extra light; the excess just grows algae on its dying leaves. Keep light moderate and CO2 stable (not boosted) during acclimation. Growth speed comes from the plant’s own adaptation timeline, which you can’t rush, only avoid delaying.
Should new plants go straight into my main display tank?
After quarantine/dipping, yes — there’s no benefit to a separate “growing-in” tank for most plants. They acclimate to your water fastest in the tank they’ll live in. The exception is very delicate species going into a tank with boisterous fish; give those a few weeks in a calm corner or breeder box first.
The Patience Rule
The single most important acclimation skill is restraint: plant it right, set gentle conditions, remove decay, and then leave it alone for a month. The hobbyists with the best plant growth aren’t doing something clever in week one — they’re simply not interfering in weeks two through four while the plants do what they’ve evolved to do. Melt looks like failure and feels like failure, but in most cases it’s the visible part of a plant successfully becoming yours.