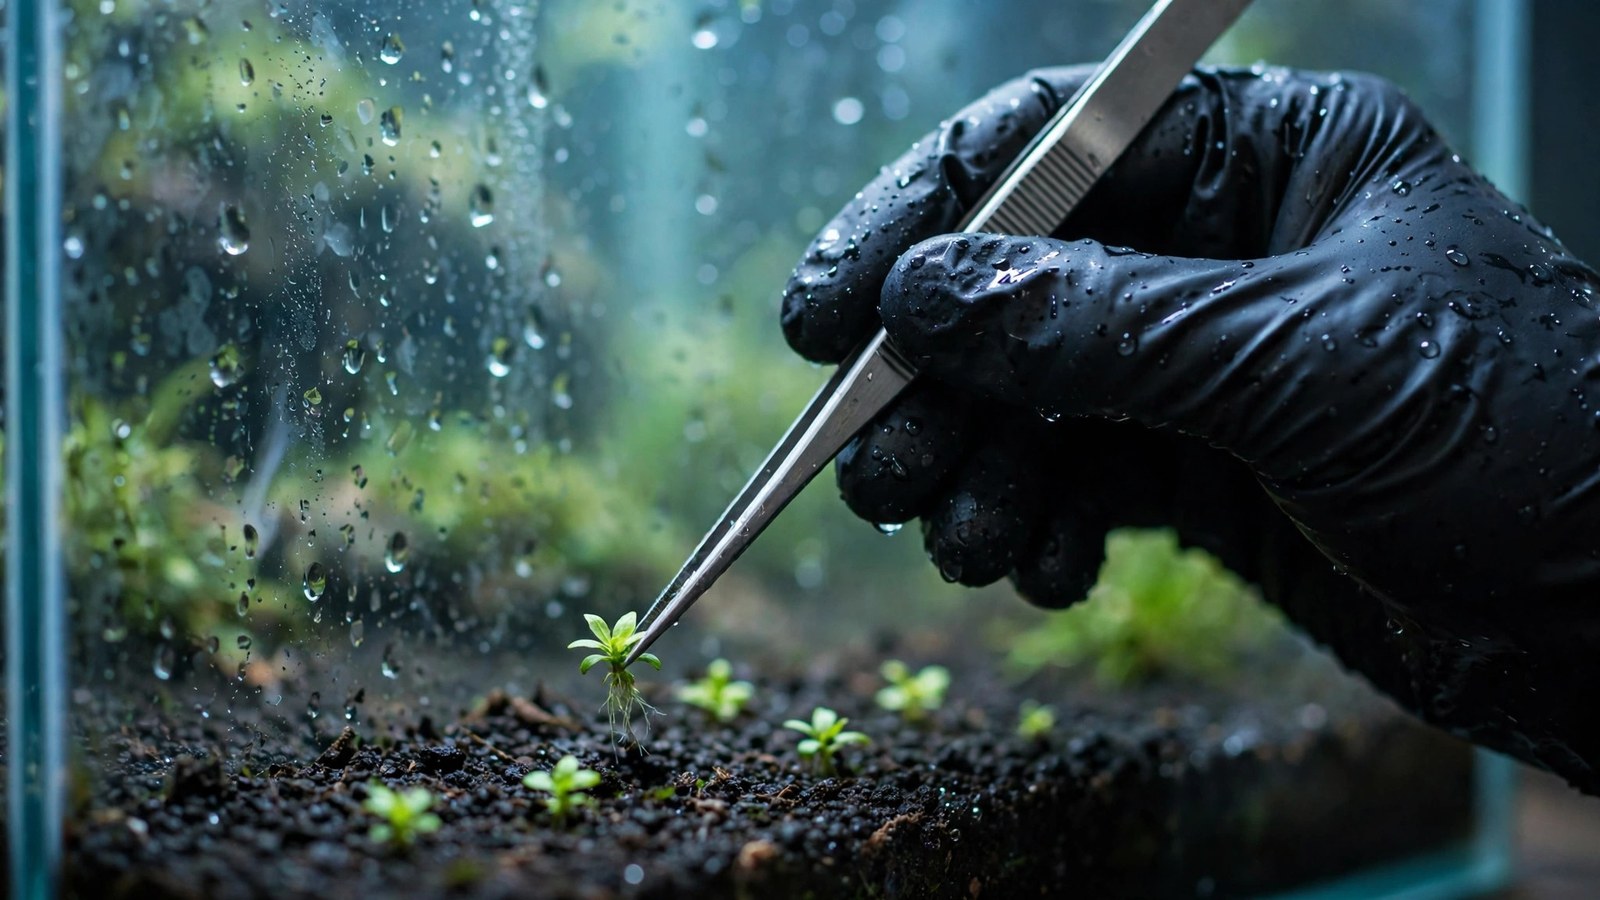
If you've ever winced at pond snails hitching a ride on a new plant, planting tissue culture aquarium plants is the technique you'll want. Tissue-culture cups — sealed containers sold under names like 1-2-Grow — hold dozens of tiny plants grown in sterile lab conditions, completely free of snails, algae, duckweed, and fish pathogens. A single cup can carpet a nano tank's foreground for the price of one potted plant. The trade-off: the plants arrive as delicate emersed-form plantlets embedded in nutrient gel, so they need a specific rinse-divide-plant routine. Get that routine right and tissue culture becomes the most reliable way to stock a planted tank cleanly.
What Tissue-Culture Cups Actually Are
Tissue culture, also called in-vitro propagation, means the plants were cloned from sterile tissue in a lab and raised on nutrient gel (agar) inside a sealed cup. Because nothing unsterile ever touches them, there are no snail eggs, algae spores, or hitchhiker plants in the package. Most hobbyists treat these cups as the gold standard for biosecurity: unlike potted plants from a shop tank, there is genuinely no reason to dip or isolate them.
One catch: most tissue-culture plants are grown emersed — in humid air rather than underwater — so their leaves are the above-water form. Planted submerged, many species shed those leaves and regrow submerged foliage. That transition (called "melt") is normal, not failure, and we'll cover how to ride it out below.
What's inside a typical cup
- Plantlets: anywhere from a few dozen tiny rosettes or stems to a dense mat of carpet runners, depending on the species. Cup labels usually state the species and sometimes a rough count.
- Nutrient gel: a firm, translucent jelly holding the plantlets upright and feeding them. It must be rinsed off completely — gel left in the tank can rot and fuel algae.
- Sealed lid: keeps the interior sterile and humid. Once opened, the contents have a limited shelf life, so only crack the cup when you're ready to plant the same day.
Tools and Prep Before You Open the Cup
Tissue-culture plantlets are small and fragile, so a little preparation keeps you from crushing them with clumsy fingers mid-job.
- Planting tweezers (pinsettes): long, angled aquarium tweezers are the single most important tool — you need them to push small portions into the substrate without disturbing the neighbors.
- A clean bowl and lukewarm tap water: for rinsing the gel. No soap, no chemicals — just water.
- A spray bottle: to keep exposed plantlets from drying out while you divide the clump.
- Substrate already in place: cups are best planted where the substrate is leveled and lightly moistened (dry start) or the tank is already filled (submerged planting).
Time the purchase for planting day. Plant tissue-culture cups within a day or two of purchase; once the seal is broken, the clock runs fast — an open cup in a dry room can desiccate or grow mold within a day or two. Plan to open, rinse, divide, and plant in one session.
If you're also bringing home potted plants from a shop tank, handle them separately — quarantining new aquarium plants and dipping plants in a bleach solution are still worth doing for those, since only the sterile cup gets a free pass.
Step by Step: Rinse, Divide, Plant, Settle
The whole routine takes about fifteen to thirty minutes per cup. Here's the sequence that gives the highest survival rate.
1. Pop the cup and rinse the gel off
Open the cup and tip the contents into your bowl of lukewarm water. Swirl and gently tease the plantlets apart with your fingers, letting the gel dissolve and wash away. This step matters most: gel left coating the roots can rot in the substrate and trigger an algae bloom right where your new plants sit. Rinse until the water runs clear — usually two or three changes of water, plus a gentle tap stream for dense carpets where gel hides between stems.
2. Divide into small portions
Working with clean hands or tweezers, split the rinsed mass into portions. Smaller portions establish faster and spread sooner, but dry out quicker on the workbench — mist them if you're dividing a big cup. As a rule of thumb:
| Plant type | Portions per cup | Portion size | Notes |
|---|---|---|---|
| Carpeting plants (e.g. Hemianthus callitrichoides, Eleocharis) | 8–15 | ~5–10 plantlets each | Small portions merge into a lawn fastest |
| Stem plants (e.g. Rotala, Ludwigia) | 6–12 | Clusters of 3–6 stems | Leave stems 3–5 cm long |
| Rosettes (e.g. Cryptocoryne, Echinodorus) | 4–8 | Single crowns | Never bury the crown where leaves meet roots |
| Mosses and creepers | 10–20 | Pea-sized tufts | Press onto hardscape or substrate |
3. Plant each portion with tweezers
Pick up a portion with your tweezers near its base, push it into the substrate at a slight angle, and release by opening the tweezers slowly while withdrawing — the substrate should close around the roots. Depth guidance:
- Carpets: about 1–2 cm deep, spaced roughly 2–3 cm apart. The grid looks sparse on day one — that's what you want, because each portion sends runners sideways and the gaps close in.
- Stems: bury the bottom 1–2 cm at a slight angle, so the stem leans up naturally and lower leaves don't rot under the substrate surface.
- Rosettes: roots down, crown (where leaves meet roots) just above the substrate line. Burying the crown is the classic way to melt a crypt — keep it exposed.
If portions keep floating up, your grip was too shallow or the substrate too coarse — push a touch deeper and firm the substrate around the base with the tweezers' back.
4. Let the tank settle
Once everything is planted, mist lightly for a dry start, or fill very gently (a plate or plastic bag on the substrate breaks the stream) for submerged planting. Cloudy first-fill water is normal and clears as the filter runs. Hold off on rearranging — every uprooting restarts a portion's rooting clock.
Carpet vs Stem vs Rosette: Portioning by Growth Habit
The cup looks the same for every species, but how you divide it depends entirely on how the plant grows.
Carpeting species
Carpets like Hemianthus callitrichoides ("HC Cuba") arrive as a dense emersed mat. Divide into as many thumbnail-sized chunks as you can manage — more portions mean a shorter wait for a full lawn, since each chunk grows outward from its edges. Space them evenly; don't bunch them into a few big clumps.
Stem plants
Stem-plant cups hold many short vertical shoots. Separate them into bunches of three to six stems and plant each bunch as one unit, trimming any mushy lower leaves first. Don't worry that the bunches look thin — healthy stems branch once settled. For a fuller background fast, you can propagate your stem plants by replanting the tops a few weeks later.
Rosettes and ferns
Rosettes like Cryptocoryne parva divide into individual crowns, each with its own root cluster — tease them apart gently, since torn roots set the plant back in its first week. Epiphytes such as Anubias or Bucephalandra sometimes arrive in culture cups too; those never go into the substrate, so attach them to rock or wood with thread or gel superglue.
Dry Start vs Submerged Planting
You can plant tissue-culture cups either way, and each route suits different situations.
Dry start (high humidity, no water yet)
Cup plants are already in emersed form, so they skip the transition entirely in a dry start: plant into damp substrate, cover the tank to hold near-100% humidity, and let them spread for several weeks before flooding. This is the fastest route to a dense carpet and nearly eliminates early melt. Keep the substrate moist like a wrung-out sponge (not soggy), ventilate briefly each day to prevent mold, and flood once coverage reaches roughly 70–80%.
Planting into a filled tank
The more common route, especially when adding plants to a newly set-up aquarium. The trade-off is the emersed-to-submerged transition: expect older leaves to yellow and dissolve over the first one to three weeks. Don't rip the plants out — watch for tiny new leaves emerging from the base or crown, the submerged form taking over. Moderate light and consistent CO2 (if you use it) give the new growth its best chance.
The Melt: Why It Happens and How to Ride It Out
"Melt" is the hobby's word for tissue-culture plants shedding emersed leaves after going underwater. The emersed leaf isn't built for submerged life, so the plant abandons it and invests in new foliage shaped for the water. Nearly every carpet and stem species does this to some degree.
- Week 1–2: older leaves yellow or dissolve. Trim fully melted leaves so they don't decay and feed algae, but leave anything still green.
- Week 2–4: new, smaller submerged leaves appear from the base — the signal the plant has turned the corner.
- After week 4: growth should be visibly new. A portion that's all mush with no new shoots is dead; remove it so it doesn't foul the substrate.
Cryptocorynes deserve a special mention: they're famous for "crypt melt" even from pot to tank, and tissue-culture crypts are no exception. Leave the roots undisturbed and most crowns resprout within weeks. Keeping your routine stable through this period — same light duration, same fertilization — helps far more than any rescue product. If you're navigating this in a brand-new setup, the first 90 days of a planted tank covers the broader timeline melt fits into.
Troubleshooting Common Problems
Portions keep floating up
This almost always means they were planted too shallow or the substrate grains are too coarse to grip tiny roots. Replant a touch deeper, and consider a pinch of fine sand around carpet portions in very coarse gravel. Fill slowly — a dumped bucket's current will uproot a day's work.
Algae blooming on gel residue
Hair or thread algae colonizing the planting zone usually traces back to an incomplete rinse. Siphon it out and double-check that no clear jelly remains around the roots. Prevention beats cure: when in doubt, rinse a third time.
Slow or stalled start
Tissue-culture plants are small and can sit quietly for a week or two while building roots — that's normal. True stalling (no new growth after a month) usually means the species' basic needs aren't met: insufficient light, no carbon source for a high-demand carpet, or nutrient-poor substrate. The cup label's care notes are a guide, not a guarantee — a demanding carpet in a low-tech tank will struggle no matter how cleanly it arrived. Match the species to your setup, or upgrade the setup to the species.
Cost Math: Cups vs Potted Plants
A tissue-culture cup typically costs about the same as one potted plant — yet the plant count is dramatically higher. A single carpet cup often yields 10+ plantable portions, where matching coverage from pots might take three or four pots. For nano tanks, where one pot is comically oversized, a cup's tiny portions are a natural fit: one or two cups can plant a 5-gallon scape.
The honest comparison includes the hidden costs. Cups demand more planting labor, carry the melt transition, and can't sit around — an opened cup must be planted promptly, while pots tolerate a few days in a bucket. Still, for a large tank scaped in one weekend, several cups are usually cheaper than the equivalent pots, and every plant arrives pest-free. For a general primer covering both formats, see how to plant aquarium plants.
Frequently Asked Questions
Do I need to quarantine tissue-culture plants?
No — that's one of their biggest selling points. Because they're grown in sterile lab conditions and sealed until sale, there's nothing alive in the cup except the plants themselves: no snails, no snail eggs, no algae, no duckweed, and no fish pathogens. You can plant them straight into your display tank. Quarantine routines still apply to potted or bunched plants bought from shop tanks, which share water with fish and invertebrates.
How long does a cup last before planting?
Unopened cups typically stay viable for several weeks at room temperature away from direct sun, but freshness matters — buy close to planting day when you can. Once the seal is broken, plant the contents the same day. An opened cup left sitting will dry out or grow mold within a day or two, and any delay costs you plantlets.
Why are my tissue-culture plants melting?
Melt is the normal shedding of emersed-grown leaves as the plant switches to submerged form. Most carpet and stem species replace their original foliage within two to four weeks. Trim fully dissolved leaves, keep light and nutrients stable, and look for tiny new growth at the base — that's success, not failure. Only remove a portion if it's entirely mush with no new shoots after a month.
Can I plant tissue-culture cups in a low-tech tank without CO2?
Yes, but choose the species honestly. Easy cups like Cryptocoryne, Anubias, mosses, and Sagittaria subulata do fine without injected CO2. Demanding carpets like HC Cuba will struggle in low-tech conditions regardless of how cleanly they arrived — the cup solves pests, not the species' light and carbon requirements. Match the plant to your setup.
Should I rinse the gel off or plant it with the gel?
Always rinse it off completely. The nutrient gel is plant food in the lab, but in your tank it's a decaying organic blob that can rot in the substrate and fuel algae exactly where your new plants are weakest. Rinse under lukewarm water, changing the water two or three times, until no jelly residue remains anywhere on the roots or stems.
How many cups do I need for my tank?
It depends on tank size and how patient you are. One cup typically plants the foreground of a nano tank up to about 10 gallons when divided into small portions. For a standard 20-gallon foreground, two to three carpet cups give reasonably quick coverage; stems and background plants need fewer. When in doubt, start with more small portions rather than fewer big ones — coverage time shrinks fast.
Plant Clean, Plant Small, Be Patient
Tissue-culture cups ask more of you on planting day — the rinse, the dividing, the tweezing of dozens of tiny portions — and repay it with a tank that starts life completely free of pests and algae hitchhikers. Divide generously, rinse the gel thoroughly, respect each species' planting depth, and give the emersed-to-submerged transition its few weeks without interference. New to the hobby side of all this? Acclimating new aquarium plants walks through the broader settling-in routine that pairs well with a clean tissue-culture start.
Tissue-culture plants are the exception — they’re grown in sterile gel and adapt with minimal melting, which is part of what you’re paying for. Plants bought submersed from another hobbyist’s tank also transition with little melt, since they’re already in the right form.
Which Plants Melt Most (and Least)
Heavy melters (expect significant leaf loss)
- Cryptocorynes — infamous for “crypt melt,” sometimes dropping every leaf after any disturbance. They almost always recover from the roots within weeks.
- Stem plants grown emersed — rotala, ludwigia, and hygrophila often shed lower emersed leaves while the growing tips transition.
- Amazon swords — emersed-grown swords typically lose their broad oval aerial leaves and replace them with longer submersed ribbon leaves.
Light melters
- Anubias, java fern, bucephalandra — slow-growing rhizome plants transition gradually; occasional old-leaf melt but rarely dramatic.
- Vallisneria — usually transitions well, though it dislikes the move itself and may sulk for a week.
- Floating plants — minimal melt since their leaves were already at the air-water interface.
The Acclimation Protocol
Step 1: Quarantine or dip first
Before acclimating to your tank’s conditions, make sure you’re not acclimating pests along with the plant. Run new arrivals through our quarantine and dip protocol — it adds days upfront but prevents months of regret.
Step 2: Float to temperature-match (30 minutes)
Float the bag or container in your tank for 20–30 minutes to equalize temperature. Plants are less temperature-sensitive than fish, but a 10°F shock on top of transplant stress is an avoidable insult.
Step 3: Trim before planting
Remove any leaves that are already damaged, yellowing, or heavily algae-covered — they won’t recover and they’ll rot in your tank, feeding algae. For stem plants, trim off the bottom inch and any emersed leaves that look unlikely to adapt; the plant wastes energy maintaining leaves it’s going to shed anyway. Keep the healthy growing tips — that’s where recovery starts.
Step 4: Plant correctly the first time
Follow our planting guide — right depth, crown exposed on rosettes, rhizomes unburied on epiphytes. Every uprooting and replanting restarts the acclimation clock, so get placement right on the first attempt. Decide where each plant goes before it goes in the water.
Step 5: Run a gentle first week
For the first 7 days after planting:
- Moderate light — run your normal photoperiod but consider dropping intensity 20–30% if your light is dimmable. Blast-level light on a melting plant grows algae on the dying leaves, not recovery.
- Stable CO2 — if you inject CO2, keep it consistent. Fluctuating CO2 during acclimation is a melt accelerator. If you’re low-tech, this doesn’t apply — see growing without CO2.
- Half-strength fertilizer — new plants with damaged leaves can’t use full dosing, and the excess feeds algae. Ramp to full strength over 2–3 weeks per our fertilizer schedule.
- No disturbance — don’t move, trim, or “check on” new plants for at least two weeks. Every touch resets root establishment. This is especially critical for crypts.
Step 6: Remove melt, keep the base
As emersed leaves melt, remove the mushy material promptly — decaying leaves release ammonia and grow fungus that can spread to healthy tissue. But never discard the plant while the crown, rhizome, or roots are firm and alive. A crypt that’s lost every leaf but has firm roots is a plant that’s about to recover, not a dead plant. Give it 3–4 weeks before judging.
Telling Normal Melt From Real Problems
Normal transition melt:
- Affects oldest/emersed leaves first, newest growth last
- New submersed leaves emerge even as old ones dissolve
- Roots and crown stay firm and white/green
- Timeline: 1–4 weeks, then obvious new growth
Concerning melt (see our full melting diagnosis guide):
- New growth also melts or emerges deformed
- Rhizome or crown turns mushy and brown — this is rot, not transition
- Entire plant dissolves within days with no new growth after 4+ weeks
- Melting spreads to established plants that weren’t recently moved
Buying Tips to Minimize Melt
- Buy submersed-grown when available — hobbyist-grown cuttings transition with almost no melt.
- Choose tissue culture for sensitive species — crypts and delicate stems establish far more reliably from sterile cups.
- Avoid plants already melting in the store tank — some melt is normal, but a plant that’s mostly mush at purchase has less energy for recovery.
- Transport carefully — keep plants damp and out of direct sun/heat. A plant that dries out or cooks in a hot car melts far worse than one transported properly.
The First-Month Timeline: What to Expect Week by Week
Knowing what’s normal when removes most acclimation anxiety. Here’s the typical timeline for a healthy plant adapting to a new tank:
Week 1: The quiet week
Almost nothing visible happens. The plant is growing roots you can’t see and assessing its new environment. Some species (vallisneria, stem plants) may start shedding their lowest leaves. This is normal. Resist the urge to “help” — no moving, no extra fertilizer, no light changes. The most common beginner mistake is intervening during a week when the correct action is nothing.
Week 2: Melt peaks
This is when emersed leaves give up in earnest. Crypts may drop everything; swords shed their broad aerial leaves; stem plants lose lower foliage. It looks catastrophic and it’s usually fine. Keep removing mushy material, keep conditions stable, and watch the crown and growing tips — if those are firm and green, recovery is already underway.
Week 3: The turn
New submersed-adapted leaves emerge — smaller, thinner, often a slightly different shade of green than the emersed foliage. Stem plant tips start growing visibly; crypts push tiny curled leaves from the crown; swords unfurl narrow ribbon leaves. This is the moment most beginners exhale for the first time.
Week 4+: Established
New growth outpaces melt, and the plant is functionally yours. You can resume full-strength fertilizer, normal trimming, and stop treating it as fragile. Some slow growers (anubias, bucephalandra) take 6–8 weeks to show obvious progress — that’s their normal speed, not a problem.
Acclimating Different Plant Formats
Tissue-culture cups
Sterile, pest-free, and already adapted to high-humidity (not emersed) growth — tissue cultures melt the least of any format. Rinse the agar gel off gently (leftover gel rots and feeds fungus), split the portion into small plantlets, and plant per our planting guide. They establish slowly for the first two weeks, then accelerate. No dip needed, minimal acclimation stress — this is the premium experience you’re paying for.
Potted plants
Remove the pot and strip away the rockwool completely — leftover rockwool traps debris and rots. Tease the root mass apart gently; if it’s a dense mat, splitting it into 2–3 smaller portions actually establishes faster than planting one big clump (more growing points, better water flow around roots). Potted plants are usually emersed-grown, so expect the standard 2–4 week melt cycle.
Bare-root / bunched stems
Typically sold as weighted bunches. Remove any bands, foam, or weights, strip the lower leaves, and plant stems individually or in small groups. Bunched stems from the store are often already transitioning — check for new submersed growth at the tips, which tells you the plant is mid-adaptation and will settle quickly.
Hobbyist cuttings
Already submersed-grown and the fastest to establish — often showing new growth within days. The main acclimation factor is water-parameter difference between the two tanks. Float to temperature-match, plant promptly, and they’ll usually take off with minimal melt. This is why experienced hobbyists prefer trading cuttings over buying potted plants.
Frequently Asked Questions
Should I use a “plant starter” or transplant fertilizer?
Products marketed for transplant shock are mostly B-vitamins and mild hormones. They don’t hurt, but there’s no strong evidence they help aquarium plants specifically. Stable conditions and patience outperform any bottle. Save the money for more plants.
My new plant melted completely — bare crown, no leaves. Is it dead?
Probably not, if the crown or rhizome is firm. Crypts and swords routinely lose 100% of their leaves and regrow from the base within a month. The test is firmness: firm and pale/green means alive; mushy and brown/black means rot. Give firm-but-leafless plants a full 4 weeks before declaring them dead.
Can I speed up acclimation with extra light or CO2?
No — and trying usually backfires. A melting plant can’t use extra light; the excess just grows algae on its dying leaves. Keep light moderate and CO2 stable (not boosted) during acclimation. Growth speed comes from the plant’s own adaptation timeline, which you can’t rush, only avoid delaying.
Should new plants go straight into my main display tank?
After quarantine/dipping, yes — there’s no benefit to a separate “growing-in” tank for most plants. They acclimate to your water fastest in the tank they’ll live in. The exception is very delicate species going into a tank with boisterous fish; give those a few weeks in a calm corner or breeder box first.
The Patience Rule
The single most important acclimation skill is restraint: plant it right, set gentle conditions, remove decay, and then leave it alone for a month. The hobbyists with the best plant growth aren’t doing something clever in week one — they’re simply not interfering in weeks two through four while the plants do what they’ve evolved to do. Melt looks like failure and feels like failure, but in most cases it’s the visible part of a plant successfully becoming yours.