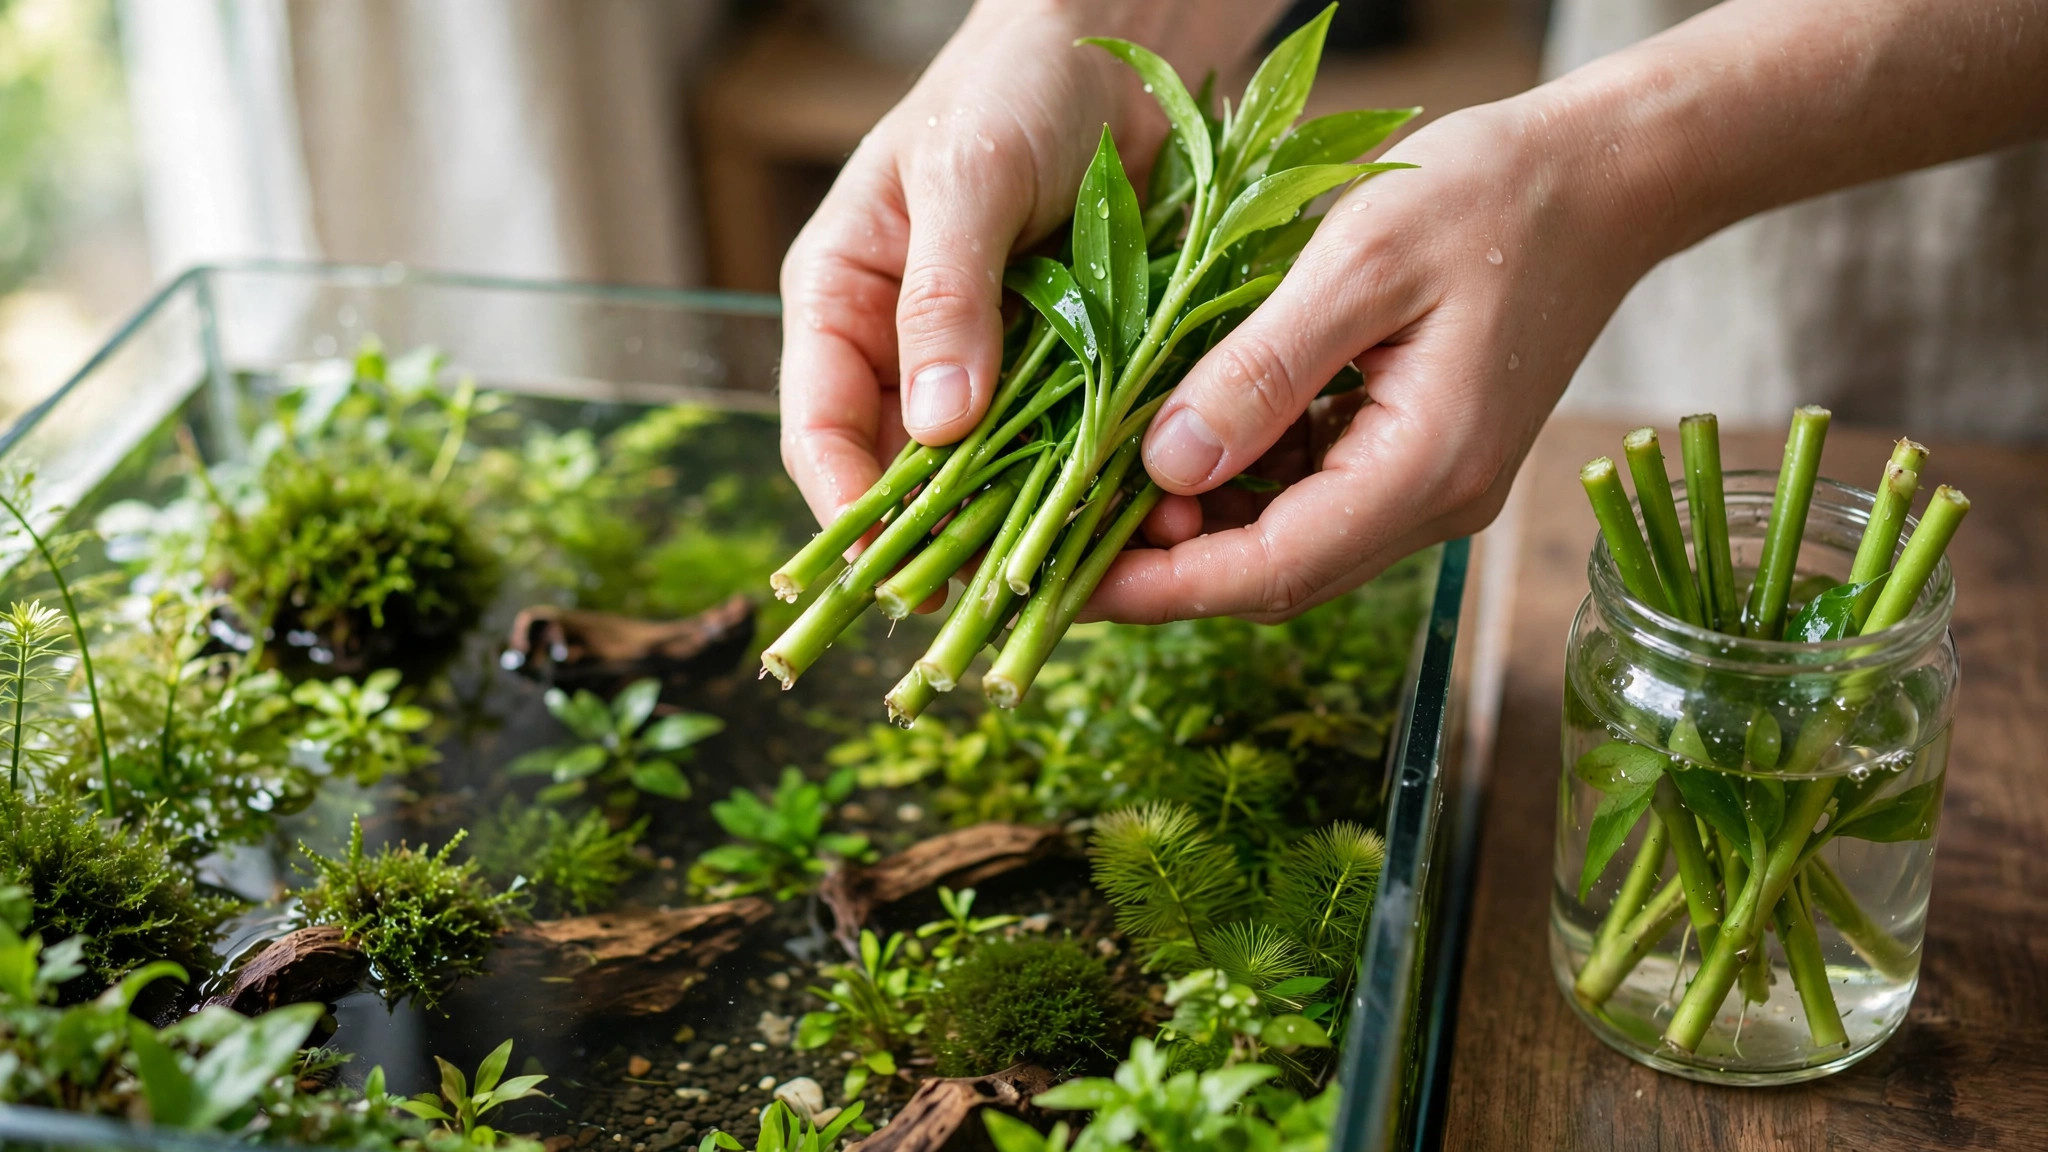
Every autumn, planted-tank keepers face the same pleasant problem: the end-of-season thinning leaves a bucket of healthy aquarium plant trimmings and nowhere to put them. Stem plants tower toward the waterline, rotala bushes need their third haircut, and the counter is covered in green cuttings too alive to waste. A trim pile is not waste at all — it is raw material for new plants, store credit, friendships, and cleaner waterways, as long as you sort, store, and move it responsibly. This guide covers everything that happens after the trim, from replanting head cuttings to the one disposal rule you must never break.
First things first: sort and keep your cuttings alive
Cuttings start dying the moment they dry out or overheat, so the first move is triage. Drop everything into a tub of old tank water right after trimming your aquarium plants — never fresh tap water, which may contain chlorine that damages cut tissue. Direct sun will cook a bucket in under an hour.
Now sort the pile into three groups:
- Prime cuttings — firm green tops with several healthy leaf nodes, no algae, no melted or yellow leaves. These are your replanting, trading, and gifting stock.
- Second-tier material — slightly ragged stems, leaves with a little algae, or mid-sections without tips. Fine for the holding tank or compost; skip these for trading.
- True waste — brown mushy stems, decaying leaves, or anything slimy. This goes straight to compost or the trash, sealed in a bag so no hitchhikers survive.
Keep each species separated, because mixed bundles confuse buyers and slow down propagating aquarium plants later. If the pile includes leaves with algae films, rub them clean — buyers reject algae-covered stock, and there is a full walkthrough on cleaning algae off plant leaves that works for cuttings too.
Option 1: Replant the head cuttings for a denser scape
The single most useful thing you can do with trimmings is put them right back into the tank. Most stem plants regrow from the stump left behind, and the cut top — the "head cutting" — roots into a brand-new plant. One trim of a twelve-stem rotala group can become a twenty-stem group in ten minutes of work.
Which cuttings are worth replanting
Pick the firmest, brightest tops with at least four to six healthy leaf nodes. Species that rebound from head cuttings include rotala, ludwigia, bacopa, hygrophila, limnophila, and pearl weed. Rhizome plants like anubias, java fern, and bucephalandra do not produce "head cuttings" — divide those only if they have multiple growing points. Rosette plants like swords and crypts propagate by runners, so their trimmings are rarely replantable. When in doubt, Tropica's plant database lists propagation methods per species.
The replanting technique that actually works
Strip the bottom one to two inches of leaves — buried leaves rot and foul the substrate. Make a clean diagonal cut on the stem with sharp scissors, because a crushed stem end invites decay. Then plant each cutting two to three inches deep with tweezers, spacing them one to two inches apart so water flows between the stems. Shallow planting is the classic failure: cuttings on top of the substrate float away within days.
For a bushier effect, replant in staggered rows rather than straight lines, and mix the fresh cuttings into the existing group instead of quarantining them in a corner. The stumps you trimmed will sprout two side shoots each within a week or two under good light, and your new cuttings will root alongside them — this double action is how high-energy tanks get thick, layered stems. The dedicated guide to trimming stem plants explains the cut-and-regrow rhythm in detail.
Expect transition behavior: replanted cuttings often stall for a few days while roots form, and some shed lower leaves before stabilizing. Do not replant them again — disturbing fresh roots sets the clock back. Keep flow gentle around the new planting, and do not check rooting by tugging.
Option 2: The holding-tank method for storing extras
When your scape is already full and you have more prime cuttings than tank space, a holding tank — hobbyists call it a "plant hotel" — keeps extras alive and growing for weeks while you arrange buyers or plan the next rescape. It costs almost nothing: a spare 10-gallon tank or even a clear plastic storage tub, a cheap sponge filter, and a basic light.
How to build a simple plant hotel
- Use a bare or thin-substrate setup. A half inch of old aquarium soil works — you want easy cleanup, not a new scape.
- Float the delicate stuff. Fast growers like hornwort, anacharis, guppy grass, and most floating plants do perfectly well drifting at the surface.
- Keep light moderate. Too much light grows algae on stressed cuttings; too little melts them. Eight hours at medium intensity is the sweet spot.
- Add nutrients lightly. A half dose of all-in-one fertilizer every few days keeps cuttings growing without fueling an algae bloom.
No heater is necessary if the room stays above 65°F; many species — anacharis, java moss, pearl weed — thrive in unheated water. Check the hotel every few days, remove melted leaves immediately, and do a small weekly water change since cuttings leak organics as they adjust. A well-run plant hotel can hold prime-quality stock for a month or more, turning one big trim into several sellable batches.
Option 3: Trade trimmings for store credit
Most independent local fish stores will take healthy trimmings in exchange for store credit or cash, and this is the fastest path from bucket to benefit. Call ahead rather than walking in with a dripping bag — stores have buying rhythms, and a five-minute conversation saves everyone time.
Package your stock like a professional. Rinse cuttings gently, remove snails and debris, and bag each species separately in clear bags with a little tank water. A dozen stems of one species in good condition is worth more to a shop than a mixed bag of forty. Mention what species it is and whether it was grown submerged — which it will be.
Know what shops actually want. Fast growers that stores constantly restock — rotala, ludwigia, pearl weed, guppy grass, anacharis — sell themselves, while common plants like standard java fern are often already overstocked. Bushier red plant cuttings command better credit because red plants are high-demand and hard to keep in stock. Typical returns are a few dollars of credit per bag — modest money, but it compounds if you trim regularly.
The unspoken benefit is relationship capital. A store that knows you as "the person with clean submerged-grown stems" will tip you off when rare stock arrives and prioritize your trades. Bring your trimmings consistently, keep them pest-free, and you become a supplier instead of a customer with a bag.
Option 4: Sell online and at aquarium club auctions
Beyond the local shop, a healthy trim can fund the hobby itself. Online marketplaces, trading groups, and club auctions are full of buyers hunting for submerged-grown plants, which skip the melting transition of emersed-grown stock and are worth more because of it.
Photograph your stock honestly: a clear top-down shot of the bundle, a close-up of leaf health, and a note about the tank conditions it grew in. Price by checking recent sold listings for the same species — common stems move at a few dollars per dozen-stem bunch. Ship in a sealed bag with damp paper towel, pack snugly to avoid crushing, and mail early in the week so nothing sits in a warehouse over the weekend.
Club auctions deserve special attention. Most aquarium societies run monthly or quarterly auctions, and a fall auction timed with end-of-season thinning is often the biggest of the year. Bring labeled, species-sorted bags and a one-line care note; new members will outbid each other for plants with provenance. Even if you leave with modest cash, the contacts are worth it — the buyer of your rotala today is the source of your rare bucephalandra tomorrow.
A word on snails and hitchhikers: declare them. Some buyers do not care, some care deeply, and undisclosed pests ruin your reputation fast. An alum dip before packing is the standard quarantine step for stock you intend to sell.
Option 5: Gift trimmings to new hobbyists
The most underrated use of a trim pile is generosity. Every club has beginners staring at empty tanks, and a bag of fast-growing stems is the single best gift a veteran can give a newcomer. Fast growers consume excess nutrients, outcompete algae, and give a new tank instant credibility.
Gift with intent: choose easy, forgiving species — pearl weed, guppy grass, anacharis, java moss — rather than your fussiest red plant. Include a brief care card: light level, whether it needs root tabs, how fast it grows, and a link to a good propagation guide so they can repeat the cycle. Trimmed stems make better gifts than whole pots because a beginner can immediately practice planting.
This is also how hobby communities actually survive. The person who receives your trimmings in October is the person bringing their trimmings to the club table next spring. Planted-tank keeping has always run on this informal economy.
Option 6: Compost — the responsible last resort
Some material has no future in a tank: melted stems, algae-slimed leaves, mixed debris from a deep clean. Composting is the correct final destination — aquarium plants compost beautifully because they are soft, nitrogen-rich greens. Bury them in garden soil or a compost bin where they decompose in days.
Two precautions matter. First, dry or hot-compost questionable material — a cold, open pile lets live fragments survive, and a stem that blows into a storm drain is one bad gust from becoming a river plant. Second, never put trimmings in the green bin loose if your area composts at low temperatures; bag and trash them instead if you are unsure.
The rule that matters most: never release live plants
This is the non-negotiable line of the whole hobby. Never dump aquarium plants into lakes, rivers, ponds, storm drains, or any outdoor waterway. It sounds harmless — a few stems in a pond — but aquarium species like hydrilla, water hyacinth, parrot's feather, and Brazilian elodea have already choked entire waterways after escaping from hobbyists and the trade. The USGS Nonindigenous Aquatic Species database tracks hundreds of aquarium-trade plants that established permanent wild populations, many of them first introduced by someone "setting plants free."
The same rule applies to water changes: pour old tank water and strained debris through a fine filter or onto dry land, never into a gutter that drains to a waterway. Killing trimmings before disposal is simple — freeze them overnight, dry them completely in the sun, or seal them in a trash bag. A responsible hobbyist's trim pile ends in a tank, a store, a mailbox, or the trash. It never ends in a river.
Comparing your options at a glance
| Option | Best for | Effort | Payoff |
|---|---|---|---|
| Replant in your tank | Densifying the scape, instant results | Low — minutes during the trim | Free plants, bushier layout |
| Holding tank | Storing surplus for weeks | Medium — setup + weekly care | Stockpile for future use or sale |
| Local fish store trade | Quick, regular turnover | Low — sort, bag, drive | Store credit + relationship capital |
| Online sale / club auction | Maximum value per stem | High — photos, packing, shipping | Real cash, hobby contacts |
| Gifting | Helping beginners, community goodwill | Low — bag and hand over | A stronger local hobby |
| Composting | Dead or unsellable material | Low | Garden soil, zero waste |
| Wild release / drain dumping | Never acceptable | — | Ecological damage, fines |
Frequently Asked Questions
How long can aquarium plant trimmings survive after cutting?
In a bucket of tank water away from direct sun, most hardy cuttings stay viable for 24 to 48 hours with no care at all. Move them to a holding tank with light and gentle flow and they can keep growing for weeks — pearl weed and anacharis can live there indefinitely. Delicate plants such as Rotala macrandra decline faster, so replant or hold those the same day. Never let cuttings sit in a hot car or a sealed bag in the sun.
Can I replant any stem cutting, or only the tops?
The top cutting with the growing tip roots fastest and keeps growing upward, so it is always the best piece. But mid-sections with healthy leaf nodes work too — they sprout side shoots from the nodes once rooted. Only the bottom stump gets left in the substrate, where it branches on its own. Discard sections that are brown, hollow, or stripped of leaves, since they rot instead of rooting. A good rule: if the stem snaps crisply and shows green inside, it is alive.
Why do my local fish stores refuse some trimmings?
Stores pass on plants they cannot sell or already have too much of — plain anubias, common java fern, and standard anacharis are typical rejects. They also decline algae-covered, snail-infested, or melting stock because one bad bag can contaminate their tanks. Bring clean, identified, submerged-grown stems in species-sorted bags and ask what they are short on. Shops often take what they need that week and pass on the rest, so timing matters more than species.
Is it safe to sell or ship trimmings that had algae or snails?
Only with full disclosure and quarantine. Clean the cuttings thoroughly, do an alum or bleach dip if you know how, and tell the buyer exactly what the stock's history is. Many buyers accept pest-snail-risky stock for their own quarantine tanks at a discount, but shipping undisclosed pests burns your reputation permanently. When in doubt, compost the questionable material and sell only your cleanest prime cuttings. One honest reputation is worth more than one extra sale.
Can I just throw plant trimmings in the trash?
Yes, the trash is acceptable — but seal the bag first so no live fragments escape on the way to landfill, and freeze or dry the contents if you are unsure anything is still alive. What you must never do is dump trimmings into ponds, rivers, storm drains, or compost piles that drain toward waterways, since many aquarium species become aggressive invaders. The USGS tracks hundreds of aquarium-trade plants that established wild populations from hobbyist releases.
The Trim-to-Share Aquarium Plant Trimmings Cycle
Here is the fall routine worth adopting: trim the tank, sort the pile the same afternoon, replant the best heads immediately, float the overflow in a holding tank, and set aside a labeled bag for the local shop or the club's next auction. What cannot be used gets composted or bagged for trash — and nothing ever touches a waterway. A trim pile handled this way turns a maintenance chore into the engine of the hobby: denser scapes, funded upgrades, and stocked beginners' tanks. That is the whole point of aquarium plant trimmings — they are not leftovers, they are the currency the hobby runs on.
Tissue-culture plants are the exception — they’re grown in sterile gel and adapt with minimal melting, which is part of what you’re paying for. Plants bought submersed from another hobbyist’s tank also transition with little melt, since they’re already in the right form.
Which Plants Melt Most (and Least)
Heavy melters (expect significant leaf loss)
- Cryptocorynes — infamous for “crypt melt,” sometimes dropping every leaf after any disturbance. They almost always recover from the roots within weeks.
- Stem plants grown emersed — rotala, ludwigia, and hygrophila often shed lower emersed leaves while the growing tips transition.
- Amazon swords — emersed-grown swords typically lose their broad oval aerial leaves and replace them with longer submersed ribbon leaves.
Light melters
- Anubias, java fern, bucephalandra — slow-growing rhizome plants transition gradually; occasional old-leaf melt but rarely dramatic.
- Vallisneria — usually transitions well, though it dislikes the move itself and may sulk for a week.
- Floating plants — minimal melt since their leaves were already at the air-water interface.
The Acclimation Protocol
Step 1: Quarantine or dip first
Before acclimating to your tank’s conditions, make sure you’re not acclimating pests along with the plant. Run new arrivals through our quarantine and dip protocol — it adds days upfront but prevents months of regret.
Step 2: Float to temperature-match (30 minutes)
Float the bag or container in your tank for 20–30 minutes to equalize temperature. Plants are less temperature-sensitive than fish, but a 10°F shock on top of transplant stress is an avoidable insult.
Step 3: Trim before planting
Remove any leaves that are already damaged, yellowing, or heavily algae-covered — they won’t recover and they’ll rot in your tank, feeding algae. For stem plants, trim off the bottom inch and any emersed leaves that look unlikely to adapt; the plant wastes energy maintaining leaves it’s going to shed anyway. Keep the healthy growing tips — that’s where recovery starts.
Step 4: Plant correctly the first time
Follow our planting guide — right depth, crown exposed on rosettes, rhizomes unburied on epiphytes. Every uprooting and replanting restarts the acclimation clock, so get placement right on the first attempt. Decide where each plant goes before it goes in the water.
Step 5: Run a gentle first week
For the first 7 days after planting:
- Moderate light — run your normal photoperiod but consider dropping intensity 20–30% if your light is dimmable. Blast-level light on a melting plant grows algae on the dying leaves, not recovery.
- Stable CO2 — if you inject CO2, keep it consistent. Fluctuating CO2 during acclimation is a melt accelerator. If you’re low-tech, this doesn’t apply — see growing without CO2.
- Half-strength fertilizer — new plants with damaged leaves can’t use full dosing, and the excess feeds algae. Ramp to full strength over 2–3 weeks per our fertilizer schedule.
- No disturbance — don’t move, trim, or “check on” new plants for at least two weeks. Every touch resets root establishment. This is especially critical for crypts.
Step 6: Remove melt, keep the base
As emersed leaves melt, remove the mushy material promptly — decaying leaves release ammonia and grow fungus that can spread to healthy tissue. But never discard the plant while the crown, rhizome, or roots are firm and alive. A crypt that’s lost every leaf but has firm roots is a plant that’s about to recover, not a dead plant. Give it 3–4 weeks before judging.
Telling Normal Melt From Real Problems
Normal transition melt:
- Affects oldest/emersed leaves first, newest growth last
- New submersed leaves emerge even as old ones dissolve
- Roots and crown stay firm and white/green
- Timeline: 1–4 weeks, then obvious new growth
Concerning melt (see our full melting diagnosis guide):
- New growth also melts or emerges deformed
- Rhizome or crown turns mushy and brown — this is rot, not transition
- Entire plant dissolves within days with no new growth after 4+ weeks
- Melting spreads to established plants that weren’t recently moved
Buying Tips to Minimize Melt
- Buy submersed-grown when available — hobbyist-grown cuttings transition with almost no melt.
- Choose tissue culture for sensitive species — crypts and delicate stems establish far more reliably from sterile cups.
- Avoid plants already melting in the store tank — some melt is normal, but a plant that’s mostly mush at purchase has less energy for recovery.
- Transport carefully — keep plants damp and out of direct sun/heat. A plant that dries out or cooks in a hot car melts far worse than one transported properly.
The First-Month Timeline: What to Expect Week by Week
Knowing what’s normal when removes most acclimation anxiety. Here’s the typical timeline for a healthy plant adapting to a new tank:
Week 1: The quiet week
Almost nothing visible happens. The plant is growing roots you can’t see and assessing its new environment. Some species (vallisneria, stem plants) may start shedding their lowest leaves. This is normal. Resist the urge to “help” — no moving, no extra fertilizer, no light changes. The most common beginner mistake is intervening during a week when the correct action is nothing.
Week 2: Melt peaks
This is when emersed leaves give up in earnest. Crypts may drop everything; swords shed their broad aerial leaves; stem plants lose lower foliage. It looks catastrophic and it’s usually fine. Keep removing mushy material, keep conditions stable, and watch the crown and growing tips — if those are firm and green, recovery is already underway.
Week 3: The turn
New submersed-adapted leaves emerge — smaller, thinner, often a slightly different shade of green than the emersed foliage. Stem plant tips start growing visibly; crypts push tiny curled leaves from the crown; swords unfurl narrow ribbon leaves. This is the moment most beginners exhale for the first time.
Week 4+: Established
New growth outpaces melt, and the plant is functionally yours. You can resume full-strength fertilizer, normal trimming, and stop treating it as fragile. Some slow growers (anubias, bucephalandra) take 6–8 weeks to show obvious progress — that’s their normal speed, not a problem.
Acclimating Different Plant Formats
Tissue-culture cups
Sterile, pest-free, and already adapted to high-humidity (not emersed) growth — tissue cultures melt the least of any format. Rinse the agar gel off gently (leftover gel rots and feeds fungus), split the portion into small plantlets, and plant per our planting guide. They establish slowly for the first two weeks, then accelerate. No dip needed, minimal acclimation stress — this is the premium experience you’re paying for.
Potted plants
Remove the pot and strip away the rockwool completely — leftover rockwool traps debris and rots. Tease the root mass apart gently; if it’s a dense mat, splitting it into 2–3 smaller portions actually establishes faster than planting one big clump (more growing points, better water flow around roots). Potted plants are usually emersed-grown, so expect the standard 2–4 week melt cycle.
Bare-root / bunched stems
Typically sold as weighted bunches. Remove any bands, foam, or weights, strip the lower leaves, and plant stems individually or in small groups. Bunched stems from the store are often already transitioning — check for new submersed growth at the tips, which tells you the plant is mid-adaptation and will settle quickly.
Hobbyist cuttings
Already submersed-grown and the fastest to establish — often showing new growth within days. The main acclimation factor is water-parameter difference between the two tanks. Float to temperature-match, plant promptly, and they’ll usually take off with minimal melt. This is why experienced hobbyists prefer trading cuttings over buying potted plants.
Frequently Asked Questions
Should I use a “plant starter” or transplant fertilizer?
Products marketed for transplant shock are mostly B-vitamins and mild hormones. They don’t hurt, but there’s no strong evidence they help aquarium plants specifically. Stable conditions and patience outperform any bottle. Save the money for more plants.
My new plant melted completely — bare crown, no leaves. Is it dead?
Probably not, if the crown or rhizome is firm. Crypts and swords routinely lose 100% of their leaves and regrow from the base within a month. The test is firmness: firm and pale/green means alive; mushy and brown/black means rot. Give firm-but-leafless plants a full 4 weeks before declaring them dead.
Can I speed up acclimation with extra light or CO2?
No — and trying usually backfires. A melting plant can’t use extra light; the excess just grows algae on its dying leaves. Keep light moderate and CO2 stable (not boosted) during acclimation. Growth speed comes from the plant’s own adaptation timeline, which you can’t rush, only avoid delaying.
Should new plants go straight into my main display tank?
After quarantine/dipping, yes — there’s no benefit to a separate “growing-in” tank for most plants. They acclimate to your water fastest in the tank they’ll live in. The exception is very delicate species going into a tank with boisterous fish; give those a few weeks in a calm corner or breeder box first.
The Patience Rule
The single most important acclimation skill is restraint: plant it right, set gentle conditions, remove decay, and then leave it alone for a month. The hobbyists with the best plant growth aren’t doing something clever in week one — they’re simply not interfering in weeks two through four while the plants do what they’ve evolved to do. Melt looks like failure and feels like failure, but in most cases it’s the visible part of a plant successfully becoming yours.