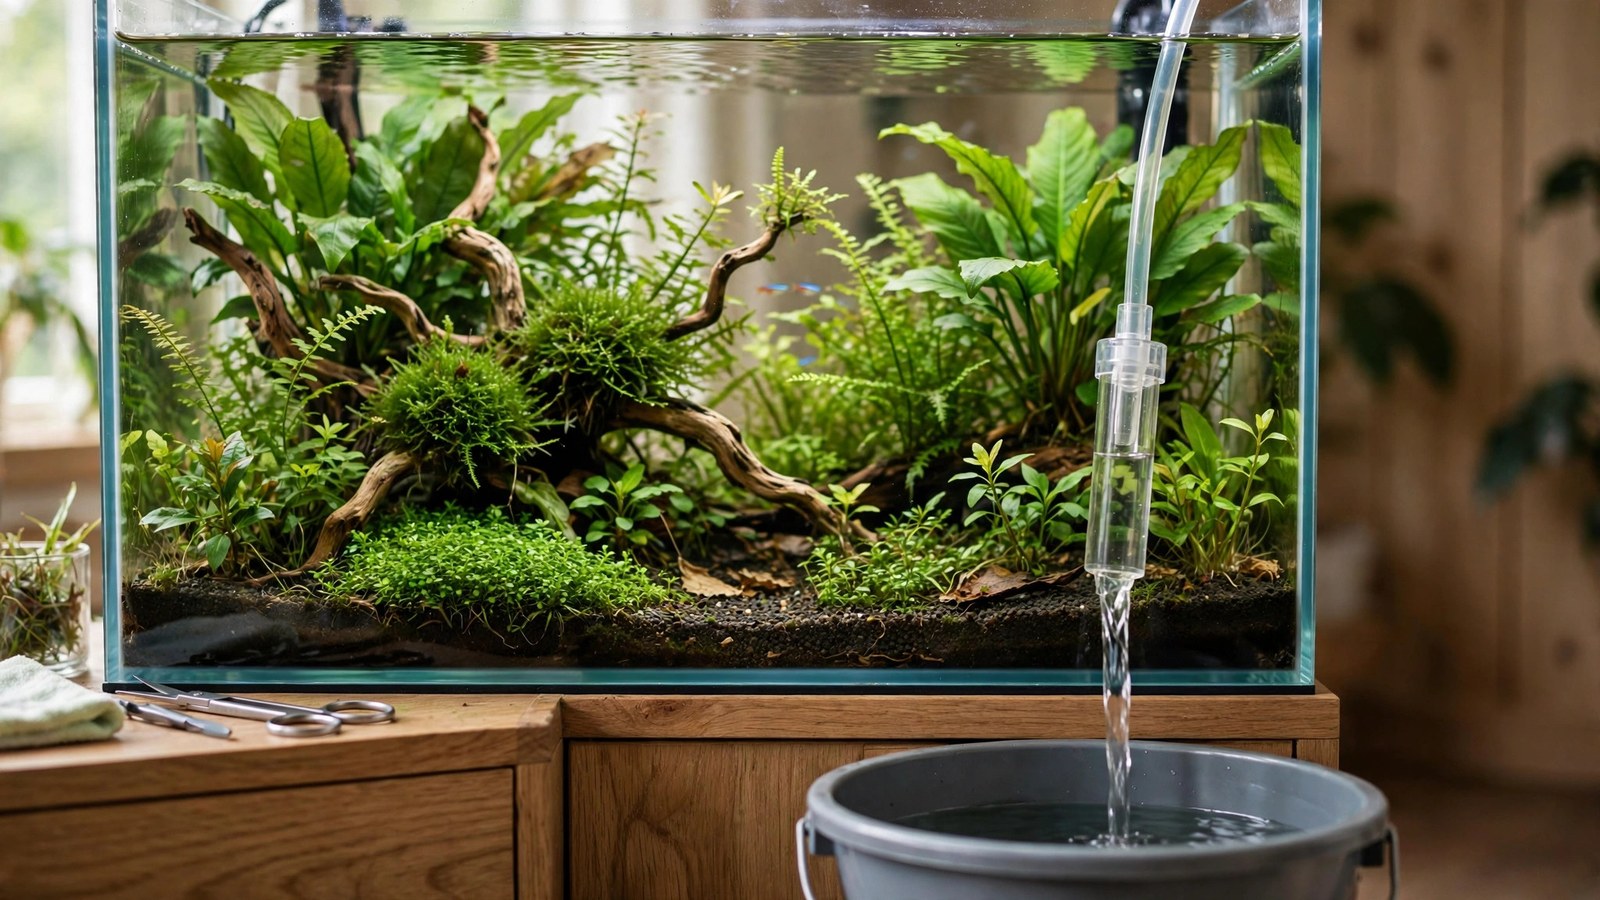
Everyone knows planted tanks need water changes. Far fewer know that how you change the water matters as much as that you change it — for plants specifically. A careless water change uproots carpet runners, blasts CO2 out of the water, swings temperature, and dumps chlorinated water onto sensitive mosses. A skilled one exports waste, resets nutrients, and leaves the garden undisturbed. This is water change technique for planted tanks: the method, the timing, and the plant-specific details.
Why Planted Tanks Need Water Changes (Beyond Fish Waste)
The standard "remove nitrates" explanation undersells it for planted tanks. Water changes also:
- Reset fertilizer levels. Every dosing method (EI, PPS-Pro, all-in-one) assumes periodic export of unconsumed nutrients. Without it, levels ratchet upward unpredictably.
- Remove dissolved organics. Plant exudates, decaying micro-matter, and humic compounds accumulate invisibly, inhibiting growth and feeding algae. No filter removes dissolved organics — only water changes and chemical filtration do.
- Replenish carbonates and trace minerals. Nitrification consumes KH; plants consume calcium, magnesium, and traces. Fresh water restores them.
- Export algae spores and free-floating algae. A water change physically removes a portion of the water-column algae load — meaningful during green-water episodes.
- Reset growth-inhibiting compounds. Dense plantings release allelopathic chemicals; regular dilution keeps them below effective concentrations.
How Much, How Often: By Method
| Setup / method | Amount | Frequency |
|---|---|---|
| EI dosing | 50% | Weekly (non-negotiable — it's the reset) |
| PPS-Pro | 25–30% | Monthly (method designed for this) |
| All-in-one, high-tech | 30–50% | Weekly |
| All-in-one, low-tech | 25–30% | Weekly or biweekly |
| New aquasoil (weeks 1–2) | 50% | 2–3x weekly (ammonia export) |
| Shrimp breeding tank | 10–20% | Weekly (stability over export) |
| Walstad / no-filter | 25% | Monthly or less (ecosystem approach) |
When in doubt: 30–50% weekly is the safe default for almost any planted tank. It's enough to matter, gentle enough to be safe, and compatible with every fertilizing method except deliberate low-change systems.
The Technique: Step by Step
Before: preparation
- Prepare replacement water first. Fill your bucket/bin, dose dechlorinator, and match temperature to within 2°F (1°C) of the tank. For large changes, a thermometer in the bucket isn't fussy — it's correct. Cold-shocking plants causes melt; hot water is worse.
- Unplug the heater if the water level will drop below it — exposed heaters crack or overheat. (Filter can usually keep running until intake is exposed; then switch off.)
- Gather tools: siphon/gravel vac, algae pad, tweezers, bucket. Do your weekly routine tasks before the change so debris gets siphoned out with the old water.
During: draining
- Siphon detritus from open areas — hover the vac over the substrate surface in unplanted zones. In planted zones, hover above the plants to lift settled detritus without uprooting anything. Never jam the vac into a carpet or root zone weekly — you'll destroy runners and disturb root tabs. Deep substrate cleaning is a monthly-or-less task, done in sections.
- Use the outflow to your advantage: direct the siphon at algae patches to vacuum them up, and at dense plant bases where detritus collects.
- Don't drain below 50% unless specifically resetting — exposing large plant masses to air for extended periods stresses them (brief exposure during the change is fine; emersed-tolerant leaves handle minutes, not hours).
- Prune before draining if doing major trims — cuttings and debris get removed with the old water instead of settling back in.
After: refilling
- Refill gently. Pour onto a plate, your hand, a plastic bag laid on the substrate, or through a colander — anything that diffuses the flow. A direct bucket-pour excavates substrate craters, uproots carpets, and blasts floating plants everywhere. This single habit separates careful keepers from crater-makers.
- Refill slowly for shrimp and sensitive fish — drip-acclimate style over 20–30 minutes for large changes in delicate tanks.
- Dose dechlorinator for the full tank volume if adding water directly to the tank (Python-style changers), or for the replacement volume if pre-mixing in buckets. When in doubt, dose for the whole tank — dechlorinator overdose margins are wide.
- Dose fertilizer after refilling — the change exported water-column nutrients; replenish per your schedule. Post-change dosing is the week's anchor dose.
- Restart equipment, verify everything: filter primed and flowing, heater submerged and on, CO2 running (it'll take an hour to rebuild levels — normal), thermometer reading correctly.
Timing: When to Change Water
- Consistency beats timing. Same day weekly matters more than morning vs. evening. Pick a day and protect it.
- CO2 tanks: do the change before the photoperiod starts or well after it ends — a big change mid-photoperiod strips dissolved CO2 and the fluctuation invites algae. Morning changes (CO2 off, lights about to start) are ideal: fresh water, then CO2 builds to target as lights come on.
- After major trims or rescaping: always follow with a water change — you've released organics and disturbed the substrate. Trim → water change is a paired ritual.
- After treatments: post-peroxide spot treatment or any in-tank medication, a water change clears residues.
- During algae episodes: increase frequency (twice weekly) rather than volume — more frequent export beats occasional massive changes for algae control.
- New tanks: follow the first-90-days schedule (frequent large changes early, settling to normal).
Water Source Matters
- Tap water: fine for most planted tanks if dechlorinated and reasonably consistent. Know your tap's baseline: test pH, KH, GH, nitrate, and phosphate once — seasonal municipal changes (spring runoff, treatment shifts) can surprise you. If your tap has high nitrates (>20 ppm), factor it into fertilizing (reduce KNO₃ in EI, for example).
- RO/DI water: the blank slate — must be remineralized before use (pure RO has zero KH/GH and crashes parameters). Best for sensitive plants, shrimp breeding, and precise control.
- Well water: test thoroughly — wells vary wildly in iron, CO2, hardness, and occasionally contaminants. High iron in well water can actually benefit plants but stain everything.
Whatever the source: consistency is king. Plants adapt to a wide range of water parameters but hate changing parameters. A stable "imperfect" source beats a fluctuating "ideal" one.
Common Water Change Mistakes (Plant Edition)
- The crater pour. Dumping refill water directly onto the substrate. Diffuse the flow — always.
- Cold water shock. "Close enough" temperature matching isn't — a 5°F+ swing melts sensitive plants (crypts especially). Match within 2°F.
- Forgetting dechlorinator. Chlorine kills biofilter bacteria and damages plant tissue (mosses and liverworts are most sensitive). Dose every time, without exception. Set the bottle next to the bucket as a physical reminder.
- Deep-vacuuming planted zones weekly. Destroys root systems, carpet runners, and tab placement. Surface-hover only; deep clean in sections, monthly at most.
- Changing water mid-photoperiod in CO2 tanks. Strips dissolved CO2, causing the fluctuation algae loves. Time changes around the CO2 schedule.
- Skipping the post-change fertilizer dose. You've exported nutrients; the plants need them replaced. The number of "mystery deficiencies" caused by diligent water changes without post-change dosing is enormous.
- Massive infrequent changes instead of regular moderate ones. A monthly 80% change shocks the system; weekly 40% maintains it. Stability comes from frequency, not volume.
Frequently Asked Questions
Do I really need weekly water changes in a heavily planted tank? Don't plants purify the water?
Plants consume nitrogen and phosphorus impressively, but they don't remove dissolved organics, replenish carbonates, or export the full spectrum of accumulated compounds. Heavily planted tanks need smaller changes than fish-only tanks, not zero changes. The "plants purify everything" idea is how old tank syndrome starts — 18 months of skipped changes, then systemic decline.
Can water changes cause algae?
Poorly executed ones, yes: large infrequent changes swing parameters (CO2, temperature, nutrients), and fluctuation triggers algae. But regular, consistent changes prevent algae. If water changes seem to cause blooms, the problem is inconsistency (volume, timing, or source varying), not the changes themselves. Stabilize the routine and the blooms stop.
Should I vacuum the substrate in a planted tank?
Surface-vacuum open areas weekly; leave planted zones essentially alone except for hovering above them. Deep substrate cleaning happens in sections, a few times a year at most. Plant roots are the substrate filtration in a planted tank — aggressive vacuuming destroys the very biology you're trying to maintain. Think "tidy the visible areas, trust the roots elsewhere."
How do I do water changes on a tank with a carpet?
Hover the siphon 1–2 inches above the carpet — the flow lifts detritus without uprooting runners. Refill with extreme gentleness (plate method mandatory — a direct pour excavates carpet craters that take months to regrow). New carpets (under 2 months) are most vulnerable; be extra gentle until runners anchor firmly.
Is it okay to change water less in winter?
Slightly — slower winter growth means slower waste accumulation, so stretching to 10 days instead of 7 is harmless. But don't slide into monthly-or-never; the habit matters more than the season. See our seasonal care guide for the full winter adjustment picture.
The Unsexy Secret of Great Tanks
Ask keepers with stunning planted tanks for their secret and the honest ones say the same thing: regular water changes, done carefully, without fail. Not exotic fertilizers, not magic additives — just the disciplined export of waste and reset of chemistry, week after week. Master the technique above, protect the schedule, and the water change becomes the foundation everything else builds on.
Tissue-culture plants are the exception — they’re grown in sterile gel and adapt with minimal melting, which is part of what you’re paying for. Plants bought submersed from another hobbyist’s tank also transition with little melt, since they’re already in the right form.
Which Plants Melt Most (and Least)
Heavy melters (expect significant leaf loss)
- Cryptocorynes — infamous for “crypt melt,” sometimes dropping every leaf after any disturbance. They almost always recover from the roots within weeks.
- Stem plants grown emersed — rotala, ludwigia, and hygrophila often shed lower emersed leaves while the growing tips transition.
- Amazon swords — emersed-grown swords typically lose their broad oval aerial leaves and replace them with longer submersed ribbon leaves.
Light melters
- Anubias, java fern, bucephalandra — slow-growing rhizome plants transition gradually; occasional old-leaf melt but rarely dramatic.
- Vallisneria — usually transitions well, though it dislikes the move itself and may sulk for a week.
- Floating plants — minimal melt since their leaves were already at the air-water interface.
The Acclimation Protocol
Step 1: Quarantine or dip first
Before acclimating to your tank’s conditions, make sure you’re not acclimating pests along with the plant. Run new arrivals through our quarantine and dip protocol — it adds days upfront but prevents months of regret.
Step 2: Float to temperature-match (30 minutes)
Float the bag or container in your tank for 20–30 minutes to equalize temperature. Plants are less temperature-sensitive than fish, but a 10°F shock on top of transplant stress is an avoidable insult.
Step 3: Trim before planting
Remove any leaves that are already damaged, yellowing, or heavily algae-covered — they won’t recover and they’ll rot in your tank, feeding algae. For stem plants, trim off the bottom inch and any emersed leaves that look unlikely to adapt; the plant wastes energy maintaining leaves it’s going to shed anyway. Keep the healthy growing tips — that’s where recovery starts.
Step 4: Plant correctly the first time
Follow our planting guide — right depth, crown exposed on rosettes, rhizomes unburied on epiphytes. Every uprooting and replanting restarts the acclimation clock, so get placement right on the first attempt. Decide where each plant goes before it goes in the water.
Step 5: Run a gentle first week
For the first 7 days after planting:
- Moderate light — run your normal photoperiod but consider dropping intensity 20–30% if your light is dimmable. Blast-level light on a melting plant grows algae on the dying leaves, not recovery.
- Stable CO2 — if you inject CO2, keep it consistent. Fluctuating CO2 during acclimation is a melt accelerator. If you’re low-tech, this doesn’t apply — see growing without CO2.
- Half-strength fertilizer — new plants with damaged leaves can’t use full dosing, and the excess feeds algae. Ramp to full strength over 2–3 weeks per our fertilizer schedule.
- No disturbance — don’t move, trim, or “check on” new plants for at least two weeks. Every touch resets root establishment. This is especially critical for crypts.
Step 6: Remove melt, keep the base
As emersed leaves melt, remove the mushy material promptly — decaying leaves release ammonia and grow fungus that can spread to healthy tissue. But never discard the plant while the crown, rhizome, or roots are firm and alive. A crypt that’s lost every leaf but has firm roots is a plant that’s about to recover, not a dead plant. Give it 3–4 weeks before judging.
Telling Normal Melt From Real Problems
Normal transition melt:
- Affects oldest/emersed leaves first, newest growth last
- New submersed leaves emerge even as old ones dissolve
- Roots and crown stay firm and white/green
- Timeline: 1–4 weeks, then obvious new growth
Concerning melt (see our full melting diagnosis guide):
- New growth also melts or emerges deformed
- Rhizome or crown turns mushy and brown — this is rot, not transition
- Entire plant dissolves within days with no new growth after 4+ weeks
- Melting spreads to established plants that weren’t recently moved
Buying Tips to Minimize Melt
- Buy submersed-grown when available — hobbyist-grown cuttings transition with almost no melt.
- Choose tissue culture for sensitive species — crypts and delicate stems establish far more reliably from sterile cups.
- Avoid plants already melting in the store tank — some melt is normal, but a plant that’s mostly mush at purchase has less energy for recovery.
- Transport carefully — keep plants damp and out of direct sun/heat. A plant that dries out or cooks in a hot car melts far worse than one transported properly.
The First-Month Timeline: What to Expect Week by Week
Knowing what’s normal when removes most acclimation anxiety. Here’s the typical timeline for a healthy plant adapting to a new tank:
Week 1: The quiet week
Almost nothing visible happens. The plant is growing roots you can’t see and assessing its new environment. Some species (vallisneria, stem plants) may start shedding their lowest leaves. This is normal. Resist the urge to “help” — no moving, no extra fertilizer, no light changes. The most common beginner mistake is intervening during a week when the correct action is nothing.
Week 2: Melt peaks
This is when emersed leaves give up in earnest. Crypts may drop everything; swords shed their broad aerial leaves; stem plants lose lower foliage. It looks catastrophic and it’s usually fine. Keep removing mushy material, keep conditions stable, and watch the crown and growing tips — if those are firm and green, recovery is already underway.
Week 3: The turn
New submersed-adapted leaves emerge — smaller, thinner, often a slightly different shade of green than the emersed foliage. Stem plant tips start growing visibly; crypts push tiny curled leaves from the crown; swords unfurl narrow ribbon leaves. This is the moment most beginners exhale for the first time.
Week 4+: Established
New growth outpaces melt, and the plant is functionally yours. You can resume full-strength fertilizer, normal trimming, and stop treating it as fragile. Some slow growers (anubias, bucephalandra) take 6–8 weeks to show obvious progress — that’s their normal speed, not a problem.
Acclimating Different Plant Formats
Tissue-culture cups
Sterile, pest-free, and already adapted to high-humidity (not emersed) growth — tissue cultures melt the least of any format. Rinse the agar gel off gently (leftover gel rots and feeds fungus), split the portion into small plantlets, and plant per our planting guide. They establish slowly for the first two weeks, then accelerate. No dip needed, minimal acclimation stress — this is the premium experience you’re paying for.
Potted plants
Remove the pot and strip away the rockwool completely — leftover rockwool traps debris and rots. Tease the root mass apart gently; if it’s a dense mat, splitting it into 2–3 smaller portions actually establishes faster than planting one big clump (more growing points, better water flow around roots). Potted plants are usually emersed-grown, so expect the standard 2–4 week melt cycle.
Bare-root / bunched stems
Typically sold as weighted bunches. Remove any bands, foam, or weights, strip the lower leaves, and plant stems individually or in small groups. Bunched stems from the store are often already transitioning — check for new submersed growth at the tips, which tells you the plant is mid-adaptation and will settle quickly.
Hobbyist cuttings
Already submersed-grown and the fastest to establish — often showing new growth within days. The main acclimation factor is water-parameter difference between the two tanks. Float to temperature-match, plant promptly, and they’ll usually take off with minimal melt. This is why experienced hobbyists prefer trading cuttings over buying potted plants.
Frequently Asked Questions
Should I use a “plant starter” or transplant fertilizer?
Products marketed for transplant shock are mostly B-vitamins and mild hormones. They don’t hurt, but there’s no strong evidence they help aquarium plants specifically. Stable conditions and patience outperform any bottle. Save the money for more plants.
My new plant melted completely — bare crown, no leaves. Is it dead?
Probably not, if the crown or rhizome is firm. Crypts and swords routinely lose 100% of their leaves and regrow from the base within a month. The test is firmness: firm and pale/green means alive; mushy and brown/black means rot. Give firm-but-leafless plants a full 4 weeks before declaring them dead.
Can I speed up acclimation with extra light or CO2?
No — and trying usually backfires. A melting plant can’t use extra light; the excess just grows algae on its dying leaves. Keep light moderate and CO2 stable (not boosted) during acclimation. Growth speed comes from the plant’s own adaptation timeline, which you can’t rush, only avoid delaying.
Should new plants go straight into my main display tank?
After quarantine/dipping, yes — there’s no benefit to a separate “growing-in” tank for most plants. They acclimate to your water fastest in the tank they’ll live in. The exception is very delicate species going into a tank with boisterous fish; give those a few weeks in a calm corner or breeder box first.
The Patience Rule
The single most important acclimation skill is restraint: plant it right, set gentle conditions, remove decay, and then leave it alone for a month. The hobbyists with the best plant growth aren’t doing something clever in week one — they’re simply not interfering in weeks two through four while the plants do what they’ve evolved to do. Melt looks like failure and feels like failure, but in most cases it’s the visible part of a plant successfully becoming yours.