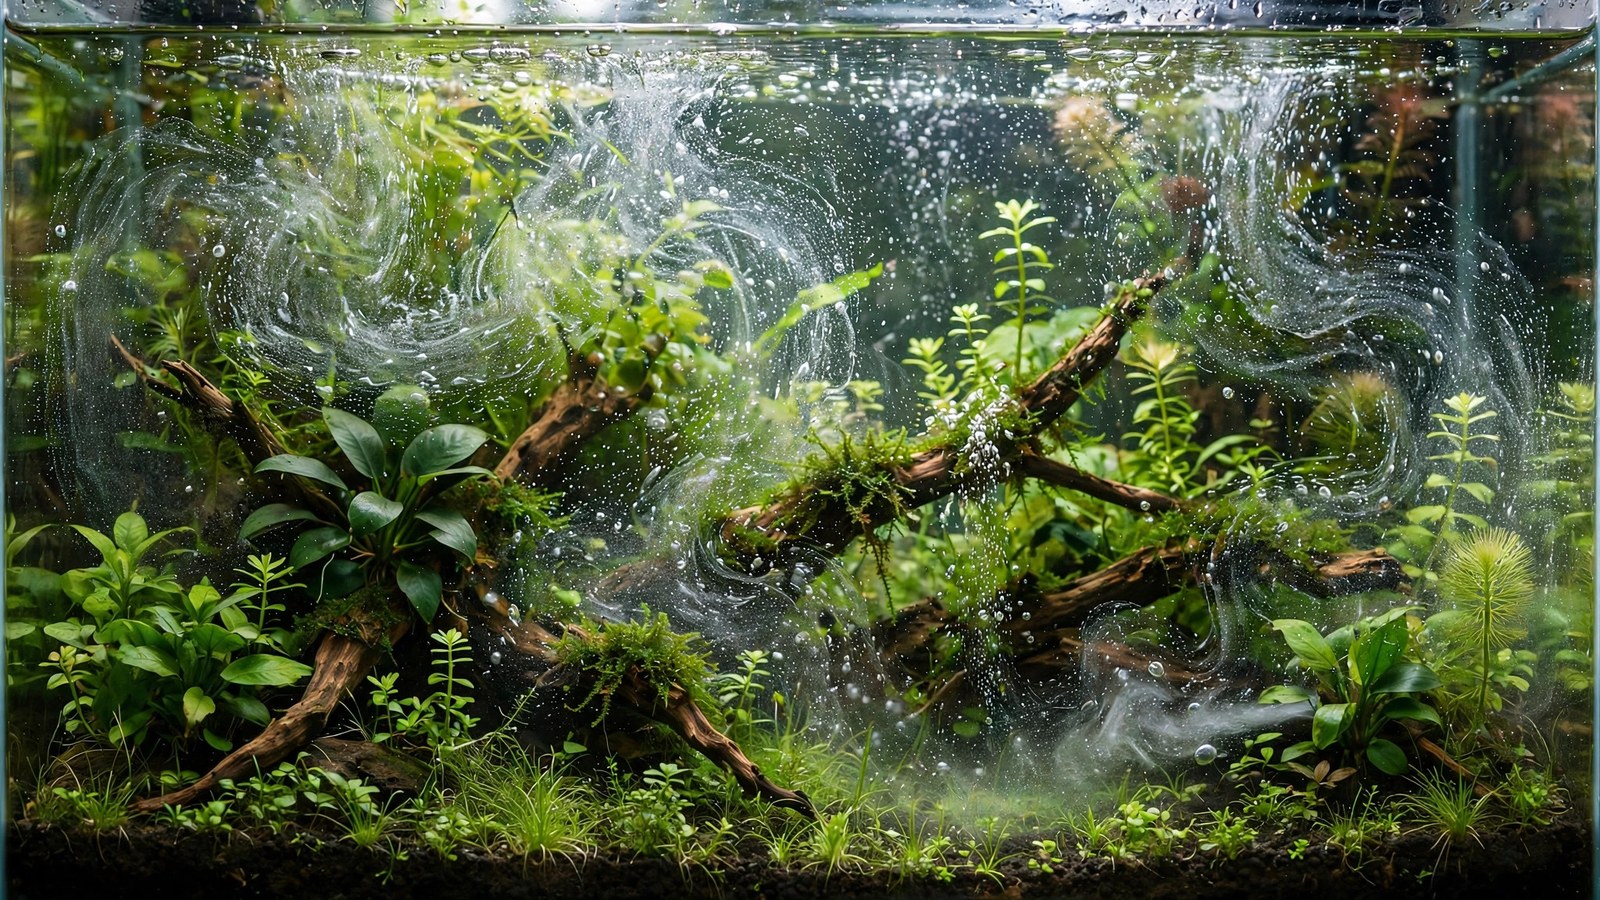
If you've ever walked past a planted tank that looked like it was filled with fizzy soda — a shimmering cloud of micro-bubbles rising through the water, leaves beading with pearls of oxygen — you've seen co2 mist aquarium technique in action. The CO2 mist method is a way of delivering carbon dioxide that skips the usual goal of dissolving every last bubble. Instead, it floods the tank with an ultra-fine mist of micro-bubbles and uses current to sweep them across foliage, giving leaves a double supply: dissolved CO2 in the water and gaseous CO2 in contact with the leaf surface.
Misting is not a piece of hardware you buy — it's a placement and flow technique applied with gear you already own. That distinction matters: misting changes where your diffuser sits, how you shape circulation, and how you judge CO2 levels. Get it right and you'll see faster growth, heavier pearling, and less algae in tanks that struggled despite seemingly adequate CO2.
What Is the CO2 Mist Aquarium Method?
In a conventional setup, the entire point of a diffuser is to dissolve gas as efficiently as possible. Reactors and atomizers aim for near-total dissolution: gas goes in, bubbles shrink to nothing, and the tank water carries only dissolved CO2 to the plants.
The mist method takes the opposite starting position. A fine ceramic diffuser sits inside the tank and produces a steady stream of micro-bubbles — bubbles small enough (well under 0.5 mm) that they rise very slowly and stay suspended in the water column. A powerhead or the filter outflow then grabs that mist and hurls it across the tank, so the micro-bubbles wash directly over leaves. The technique is famous from early aquascaping forum threads where hobbyists first documented the growth response. See our CO2 diffuser setup guide for the diffuser basics it builds on.
The key insight is simple physics: CO2 diffuses roughly 10,000 times more slowly through water than through air. A leaf in fully dissolved CO2 still faces a sluggish boundary layer of water clinging to its surface, and CO2 must creep through it. When a gaseous micro-bubble touches the leaf directly, cells can take up CO2 straight from the gas phase — orders of magnitude faster. That direct contact is the "secret sauce" of misting: it bypasses the diffusion bottleneck entirely.
How Misting Actually Works
To use the mist method well, you need to understand what each part of the system is doing:
- Micro-bubble generation. A fine-pore ceramic diffuser makes bubbles small enough to hover rather than race upward. Finer is better — coarse bubbles escape at the surface, doing nothing. Keep the disc clean; clogged pores make larger, less useful bubbles.
- Current as the delivery truck. Flow grabs the rising mist and stretches it horizontally. Without current, the mist goes straight up and wastes itself at the surface; with strong directed current, it blankets the aquascape first.
- Dissolution still happens. Misting doesn't abandon dissolved CO2. Tiny bubbles have enormous surface area for their volume, so they dissolve readily in transit — the tank gets both dissolved CO2 and direct bubble-to-leaf contact.
- Pearling as feedback. When plants photosynthesize flat-out, they release oxygen faster than water can absorb, forming classic pearl streams. Heavy, tank-wide pearling is the mist practitioner's best sign the technique is working.
This is why technique, not hardware, is the heart of misting. Two aquarists can own identical diffusers and get wildly different results depending on where the disc sits and how the current moves. If you're still fuzzy on the hardware options themselves, our reactor vs inline diffuser vs atomizer comparison covers which equipment each approach needs — but remember, misting is about placement and flow, not which box you buy.
The "7-Up Tank" Look: What to Expect (and Manage)
Misting's signature look — the tank that resembles a glass of lemon-lime soda — is the most divisive part of the method. A light, shimmering mist is normal and expected, but there's a line between a fine haze that catches the light and a soupy cloud that obscures your aquascape.
Controlling the visual impact comes down to three things:
- Bubble fineness. The finer the pores of your diffuser, the more transparent the mist. Premium atomizer discs produce a near-invisible fog; cheap coarse discs produce visible popcorn. If the look bothers you, upgrading diffuser quality matters more than lowering the bubble rate.
- Flow distribution. When current spreads the mist evenly, no single area looks blizzard-like. When it clumps in one corner, that corner looks fizzy while the rest gets nothing. Shape your circulation so the mist fans out, not piles up.
- Photography timing. Many contest aquascapers mist aggressively for growth, then switch to full-dissolution equipment (or temporarily lower the rate) for photos. There's no rule that says the mist must be at full blast 24/7 — it's a tool you can modulate.
Surface scum is the other aesthetic complaint when misting starts: a fine protein film can appear at the surface. It usually signals overfeeding or too little surface agitation rather than the mist itself — but visible bubbles make it more noticeable. Gentle surface skimming clears it without destroying CO2. For the full balance, see how surface agitation interacts with CO2 levels.
Setting Up the Mist: Diffuser Placement and Flow
Placement is the single most important variable in the mist method:
1. Put the diffuser low, under the main current source
Mount the ceramic diffuser low in the tank, directly beneath the filter outflow (lily pipe, spray bar outlet, or powerhead). The current should catch bubbles within an inch or two and fling them outward — before they rise straight up. This single decision determines 80% of your success: a diffuser in a dead spot produces a vertical column of wasted bubbles, while one under strong flow produces a horizontal mist blanket.
2. Create a circular circulation pattern
Aim for a gentle gyre: outflow pushes water along the back glass, it travels down the far end, returns along the front, and cycles back to the intake. The mist should make a full circuit before surfacing. Test by watching the bubbles — you want them drifting sideways, not just up. If your filter alone can't drive this, a small circulation pump aimed to complement the outflow fills the gap.
3. Mind the dead zones
Dense carpets and the corners behind hardscape are classic low-flow pockets where neither mist nor dissolved CO2 reaches. Trim stems to keep the carpet's leading edge open to current, and angle your outflow so no area sits stagnant. Plants in dead zones will show signs of CO2 deficiency even while the rest of the tank pearls — a dead giveaway that distribution, not dose, is the problem.
4. Sync timing with your lights
Like any CO2 delivery, misting works best when gas starts building about an hour before lights-on and shuts off about an hour before lights-off (the "one hour before" rule). CO2 does nothing for plants in the dark, and running mist all night wastes gas and risks livestock. A solenoid and timer setup automates this so the mist is at full strength exactly when photosynthesis begins.
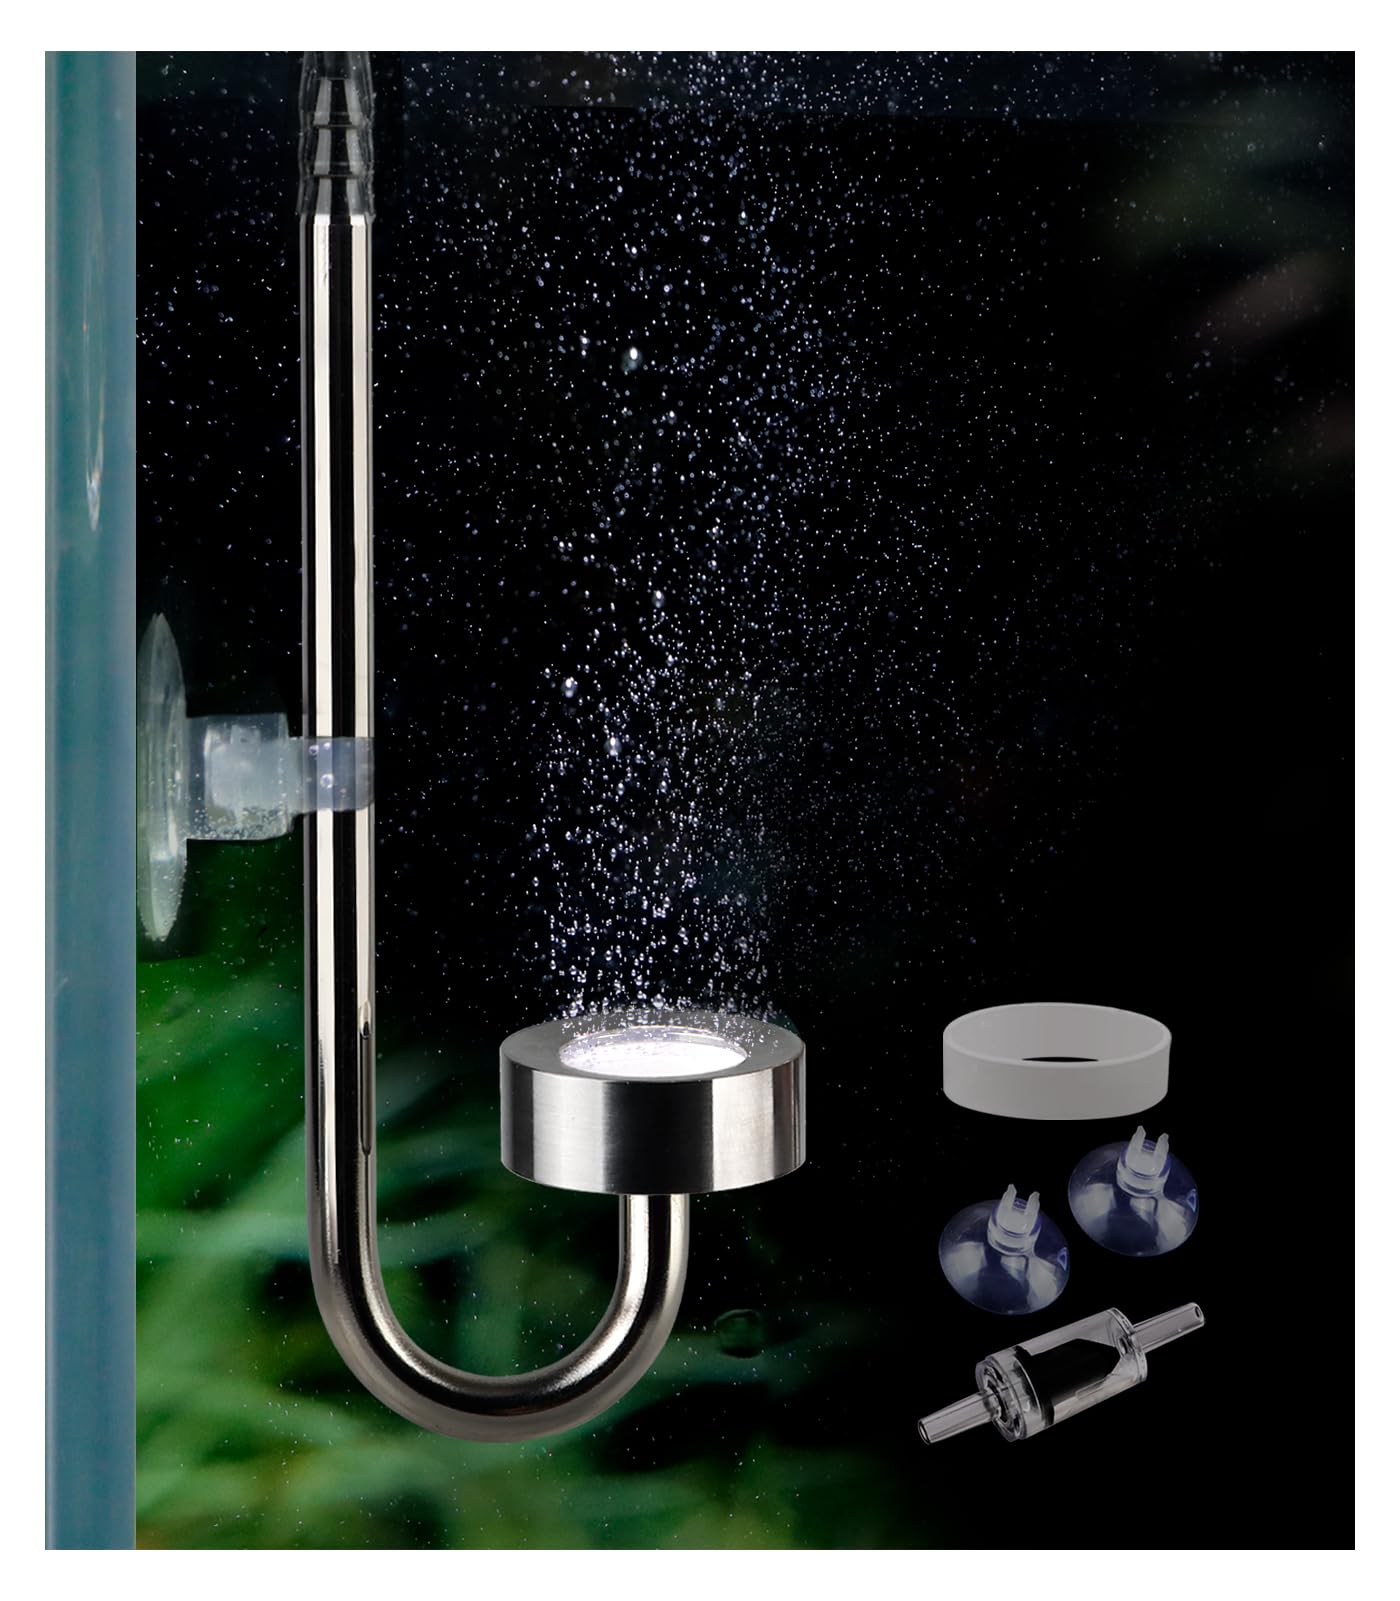
A fine atomizer is what creates the mist in the first place: a stainless steel diffuser.
 ★4.3
Clscea Stainless Steel CO2 Diffuser Atomizer DC300-20
Check Price on Amazon ★4.3When Mist Beats Full Dissolution
Misting isn't universally better than inline reactors or atomizers — it's better in specific situations:
| Situation | Why misting wins |
|---|---|
| Demand-heavy species (Rotala, Ludwigia 'super red', carpet plants) | Direct bubble-to-leaf contact delivers CO2 faster than diffusion through the boundary layer alone, pushing growth and color hard plants demand. |
| Tanks where a reactor is impractical | No canister filter, rimless nano with a HOB, or a tank where you don't want to cut tubing — misting works with an in-tank diffuser and a powerhead. |
| Stubborn algae despite "enough" CO2 | Often the issue is distribution, not dose. The visible mist shows flow patterns — you can literally see which leaves the CO2 reaches. |
| Maximum pearling for photos | Nothing drives visible pearling like direct CO2 contact; misting is the classic pre-photo trick for aquascapers. |
When full dissolution wins: livestock-heavy community tanks where the bubble cloud stresses fish, tanks where the mist look bothers the owner, and shrimp breeding tanks needing extra-conservative safety margins. There's no shame in switching a tank from mist to a reactor once it's grown in — many aquascapers mist during grow-in and go dissolved-only for maintenance.
Livestock Safety Margins at High Mist
Here's the part that demands respect: misting often runs at slightly higher injection rates than dissolved-only methods, because some bubbles inevitably escape at the surface. That means your safety monitoring has to be better, not worse.
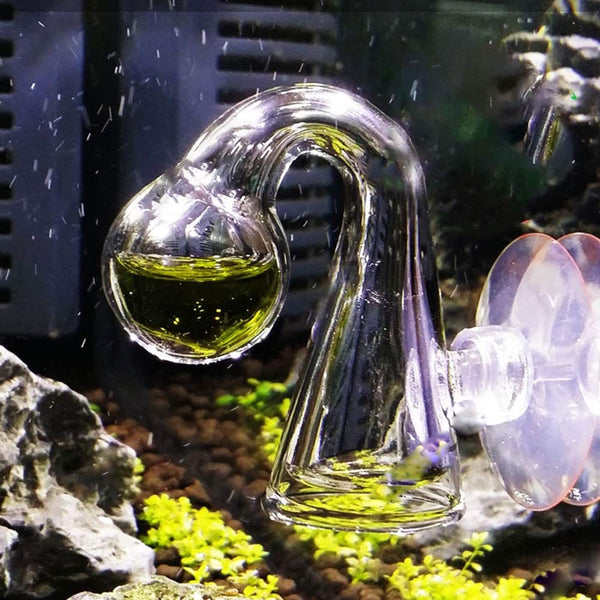
- The drop checker is your governor. Keep it green — never push toward yellow just because "the mist handles it." It measures dissolved CO2, which is what stresses livestock. A drop checker sitting in lime-green with normal fish behavior is the safe zone; yellow or stressed fish means back off the needle valve immediately.
- Watch fish, not just the gauge. Fish gathering at the surface, rapid gill movement, or lethargy are early warnings of CO2/O2 imbalance — well before fatalities. Our CO2 and fish safety guide covers the full warning-sign sequence.
- Mist still dissolves. A common misconception is that visible bubbles "don't count" toward overdose. They do — fine bubbles dissolve efficiently, and a mist-packed tank at a high bubble rate can absolutely drive dissolved CO2 into the danger zone. Treat mist injection with the same caution as any pressurized system.
- Surface agitation stays on. Don't kill all ripple to "save" CO2. A gentle ripple keeps oxygen exchange healthy — exactly what protects livestock when CO2 runs rich.
- Shrimp need the low end. Shrimp tolerate CO2 swings worse than fish — target the low end of the green range and aerate at night.
 ★4.6
FZONE Glass CO2 Drop Checker Kit
Check Price on Amazon ★4.6Pearling: How Mist Drives Those Oxygen Streams
Pearling — continuous streams of tiny oxygen bubbles rising from leaf surfaces — is the mist method's favorite bragging right, and it's worth understanding what you're actually seeing. When photosynthesis runs at full tilt, plants produce oxygen faster than the surrounding water can absorb it; the excess forms bubbles on the leaf that detach and stream upward.
Heavy pearling means photosynthesis is maxed out, but it doesn't by itself prove CO2 is dialed in — it proves the rate is high right now. True mist-driven pearling shows across the whole tank, not just under the diffuser, because the technique distributes CO2 evenly. If only one corner pearls, your flow pattern needs work, not your bubble rate. See what plant pearling really means for the full picture.
Troubleshooting the Mist Method
| Problem | Likely cause | Fix |
|---|---|---|
| Coarse, popcorn-like bubbles | Clogged or low-quality diffuser disc | Soak the disc in diluted bleach and rinse thoroughly; upgrade to a finer atomizer disc if it returns. |
| Mist rises straight up in one column | Diffuser not under current | Move the disc directly beneath the filter outflow so flow catches bubbles immediately. |
| Plants pearl only near the diffuser | Poor distribution / dead zones | Reshape circulation into a full-tank gyre, add a circulation pump, and clear blocked flow paths through the scape. |
| Drop checker stays blue despite heavy mist | Bubbles escaping at surface before dissolving | Reduce bubble size, strengthen current to lengthen bubble path, or slightly increase rate — but recheck livestock behavior first. |
| Fish gasping while plants pearl | Dissolved CO2 too high for livestock | Reduce the needle valve, increase surface agitation, and re-target a conservative green on the drop checker. |
| Surface scum appears | Organic film made visible by mist | Skim the surface, feed a little less, and add gentle surface ripple — not a mist problem per se. |
Frequently Asked Questions
Is CO2 misting better than a CO2 reactor?
Neither is strictly better — they solve different problems. A reactor dissolves nearly all CO2 before water returns to the tank, which suits livestock-heavy tanks and aquarists who dislike visible bubbles. Misting adds direct bubble-to-leaf contact on top of dissolved CO2, which often pushes faster growth and heavier pearling in plant-heavy setups. Many experienced aquarists use both at different stages: mist during grow-in, reactor during the maintenance phase.
Do the micro-bubbles harm fish?
The bubbles themselves don't harm fish — what matters is dissolved CO2 and oxygen, which your drop checker and your livestock's behavior tell you. That said, misting is often run at higher injection rates, so safety margins matter more. Keep the drop checker green, maintain gentle surface agitation for oxygen exchange, and watch fish behavior when CO2 peaks midday.
How long should the mist run each day?
Start the CO2 about one hour before lights come on so levels are saturated when photosynthesis begins, and shut it off about one hour before lights go off. Running mist around the clock wastes gas and risks nighttime oxygen depletion, since plants consume oxygen (not CO2) in the dark. A solenoid on a timer makes this automatic — essentially mandatory for pressurized systems.
Can I mist CO2 in a shrimp tank?
You can, but conservatively. Shrimp — especially Caridina species — are less forgiving of CO2 and pH swings than most fish. Target the low end of the green drop-checker range, keep strong surface agitation at night, and watch for erratic swimming or deaths after any CO2 increase. Many shrimp keepers prefer dissolved-only delivery for the extra stability margin.
Why does my drop checker stay blue even though the tank is full of mist?
Blue means dissolved CO2 is low even though you can see bubbles — usually they're too coarse and rise before dissolving, or the current isn't carrying them on a long enough path. Fix bubble fineness (clean or upgrade the diffuser) and the flow pattern (diffuser under the outflow, full-tank circulation) before touching the needle valve — more gas rarely fixes a distribution problem.
Does misting work with DIY yeast CO2?
Not really. DIY systems produce low, inconsistent pressure that can't push gas through a fine ceramic disc — you'll get coarse, useless bubbles and an unstable mist. Misting needs a pressurized system with a proper regulator and needle valve holding a steady fine mist all day. DIY users are better off with a simple diffuser and modest expectations.
The Bottom Line
The CO2 mist method costs nothing extra yet changes results noticeably: place a fine diffuser under your filter outflow, shape your current into a full-tank circuit, and let micro-bubbles wash CO2 directly across leaves while they dissolve. Respect the livestock rules — green drop checker, calm fish, real surface agitation — and the "7-Up tank" look becomes the badge of a high-performing planted tank rather than a fizzy gimmick. Start with your existing diffuser in the right spot, watch where the mist travels for a few days, and adjust flow before you ever touch the bubble rate: in misting, distribution beats dosage every time.
Further reading on CO2 delivery: How to Dose a Plant Tank, Part 1: Carbon Dioxide (Reefs Magazine) covers diffuser-based dosing in depth, and CO2 for Dummies (My Tank Life) is a solid rundown of pressurized system components if you're building your first rig.