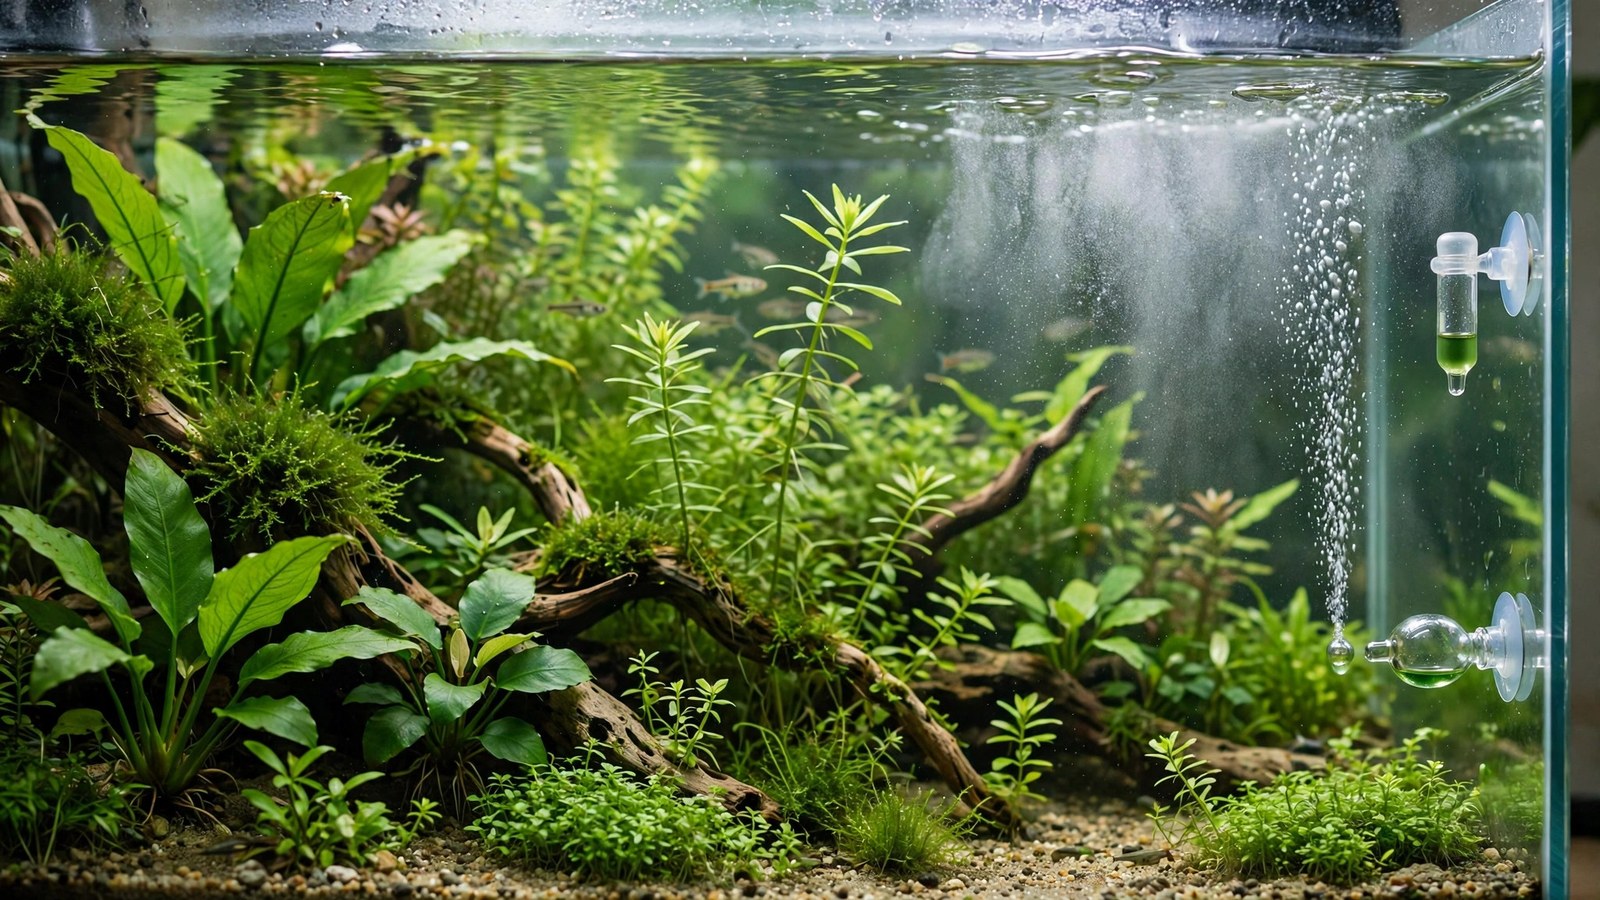
CO2 is plant food — and, at high enough concentrations, a fish killer. Every year, aquarists lose entire tanks of fish to CO2 mistakes that were completely preventable: a solenoid left on overnight, a regulator end-dump, a bubble rate cranked up "just to be sure." This guide is about CO2 and fish safety: understanding the danger, recognizing the warning signs, and building a system where a gas disaster is nearly impossible.
How CO2 Harms Fish
Fish exchange gases at their gills based on concentration gradients: oxygen moves in, CO2 moves out. When dissolved CO2 in the water climbs too high, that gradient collapses — fish can't offload their own metabolic CO2, blood pH drops (acidosis), and they effectively suffocate despite oxygen being present. This is why CO2 poisoning looks like oxygen deprivation but adding an airstone during a CO2 crisis helps — surface agitation drives off the excess CO2, restoring the gradient.
The danger zone generally starts around 40–50+ ppm for most community fish, though sensitivity varies enormously by species. The commonly targeted 25–35 ppm range has a comfortable safety margin for most fish provided oxygen levels are good and pH swings are gradual. Problems come from spikes and accumulation, not from well-managed target levels.
Which Fish Are Most Sensitive
- High sensitivity: many tetras (especially wild-caught), dwarf cichlids (rams, apistos), otocinclus, shrimp (all dwarf shrimp are quite CO2-sensitive), and labyrinth fish in some reports. Treat 30 ppm as a ceiling, not a target, with these.
- Moderate sensitivity: most community fish — rasboras, livebearers, corydoras, angelfish. Standard 25–35 ppm targets are fine with good oxygenation.
- Relatively tolerant: hardy barbs, danios, white clouds. Still not immune — tolerance means a wider margin, not invincibility.
- Shrimp note: neocaridina and caridina shrimp show stress (erratic swimming, gathering at the surface) at CO2 levels many fish tolerate. In shrimp-heavy tanks, target the low end (20–25 ppm) and prioritize surface agitation.
Newly added fish are more vulnerable than established residents — acclimate livestock to CO2-injected tanks gradually, and avoid adding new fish on a day you've just increased the bubble rate.
Warning Signs: Reading Your Fish
Fish tell you about CO2 problems before test kits do. Learn these signs — the 2Hr Aquarist CO2 guide makes the same point: during tuning, watch fish, shrimp, and plant posture rather than worshipping the bubble rate.
- Gasping at the surface — the classic sign. Fish hang at the top, mouths breaking the surface, gills pumping rapidly. In a CO2-injected tank, assume CO2 excess first, oxygen shortage second (they often coincide).
- Rapid gill movement in fish that are otherwise behaving normally — early warning, often appearing an hour before surface gasping.
- Lethargy and loss of appetite — fish sitting on the bottom, ignoring food, especially in the late afternoon when CO2 has accumulated all day.
- Shrimp climbing — shrimp gathering at the waterline or on filter outputs is a CO2/oxygen distress signal.
- Timing pattern: symptoms worst in late afternoon/evening (CO2 accumulated through the photoperiod) and better by morning (overnight degassing) point squarely at CO2, not disease.
The Five Classic CO2 Disasters (and Prevention)
1. The overnight runaway
Cause: solenoid left on (or timer failed) with lights off; CO2 accumulates all night on top of respiration. Morning reveals gasping or dead fish.
Prevention: solenoid on a reliable timer with pre-dark shutoff; adequate overnight surface agitation to degas. See why CO2 must stop at night.
2. The end-dump
Cause: single-stage regulator on a nearly empty cylinder; inlet pressure drops, outlet pressure surges, tank gets a massive CO2 dose.
Prevention: dual-stage regulator; or swap single-stage cylinders at ~500 PSI remaining, never run dry.
3. The "more is better" crank
Cause: aquarist raises the bubble rate chasing faster growth or a greener drop checker, overshooting into the yellow zone.
Prevention: tune to green on the drop checker, change rates by ≤25% at a time, and watch fish for an hour after any increase. Growth gains above ~30 ppm are marginal; risk climbs steeply.
4. The stuck solenoid
Cause: solenoid valve sticks open (debris, wear) and injects continuously regardless of timer.
Prevention: verify shutoff monthly (watch the bubble counter hit zero after off-time); replace aging solenoids proactively.
5. The post-water-change pH crash
Cause: large water change with very different KH alters the pH/CO2 relationship; a pH controller then misjudges and over-injects.
Prevention: keep water-change water consistent in KH; re-verify CO2 with the drop checker after any source-water change.
Emergency Response: CO2 Overdose in Progress
If fish are gasping and you suspect CO2:
- Shut off the CO2 immediately — close the cylinder valve or unplug the solenoid. Don't fiddle with the needle valve; kill the gas at the source.
- Maximize surface agitation NOW — point a powerhead at the surface, drop in an airstone on full blast, raise the filter outflow to break the surface. Degassing is the fastest way to drop dissolved CO2.
- Don't do a panicked massive water change — a moderate (25–30%) change with temperature-matched, degassed water is fine, but a huge change adds pH/temperature shock to stressed fish.
- Observe for an hour. Fish that recover normal behavior within 30–60 minutes of gas-off and agitation will usually be fine. Fish still gasping after an hour may need continued aeration overnight.
- Find the cause before restarting. Was the timer wrong? Solenoid stuck? Rate cranked too high? Fix it, restart at a lower rate, and re-tune gradually.
Building an Inherently Safe System
Safety isn't one device — it's layers:
- Dual-stage regulator — eliminates end-dump, the most violent failure mode.
- Solenoid + timer — guarantees the gas stops before dark, every day, without relying on memory.
- Drop checker — the independent, always-on visual monitor. Glance at it daily; it should never be yellow.
- Adequate surface agitation — your passive safety net. Good ripple means excess CO2 degasses instead of accumulating, day and night.
- Conservative targets with sensitive livestock — 20–25 ppm for shrimp tanks and delicate species; the plants will still thrive.
- Oxygen abundance — well-oxygenated water dramatically increases fish tolerance to CO2. Surface agitation, good circulation, and reasonable stocking all contribute. High O2 + moderate CO2 is safe; low O2 + moderate CO2 can be lethal.
The Oxygen Connection
This deserves emphasis because it resolves the apparent paradox of "CO2 injection is safe" vs "CO2 killed my fish." Fish don't experience CO2 in isolation — they experience the CO2/O2 balance. In a tank with strong surface agitation and high dissolved oxygen, fish tolerate 30+ ppm CO2 comfortably. In a stagnant, oxygen-poor tank, the same CO2 level can be dangerous — and nighttime is when oxygen is lowest (plants respiring, no photosynthesis).
Practical takeaway: never reduce surface agitation to "save" CO2. The small gas savings aren't worth the oxygen crash. Run the ripple, inject slightly more CO2 to compensate, and enjoy fish that are safe around the clock. The full reasoning is in surface agitation vs CO2.
Frequently Asked Questions
What CO2 level is safe for fish?
25–35 ppm is the standard target range and is safe for most community fish with good oxygenation. Sensitive species (many wild-caught tetras, dwarf cichlids, shrimp) do better at 20–25 ppm. Above ~40 ppm, stress signs appear in many species; above 50+ ppm becomes dangerous. Use a drop checker (green = safe zone) rather than guessing from bubble counts.
My fish gasp every evening but are fine in the morning — is it CO2?
Almost certainly. That daily pattern — worst late in the photoperiod, recovered by morning — is the signature of CO2 accumulating faster than it degasses, or oxygen dropping as the day progresses. Reduce the bubble rate slightly, increase surface agitation, and confirm the solenoid shuts off before lights-out.
Can I keep shrimp in a CO2-injected tank?
Yes — thousands of aquarists do — but shrimp are more CO2-sensitive than most fish. Target 20–25 ppm (light green drop checker), ensure strong surface agitation, and introduce CO2 gradually. Caridina species (crystal shrimp) are fussier than neocaridina (cherry shrimp); go conservative with caridina.
Will a pH controller keep my fish safe from CO2?
It adds a layer of daytime protection by capping injection at your pH target, but it can't prevent every scenario — probe drift, KH changes, and stuck solenoids can all defeat it, and it does nothing at night without a timer. See our pH controller guide for its real limits. It's a supplement to safe practices, not a replacement.
Should I turn off CO2 when adding new fish?
It's wise to reduce (not necessarily eliminate) CO2 on fish-introduction day: new arrivals are stressed from transport and more vulnerable. Drop the rate ~30% for 24 hours, ensure strong aeration, and return to normal once they're eating and behaving normally. Never add fish right after increasing the bubble rate.
Is CO2 dangerous to me or my pets in the room?
Normal aquarium CO2 use is not a room-air hazard — even a full 5 lb cylinder released into a bedroom disperses to harmless levels with normal ventilation. The real-world risks are a tipping cylinder (secure it upright) and CO2 accumulating inside a sealed, unventilated stand cabinet. Ventilate the cabinet and fix leaks; the fish are at far more risk than you are.
Respect the Gas, Enjoy the Growth
CO2 injection is one of the safest high-impact upgrades in the hobby when the system is built with layers: dual-stage regulation, timer-controlled shutoff, a drop checker you actually look at, and real surface agitation. Every fish-killing CO2 incident traces back to a missing layer, not to bad luck. Build all the layers, and you'll get the explosive plant growth without ever writing a forum post titled "all my fish died overnight."
Tissue-culture plants are the exception — they’re grown in sterile gel and adapt with minimal melting, which is part of what you’re paying for. Plants bought submersed from another hobbyist’s tank also transition with little melt, since they’re already in the right form.
Which Plants Melt Most (and Least)
Heavy melters (expect significant leaf loss)
- Cryptocorynes — infamous for “crypt melt,” sometimes dropping every leaf after any disturbance. They almost always recover from the roots within weeks.
- Stem plants grown emersed — rotala, ludwigia, and hygrophila often shed lower emersed leaves while the growing tips transition.
- Amazon swords — emersed-grown swords typically lose their broad oval aerial leaves and replace them with longer submersed ribbon leaves.
Light melters
- Anubias, java fern, bucephalandra — slow-growing rhizome plants transition gradually; occasional old-leaf melt but rarely dramatic.
- Vallisneria — usually transitions well, though it dislikes the move itself and may sulk for a week.
- Floating plants — minimal melt since their leaves were already at the air-water interface.
The Acclimation Protocol
Step 1: Quarantine or dip first
Before acclimating to your tank’s conditions, make sure you’re not acclimating pests along with the plant. Run new arrivals through our quarantine and dip protocol — it adds days upfront but prevents months of regret.
Step 2: Float to temperature-match (30 minutes)
Float the bag or container in your tank for 20–30 minutes to equalize temperature. Plants are less temperature-sensitive than fish, but a 10°F shock on top of transplant stress is an avoidable insult.
Step 3: Trim before planting
Remove any leaves that are already damaged, yellowing, or heavily algae-covered — they won’t recover and they’ll rot in your tank, feeding algae. For stem plants, trim off the bottom inch and any emersed leaves that look unlikely to adapt; the plant wastes energy maintaining leaves it’s going to shed anyway. Keep the healthy growing tips — that’s where recovery starts.
Step 4: Plant correctly the first time
Follow our planting guide — right depth, crown exposed on rosettes, rhizomes unburied on epiphytes. Every uprooting and replanting restarts the acclimation clock, so get placement right on the first attempt. Decide where each plant goes before it goes in the water.
Step 5: Run a gentle first week
For the first 7 days after planting:
- Moderate light — run your normal photoperiod but consider dropping intensity 20–30% if your light is dimmable. Blast-level light on a melting plant grows algae on the dying leaves, not recovery.
- Stable CO2 — if you inject CO2, keep it consistent. Fluctuating CO2 during acclimation is a melt accelerator. If you’re low-tech, this doesn’t apply — see growing without CO2.
- Half-strength fertilizer — new plants with damaged leaves can’t use full dosing, and the excess feeds algae. Ramp to full strength over 2–3 weeks per our fertilizer schedule.
- No disturbance — don’t move, trim, or “check on” new plants for at least two weeks. Every touch resets root establishment. This is especially critical for crypts.
Step 6: Remove melt, keep the base
As emersed leaves melt, remove the mushy material promptly — decaying leaves release ammonia and grow fungus that can spread to healthy tissue. But never discard the plant while the crown, rhizome, or roots are firm and alive. A crypt that’s lost every leaf but has firm roots is a plant that’s about to recover, not a dead plant. Give it 3–4 weeks before judging.
Telling Normal Melt From Real Problems
Normal transition melt:
- Affects oldest/emersed leaves first, newest growth last
- New submersed leaves emerge even as old ones dissolve
- Roots and crown stay firm and white/green
- Timeline: 1–4 weeks, then obvious new growth
Concerning melt (see our full melting diagnosis guide):
- New growth also melts or emerges deformed
- Rhizome or crown turns mushy and brown — this is rot, not transition
- Entire plant dissolves within days with no new growth after 4+ weeks
- Melting spreads to established plants that weren’t recently moved
Buying Tips to Minimize Melt
- Buy submersed-grown when available — hobbyist-grown cuttings transition with almost no melt.
- Choose tissue culture for sensitive species — crypts and delicate stems establish far more reliably from sterile cups.
- Avoid plants already melting in the store tank — some melt is normal, but a plant that’s mostly mush at purchase has less energy for recovery.
- Transport carefully — keep plants damp and out of direct sun/heat. A plant that dries out or cooks in a hot car melts far worse than one transported properly.
The First-Month Timeline: What to Expect Week by Week
Knowing what’s normal when removes most acclimation anxiety. Here’s the typical timeline for a healthy plant adapting to a new tank:
Week 1: The quiet week
Almost nothing visible happens. The plant is growing roots you can’t see and assessing its new environment. Some species (vallisneria, stem plants) may start shedding their lowest leaves. This is normal. Resist the urge to “help” — no moving, no extra fertilizer, no light changes. The most common beginner mistake is intervening during a week when the correct action is nothing.
Week 2: Melt peaks
This is when emersed leaves give up in earnest. Crypts may drop everything; swords shed their broad aerial leaves; stem plants lose lower foliage. It looks catastrophic and it’s usually fine. Keep removing mushy material, keep conditions stable, and watch the crown and growing tips — if those are firm and green, recovery is already underway.
Week 3: The turn
New submersed-adapted leaves emerge — smaller, thinner, often a slightly different shade of green than the emersed foliage. Stem plant tips start growing visibly; crypts push tiny curled leaves from the crown; swords unfurl narrow ribbon leaves. This is the moment most beginners exhale for the first time.
Week 4+: Established
New growth outpaces melt, and the plant is functionally yours. You can resume full-strength fertilizer, normal trimming, and stop treating it as fragile. Some slow growers (anubias, bucephalandra) take 6–8 weeks to show obvious progress — that’s their normal speed, not a problem.
Acclimating Different Plant Formats
Tissue-culture cups
Sterile, pest-free, and already adapted to high-humidity (not emersed) growth — tissue cultures melt the least of any format. Rinse the agar gel off gently (leftover gel rots and feeds fungus), split the portion into small plantlets, and plant per our planting guide. They establish slowly for the first two weeks, then accelerate. No dip needed, minimal acclimation stress — this is the premium experience you’re paying for.
Potted plants
Remove the pot and strip away the rockwool completely — leftover rockwool traps debris and rots. Tease the root mass apart gently; if it’s a dense mat, splitting it into 2–3 smaller portions actually establishes faster than planting one big clump (more growing points, better water flow around roots). Potted plants are usually emersed-grown, so expect the standard 2–4 week melt cycle.
Bare-root / bunched stems
Typically sold as weighted bunches. Remove any bands, foam, or weights, strip the lower leaves, and plant stems individually or in small groups. Bunched stems from the store are often already transitioning — check for new submersed growth at the tips, which tells you the plant is mid-adaptation and will settle quickly.
Hobbyist cuttings
Already submersed-grown and the fastest to establish — often showing new growth within days. The main acclimation factor is water-parameter difference between the two tanks. Float to temperature-match, plant promptly, and they’ll usually take off with minimal melt. This is why experienced hobbyists prefer trading cuttings over buying potted plants.
Frequently Asked Questions
Should I use a “plant starter” or transplant fertilizer?
Products marketed for transplant shock are mostly B-vitamins and mild hormones. They don’t hurt, but there’s no strong evidence they help aquarium plants specifically. Stable conditions and patience outperform any bottle. Save the money for more plants.
My new plant melted completely — bare crown, no leaves. Is it dead?
Probably not, if the crown or rhizome is firm. Crypts and swords routinely lose 100% of their leaves and regrow from the base within a month. The test is firmness: firm and pale/green means alive; mushy and brown/black means rot. Give firm-but-leafless plants a full 4 weeks before declaring them dead.
Can I speed up acclimation with extra light or CO2?
No — and trying usually backfires. A melting plant can’t use extra light; the excess just grows algae on its dying leaves. Keep light moderate and CO2 stable (not boosted) during acclimation. Growth speed comes from the plant’s own adaptation timeline, which you can’t rush, only avoid delaying.
Should new plants go straight into my main display tank?
After quarantine/dipping, yes — there’s no benefit to a separate “growing-in” tank for most plants. They acclimate to your water fastest in the tank they’ll live in. The exception is very delicate species going into a tank with boisterous fish; give those a few weeks in a calm corner or breeder box first.
The Patience Rule
The single most important acclimation skill is restraint: plant it right, set gentle conditions, remove decay, and then leave it alone for a month. The hobbyists with the best plant growth aren’t doing something clever in week one — they’re simply not interfering in weeks two through four while the plants do what they’ve evolved to do. Melt looks like failure and feels like failure, but in most cases it’s the visible part of a plant successfully becoming yours.