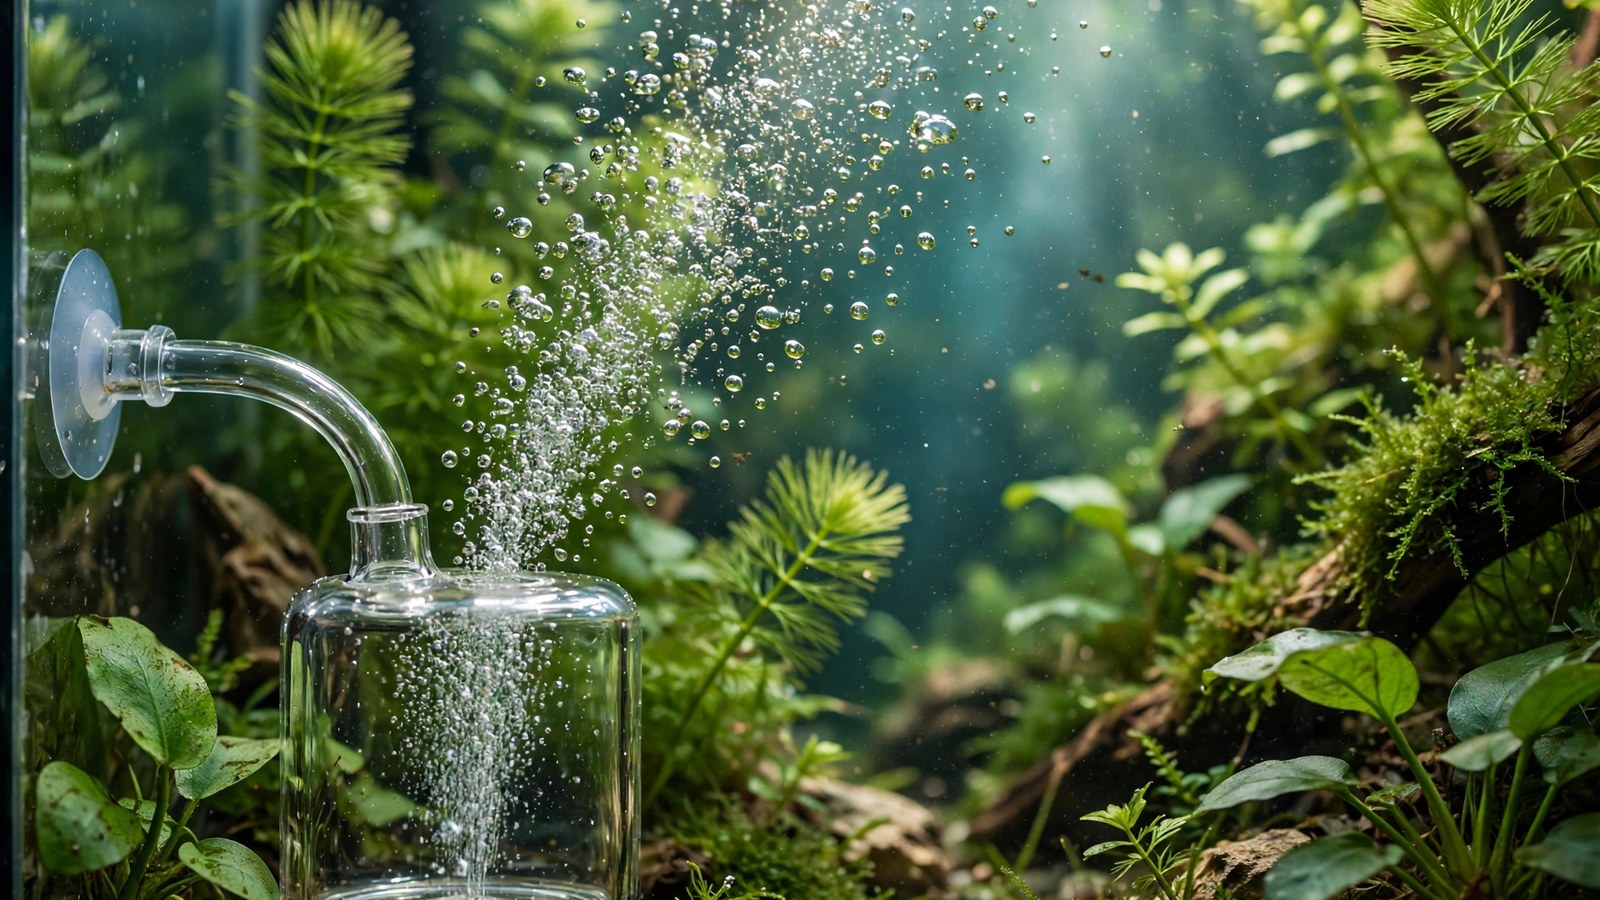
You finally bought one — a glass-bodied aquarium CO2 diffuser with a ceramic disc, still in its plastic blister pack, ready to take your planted tank from surviving to thriving. Most first-time diffuser failures are not faulty hardware; they are installation mistakes: the disc parked in a dead corner, the check valve installed backwards, or the bubble rate cranked far too high on day one. This guide walks you through unboxing, mounting, tuning, and long-term care so your diffuser produces a fine, even mist from the very first evening.
What's in the Box: Your Aquarium CO2 Diffuser Kit
A standard ceramic disc diffuser kit usually arrives with four parts, and each one has a job:
- The diffuser body: a small glass or acrylic bell housing the porous ceramic disc. Gas enters through a nipple at the top and is forced through the disc's microscopic pores, emerging as a fine mist of micro-bubbles on the underside.
- Suction cups: usually two, threaded onto a holder that grips the diffuser body. These stick the unit to the inside glass of your tank.
- CO2 tubing: a length of clear polyurethane tubing rated for pressurized CO2. Ordinary silicone airline tubing slowly leaks CO2 through its walls and hardens under pressure, so use the CO2-rated tubing that comes in the kit.
- The check valve: a small one-way valve, often with a printed arrow showing flow direction. It lets gas flow toward the tank but slams shut if water tries to travel the other way — cheap insurance against back-siphoning into your regulator and solenoid when the gas shuts off.
If your kit is missing the check valve, buy one before installing — running pressurized CO2 without one is asking for a flooded regulator. Inspect the ceramic disc under a light before anything else: a cracked disc from rough shipping will never make a fine mist, and it's easier to exchange the unit now than to diagnose "bad bubbles" for a month.
Step-by-Step Installation
Set aside about 30 minutes. Do the dry assembly outside the tank first so you know how the parts fit, then mount everything in place.
- Soak the diffuser. Submerge the diffuser body in a cup of tank water for a few hours (overnight is ideal). Dry ceramic pores resist gas flow; a pre-soaked disc starts producing an even mist much sooner on first use.
- Choose the location. Mount the diffuser low in the tank, near the substrate, on the side opposite your filter outflow. The filter's current should catch the rising mist and sweep it across the tank. A diffuser sitting in a still corner feeds only the plants directly above it — placement in the flow path is what turns a mist into real distribution. Keep a small gap between the disc and dense plant mass so leaves don't smother the pores.
- Secure it with the suction cups. Press the suction cups firmly against clean inside glass, then clip or thread the diffuser into its holder. Test the grip with a gentle tug — a diffuser that tips over mid-photoperiod traps a gas pocket under the disc and wastes a day of dosing.
- Run the tubing route. Cut the CO2 tubing to length with a little slack (never drum-tight), routing it neatly up and out of the tank, ideally behind a background or along a corner seam so it doesn't ruin the aquascape. Avoid sharp kinks, which throttle gas flow and make bubble rates drift.
- Install the check valve in the right orientation. Cut the tubing line above the tank and insert the check valve so the printed flow arrow points toward the tank (gas flows in the arrow's direction; water trying to flow back is blocked). Position it above the waterline if possible, between the bubble counter and the diffuser. Blow gently through it before installing to confirm which way gas passes.
- Prime the system slowly. Connect the tubing to your regulator's output (via the bubble counter — see below), then open the cylinder and needle valve very gradually until you see the first bubbles forming on the disc. New discs can take 10–30 minutes of pressure before the mist becomes uniform; that's normal.
Connecting to Your Regulator, Solenoid, and Timer
The diffuser is the last link in a short chain: cylinder → regulator → solenoid → bubble counter → check valve → diffuser. Two connection details matter most for a beginner:
- Working pressure matters. Fine-pore ceramic discs need higher pressure than you might expect — many require 30 psi or more. If your regulator has adjustable working pressure, set it to the range printed on the diffuser's packaging. A fixed low-pressure regulator may barely bubble through a fine disc, one of the most common "my diffuser is dead" false alarms. The best CO2 regulators for planted tanks guide explains adjustable output in more detail.
- Automate with a solenoid and timer. Plants only use CO2 while photosynthesizing, so run gas only during the photoperiod: solenoid opens about an hour before lights on and closes about an hour before lights off. This gives livestock an overnight breather and stretches your cylinder. A simple outlet timer on the solenoid handles the schedule automatically — our CO2 solenoid and timer setup guide walks through the wiring, and CO2 timing and your light schedule explains why the one-hour head start matters.
Most setups put the CO2 bubble counter between the solenoid and the check valve, filled halfway with water or mineral oil. The counter is your only visual dial for injection rate — you'll calibrate against it in the next step.
Tuning Your Bubble Rate Safely
Bubble rate — bubbles per second (BPS) as read on your bubble counter — is a rough dial, not a precision measurement, because bubble size varies by disc. But conservative starting points keep you out of trouble while you calibrate with a drop checker:
- Under 10 gallons: about 1 bubble every 2–3 seconds. Small water volumes respond to CO2 fast, so gentleness pays.
- 10–40 gallons: about 1 bubble per second.
- 40–75 gallons: about 2 bubbles per second.
- 75+ gallons: about 3 bubbles per second as a starting ceiling for a single in-tank disc.
Start low, observe livestock, and raise the rate gradually over several days — never chase a number. This is the single most important sentence in CO2 dosing. Fish and shrimp tell you the truth faster than any test kit: gasping at the surface, lethargy, clamped fins, or faded color mean you've gone too far — dial back immediately and let the tank settle.
Your calibration anchor is the drop checker, a small in-tank vessel of indicator solution that changes color with dissolved CO2. Mount it on the opposite side of the tank from the diffuser, away from the direct mist stream, so it reads the tank's average rather than a concentrated plume. Lime-green at mid-photoperiod is the generally accepted target; blue means too little, yellow means back off. Allow 2–3 hours after any bubble-rate change before judging the color. The CO2 drop checker guide covers filling and reading in full, and the CO2 and fish safety guide details the livestock warning signs every beginner should memorize.
Your First-Week Routine
The first week is calibration, not set-and-forget. Keep this short routine until the tank stabilizes:
- Days 1–3: hold your conservative starting rate. Watch the mist pattern each morning — it should drift sideways in the current, not rise in a single tight column. Glance at livestock at lights-on and mid-day.
- Days 3–5: check the drop checker color at mid-photoperiod. Still blue after two full days? Nudge the needle valve up slightly — a quarter-turn at most — then wait another full day before judging.
- Days 5–7: once the checker holds lime-green through the photoperiod and livestock behave normally, stop adjusting. Write down the bubble rate and working pressure — that's your tank's baseline.
- Every water change: give the ceramic disc a gentle scrub with a soft toothbrush. Algae film and biofilm start sealing pores within weeks; a weekly brush stretches the time between deep cleans considerably.
Resist the urge to chase faster plant growth by turning the gas up during week one. Plants take days to weeks to respond to new CO2 levels; livestock respond within hours. Let the animals set the pace.
Cleaning a Clogged Ceramic Disc
Even with weekly brushing, ceramic discs eventually clog: algae, biofilm, and mineral deposits seal the microscopic pores, the mist gets coarser, and you catch yourself opening the needle valve wider to compensate. That compensation is the signal to clean — not to add pressure, which only makes CO2 delivery inconsistent.
The reliable rescue is a diluted bleach soak:
- Remove the diffuser from the tank and rinse off loose algae.
- Soak the ceramic membrane in roughly 1 part household bleach to 20 parts water for 2–4 hours, keeping it fully submerged so the solution works into the pores.
- Rinse thoroughly, then soak in fresh water with a double dose of dechlorinator for another hour to neutralize any bleach residue.
- Rinse once more, reconnect, and run. The mist should be visibly finer than before cleaning.
Safety note: never return a bleach-soaked diffuser to the tank without the dechlorinator neutralization step — residual bleach is dangerous to fish, shrimp, and beneficial bacteria. When in doubt, soak longer in dechlorinated water and rinse again; bleach residue is far more harmful than a slightly under-cleaned disc. If the mist stays coarse after two bleach soaks, the pores are permanently sealed and the disc (or the whole diffuser) is due for replacement — most last 12–24 months with regular care. Manufacturers agree ceramic is a consumable: Fluval's pressurized CO2 kit manual advises replacing the ceramic disc roughly every three months for reliable operation.
Troubleshooting
Only large bubbles, no fine mist
This is almost always a clogged membrane or working pressure that's too low for the disc's pore rating. Run the bleach soak first, then confirm your regulator delivers the pressure printed on the diffuser's packaging (many fine-pore discs need 30+ psi). If large bubbles persist right out of the box, inspect the disc under light for cracks — shipping damage is a real cause, and a cracked disc will never mist properly.
No bubbles at all
Work through the chain in order: is the cylinder open and non-empty? Is the solenoid energized (you should hear it click)? Is the needle valve open? Then check the line for kinks and confirm the check valve isn't installed backwards — a reversed check valve blocks all gas flow, and it looks identical either way, so blow through it to verify direction. New discs also need pressurizing time: give it 30 minutes at working pressure before concluding it's dead.
Water backing into the tubing
This happens when the solenoid closes at lights-off and cooling tubing creates a slight vacuum that pulls tank water backward. A functioning CO2-rated check valve between the bubble counter and the diffuser stops it completely. If backflow continues, the check valve is either installed backwards (flip it so the arrow points toward the tank) or worn out — replace it, since repeated water intrusion can corrode the regulator's internals.
Bubble rate dropping over days
A rate that slowly fades usually points to one of three things: a cylinder running low (working pressure falls as the bottle empties), a disc gradually clogging (clean it), or a kink developing where the tubing bends over the tank rim. Check the cylinder gauge first — it's the most common culprit. If the hardware is all sound and the rate still drifts, the needle valve itself may be imprecise; a stable, quality needle valve holds a setting for weeks without wandering.
When Your Tank Outgrows an In-Tank Diffuser
One honest note for the future: an in-tank ceramic diffuser is the right tool for most beginner tanks, but on large aquariums — typically 75 gallons and up — inline atomizers and external CO2 reactors dissolve gas more efficiently with less visible hardware in the tank. When you reach that scale, see our comparison of CO2 diffusion methods for planted tanks to decide whether an upgrade makes sense for your setup.
Frequently Asked Questions
How long should I soak a new ceramic diffuser before first use?
A few hours in tank water is the minimum; overnight is better. Dry ceramic pores resist gas flow, so an unsoaked disc may take much longer to start misting evenly, and beginners often mistake this for a faulty unit or an underpowered regulator. Soaking is free insurance for a smooth first evening.
Where exactly should the diffuser sit in my tank?
Low in the tank, near the substrate, on the side opposite your filter outflow, with a small gap between the disc and dense plants. The filter current should catch the rising mist and sweep it sideways across the tank. A diffuser in a still corner feeds only the plants above it.
Can I run CO2 24/7 instead of using a solenoid timer?
You can, but it's wasteful and riskier for livestock: plants don't use CO2 in the dark, and overnight injection lets dissolved levels creep up while nothing consumes them. A solenoid on a timer — on an hour before lights on, off an hour before lights off — is safer, cheaper on gas, and fully automatic.
Why does my drop checker stay blue even though I see bubbles?
Visible bubbles don't equal dissolved CO2. Suspect placement first: mist rising straight to the surface in still water dissolves poorly. Move the diffuser into the filter's current path. Second, check for leaks by brushing soapy water over every connection. And give the checker 2–3 hours to respond after any change.
How often should I clean the ceramic disc?
Brush it lightly with a soft toothbrush during every water change, and do the full bleach soak when the mist visibly coarsens or you find yourself opening the needle valve to compensate — typically every 1–3 months depending on algae load. Discs cleaned on schedule last 12–24 months before the pores seal permanently.
Do I need a bubble counter if I have a drop checker?
Yes — they do different jobs. The bubble counter is your adjustment dial: it shows exactly what you changed when you turn the needle valve. The drop checker is your outcome measurement: it shows what the tank's dissolved CO2 actually became, hours later. You need both to tune safely.
Your first aquarium CO2 diffuser doesn't need to be complicated to work well — it needs to be placed in real flow, fed at a conservative rate, and cleaned on schedule. Mount it low, point the check valve arrow toward the tank, start low and observe livestock, and let the drop checker hold lime-green before you call the setup finished. Within a few weeks you'll see the payoff every planted-tank keeper chases: new growth, deeper color, and that first fine stream of pearling rising through the light.
Tissue-culture plants are the exception — they’re grown in sterile gel and adapt with minimal melting, which is part of what you’re paying for. Plants bought submersed from another hobbyist’s tank also transition with little melt, since they’re already in the right form.
Which Plants Melt Most (and Least)
Heavy melters (expect significant leaf loss)
- Cryptocorynes — infamous for “crypt melt,” sometimes dropping every leaf after any disturbance. They almost always recover from the roots within weeks.
- Stem plants grown emersed — rotala, ludwigia, and hygrophila often shed lower emersed leaves while the growing tips transition.
- Amazon swords — emersed-grown swords typically lose their broad oval aerial leaves and replace them with longer submersed ribbon leaves.
Light melters
- Anubias, java fern, bucephalandra — slow-growing rhizome plants transition gradually; occasional old-leaf melt but rarely dramatic.
- Vallisneria — usually transitions well, though it dislikes the move itself and may sulk for a week.
- Floating plants — minimal melt since their leaves were already at the air-water interface.
The Acclimation Protocol
Step 1: Quarantine or dip first
Before acclimating to your tank’s conditions, make sure you’re not acclimating pests along with the plant. Run new arrivals through our quarantine and dip protocol — it adds days upfront but prevents months of regret.
Step 2: Float to temperature-match (30 minutes)
Float the bag or container in your tank for 20–30 minutes to equalize temperature. Plants are less temperature-sensitive than fish, but a 10°F shock on top of transplant stress is an avoidable insult.
Step 3: Trim before planting
Remove any leaves that are already damaged, yellowing, or heavily algae-covered — they won’t recover and they’ll rot in your tank, feeding algae. For stem plants, trim off the bottom inch and any emersed leaves that look unlikely to adapt; the plant wastes energy maintaining leaves it’s going to shed anyway. Keep the healthy growing tips — that’s where recovery starts.
Step 4: Plant correctly the first time
Follow our planting guide — right depth, crown exposed on rosettes, rhizomes unburied on epiphytes. Every uprooting and replanting restarts the acclimation clock, so get placement right on the first attempt. Decide where each plant goes before it goes in the water.
Step 5: Run a gentle first week
For the first 7 days after planting:
- Moderate light — run your normal photoperiod but consider dropping intensity 20–30% if your light is dimmable. Blast-level light on a melting plant grows algae on the dying leaves, not recovery.
- Stable CO2 — if you inject CO2, keep it consistent. Fluctuating CO2 during acclimation is a melt accelerator. If you’re low-tech, this doesn’t apply — see growing without CO2.
- Half-strength fertilizer — new plants with damaged leaves can’t use full dosing, and the excess feeds algae. Ramp to full strength over 2–3 weeks per our fertilizer schedule.
- No disturbance — don’t move, trim, or “check on” new plants for at least two weeks. Every touch resets root establishment. This is especially critical for crypts.
Step 6: Remove melt, keep the base
As emersed leaves melt, remove the mushy material promptly — decaying leaves release ammonia and grow fungus that can spread to healthy tissue. But never discard the plant while the crown, rhizome, or roots are firm and alive. A crypt that’s lost every leaf but has firm roots is a plant that’s about to recover, not a dead plant. Give it 3–4 weeks before judging.
Telling Normal Melt From Real Problems
Normal transition melt:
- Affects oldest/emersed leaves first, newest growth last
- New submersed leaves emerge even as old ones dissolve
- Roots and crown stay firm and white/green
- Timeline: 1–4 weeks, then obvious new growth
Concerning melt (see our full melting diagnosis guide):
- New growth also melts or emerges deformed
- Rhizome or crown turns mushy and brown — this is rot, not transition
- Entire plant dissolves within days with no new growth after 4+ weeks
- Melting spreads to established plants that weren’t recently moved
Buying Tips to Minimize Melt
- Buy submersed-grown when available — hobbyist-grown cuttings transition with almost no melt.
- Choose tissue culture for sensitive species — crypts and delicate stems establish far more reliably from sterile cups.
- Avoid plants already melting in the store tank — some melt is normal, but a plant that’s mostly mush at purchase has less energy for recovery.
- Transport carefully — keep plants damp and out of direct sun/heat. A plant that dries out or cooks in a hot car melts far worse than one transported properly.
The First-Month Timeline: What to Expect Week by Week
Knowing what’s normal when removes most acclimation anxiety. Here’s the typical timeline for a healthy plant adapting to a new tank:
Week 1: The quiet week
Almost nothing visible happens. The plant is growing roots you can’t see and assessing its new environment. Some species (vallisneria, stem plants) may start shedding their lowest leaves. This is normal. Resist the urge to “help” — no moving, no extra fertilizer, no light changes. The most common beginner mistake is intervening during a week when the correct action is nothing.
Week 2: Melt peaks
This is when emersed leaves give up in earnest. Crypts may drop everything; swords shed their broad aerial leaves; stem plants lose lower foliage. It looks catastrophic and it’s usually fine. Keep removing mushy material, keep conditions stable, and watch the crown and growing tips — if those are firm and green, recovery is already underway.
Week 3: The turn
New submersed-adapted leaves emerge — smaller, thinner, often a slightly different shade of green than the emersed foliage. Stem plant tips start growing visibly; crypts push tiny curled leaves from the crown; swords unfurl narrow ribbon leaves. This is the moment most beginners exhale for the first time.
Week 4+: Established
New growth outpaces melt, and the plant is functionally yours. You can resume full-strength fertilizer, normal trimming, and stop treating it as fragile. Some slow growers (anubias, bucephalandra) take 6–8 weeks to show obvious progress — that’s their normal speed, not a problem.
Acclimating Different Plant Formats
Tissue-culture cups
Sterile, pest-free, and already adapted to high-humidity (not emersed) growth — tissue cultures melt the least of any format. Rinse the agar gel off gently (leftover gel rots and feeds fungus), split the portion into small plantlets, and plant per our planting guide. They establish slowly for the first two weeks, then accelerate. No dip needed, minimal acclimation stress — this is the premium experience you’re paying for.
Potted plants
Remove the pot and strip away the rockwool completely — leftover rockwool traps debris and rots. Tease the root mass apart gently; if it’s a dense mat, splitting it into 2–3 smaller portions actually establishes faster than planting one big clump (more growing points, better water flow around roots). Potted plants are usually emersed-grown, so expect the standard 2–4 week melt cycle.
Bare-root / bunched stems
Typically sold as weighted bunches. Remove any bands, foam, or weights, strip the lower leaves, and plant stems individually or in small groups. Bunched stems from the store are often already transitioning — check for new submersed growth at the tips, which tells you the plant is mid-adaptation and will settle quickly.
Hobbyist cuttings
Already submersed-grown and the fastest to establish — often showing new growth within days. The main acclimation factor is water-parameter difference between the two tanks. Float to temperature-match, plant promptly, and they’ll usually take off with minimal melt. This is why experienced hobbyists prefer trading cuttings over buying potted plants.
Frequently Asked Questions
Should I use a “plant starter” or transplant fertilizer?
Products marketed for transplant shock are mostly B-vitamins and mild hormones. They don’t hurt, but there’s no strong evidence they help aquarium plants specifically. Stable conditions and patience outperform any bottle. Save the money for more plants.
My new plant melted completely — bare crown, no leaves. Is it dead?
Probably not, if the crown or rhizome is firm. Crypts and swords routinely lose 100% of their leaves and regrow from the base within a month. The test is firmness: firm and pale/green means alive; mushy and brown/black means rot. Give firm-but-leafless plants a full 4 weeks before declaring them dead.
Can I speed up acclimation with extra light or CO2?
No — and trying usually backfires. A melting plant can’t use extra light; the excess just grows algae on its dying leaves. Keep light moderate and CO2 stable (not boosted) during acclimation. Growth speed comes from the plant’s own adaptation timeline, which you can’t rush, only avoid delaying.
Should new plants go straight into my main display tank?
After quarantine/dipping, yes — there’s no benefit to a separate “growing-in” tank for most plants. They acclimate to your water fastest in the tank they’ll live in. The exception is very delicate species going into a tank with boisterous fish; give those a few weeks in a calm corner or breeder box first.
The Patience Rule
The single most important acclimation skill is restraint: plant it right, set gentle conditions, remove decay, and then leave it alone for a month. The hobbyists with the best plant growth aren’t doing something clever in week one — they’re simply not interfering in weeks two through four while the plants do what they’ve evolved to do. Melt looks like failure and feels like failure, but in most cases it’s the visible part of a plant successfully becoming yours.