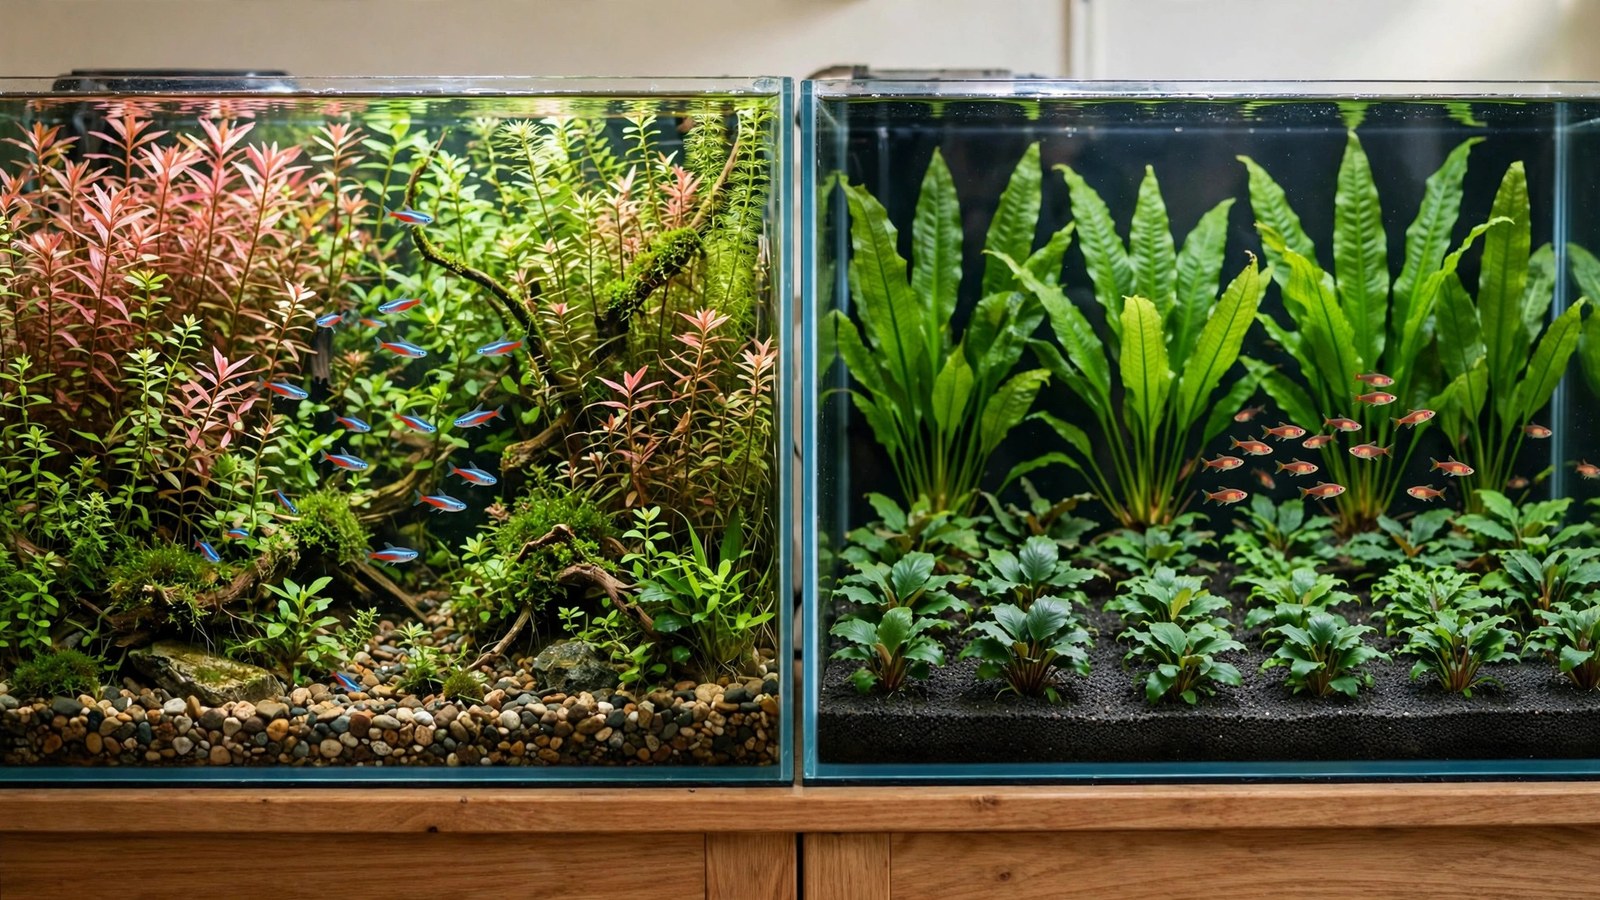
If you have spent any time in planted-tank forums, you have seen the debate: walstad vs dirted tank — two soil-based, low-tech approaches that sound nearly identical but behave very differently once water hits them. Both skip CO2 injection, both rely on dirt under a cap, and both promise lush plants on a budget. But the Walstad method and the classic dirted tank differ in soil preparation, cap thickness, water-change philosophy, cost, and — most importantly — how long each one lasts. This head-to-head comparison breaks down every practical difference so you can pick the right method for your temperament.
Walstad vs Dirted Tank: The Two Methods at a Glance
The Walstad method, developed by Diana L. Walstad and detailed in her book Ecology of the Planted Aquarium, is a complete low-tech system: roughly one inch of organic potting soil under about one inch of gravel, low light, minimal or no filtration, and almost no water changes after the first months. The soil is the engine — it feeds plants through their roots while bacteria and plants share the job of processing fish waste. Walstad's reasoning, including the science of soil chemistry in aquariums, is explained on her own website, which remains the most authoritative source on the method.
A dirted tank is a looser DIY tradition. It also uses soil under a cap, but the soil is often more carefully prepared (many hobbyists mineralize it first through repeated wet-and-dry cycles), the cap is usually thicker, and the setup is commonly paired with whatever filtration and lighting the keeper already owns. Where the Walstad method is a defined recipe with rules, the dirted tank is a family of builds. For background on each approach, see the Walstad method and how to set up a dirted tank.
| Feature | Walstad Method | Dirted Tank |
|---|---|---|
| Soil preparation | Straight from the bag; remove wood chunks and large debris | Often mineralized (2–4 wet/dry cycles) or screened before use |
| Cap depth | ~1 inch of gravel | ~1.5–2 inches of sand or gravel, sometimes layered |
| Filtration | Optional; many runs go filterless or use only a small sponge for circulation | Keep whatever filter you have; no special requirement |
| Lighting | Low (PAR roughly 30–50); excess light causes algae, not faster growth | Flexible; works under low or moderate light |
| Water changes | 50% weekly for the first 1–2 months, then rarely (monthly or less) | Conventional schedule — many keepers still change 25–50% weekly |
| Typical cost (10 gal) | Roughly $60–$120 | Roughly $50–$120, depending on equipment on hand |
| Soil longevity | ~1–2 years of strong growth before the soil depletes | ~2–5 years with mineralized soil, longer with root tabs |
| Beginner-friendliness | High — but only if you follow the low-light, low-water-change rules | High; more forgiving of lighting and maintenance mistakes |
Soil Preparation: Bagged vs Mineralized
Walstad: soil straight from the bag
Walstad's instructions are deliberately simple: buy a plain organic potting soil with no added fertilizers, pick out the wood chunks and anything larger than a fingernail, spread about an inch on the bare glass, and cap it. The soil's natural nutrients — nitrates, phosphates, potassium, and trace minerals — become available to roots as bacteria colonize the substrate.
One caution matters: fresh bagged soil can leach a burst of ammonia in the first weeks. This is why Walstad-style tanks are planted heavily from day one and usually receive large water changes during the first month or two. Floating plants such as duckweed or frogbit are especially useful here: they grow fast, pull nutrients directly from the water, and shade the tank — a triple shield against early algae.
Dirted tank: the mineralization option
Many dirted-tank keepers add one prep step the Walstad method skips: mineralization. The soil is soaked, drained, spread to dry in the sun, and the cycle is repeated two to four times over several weeks. This decomposes the most volatile organic matter in advance, so the submerged soil releases far less ammonia and tannins once the tank is filled — the result is a calmer cycle-up with fewer algae outbreaks.
Is mineralization required? No — a dirted tank built with straight bagged soil works fine. It simply trades a few weeks of upfront labor for an easier first month. Tinkerers who enjoy process usually mineralize; keepers who want water in the tank this weekend do not.
Cap Choice: What Holds the Dirt Down
The cap keeps soil in place, prevents cloudy water, and creates the zone where plant roots anchor. Both methods cap the soil, but the details differ.
Walstad cap
About one inch of fine to medium gravel. Walstad specifies gravel rather than sand because it allows gentle circulation through the cap, which supports the aerobic bacteria that process ammonia. A very thin cap risks soil seeping up and clouding the tank; a very thick one can go anaerobic in patches. Keep it even, about an inch, and never vacuum it — disturbing the cap is what releases buried soil into the water column.
Dirted-tank cap
Usually thicker — 1.5 to 2 inches — and commonly pool filter sand, though gravel works too. Sand forms a tighter barrier, which is why dirted keepers who skip mineralization often choose it: less soil escapes, less ammonia reaches the water. Some keepers layer the cap for appearance. Because many dirted tanks keep a conventional filter running, the cap's bacterial role matters less, so aesthetics can drive the choice.
Practical tip for either method: when you fill the tank for the first time, pour the water over a plate or a plastic bag resting on the cap. A direct stream will blast a crater through the cap and mix soil upward, which turns your water into weak tea before you have even planted anything.
Water-Change Regime: The Biggest Behavioral Difference
This is where the two methods diverge most in daily life. The Walstad method treats water changes as a temporary tool: 50% weekly changes during the first one to two months to dilute the ammonia surge, then a taper to rare, small changes — some keepers go months between changes, topping off evaporation in between. The philosophy is that in a mature low-tech tank, plants and bacteria handle the waste cycle, and constantly replacing water resets the nutrient balance the soil built.
A dirted tank follows no such philosophy. Most dirted keepers run a normal schedule — 25 to 50% weekly or biweekly — especially with a filter and moderate light. This keeps nutrient accumulation in check and suits keepers who find routine maintenance relaxing rather than burdensome. Neither approach is "better": the Walstad route saves labor but demands restraint, while the dirted route costs more labor but forgives overfeeding and mistakes.
One shared rule: if ammonia or nitrite ever reads above zero after the initial cycle, do a water change immediately regardless of method. The schedule serves the livestock, not the other way around. For a fuller picture of cycling a soil tank quickly and safely, see our guide on how to cycle a planted tank faster.
Cost Comparison: What Each Method Actually Costs
Both methods are famous for being cheap, and the honest answer is that the soil itself is nearly free either way. A bag of organic potting soil costs roughly $8–$15 and covers several tanks; a 50-pound bag of pool filter sand runs about $10–$20. The real money goes to light, plants, and equipment you may already own.
- Substrate (both methods): $8–$20 total for soil plus gravel or sand in a 10-gallon tank.
- Light: $25–$60 for a decent low-to-moderate LED. The Walstad method does not benefit from a brighter light, so buy the cheapest full-spectrum fixture — spending more buys algae, not growth.
- Plants: $40–$100 to plant a 10-gallon heavily from day one, which both methods require. Buy fast growers (stem plants, floaters) for the majority; slow growers like anubias can wait.
- Filter: optional for Walstad ($0–$25 for a small sponge filter); keep your existing one for a dirted build.
- Test kit: $25–$35 for a liquid kit. Non-negotiable during the first month of either method.
All in, a new 10-gallon low-tech soil tank typically lands in the $60–$120 range on top of the tank itself. The methods differ by less than the price of a plant order, so cost should not decide between them. If budgeting the whole project, our planted aquarium cost breakdown covers every line item, and the first planted tank shopping list keeps you from buying duplicates.
Longevity: How Long Before the Soil Runs Out?
Every soil substrate is a battery, and every battery drains. The honest numbers, based on widespread keeper experience rather than any single study:
- Walstad soil: roughly 1–2 years of strong growth. After that, growth slows and the tank starts behaving like an inert-substrate tank. Root tabs pushed into the substrate near heavy feeders extend the productive life, and adding a fresh thin soil layer under new scapes is common practice.
- Dirted tank (mineralized soil): roughly 2–5 years, sometimes longer, because mineralization removed the quick-burning organics and left the slow-release minerals. Many keepers report that a mineralized dirted bed just keeps working, with occasional root-tab supplementation.
- Dirted tank (unmineralized): similar to Walstad in depletion, sometimes with a sharper drop-off as the leftover organics exhaust.
Longevity is also about what happens when the soil is spent. A Walstad tank is easy to refresh — the thin cap lifts off, fresh soil goes down, cap goes back. A deep-capped dirted tank is more work to disturb, which is one reason many dirted keepers prefer to rejuvenate with root tabs rather than tear the substrate down. For the full story on substrate lifespan, read how long a dirted tank lasts and our notes on the deep substrate method.
Plant Growth and Livestock
Both methods grow the same easy plants — swords, crypts, anubias, java fern, stem plants, and floaters all thrive in soil. The Walstad method has one notable specialty: low light and low water changes make floating plants the star performers, and the tank often takes on the lush, natural look of a backwater pond. Dirted tanks under moderate light can push slightly more demanding stem plants, though neither method competes with injected CO2 for carpets or red species.
For livestock, both methods are shrimp- and snail-friendly: the soil buffers gently and mature tanks develop rich biofilm. Walstad's low water-change regime suits small, lightly stocked fish like bettas, endlers, and nano schooling species. If you want a filterless setup specifically, the no-filter planted tank setup guide covers the stocking math. For choosing plants by species, the Tropica plant database is a reliable reference for light and CO2 requirements.
Maintenance Realities After the First Year
Once established, both methods are low-maintenance by planted-tank standards, but "low" means different things.
- Walstad maintenance: trim fast growers regularly (they shade everything else otherwise), thin floaters weekly, top off evaporation, and feed lightly. Test water occasionally. That is nearly the whole job.
- Dirted-tank maintenance: the same plant work, plus your regular water-change routine and filter upkeep. More labor, but each task is familiar to any freshwater keeper.
- Common to both: never deep-vacuum the substrate. Pushing a siphon into the soil releases trapped organics and clouds the tank for days. Skim debris off the cap surface only, and gently.
Which Should You Choose?
Choose the Walstad method if…
- You want the lowest long-term workload and will follow the rules — low light, heavy planting from day one, minimal water changes.
- You prefer a complete, tested system over improvising; you can look up what to do at every stage.
- You are setting up a small, lightly stocked tank — a betta, a shrimp colony, a nano species tank — where the pond-in-a-glass look fits.
- You would rather spend two hours planting once than twenty minutes on water changes every week.
Choose a dirted tank if…
- You like to tinker and want to adapt the method to equipment you already own — your filter, your light, your schedule.
- You find regular water changes reassuring, and you want the familiar safety net of a conventional routine.
- You are building a larger tank, where a filter provides peace of mind.
- You enjoy prep projects: mineralizing soil, layering caps, and dialing in a build over time.
Frequently Asked Questions
Can I use Miracle-Gro or another garden soil for either method?
Standard garden soils with slow-release fertilizer pellets are risky because the concentrated fertilizer spikes ammonia and can harm livestock. Stick to plain organic potting soils with no added fertilizers or wetting agents, and always read the ingredient list. If the only soil available has additives, choose a different product rather than trying to rinse it clean.
Will a Walstad tank work with sand instead of gravel?
It can, but gravel is the method's specified cap for a reason: it allows gentle circulation that supports aerobic bacteria in the substrate bed. Sand caps are standard in dirted tanks, where filtration handles the bacterial workload. If you prefer the look of sand in a Walstad build, keep the cap to about an inch and plant heavily, since compaction in a sand cap can create anaerobic pockets.
How do I know when my soil substrate is depleted?
Growth slows noticeably even though light and water changes have not changed: swords stay small, stem plants grow thin and leggy, and new leaves look pale. Algae may increase as plants stop competing effectively for nutrients. Before declaring the soil dead, try root tabs — if growth rebounds within a few weeks, the soil was simply hungry, not finished.
Can I combine the two — mineralized soil in a Walstad-style no-filter tank?
Yes, and many experienced keepers do exactly this. Mineralized soil under a one-inch gravel cap, low light, and minimal water changes gives you the Walstad system's behavior with the calmer start-up of a dirted build. The two methods are traditions, not rival brands — borrowing the best ideas from both is how most veteran planted-tank keepers actually operate.
Is one method safer for shrimp?
Both are excellent for shrimp once cycled, because mature soil tanks grow dense biofilm that shrimp graze constantly. During the first month, a dirted tank with mineralized soil and regular water changes is arguably safer, since ammonia levels stay lower. Whichever method you choose, confirm zero ammonia and nitrite with a liquid test kit before adding any shrimp.
The Verdict
The walstad vs dirted tank debate has no single winner — it has a right answer per keeper. The Walstad method wins for minimalism: a defined system, almost no water changes, and the lowest long-term effort once you learn its rules. The dirted tank wins for flexibility: adaptable to any filter and light, forgiving of routine maintenance, and longer-lived when the soil is mineralized. Beginners who love a clear recipe should start Walstad; tinkerers who love the process should start dirted. Either way, you will spend less than you expect, learn more than you planned, and end up with a planted tank that looks like it cost three times as much.
Tissue-culture plants are the exception — they’re grown in sterile gel and adapt with minimal melting, which is part of what you’re paying for. Plants bought submersed from another hobbyist’s tank also transition with little melt, since they’re already in the right form.
Which Plants Melt Most (and Least)
Heavy melters (expect significant leaf loss)
- Cryptocorynes — infamous for “crypt melt,” sometimes dropping every leaf after any disturbance. They almost always recover from the roots within weeks.
- Stem plants grown emersed — rotala, ludwigia, and hygrophila often shed lower emersed leaves while the growing tips transition.
- Amazon swords — emersed-grown swords typically lose their broad oval aerial leaves and replace them with longer submersed ribbon leaves.
Light melters
- Anubias, java fern, bucephalandra — slow-growing rhizome plants transition gradually; occasional old-leaf melt but rarely dramatic.
- Vallisneria — usually transitions well, though it dislikes the move itself and may sulk for a week.
- Floating plants — minimal melt since their leaves were already at the air-water interface.
The Acclimation Protocol
Step 1: Quarantine or dip first
Before acclimating to your tank’s conditions, make sure you’re not acclimating pests along with the plant. Run new arrivals through our quarantine and dip protocol — it adds days upfront but prevents months of regret.
Step 2: Float to temperature-match (30 minutes)
Float the bag or container in your tank for 20–30 minutes to equalize temperature. Plants are less temperature-sensitive than fish, but a 10°F shock on top of transplant stress is an avoidable insult.
Step 3: Trim before planting
Remove any leaves that are already damaged, yellowing, or heavily algae-covered — they won’t recover and they’ll rot in your tank, feeding algae. For stem plants, trim off the bottom inch and any emersed leaves that look unlikely to adapt; the plant wastes energy maintaining leaves it’s going to shed anyway. Keep the healthy growing tips — that’s where recovery starts.
Step 4: Plant correctly the first time
Follow our planting guide — right depth, crown exposed on rosettes, rhizomes unburied on epiphytes. Every uprooting and replanting restarts the acclimation clock, so get placement right on the first attempt. Decide where each plant goes before it goes in the water.
Step 5: Run a gentle first week
For the first 7 days after planting:
- Moderate light — run your normal photoperiod but consider dropping intensity 20–30% if your light is dimmable. Blast-level light on a melting plant grows algae on the dying leaves, not recovery.
- Stable CO2 — if you inject CO2, keep it consistent. Fluctuating CO2 during acclimation is a melt accelerator. If you’re low-tech, this doesn’t apply — see growing without CO2.
- Half-strength fertilizer — new plants with damaged leaves can’t use full dosing, and the excess feeds algae. Ramp to full strength over 2–3 weeks per our fertilizer schedule.
- No disturbance — don’t move, trim, or “check on” new plants for at least two weeks. Every touch resets root establishment. This is especially critical for crypts.
Step 6: Remove melt, keep the base
As emersed leaves melt, remove the mushy material promptly — decaying leaves release ammonia and grow fungus that can spread to healthy tissue. But never discard the plant while the crown, rhizome, or roots are firm and alive. A crypt that’s lost every leaf but has firm roots is a plant that’s about to recover, not a dead plant. Give it 3–4 weeks before judging.
Telling Normal Melt From Real Problems
Normal transition melt:
- Affects oldest/emersed leaves first, newest growth last
- New submersed leaves emerge even as old ones dissolve
- Roots and crown stay firm and white/green
- Timeline: 1–4 weeks, then obvious new growth
Concerning melt (see our full melting diagnosis guide):
- New growth also melts or emerges deformed
- Rhizome or crown turns mushy and brown — this is rot, not transition
- Entire plant dissolves within days with no new growth after 4+ weeks
- Melting spreads to established plants that weren’t recently moved
Buying Tips to Minimize Melt
- Buy submersed-grown when available — hobbyist-grown cuttings transition with almost no melt.
- Choose tissue culture for sensitive species — crypts and delicate stems establish far more reliably from sterile cups.
- Avoid plants already melting in the store tank — some melt is normal, but a plant that’s mostly mush at purchase has less energy for recovery.
- Transport carefully — keep plants damp and out of direct sun/heat. A plant that dries out or cooks in a hot car melts far worse than one transported properly.
The First-Month Timeline: What to Expect Week by Week
Knowing what’s normal when removes most acclimation anxiety. Here’s the typical timeline for a healthy plant adapting to a new tank:
Week 1: The quiet week
Almost nothing visible happens. The plant is growing roots you can’t see and assessing its new environment. Some species (vallisneria, stem plants) may start shedding their lowest leaves. This is normal. Resist the urge to “help” — no moving, no extra fertilizer, no light changes. The most common beginner mistake is intervening during a week when the correct action is nothing.
Week 2: Melt peaks
This is when emersed leaves give up in earnest. Crypts may drop everything; swords shed their broad aerial leaves; stem plants lose lower foliage. It looks catastrophic and it’s usually fine. Keep removing mushy material, keep conditions stable, and watch the crown and growing tips — if those are firm and green, recovery is already underway.
Week 3: The turn
New submersed-adapted leaves emerge — smaller, thinner, often a slightly different shade of green than the emersed foliage. Stem plant tips start growing visibly; crypts push tiny curled leaves from the crown; swords unfurl narrow ribbon leaves. This is the moment most beginners exhale for the first time.
Week 4+: Established
New growth outpaces melt, and the plant is functionally yours. You can resume full-strength fertilizer, normal trimming, and stop treating it as fragile. Some slow growers (anubias, bucephalandra) take 6–8 weeks to show obvious progress — that’s their normal speed, not a problem.
Acclimating Different Plant Formats
Tissue-culture cups
Sterile, pest-free, and already adapted to high-humidity (not emersed) growth — tissue cultures melt the least of any format. Rinse the agar gel off gently (leftover gel rots and feeds fungus), split the portion into small plantlets, and plant per our planting guide. They establish slowly for the first two weeks, then accelerate. No dip needed, minimal acclimation stress — this is the premium experience you’re paying for.
Potted plants
Remove the pot and strip away the rockwool completely — leftover rockwool traps debris and rots. Tease the root mass apart gently; if it’s a dense mat, splitting it into 2–3 smaller portions actually establishes faster than planting one big clump (more growing points, better water flow around roots). Potted plants are usually emersed-grown, so expect the standard 2–4 week melt cycle.
Bare-root / bunched stems
Typically sold as weighted bunches. Remove any bands, foam, or weights, strip the lower leaves, and plant stems individually or in small groups. Bunched stems from the store are often already transitioning — check for new submersed growth at the tips, which tells you the plant is mid-adaptation and will settle quickly.
Hobbyist cuttings
Already submersed-grown and the fastest to establish — often showing new growth within days. The main acclimation factor is water-parameter difference between the two tanks. Float to temperature-match, plant promptly, and they’ll usually take off with minimal melt. This is why experienced hobbyists prefer trading cuttings over buying potted plants.
Frequently Asked Questions
Should I use a “plant starter” or transplant fertilizer?
Products marketed for transplant shock are mostly B-vitamins and mild hormones. They don’t hurt, but there’s no strong evidence they help aquarium plants specifically. Stable conditions and patience outperform any bottle. Save the money for more plants.
My new plant melted completely — bare crown, no leaves. Is it dead?
Probably not, if the crown or rhizome is firm. Crypts and swords routinely lose 100% of their leaves and regrow from the base within a month. The test is firmness: firm and pale/green means alive; mushy and brown/black means rot. Give firm-but-leafless plants a full 4 weeks before declaring them dead.
Can I speed up acclimation with extra light or CO2?
No — and trying usually backfires. A melting plant can’t use extra light; the excess just grows algae on its dying leaves. Keep light moderate and CO2 stable (not boosted) during acclimation. Growth speed comes from the plant’s own adaptation timeline, which you can’t rush, only avoid delaying.
Should new plants go straight into my main display tank?
After quarantine/dipping, yes — there’s no benefit to a separate “growing-in” tank for most plants. They acclimate to your water fastest in the tank they’ll live in. The exception is very delicate species going into a tank with boisterous fish; give those a few weeks in a calm corner or breeder box first.
The Patience Rule
The single most important acclimation skill is restraint: plant it right, set gentle conditions, remove decay, and then leave it alone for a month. The hobbyists with the best plant growth aren’t doing something clever in week one — they’re simply not interfering in weeks two through four while the plants do what they’ve evolved to do. Melt looks like failure and feels like failure, but in most cases it’s the visible part of a plant successfully becoming yours.