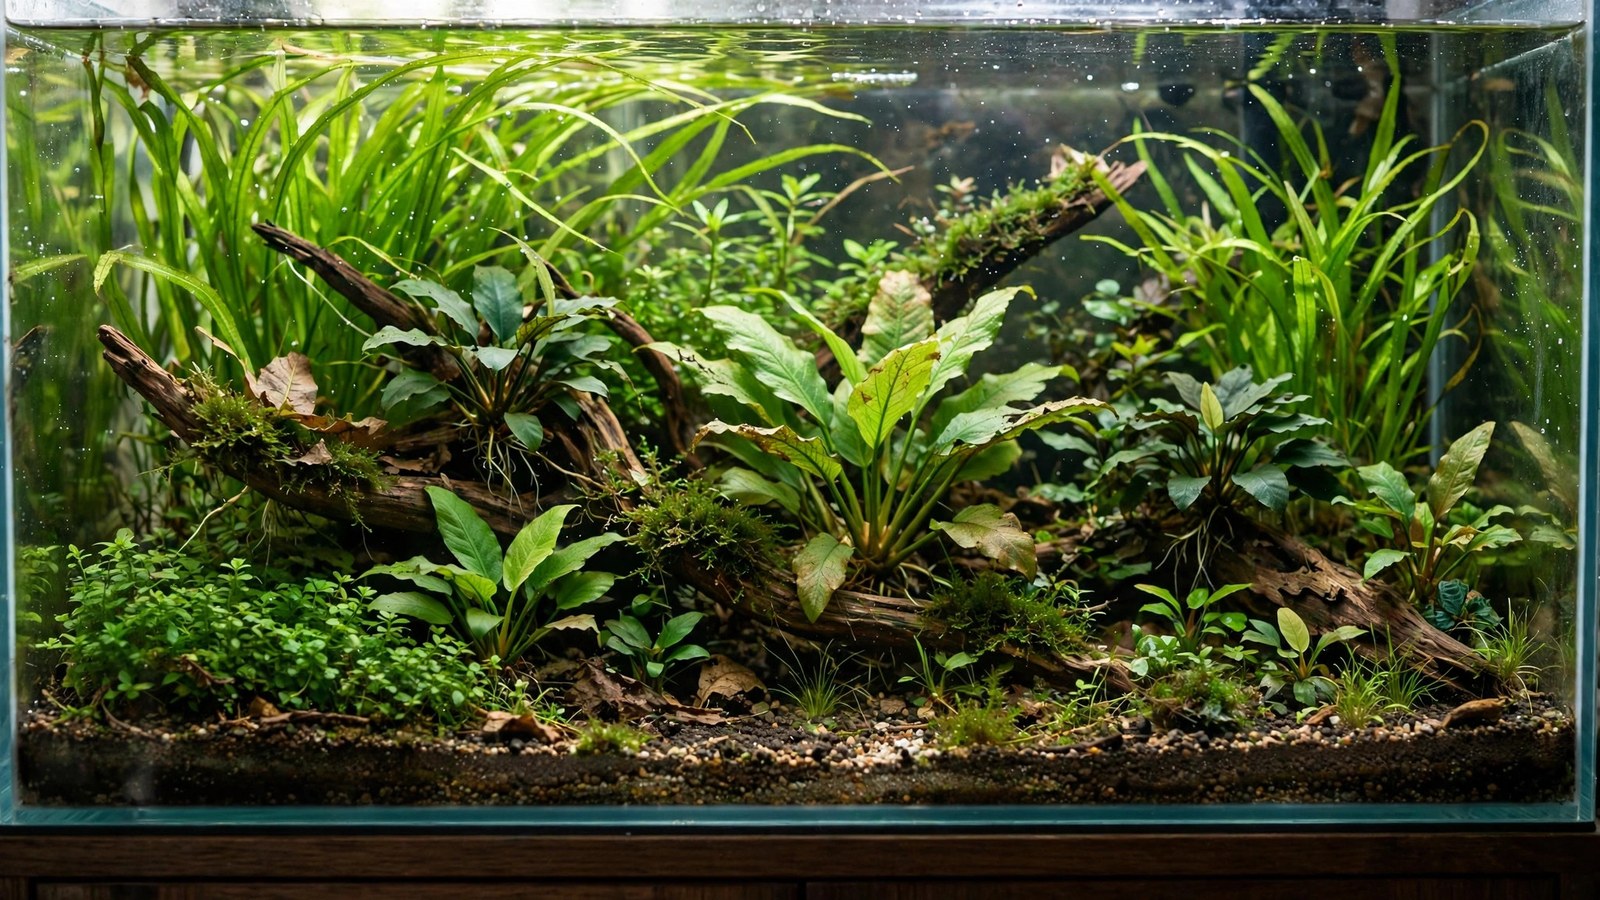
Dirted tanks — aquariums with organic soil under a cap — have a legendary reputation: explosive growth for pennies, then... what? Ask five keepers how long a dirted tank lasts and you'll get five answers ranging from "mine crashed at 8 months" to "going strong at year six." The truth about dirted tank longevity is more nuanced than either camp admits. This guide explains how long soil substrates actually feed plants, what makes them fade early, and how to build one that lasts.
What "Lasting" Means for a Dirted Tank
A dirted tank doesn't have a single expiration date — it has three overlapping lifespans:
- Nutrient lifespan: how long the soil's organic nutrients feed plants before depleting — typically 1–3 years for a well-built mineralized soil bed.
- Structural lifespan: how long before the soil layer compacts, goes anaerobic, or migrates up through the cap — highly build-dependent, 2–5+ years with a good cap.
- Aesthetic lifespan: how long before the tank looks tired — usually the first thing to go, driven by algae phases, cap mixing, and scape fatigue rather than soil failure.
Most "my dirted tank died at 14 months" stories are actually nutrient depletion stories — the soil's free lunch ended and nobody started feeding the tank. The soil itself was fine; the fertilization strategy expired. Keep that distinction in mind throughout.
The Nutrient Curve: What the Science Says
Organic soil feeds plants through mineralization — bacteria breaking down organic matter into plant-available ammonium, phosphate, and micronutrients. This follows a predictable curve:
- Months 0–3: the flood. Fresh soil mineralizes rapidly, releasing abundant nutrients (and often ammonia — see our ammonia leach guide, which applies to dirted startups too). Growth is explosive; algae risk is highest. Heavy planting and water changes manage it.
- Months 3–12: the golden year. Mineralization settles to a steady rate that closely matches plant uptake. This is the legendary dirted-tank phase — lush growth with minimal dosing.
- Year 2: the taper. Easily mineralized organics are consumed; the rate slows. Growth remains good but you notice heavier feeders wanting more. This is when smart keepers start root tabs.
- Year 3+: the long tail. The soil's remaining organics are the tough, slow stuff (lignin, humus). Mineralization continues at a low background rate indefinitely — the soil never goes fully "dead," but it no longer carries the tank nutritionally.
Mineralized soil (pre-processed through wet/dry cycles to burn off the fast organics before it ever enters the tank) skips the flood phase and starts at the golden year — lower peak, but more stable and longer-lived. Our mineralization guide covers the process, and mineralized vs potting mix compares the two approaches directly.
Why Some Dirted Tanks Die Young
When a dirted tank fails at 8–14 months, the cause is almost always one of these build errors:
- Soil layer too thick. More than 1–1.5 inches of soil goes anaerobic in the middle — the classic "dirt bomb." Anaerobic soil produces hydrogen sulfide, kills roots from below, and eventually burps toxins into the water column. One inch of soil is plenty; depth comes from the cap.
- Cap too thin or too fine. Under 2 inches of cap (or a very fine sand cap), soil migrates upward with every planting and water change, turning the tank into mud soup. Use 2–3 inches of coarse sand or fine gravel — heavy enough to stay put.
- Wrong soil. Potting mixes with perlite, vermiculite, or slow-release fertilizer beads are time bombs — the beads dump concentrated fertilizer months in, and perlite floats up through the cap forever. Plain organic topsoil only (see our soil comparison).
- No fertilization after year one. The most common "failure" — the keeper treated the soil as permanent free nutrition, never added tabs or liquid ferts, and watched plants starve in year two. The fix is trivial: start feeding the tank.
- Constant rescaping. Every uprooting churns soil into the cap and cap into the soil. Dirted tanks reward stability — plan the layout, plant it, and leave it alone.
Building for Longevity: The 5-Year Dirted Tank
The keepers reporting 5+ year dirted tanks share a build formula:
- Mineralized soil, 1 inch max. Pre-processed, thin, even layer. Some add a laterite sprinkle for iron insurance.
- Heavy cap, 2.5–3 inches of coarse sand or 2–3 mm gravel. The cap is structural — it holds the soil down, gives roots a clean zone, and is what you actually interact with.
- Hardscape on the glass before soil goes in — driftwood and rocks placed first, soil and cap packed around them. Prevents shifting and anaerobic pockets under wood.
- Heavy planting from day one — roots are the soil's aeration system. A densely rooted bed stays aerobic; a sparsely planted one compacts.
- Malaysian trumpet snails — they turn the cap nightly, preventing the cap-soil interface from sealing.
- Start root tabs at month 12 — don't wait for deficiency. Supplementing before the taper keeps growth seamless.
- Hands off. Replant as little as possible. Trim tops; don't uproot and replant stems repeatedly.
Extending Life: Recharging a Tired Dirted Tank
Year-two slowdown isn't death — it's a transition to supplemented nutrition, exactly like aquasoil exhaustion:
- Root tabs in a grid — pushed through the cap into the soil layer. The old soil's high CEC (like any good soil) holds the tab nutrients beautifully. This alone revives most "dying" dirted tanks within weeks.
- Liquid fertilizer — start a complete macro/micro regimen. The tank transitions from soil-fed to water-fed supplementation, same as aging aquasoil.
- Soil "injections" — some keepers push Osmocote-style slow-release granules or new mineralized soil balls deep into the bed with a turkey baster or syringe. Effective but fiddly; root tabs are simpler.
- Partial soil refresh during rescapes — if you're already tearing down sections, replace the old soil in that section with fresh mineralized soil. Section-by-section, like aquasoil replacement.
What you can't fix: a soil layer that's gone anaerobic and sulfurous throughout (rotten-egg smell when poked deeply). That's structural failure — the only remedy is removing the bad soil, which usually means a teardown. Prevention (thin layer, good cap, rooted plants) is everything.
Dirted vs Aquasoil Longevity: Honest Comparison
| Factor | Dirted (mineralized) | Aquasoil (e.g., Amazonia) |
|---|---|---|
| Peak nutrition duration | 12–24 months | 12–18 months |
| Rechargeable with tabs? | Yes — excellent CEC | Yes — excellent CEC |
| Structural lifespan | 3–5+ years (build-dependent) | 1–3 years (granules break down) |
| Cost | Near zero | Premium |
| Startup difficulty | High (mess, ammonia, algae risk) | Medium (ammonia protocol) |
| Rescape friendliness | Poor (disturbing soil = mess) | Good (granules stay put) |
The honest summary: a well-built dirted tank lasts as long as or longer than aquasoil nutritionally, and longer structurally — at a fraction of the cost, with a harder startup and zero forgiveness for rescaping. Aquasoil is the convenient, predictable, expensive option; dirt is the cheap, high-maintenance, long-lived option. Our soil vs gravel comparison frames the broader choice.
Frequently Asked Questions
How long will my dirted tank last without any fertilizer?
Expect strong growth for 12–18 months, acceptable growth through year two, then visible decline in heavy feeders. "Without any fertilizer" is the key qualifier — with root tabs started at month 12, the same tank grows well for 4–5+ years. The soil doesn't die; it just stops carrying the full load.
Do I ever need to replace the soil?
Rarely, if built right. Unlike aquasoil, soil doesn't structurally disintegrate — it just depletes. A thin mineralized layer under a good cap can remain structurally sound for the life of the tank, serving as a high-CEC root zone fed by tabs indefinitely. Replace only if it goes anaerobic throughout or gets hopelessly mixed into the cap.
Can I convert a dirted tank to aquasoil later?
Yes, but it's a project: siphon/scoop out the cap, remove the soil layer, and replace with aquasoil section-by-section to preserve bacteria. Most keepers who consider this are actually just seeing nutrient depletion — try root tabs first. Nine times out of ten, tabs solve the "problem" that was prompting the conversion.
Why did my dirted tank get algae in month 2?
The mineralization flood: fresh soil releases more nutrients than young plants can uptake, and algae exploits the surplus. It's the normal dirted-tank adolescence — heavy planting, large water changes, and reduced light for the first month get you through it. Mineralized soil largely skips this phase, which is why experienced dirt keepers mineralize.
Is a dirted tank worth it vs just using aquasoil?
If you enjoy the process and won't rescape often: absolutely — pennies per tank, excellent longevity, superb growth. If you value convenience, clean handling, and rescape freedom: aquasoil's premium buys real quality of life. There's no wrong answer, only a mismatch between the method and the keeper. Be honest about which keeper you are.
The Long View
A dirted tank's lifespan is mostly determined before water ever hits the soil — by the soil choice, the layer thickness, the cap, and the planting plan. Build it thin, cap it heavy, plant it densely, feed it from year two, and leave it alone: that's the recipe behind every 5-year dirted tank you've admired. The soil rewards patience and punishes impatience, which, come to think of it, describes the entire hobby.
Tissue-culture plants are the exception — they’re grown in sterile gel and adapt with minimal melting, which is part of what you’re paying for. Plants bought submersed from another hobbyist’s tank also transition with little melt, since they’re already in the right form.
Which Plants Melt Most (and Least)
Heavy melters (expect significant leaf loss)
- Cryptocorynes — infamous for “crypt melt,” sometimes dropping every leaf after any disturbance. They almost always recover from the roots within weeks.
- Stem plants grown emersed — rotala, ludwigia, and hygrophila often shed lower emersed leaves while the growing tips transition.
- Amazon swords — emersed-grown swords typically lose their broad oval aerial leaves and replace them with longer submersed ribbon leaves.
Light melters
- Anubias, java fern, bucephalandra — slow-growing rhizome plants transition gradually; occasional old-leaf melt but rarely dramatic.
- Vallisneria — usually transitions well, though it dislikes the move itself and may sulk for a week.
- Floating plants — minimal melt since their leaves were already at the air-water interface.
The Acclimation Protocol
Step 1: Quarantine or dip first
Before acclimating to your tank’s conditions, make sure you’re not acclimating pests along with the plant. Run new arrivals through our quarantine and dip protocol — it adds days upfront but prevents months of regret.
Step 2: Float to temperature-match (30 minutes)
Float the bag or container in your tank for 20–30 minutes to equalize temperature. Plants are less temperature-sensitive than fish, but a 10°F shock on top of transplant stress is an avoidable insult.
Step 3: Trim before planting
Remove any leaves that are already damaged, yellowing, or heavily algae-covered — they won’t recover and they’ll rot in your tank, feeding algae. For stem plants, trim off the bottom inch and any emersed leaves that look unlikely to adapt; the plant wastes energy maintaining leaves it’s going to shed anyway. Keep the healthy growing tips — that’s where recovery starts.
Step 4: Plant correctly the first time
Follow our planting guide — right depth, crown exposed on rosettes, rhizomes unburied on epiphytes. Every uprooting and replanting restarts the acclimation clock, so get placement right on the first attempt. Decide where each plant goes before it goes in the water.
Step 5: Run a gentle first week
For the first 7 days after planting:
- Moderate light — run your normal photoperiod but consider dropping intensity 20–30% if your light is dimmable. Blast-level light on a melting plant grows algae on the dying leaves, not recovery.
- Stable CO2 — if you inject CO2, keep it consistent. Fluctuating CO2 during acclimation is a melt accelerator. If you’re low-tech, this doesn’t apply — see growing without CO2.
- Half-strength fertilizer — new plants with damaged leaves can’t use full dosing, and the excess feeds algae. Ramp to full strength over 2–3 weeks per our fertilizer schedule.
- No disturbance — don’t move, trim, or “check on” new plants for at least two weeks. Every touch resets root establishment. This is especially critical for crypts.
Step 6: Remove melt, keep the base
As emersed leaves melt, remove the mushy material promptly — decaying leaves release ammonia and grow fungus that can spread to healthy tissue. But never discard the plant while the crown, rhizome, or roots are firm and alive. A crypt that’s lost every leaf but has firm roots is a plant that’s about to recover, not a dead plant. Give it 3–4 weeks before judging.
Telling Normal Melt From Real Problems
Normal transition melt:
- Affects oldest/emersed leaves first, newest growth last
- New submersed leaves emerge even as old ones dissolve
- Roots and crown stay firm and white/green
- Timeline: 1–4 weeks, then obvious new growth
Concerning melt (see our full melting diagnosis guide):
- New growth also melts or emerges deformed
- Rhizome or crown turns mushy and brown — this is rot, not transition
- Entire plant dissolves within days with no new growth after 4+ weeks
- Melting spreads to established plants that weren’t recently moved
Buying Tips to Minimize Melt
- Buy submersed-grown when available — hobbyist-grown cuttings transition with almost no melt.
- Choose tissue culture for sensitive species — crypts and delicate stems establish far more reliably from sterile cups.
- Avoid plants already melting in the store tank — some melt is normal, but a plant that’s mostly mush at purchase has less energy for recovery.
- Transport carefully — keep plants damp and out of direct sun/heat. A plant that dries out or cooks in a hot car melts far worse than one transported properly.
The First-Month Timeline: What to Expect Week by Week
Knowing what’s normal when removes most acclimation anxiety. Here’s the typical timeline for a healthy plant adapting to a new tank:
Week 1: The quiet week
Almost nothing visible happens. The plant is growing roots you can’t see and assessing its new environment. Some species (vallisneria, stem plants) may start shedding their lowest leaves. This is normal. Resist the urge to “help” — no moving, no extra fertilizer, no light changes. The most common beginner mistake is intervening during a week when the correct action is nothing.
Week 2: Melt peaks
This is when emersed leaves give up in earnest. Crypts may drop everything; swords shed their broad aerial leaves; stem plants lose lower foliage. It looks catastrophic and it’s usually fine. Keep removing mushy material, keep conditions stable, and watch the crown and growing tips — if those are firm and green, recovery is already underway.
Week 3: The turn
New submersed-adapted leaves emerge — smaller, thinner, often a slightly different shade of green than the emersed foliage. Stem plant tips start growing visibly; crypts push tiny curled leaves from the crown; swords unfurl narrow ribbon leaves. This is the moment most beginners exhale for the first time.
Week 4+: Established
New growth outpaces melt, and the plant is functionally yours. You can resume full-strength fertilizer, normal trimming, and stop treating it as fragile. Some slow growers (anubias, bucephalandra) take 6–8 weeks to show obvious progress — that’s their normal speed, not a problem.
Acclimating Different Plant Formats
Tissue-culture cups
Sterile, pest-free, and already adapted to high-humidity (not emersed) growth — tissue cultures melt the least of any format. Rinse the agar gel off gently (leftover gel rots and feeds fungus), split the portion into small plantlets, and plant per our planting guide. They establish slowly for the first two weeks, then accelerate. No dip needed, minimal acclimation stress — this is the premium experience you’re paying for.
Potted plants
Remove the pot and strip away the rockwool completely — leftover rockwool traps debris and rots. Tease the root mass apart gently; if it’s a dense mat, splitting it into 2–3 smaller portions actually establishes faster than planting one big clump (more growing points, better water flow around roots). Potted plants are usually emersed-grown, so expect the standard 2–4 week melt cycle.
Bare-root / bunched stems
Typically sold as weighted bunches. Remove any bands, foam, or weights, strip the lower leaves, and plant stems individually or in small groups. Bunched stems from the store are often already transitioning — check for new submersed growth at the tips, which tells you the plant is mid-adaptation and will settle quickly.
Hobbyist cuttings
Already submersed-grown and the fastest to establish — often showing new growth within days. The main acclimation factor is water-parameter difference between the two tanks. Float to temperature-match, plant promptly, and they’ll usually take off with minimal melt. This is why experienced hobbyists prefer trading cuttings over buying potted plants.
Frequently Asked Questions
Should I use a “plant starter” or transplant fertilizer?
Products marketed for transplant shock are mostly B-vitamins and mild hormones. They don’t hurt, but there’s no strong evidence they help aquarium plants specifically. Stable conditions and patience outperform any bottle. Save the money for more plants.
My new plant melted completely — bare crown, no leaves. Is it dead?
Probably not, if the crown or rhizome is firm. Crypts and swords routinely lose 100% of their leaves and regrow from the base within a month. The test is firmness: firm and pale/green means alive; mushy and brown/black means rot. Give firm-but-leafless plants a full 4 weeks before declaring them dead.
Can I speed up acclimation with extra light or CO2?
No — and trying usually backfires. A melting plant can’t use extra light; the excess just grows algae on its dying leaves. Keep light moderate and CO2 stable (not boosted) during acclimation. Growth speed comes from the plant’s own adaptation timeline, which you can’t rush, only avoid delaying.
Should new plants go straight into my main display tank?
After quarantine/dipping, yes — there’s no benefit to a separate “growing-in” tank for most plants. They acclimate to your water fastest in the tank they’ll live in. The exception is very delicate species going into a tank with boisterous fish; give those a few weeks in a calm corner or breeder box first.
The Patience Rule
The single most important acclimation skill is restraint: plant it right, set gentle conditions, remove decay, and then leave it alone for a month. The hobbyists with the best plant growth aren’t doing something clever in week one — they’re simply not interfering in weeks two through four while the plants do what they’ve evolved to do. Melt looks like failure and feels like failure, but in most cases it’s the visible part of a plant successfully becoming yours.