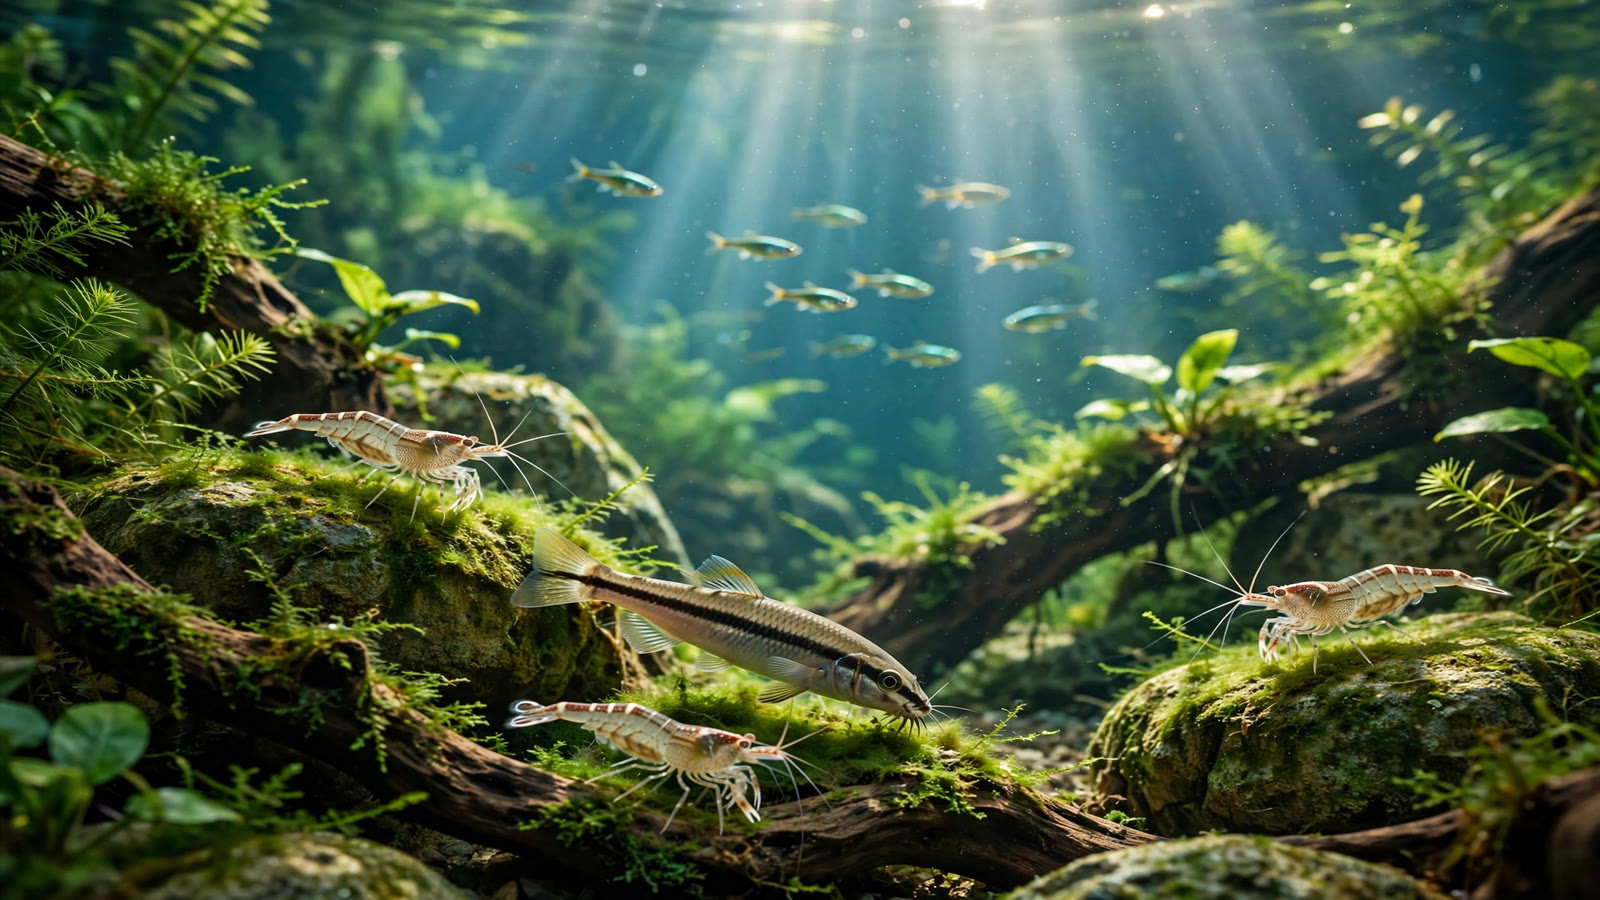
Most planted-tank owners hunting for the best algae eaters for planted tank walk out of the fish store with the wrong animal for their actual problem. Algae is not one thing, and neither are algae eaters: the famous shrimp that demolishes hair algae will completely ignore black beard algae, and the fish that grazes green spot algae off your glass won't touch a thread-algae infestation. The right cleaner is the one matched to your specific algae type, your tank size, and your plants' safety — this guide is built around that matching process, not a generic top-10 list.
One Crucial Caveat: Algae Eaters Treat the Symptom
Before matching eater to algae, be honest about the cause. Algae in a planted tank is a signal — usually an imbalance between light, CO2, and nutrients. Algae eaters are a maintenance tool that keeps a healthy tank pristine and holds the line while you fix the underlying imbalance, not a substitute for fixing it. Pair this guide with stable water parameters for planted tanks and a regular maintenance schedule, and your cleaners will do ten times the work.
Quick-Match Table: The Best Algae Eaters for Planted Tank, by Algae Type
Use this as your starting reference, then read the sections below for stocking, compatibility, and caveats.
| Algae type | Best eater | Runner-up | Minimum tank |
|---|---|---|---|
| Black beard algae (BBA) | Siamese algae eater (true SAE) | None reliable | 20 gal |
| Hair / thread algae | Amano shrimp | Cherry shrimp (light infestations) | 10 gal |
| Brown diatoms | Otocinclus | Nerite snails | 10 gal |
| Green spot algae (GSA) | Nerite snails | None reliable | 5 gal |
| Soft green film algae | Nerite snails | Amano shrimp, otocinclus | 5 gal |
| Staghorn algae | Siamese algae eater (young ones) | Manual removal | 20 gal |
| Leftover food / detritus | Corydoras / kuhli loach | Malaysian trumpet snails | 20 gal (cory school) |
Black Beard Algae: The True Siamese Algae Eater
Black beard algae — those dark tufts clinging to slow-growing leaves like Anubias and Java fern — is the one algae type with almost exactly one reliable animal answer: the true Siamese algae eater, Crossocheilus oblongus. It is the only commonly available fish that will genuinely graze established BBA.
How to buy a real one
Three lookalike fish get mislabeled at stores. The true SAE has a black lateral stripe that runs all the way through the tail fin, with a ragged, zigzag edge. The flying fox has a crisp-edged stripe that stops at the base of the tail and is far less interested in BBA. Inspect the stripe before you buy, or ask the store to bag from a tank you can verify.
Planted-tank behavior
SAEs are among the safest fish for planted tanks: they won't uproot stems, don't eat healthy leaves, and school loosely and peacefully. The catch is motivation. Juveniles under about 3 inches are voracious algae grazers; as they mature toward 5–6 inches they increasingly prefer fish food and their BBA consumption drops sharply. Many aquascapers keep a group of young SAEs for six to twelve months, then rehome the adults. Groups of three to six are the minimum for tanks 20 gallons and up.
Hair and Thread Algae: Amano Shrimp
For the long, green filaments that tangle around moss and stem tips, nothing competes with the Amano shrimp (Caridina multidentata), the species that started the modern planted-tank cleanup movement. A working crew of Amanos will strip thread algae cleanly in days — they are the single most effective hair-algae grazer in the hobby.
Stocking and plant safety
The standard working dose is one Amano per 2–5 gallons when fighting an outbreak, settling to roughly one per 5 gallons for maintenance. They are large for shrimp (up to 2 inches), sturdy, and completely plant-safe. One quirk: in a freshly cycled tank with nothing to graze, Amanos will opportunistically nibble tender new shoots, which looks alarming but is harmless once the tank matures. For the full picture, see setting up a shrimp-focused planted tank.
When cherry shrimp are enough
Neocaridina (cherry shrimp) colonies graze algae too, just less aggressively. In a small nano tank where a 2-inch Amano feels oversized, a self-sustaining colony of a dozen cherry shrimp will handle light dustings and keep mosses clean. Cherry shrimp breed in freshwater while Amanos don't, so the colony maintains itself — but Amanos do the heavy lifting per individual. This pairing is also the answer to the classic ordering question (see FAQ): in a new planted tank, shrimp first, fish later.
Brown Diatoms: Otocinclus
The dusty brown coating that blankets new tanks in the first weeks is diatoms, not true algae — and otocinclus catfish are diatom specialists. A small school of three to six will polish leaves, glass, and hardscape in a new setup within days, working as a group the way nature designed them to.
The delicate-fish disclaimer
Otos are the cleaners most likely to die in your tank, and it's almost never your fault. They are frequently wild-caught, often arrive starved at wholesalers, and go through gut-flora changes on arrival. Buy the fattest, most active specimens, keep their bellies rounded with algae wafers or blanched zucchini from day one, and add them only to a mature, stable tank — never a fresh cycle. Once settled, healthy otos are gentle, plant-safe, and nearly invisible against the leaves they clean. Drip-acclimate them slowly; they are sensitive to sudden parameter swings.
Green Spot Algae and Film Algae: Nerite Snails
Green spot algae — the hard little green dots on glass and slow-grower leaves that resist scrapers and plecos alike — has exactly one reliable predator: the nerite snail. Species like zebra, olive, and horned nerites rasp GSA off glass overnight and are equally enthusiastic about soft film algae and diatoms. For algae control per dollar, a nerite is unmatched.
Plant safety and the egg question
Nerites are 100% plant-safe; they rasp algae off leaf surfaces without damaging tissue. The one tradeoff: female nerites lay hard, sesame-seed-like white eggs on hardscape and glass. The eggs cannot hatch in freshwater, so you'll never get baby nerites — but they are persistent and need scraping off. If the look bothers you, keep a single nerite (a lone snail still lays eggs, but far fewer). One nerite per 5–10 gallons is a solid starting dose.
Leftover Food and Detritus: Corydoras and Malaysian Trumpet Snails
Not everything labeled "cleaner" eats algae. Corydoras catfish and kuhli loaches eat uneaten food and disturb settled detritus; Malaysian trumpet snails burrow through the substrate, aerating it and eating buried debris. None remove algae from glass or leaves — but they prevent the decaying organic matter that feeds future outbreaks. A cleanup crew is a team: bottom-feeders handle waste, grazers handle algae. For how all these roles fit together, read our full cleanup crew guide.
The Two Species You Should Never Buy
The Chinese algae eater
The Chinese algae eater (Gyrinocheilus aymonieri, sold as "golden algae eater") is the pet trade's most regrettable default recommendation. Juveniles eat algae, which is why stores sell them — but adults reach 10 inches, stop eating algae, and develop a habit of latching onto slow fish to rasp their slime coats. They are territorial, aggressive, and spectacularly unsuited to planted community tanks.
The common pleco in a small tank
The common pleco (Hypostomus plecostomus) is sold at 2 inches and matures into a 2-foot bulldozer that uproots plants, produces enormous waste, and outgrows anything under 75–125 gallons. It is also a mediocre algae eater as an adult. Small planted tanks have a legitimate pleco option — bristlenose plecos (Ancistrus spp.) stay around 4–5 inches, graze glass diligently, and are generally plant-safe — but the common pleco never belongs in a 20-gallon scape.
Stocking Rules by Tank Size
Algae-eater stocking follows the algae, not the gallons — but bioload matters. Use these as starting points for an established, planted tank with a moderate algae load:
- 5–10 gallon nano: 1–2 nerite snails plus either 4–6 Amano shrimp or a colony of 10+ cherry shrimp. No SAE — too large and active.
- 20 gallon: 2–3 nerites, 6–8 Amanos, 3–4 otocinclus, and a trio of young SAEs for BBA-prone setups.
- 40+ gallon: scale the above per 10 gallons, plus a school of 6–8 otocinclus and, if appropriate, a bristlenose pleco and a small corydoras school for substrate duty.
Build the crew gradually over weeks, starting with snails and shrimp, then otos, then SAEs last. Adding everything at once to an immature tank means hungry cleaners and ammonia spikes — the same patience stocking a 10-gallon planted tank requires applies at any size.
Acclimation: The Step Everyone Skips
Shrimp and otos are the two cleaners most sensitive to water-chemistry changes, and most losses happen in the first 48 hours. Float the bag for temperature, then drip-acclimate over 45–60 minutes so the chemistry blends gradually. For Amano and cherry shrimp, sudden shifts in GH/KH are the specific killer — a shrimp that was fine at the store can die overnight in a tank with very different hardness. Nerites are tougher but still benefit from acclimation. Keep the tank lights off for the first few hours and have food available: wafers or blanched vegetables for otos, a small algae wafer for shrimp, so nobody spends its first night hunting a strange tank on an empty stomach.
Why Overfed Cleaners Stop Cleaning (and How to Feed Them Right)
Here is the paradox at the heart of algae-eater keeping: the cleaner that never goes hungry never cleans. A crew that gets flake food, algae wafers, and blanched zucchini every day will graze less — why work for algae when dinner is served? But a starving cleaner dies, and starvation is the far more common problem, especially with otocinclus.
The balance: feed enough that bellies stay rounded and animals stay active, but make algae the first course. Targeted supplemental feeding — a half wafer twice a week for otos in a clean tank, vegetables only when grazing looks thin — keeps cleaners alive without turning them into pets that wait for the hand that feeds. Shrimp in an established planted tank rarely need feeding at all; biofilm and microalgae sustain them. If your Amanos abandon the algae the day you add a wafer, you know your dosage is off.
Frequently Asked Questions
Will algae eaters starve in a clean tank?
Sometimes — and this is how many otocinclus die. A truly algae-free tank cannot support grazing specialists, so keep a patch of light on a back glass or rock you deliberately let grow, rotate "algae rocks" from a sunny windowsill bucket, and supplement with blanched zucchini, cucumber, or algae wafers. Shrimp are far less demanding: established tanks produce enough biofilm to sustain colonies indefinitely.
Algae eaters or shrimp first — which should I add to a new tank?
Shrimp first, always. Shrimp have a tiny bioload and can graze a new tank the moment algae appears without disturbing the cycle. Otocinclus and especially SAEs need mature, stable water and an existing food supply. The practical order is: cycle the tank, add nerites and shrimp as the first cleanup wave, wait until the tank is stable and at least a few weeks old, then add otos and SAEs.
Will Siamese algae eaters eat my plants?
True SAEs are plant-safe and won't uproot stems or chew healthy leaves. The confusion comes from mislabeled Chinese algae eaters and flying foxes, which are less useful against algae and more disruptive. Verify the stripe-through-the-tail marking when you buy. One exception: an SAE in a starving tank may rasp at tender new growth, so keep them fed with vegetables when algae is scarce.
Can I keep algae eaters with bettas or dwarf shrimp?
Nerites and otos are safe with virtually everything. Amano shrimp are too large for bettas to eat and usually coexist peacefully, though a feisty betta may nip. Cherry shrimp colonies, however, become expensive betta snacks — their shrimplets rarely survive with a betta present. Keep cherry shrimp breeding tanks fishless or with only micro-fish tankmates.
How many algae eaters do I need for my tank?
Start with the stocking section above rather than guessing by volume alone: one nerite per 5–10 gallons, roughly one Amano per 5 gallons for maintenance, otos in schools of at least three, SAEs in trios or larger for tanks 20 gallons and up. Match the crew to the algae you actually have — there is no point adding an SAE if your problem is diatoms, and otos won't touch green spot algae.
Do algae eaters eliminate the need for manual algae removal?
No. Cleaners graze films, dustings, and early-stage growths — but they can't scrape mature green spot off glass, untangle heavy thread-algae mats, or remove established BBA tufts. Think of them as the crew that keeps a clean tank clean after you've done the initial scrub.
The Bottom Line
The best algae eater for a planted tank is the one that eats your specific algae: young Siamese algae eaters for black beard algae, Amano shrimp for hair algae, otocinclus for diatoms, and nerite snails for green spot algae and film. Avoid the Chinese algae eater and the common pleco entirely, stock gradually to your tank's actual needs, acclimate patiently, and feed just enough to keep cleaners alive without retiring them. Do that, and your cleanup crew becomes what it's meant to be — the finishing touch on a balanced tank, not a patch over a broken one.
Tissue-culture plants are the exception — they’re grown in sterile gel and adapt with minimal melting, which is part of what you’re paying for. Plants bought submersed from another hobbyist’s tank also transition with little melt, since they’re already in the right form.
Which Plants Melt Most (and Least)
Heavy melters (expect significant leaf loss)
- Cryptocorynes — infamous for “crypt melt,” sometimes dropping every leaf after any disturbance. They almost always recover from the roots within weeks.
- Stem plants grown emersed — rotala, ludwigia, and hygrophila often shed lower emersed leaves while the growing tips transition.
- Amazon swords — emersed-grown swords typically lose their broad oval aerial leaves and replace them with longer submersed ribbon leaves.
Light melters
- Anubias, java fern, bucephalandra — slow-growing rhizome plants transition gradually; occasional old-leaf melt but rarely dramatic.
- Vallisneria — usually transitions well, though it dislikes the move itself and may sulk for a week.
- Floating plants — minimal melt since their leaves were already at the air-water interface.
The Acclimation Protocol
Step 1: Quarantine or dip first
Before acclimating to your tank’s conditions, make sure you’re not acclimating pests along with the plant. Run new arrivals through our quarantine and dip protocol — it adds days upfront but prevents months of regret.
Step 2: Float to temperature-match (30 minutes)
Float the bag or container in your tank for 20–30 minutes to equalize temperature. Plants are less temperature-sensitive than fish, but a 10°F shock on top of transplant stress is an avoidable insult.
Step 3: Trim before planting
Remove any leaves that are already damaged, yellowing, or heavily algae-covered — they won’t recover and they’ll rot in your tank, feeding algae. For stem plants, trim off the bottom inch and any emersed leaves that look unlikely to adapt; the plant wastes energy maintaining leaves it’s going to shed anyway. Keep the healthy growing tips — that’s where recovery starts.
Step 4: Plant correctly the first time
Follow our planting guide — right depth, crown exposed on rosettes, rhizomes unburied on epiphytes. Every uprooting and replanting restarts the acclimation clock, so get placement right on the first attempt. Decide where each plant goes before it goes in the water.
Step 5: Run a gentle first week
For the first 7 days after planting:
- Moderate light — run your normal photoperiod but consider dropping intensity 20–30% if your light is dimmable. Blast-level light on a melting plant grows algae on the dying leaves, not recovery.
- Stable CO2 — if you inject CO2, keep it consistent. Fluctuating CO2 during acclimation is a melt accelerator. If you’re low-tech, this doesn’t apply — see growing without CO2.
- Half-strength fertilizer — new plants with damaged leaves can’t use full dosing, and the excess feeds algae. Ramp to full strength over 2–3 weeks per our fertilizer schedule.
- No disturbance — don’t move, trim, or “check on” new plants for at least two weeks. Every touch resets root establishment. This is especially critical for crypts.
Step 6: Remove melt, keep the base
As emersed leaves melt, remove the mushy material promptly — decaying leaves release ammonia and grow fungus that can spread to healthy tissue. But never discard the plant while the crown, rhizome, or roots are firm and alive. A crypt that’s lost every leaf but has firm roots is a plant that’s about to recover, not a dead plant. Give it 3–4 weeks before judging.
Telling Normal Melt From Real Problems
Normal transition melt:
- Affects oldest/emersed leaves first, newest growth last
- New submersed leaves emerge even as old ones dissolve
- Roots and crown stay firm and white/green
- Timeline: 1–4 weeks, then obvious new growth
Concerning melt (see our full melting diagnosis guide):
- New growth also melts or emerges deformed
- Rhizome or crown turns mushy and brown — this is rot, not transition
- Entire plant dissolves within days with no new growth after 4+ weeks
- Melting spreads to established plants that weren’t recently moved
Buying Tips to Minimize Melt
- Buy submersed-grown when available — hobbyist-grown cuttings transition with almost no melt.
- Choose tissue culture for sensitive species — crypts and delicate stems establish far more reliably from sterile cups.
- Avoid plants already melting in the store tank — some melt is normal, but a plant that’s mostly mush at purchase has less energy for recovery.
- Transport carefully — keep plants damp and out of direct sun/heat. A plant that dries out or cooks in a hot car melts far worse than one transported properly.
The First-Month Timeline: What to Expect Week by Week
Knowing what’s normal when removes most acclimation anxiety. Here’s the typical timeline for a healthy plant adapting to a new tank:
Week 1: The quiet week
Almost nothing visible happens. The plant is growing roots you can’t see and assessing its new environment. Some species (vallisneria, stem plants) may start shedding their lowest leaves. This is normal. Resist the urge to “help” — no moving, no extra fertilizer, no light changes. The most common beginner mistake is intervening during a week when the correct action is nothing.
Week 2: Melt peaks
This is when emersed leaves give up in earnest. Crypts may drop everything; swords shed their broad aerial leaves; stem plants lose lower foliage. It looks catastrophic and it’s usually fine. Keep removing mushy material, keep conditions stable, and watch the crown and growing tips — if those are firm and green, recovery is already underway.
Week 3: The turn
New submersed-adapted leaves emerge — smaller, thinner, often a slightly different shade of green than the emersed foliage. Stem plant tips start growing visibly; crypts push tiny curled leaves from the crown; swords unfurl narrow ribbon leaves. This is the moment most beginners exhale for the first time.
Week 4+: Established
New growth outpaces melt, and the plant is functionally yours. You can resume full-strength fertilizer, normal trimming, and stop treating it as fragile. Some slow growers (anubias, bucephalandra) take 6–8 weeks to show obvious progress — that’s their normal speed, not a problem.
Acclimating Different Plant Formats
Tissue-culture cups
Sterile, pest-free, and already adapted to high-humidity (not emersed) growth — tissue cultures melt the least of any format. Rinse the agar gel off gently (leftover gel rots and feeds fungus), split the portion into small plantlets, and plant per our planting guide. They establish slowly for the first two weeks, then accelerate. No dip needed, minimal acclimation stress — this is the premium experience you’re paying for.
Potted plants
Remove the pot and strip away the rockwool completely — leftover rockwool traps debris and rots. Tease the root mass apart gently; if it’s a dense mat, splitting it into 2–3 smaller portions actually establishes faster than planting one big clump (more growing points, better water flow around roots). Potted plants are usually emersed-grown, so expect the standard 2–4 week melt cycle.
Bare-root / bunched stems
Typically sold as weighted bunches. Remove any bands, foam, or weights, strip the lower leaves, and plant stems individually or in small groups. Bunched stems from the store are often already transitioning — check for new submersed growth at the tips, which tells you the plant is mid-adaptation and will settle quickly.
Hobbyist cuttings
Already submersed-grown and the fastest to establish — often showing new growth within days. The main acclimation factor is water-parameter difference between the two tanks. Float to temperature-match, plant promptly, and they’ll usually take off with minimal melt. This is why experienced hobbyists prefer trading cuttings over buying potted plants.
Frequently Asked Questions
Should I use a “plant starter” or transplant fertilizer?
Products marketed for transplant shock are mostly B-vitamins and mild hormones. They don’t hurt, but there’s no strong evidence they help aquarium plants specifically. Stable conditions and patience outperform any bottle. Save the money for more plants.
My new plant melted completely — bare crown, no leaves. Is it dead?
Probably not, if the crown or rhizome is firm. Crypts and swords routinely lose 100% of their leaves and regrow from the base within a month. The test is firmness: firm and pale/green means alive; mushy and brown/black means rot. Give firm-but-leafless plants a full 4 weeks before declaring them dead.
Can I speed up acclimation with extra light or CO2?
No — and trying usually backfires. A melting plant can’t use extra light; the excess just grows algae on its dying leaves. Keep light moderate and CO2 stable (not boosted) during acclimation. Growth speed comes from the plant’s own adaptation timeline, which you can’t rush, only avoid delaying.
Should new plants go straight into my main display tank?
After quarantine/dipping, yes — there’s no benefit to a separate “growing-in” tank for most plants. They acclimate to your water fastest in the tank they’ll live in. The exception is very delicate species going into a tank with boisterous fish; give those a few weeks in a calm corner or breeder box first.
The Patience Rule
The single most important acclimation skill is restraint: plant it right, set gentle conditions, remove decay, and then leave it alone for a month. The hobbyists with the best plant growth aren’t doing something clever in week one — they’re simply not interfering in weeks two through four while the plants do what they’ve evolved to do. Melt looks like failure and feels like failure, but in most cases it’s the visible part of a plant successfully becoming yours.