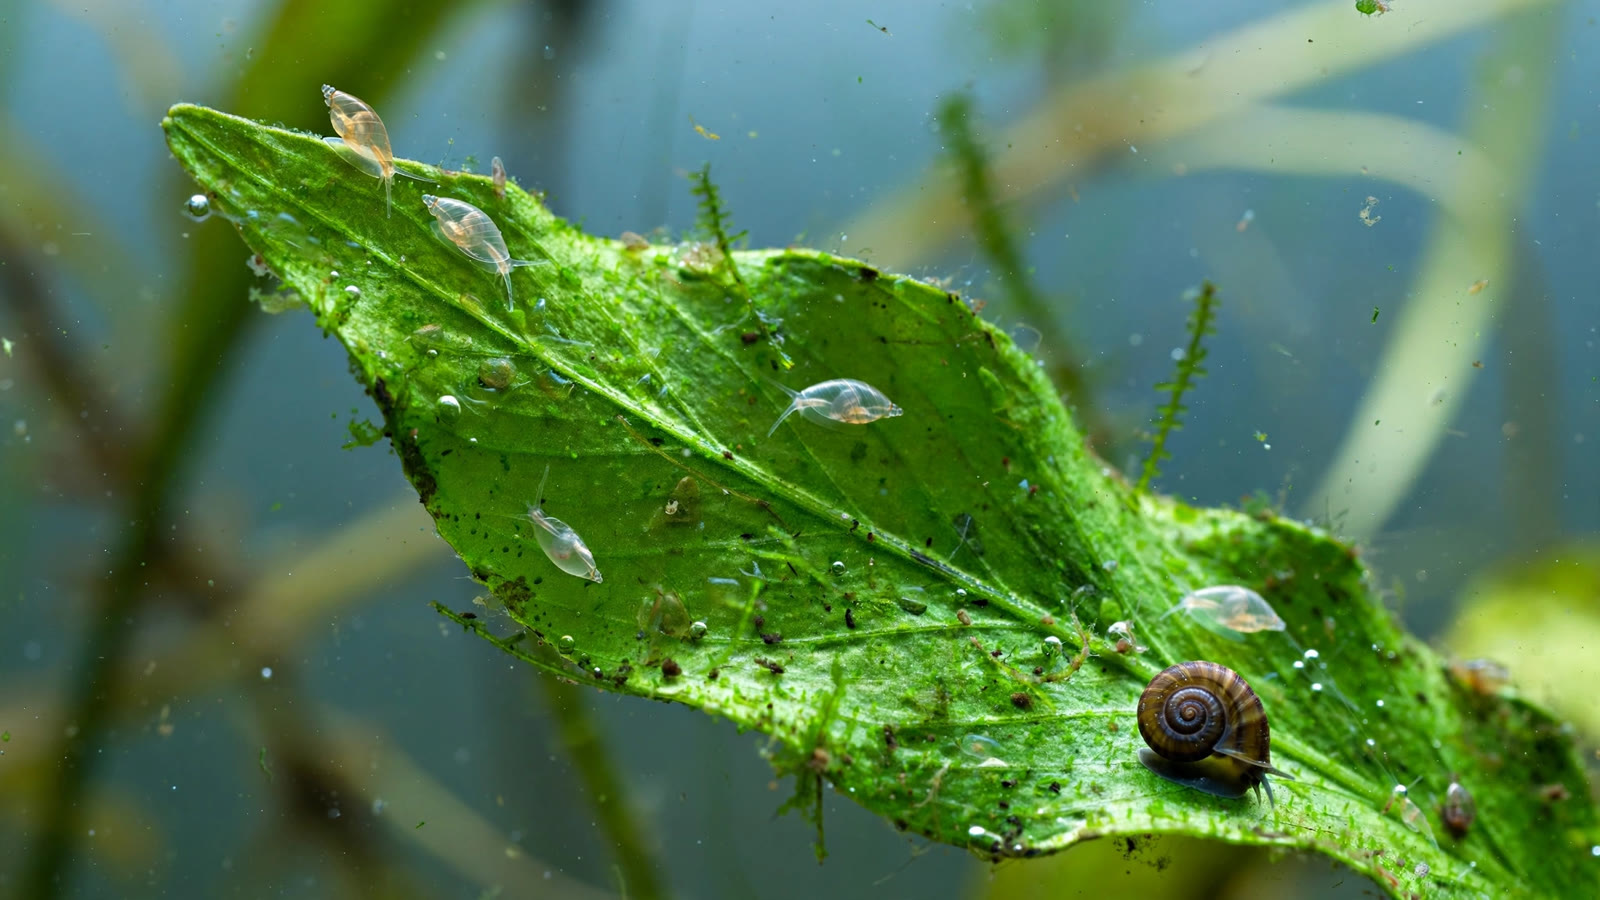
Finding pest snails on aquarium plants you just brought home is one of the most common surprises in the planted tank hobby. You unwrap a lush bunch of stems, plant them carefully, and a week later tiny translucent specks are gliding across the glass. Most arrived as nearly invisible egg clutches tucked into leaf axils or root masses at the nursery, not as adult snails. The good news: hitchhikers are entirely preventable, and even an established outbreak can be brought under control without tearing down your aquascape.
Why Plants Are the Number-One Entry Vector
Almost every pest snail infestation in a planted tank traces back to new plants. Commercial growers cultivate plants in outdoor or greenhouse ponds where snails are simply part of the ecosystem. A single egg clutch can contain hundreds of eggs, laid as a clear gelatinous mass on leaf undersides, in the crowns of rosette plants like cryptocorynes, or tangled in root systems where a rinse under the tap rarely reaches them.
Eggs hatch in one to three weeks, and newborn snails are barely a millimeter across — easily mistaken for debris. Because common pest species reproduce asexually or self-fertilize, one surviving clutch can seed an entire tank. Other entry routes like fish water play a minor role by comparison, which is why quarantining new aquarium plants is the single highest-leverage habit a planted tank keeper can build. Prevention beats every cure.
Identifying the Common Hitchhiker Snails
Not every small snail is a disaster, and misidentification leads to unnecessary panic or, worse, the wrong treatment. The four species that hitchhike most often each behave differently:
Bladder snails
Tiny (2–6 mm as adults), with a left-handed teardrop shell. Bladder snails are the fastest breeders of the group and can reproduce from a single individual. They eat algae, biofilm, and decaying matter but leave healthy plants alone. An explosion of bladder snails almost always signals overfeeding or excess detritus rather than a snail problem per se.
Ramshorn snails
Recognizable by their flat, coil-shaped shell resembling a ram's horn, growing to 1–2 cm. Ramshorns are excellent algae eaters and considered beneficial until their numbers climb. They lay flat, clear egg discs on glass and leaves, and large adults may rasp tender plants if food is scarce.
Common pond snails
Similar to bladder snails in silhouette but right-handed and larger, up to 2–3 cm. Pond snails are the most likely hitchhikers to graze on living plant tissue, especially soft new growth. They reproduce rapidly and lay long clear jelly ribbons on hard surfaces.
Malaysian trumpet snails (MTS)
Long conical shells that burrow into the substrate by day and emerge at night. MTS rarely touch plants and aerate the substrate, but they multiply quickly and are nearly impossible to remove once established in deep gravel. Their presence signals food accumulating in the substrate.
Inspecting New Plants Before They Enter Your Tank
A careful inspection catches most adult snails and many egg clutches before they ever reach your display tank. Make inspection a non-negotiable step of every plant purchase, whether the plant came from a local fish store, an online retailer, or a hobbyist trade:
- Rinse and shake. Hold the plant in a bucket of dechlorinated water and swish vigorously. Dislodged adult snails sink or float out of the foliage.
- Examine leaf undersides. Flip leaves and look for clear jelly dots or smears — bladder snail eggs look like clusters of tiny white dots in clear gel; ramshorn eggs form flat, circular discs.
- Check the crown and roots. Rosette plants like Amazon swords and crypts hide clutches deep in the crown. For rooted plants, gently tease the root mass apart under bright light.
- Remove dead or melting leaves. Decaying tissue is both the preferred egg-laying surface and the food that fuels the first generation. Trim it before the plant goes in.
- Use a magnifying glass. Newly hatched snails are under a millimeter. A quick pass with a loupe over new stems costs seconds and catches what eyes miss.
Inspection alone is not enough — eggs are translucent and easy to miss — but it removes the bulk of the hitchhikers and makes the following dip treatments far more effective. If you bought plants that are already melting, consider that melting tissue signals wider problems; our guide on plants melting after a CO2 change covers how melting leaves invite trouble of all kinds.
Plant Dips: The Proven Disinfection Methods
A plant dip is a short chemical bath that kills snails and egg clutches without (usually) killing the plant. Three dips have long track records in the hobby. Choose based on how delicate your plant is — never dip weak, recently melted, or ultra-sensitive species like Utricularia or newly tissue-cultured plantlets if you can quarantine them instead.
| Dip | Recipe (per gallon of water) | Duration | Best for |
|---|---|---|---|
| Alum | 1 tablespoon aluminum sulfate (spice-aisle alum) | 3 hours (overnight for tough plants) | All plants; gentlest and most reliable for eggs |
| Bleach | 1 part unscented bleach to 19 parts water (5%) | 90 seconds to 2 minutes | Sturdy plants (anubias, java fern, swords) |
| Hydrogen peroxide | 3% pharmacy peroxide, 1 part to 3 parts water | 3–5 minutes | Delicate stems; good against algae too |
The alum dip (most forgiving)
Alum is the best starting point for most hobbyists. Dissolve one tablespoon of alum per gallon of dechlorinated water, submerge the plants for up to three hours, then rinse thoroughly and soak in fresh dechlorinated water with a double dose of dechlorinator for ten minutes. Alum reliably kills adult snails and, with the longer soak, most egg clutches. Sensitive mosses may need the shorter end of the range.
The bleach dip (fast and harsh)
Mix a 5% bleach solution (1:19 with water), submerge hardy plants for 90 seconds to two minutes while gently agitating, then rinse extremely well and soak in heavily dechlorinated water for at least ten minutes. Bleach is the most effective against eggs but the harshest on plants — delicate stems and mosses can melt from it. Never use scented or splashless bleach, and never skip the dechlorinator soak.
The hydrogen peroxide dip (middle ground)
Dilute standard 3% hydrogen peroxide 1:3 with water, soak plants for three to five minutes, then rinse and dechlorinate. Peroxide kills exposed snails and is gentler than bleach, though less certain against thick egg jelly. It breaks down into water and oxygen, so residue concerns are minimal.
Whatever dip you choose, rinse, rinse, rinse: any chemical residue carried into the tank threatens shrimp and sensitive fish far more than the snails you were trying to remove. Plants you dip may shed a few leaves afterward — this stress melting looks alarming but is usually temporary; see our guide on plants melting in new aquasoil for how to tell stress melt from a dying plant.
Quarantine: The Two-Week Safety Net
Even after inspection and a dip, a dedicated plant quarantine of two weeks catches anything that survived. Use a bucket or small spare tank with a light and a lid to slow evaporation. Float or plant the new arrivals in dechlorinated water with no fish.
Over the two weeks, watch for baby snails on the walls and tiny white specks of new egg clutches. If snails appear, pick them out and re-dip or extend quarantine; if the container stays clean for a full two weeks, the plants are almost certainly safe. A side benefit: quarantine lets plants recover from shipping stress before facing the demands of your aquascape. Dip plus quarantine is the gold standard — dips handle most eggs, quarantine catches the survivors, and together they fail rarely. For species-specific hardiness data before you choose a dip strength, Tropica's aquarium plant resources list each species' difficulty and growth rate, which helps you judge how much chemical stress a plant can take.
Tissue Culture Plants: The Snail-Free Alternative
If all of this sounds like too much work, tissue culture plants sidestep the problem entirely. These are grown in sterile lab conditions and arrive in sealed cups — no snails, no eggs, no algae, no pesticides. Species like Alternanthera reineckii, Staurogyne repens, and most carpeting plants are widely available in tissue culture form.
The trade-offs are manageable: tissue culture cups cost more per plant, the plantlets are small, and they typically melt back before regrowing (a normal transition, not a failure). For delicate carpet plants that are impossible to inspect thoroughly, tissue culture is the cleanest option available. Many aquarists use a hybrid approach: tissue culture for carpets and foregrounds, dipped and quarantined potted plants for the rest.
Managing Pest Snails on Aquarium Plants Already in Your Tank
Prevention is ideal, but most aquarists reading this already have snails. Population control works because snail numbers track food availability almost exactly. A tank full of snails is a tank with excess food — cutting the food crashes the population.
Cut the food supply
Reduce feeding to what fish consume in two minutes, vacuum detritus from the substrate weekly, and remove dead leaves promptly. Bladder and ramshorn populations visibly shrink within a few weeks of stricter feeding. Snail booms often coincide with other overfeeding-linked pests — if you are fighting multiple fronts, our guide to detritus worms in planted tanks addresses a problem with the same root cause.
Snail traps
A blanched lettuce leaf or piece of zucchini placed in the tank at lights-out becomes a snail magnet by morning; lift it out with its passengers attached. Trapping removes dozens to hundreds of snails per night during the early weeks of an outbreak and is completely livestock-safe, making it the best first move alongside feeding cuts.
Assassin snails
Clea helena (assassin snails) are the biological control option: they prey on other snails, eating one to a few per day each. They are safe with plants, most fish, and adult shrimp, though they will opportunistically take shrimplets. Use them as a cleanup crew for an established outbreak, not as permanent residents alongside snails you want to keep — they turn on nerites and each other once the pests are gone.
What to avoid
Copper-based medications kill snails but also kill shrimp, damage plants, and can leave residues that make the tank permanently invertebrate-unfriendly. Loach "solutions" like clown loaches solve a snail problem by creating an outgrown-fish problem. Chemical shortcuts almost always cost more than the problem they solve.
Helpful Snails vs. True Pest Outbreaks
Not every snail deserves eviction. A modest population of bladder or ramshorn snails is genuinely useful: they eat algae and biofilm, break down detritus, and serve as a living indicator of how much excess food is in the tank. The distinction between "helpful residents" and "pest outbreak" is quantitative, not moral:
- Healthy balance: a few dozen snails that stay mostly out of sight during the day, algae under control, plants untouched.
- True outbreak: hundreds of snails coating the glass, egg clutches on every leaf, plants being rasped, numbers rebounding within days of manual removal.
An outbreak means the tank has a food problem, and the snails are its symptom. Treat the cause (feeding, detritus, dying plant matter) and the snails follow. It is worth confirming snails are actually the culprits chewing your leaves — our article on snails eating aquarium plants helps you tell snail damage apart from other causes.
Finally, plants can harbor more than snails. Eggs of hydra and planaria arrive the same way — dips and quarantine protect against all of them at once, one more reason to make inspection and dipping a habit rather than an emergency measure. Floating plants deserve a caution too: duckweed hitchhikes on plant orders just like snails do, and it is far harder to remove once established.
Frequently Asked Questions
Will pest snails eat my healthy aquarium plants?
Most hitchhiker snails — bladder, ramshorn, and Malaysian trumpet snails — prefer algae and decaying matter over living tissue, so healthy plants are usually safe. Common pond snails are the exception and will rasp soft new growth. When populations explode, even "safe" species can damage tender plants by sheer numbers, so verify snails are the actual cause before acting.
Do I really need to dip plants if they look clean?
Yes. Egg clutches are translucent jelly masses nearly invisible on green leaves, and they survive a tap-water rinse. A plant can look spotless and still carry hundreds of eggs. The alum dip is gentle and takes minutes of active work, so there is little reason to skip it — treat it like quarantining new fish.
How long should I quarantine new aquarium plants?
Two weeks is the reliable minimum. Snail eggs hatch in one to three weeks depending on temperature, so a full fortnight in a separate lit container reveals hatchlings from any clutch that survived inspection and dipping. If snails appear, remove them and extend quarantine or re-dip. If two weeks pass with nothing, the plants are safe to plant.
Are assassin snails safe with shrimp and plants?
Assassin snails are completely plant-safe and coexist fine with fish and adult shrimp, making them one of the gentler biological controls. The caveat is shrimplets: they will take baby shrimp they can catch, so they are a poor choice for breeding tanks. They also eat desirable snails like nerites, so rehome them once the pests are gone.
Can I just crush pest snails and leave them in the tank?
Crushing snails and leaving them feeds the tank: fish, shrimp, and loaches happily eat the meat, and the shells' calcium benefits water chemistry. It is a legitimate chemical-free reduction method — but it does nothing about eggs, so pair it with food reduction. Never crush large numbers at once in a small tank, since the sudden organic load can spike ammonia.
Will a snail outbreak go away on its own?
It can, but only if the food supply that built it disappears. Snail populations track available food almost exactly: cut feeding, vacuum detritus, and remove decaying leaves, and numbers fall noticeably within three to six weeks. If you change nothing, the population stabilizes at whatever level your waste supports — it will not vanish. Treat snails as a gauge for overfeeding rather than an independent enemy.
Make Clean Plants a Habit, Not an Emergency
Pest snails on aquarium plants are one of the most preventable problems in the hobby: inspect every new plant, run a three-minute dip, and quarantine new arrivals for two weeks. Clean arrivals never build the food surplus that turns a few grazers into an outbreak. If snails are already established, cut the food, trap nightly, consider assassin snails — then keep the habits so the next plant order does not restart the cycle.
Tissue-culture plants are the exception — they’re grown in sterile gel and adapt with minimal melting, which is part of what you’re paying for. Plants bought submersed from another hobbyist’s tank also transition with little melt, since they’re already in the right form.
Which Plants Melt Most (and Least)
Heavy melters (expect significant leaf loss)
- Cryptocorynes — infamous for “crypt melt,” sometimes dropping every leaf after any disturbance. They almost always recover from the roots within weeks.
- Stem plants grown emersed — rotala, ludwigia, and hygrophila often shed lower emersed leaves while the growing tips transition.
- Amazon swords — emersed-grown swords typically lose their broad oval aerial leaves and replace them with longer submersed ribbon leaves.
Light melters
- Anubias, java fern, bucephalandra — slow-growing rhizome plants transition gradually; occasional old-leaf melt but rarely dramatic.
- Vallisneria — usually transitions well, though it dislikes the move itself and may sulk for a week.
- Floating plants — minimal melt since their leaves were already at the air-water interface.
The Acclimation Protocol
Step 1: Quarantine or dip first
Before acclimating to your tank’s conditions, make sure you’re not acclimating pests along with the plant. Run new arrivals through our quarantine and dip protocol — it adds days upfront but prevents months of regret.
Step 2: Float to temperature-match (30 minutes)
Float the bag or container in your tank for 20–30 minutes to equalize temperature. Plants are less temperature-sensitive than fish, but a 10°F shock on top of transplant stress is an avoidable insult.
Step 3: Trim before planting
Remove any leaves that are already damaged, yellowing, or heavily algae-covered — they won’t recover and they’ll rot in your tank, feeding algae. For stem plants, trim off the bottom inch and any emersed leaves that look unlikely to adapt; the plant wastes energy maintaining leaves it’s going to shed anyway. Keep the healthy growing tips — that’s where recovery starts.
Step 4: Plant correctly the first time
Follow our planting guide — right depth, crown exposed on rosettes, rhizomes unburied on epiphytes. Every uprooting and replanting restarts the acclimation clock, so get placement right on the first attempt. Decide where each plant goes before it goes in the water.
Step 5: Run a gentle first week
For the first 7 days after planting:
- Moderate light — run your normal photoperiod but consider dropping intensity 20–30% if your light is dimmable. Blast-level light on a melting plant grows algae on the dying leaves, not recovery.
- Stable CO2 — if you inject CO2, keep it consistent. Fluctuating CO2 during acclimation is a melt accelerator. If you’re low-tech, this doesn’t apply — see growing without CO2.
- Half-strength fertilizer — new plants with damaged leaves can’t use full dosing, and the excess feeds algae. Ramp to full strength over 2–3 weeks per our fertilizer schedule.
- No disturbance — don’t move, trim, or “check on” new plants for at least two weeks. Every touch resets root establishment. This is especially critical for crypts.
Step 6: Remove melt, keep the base
As emersed leaves melt, remove the mushy material promptly — decaying leaves release ammonia and grow fungus that can spread to healthy tissue. But never discard the plant while the crown, rhizome, or roots are firm and alive. A crypt that’s lost every leaf but has firm roots is a plant that’s about to recover, not a dead plant. Give it 3–4 weeks before judging.
Telling Normal Melt From Real Problems
Normal transition melt:
- Affects oldest/emersed leaves first, newest growth last
- New submersed leaves emerge even as old ones dissolve
- Roots and crown stay firm and white/green
- Timeline: 1–4 weeks, then obvious new growth
Concerning melt (see our full melting diagnosis guide):
- New growth also melts or emerges deformed
- Rhizome or crown turns mushy and brown — this is rot, not transition
- Entire plant dissolves within days with no new growth after 4+ weeks
- Melting spreads to established plants that weren’t recently moved
Buying Tips to Minimize Melt
- Buy submersed-grown when available — hobbyist-grown cuttings transition with almost no melt.
- Choose tissue culture for sensitive species — crypts and delicate stems establish far more reliably from sterile cups.
- Avoid plants already melting in the store tank — some melt is normal, but a plant that’s mostly mush at purchase has less energy for recovery.
- Transport carefully — keep plants damp and out of direct sun/heat. A plant that dries out or cooks in a hot car melts far worse than one transported properly.
The First-Month Timeline: What to Expect Week by Week
Knowing what’s normal when removes most acclimation anxiety. Here’s the typical timeline for a healthy plant adapting to a new tank:
Week 1: The quiet week
Almost nothing visible happens. The plant is growing roots you can’t see and assessing its new environment. Some species (vallisneria, stem plants) may start shedding their lowest leaves. This is normal. Resist the urge to “help” — no moving, no extra fertilizer, no light changes. The most common beginner mistake is intervening during a week when the correct action is nothing.
Week 2: Melt peaks
This is when emersed leaves give up in earnest. Crypts may drop everything; swords shed their broad aerial leaves; stem plants lose lower foliage. It looks catastrophic and it’s usually fine. Keep removing mushy material, keep conditions stable, and watch the crown and growing tips — if those are firm and green, recovery is already underway.
Week 3: The turn
New submersed-adapted leaves emerge — smaller, thinner, often a slightly different shade of green than the emersed foliage. Stem plant tips start growing visibly; crypts push tiny curled leaves from the crown; swords unfurl narrow ribbon leaves. This is the moment most beginners exhale for the first time.
Week 4+: Established
New growth outpaces melt, and the plant is functionally yours. You can resume full-strength fertilizer, normal trimming, and stop treating it as fragile. Some slow growers (anubias, bucephalandra) take 6–8 weeks to show obvious progress — that’s their normal speed, not a problem.
Acclimating Different Plant Formats
Tissue-culture cups
Sterile, pest-free, and already adapted to high-humidity (not emersed) growth — tissue cultures melt the least of any format. Rinse the agar gel off gently (leftover gel rots and feeds fungus), split the portion into small plantlets, and plant per our planting guide. They establish slowly for the first two weeks, then accelerate. No dip needed, minimal acclimation stress — this is the premium experience you’re paying for.
Potted plants
Remove the pot and strip away the rockwool completely — leftover rockwool traps debris and rots. Tease the root mass apart gently; if it’s a dense mat, splitting it into 2–3 smaller portions actually establishes faster than planting one big clump (more growing points, better water flow around roots). Potted plants are usually emersed-grown, so expect the standard 2–4 week melt cycle.
Bare-root / bunched stems
Typically sold as weighted bunches. Remove any bands, foam, or weights, strip the lower leaves, and plant stems individually or in small groups. Bunched stems from the store are often already transitioning — check for new submersed growth at the tips, which tells you the plant is mid-adaptation and will settle quickly.
Hobbyist cuttings
Already submersed-grown and the fastest to establish — often showing new growth within days. The main acclimation factor is water-parameter difference between the two tanks. Float to temperature-match, plant promptly, and they’ll usually take off with minimal melt. This is why experienced hobbyists prefer trading cuttings over buying potted plants.
Frequently Asked Questions
Should I use a “plant starter” or transplant fertilizer?
Products marketed for transplant shock are mostly B-vitamins and mild hormones. They don’t hurt, but there’s no strong evidence they help aquarium plants specifically. Stable conditions and patience outperform any bottle. Save the money for more plants.
My new plant melted completely — bare crown, no leaves. Is it dead?
Probably not, if the crown or rhizome is firm. Crypts and swords routinely lose 100% of their leaves and regrow from the base within a month. The test is firmness: firm and pale/green means alive; mushy and brown/black means rot. Give firm-but-leafless plants a full 4 weeks before declaring them dead.
Can I speed up acclimation with extra light or CO2?
No — and trying usually backfires. A melting plant can’t use extra light; the excess just grows algae on its dying leaves. Keep light moderate and CO2 stable (not boosted) during acclimation. Growth speed comes from the plant’s own adaptation timeline, which you can’t rush, only avoid delaying.
Should new plants go straight into my main display tank?
After quarantine/dipping, yes — there’s no benefit to a separate “growing-in” tank for most plants. They acclimate to your water fastest in the tank they’ll live in. The exception is very delicate species going into a tank with boisterous fish; give those a few weeks in a calm corner or breeder box first.
The Patience Rule
The single most important acclimation skill is restraint: plant it right, set gentle conditions, remove decay, and then leave it alone for a month. The hobbyists with the best plant growth aren’t doing something clever in week one — they’re simply not interfering in weeks two through four while the plants do what they’ve evolved to do. Melt looks like failure and feels like failure, but in most cases it’s the visible part of a plant successfully becoming yours.