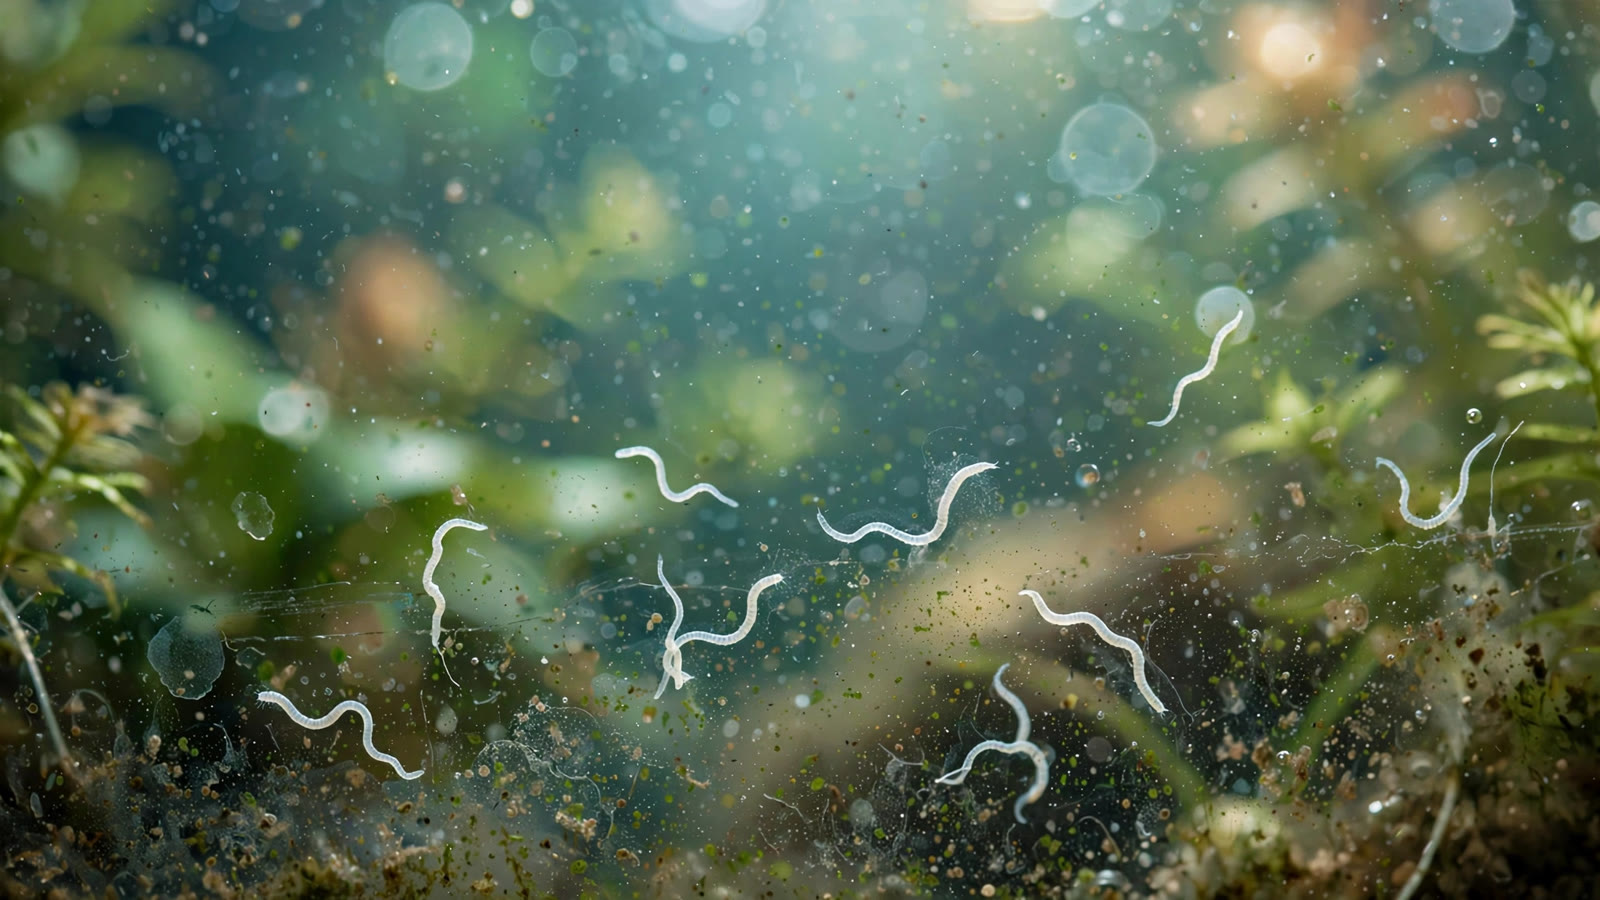
You lean in to admire your newly trimmed carpet of Monte Carlo, and something moves. There they are: tiny white threads wriggling against the glass, dozens of them, all at once. Your stomach drops. Detritus worms are the surprise every planted tank owner eventually meets — and the first thing to know is that they are far less terrifying than they look. These millimeter-scale oligochaetes are harmless to your fish, your shrimp, and your plants. They are simply doing what they have always done: eating the waste nobody else wants.
What Detritus Worms Actually Are
Detritus worms are segmented annelid worms in the class Oligochaeta, the same broad group as earthworms. They measure just 1–5 millimeters, appear white or translucent, and live mainly in the substrate, tunneling through its upper layers to feed on fish waste, uneaten food, decaying plant matter, and mulm. In a healthy tank they stay out of sight — you typically only notice them when a water change flushes them into the water column, or when a population boom sends them waving from the glass.
They arrive the ordinary way: hitched onto new plants, carried in new substrate, or introduced with decor and filter media. Dense plantings help them settle in quietly, because thick roots and carpets trap the organic debris that feeds them — and the plant cover hides them entirely until something changes.
The key point that surprises most newcomers: detritus worms are a natural, permanent part of the aquarium ecosystem. They cannot be permanently eradicated, and they should not be. The goal is simply a tank where the population stays small enough that you rarely see them.
How to Identify Them (And Rule Out Lookalikes)
Before doing anything, confirm you are looking at detritus worms and not something more serious. Watch how they move:
- Shape: thin, thread-like, uniform width, like a tiny white hair or sewing thread.
- Movement: they wiggle — frantic, thrashing, S-shaped swimming through open water. They do not glide.
- Location: scattered through the water column after a disturbance, or clinging to the glass and waving in the current. Some burrow back into the substrate when conditions settle.
- Behavior: they ignore your livestock entirely. They do not crawl onto fish or congregate on shrimp.
This wiggle test matters because two other common "white worms" get confused with detritus worms, and one of them genuinely deserves a response. Here is how to tell them apart:
| Feature | Detritus Worms | Planaria | Rhabdocoela |
|---|---|---|---|
| Appearance | Thin white threads, 1–5 mm, uniform width | Flat, slimy body, arrow/triangular head with visible eyespots | Tiny white ovals, 1–3 mm, often roundish |
| Movement | Wiggles and thrashes through water | Glides smoothly across glass, head first | Glides or inches along surfaces |
| Danger level | Harmless to fish, shrimp, and plants | Can prey on shrimp fry, baby snails, and weak livestock; eggs are the real target | Harmless |
| Treatment | Reduce feeding and waste; no chemicals needed | Manual removal plus targeted treatment (see planaria guide) | Same as detritus worms — starve them out |
The decisive clue is the head: planaria have a distinctly triangular or arrow-shaped head with two dark eyespots. If you see that, you are not dealing with detritus worms — read our guide to planaria in planted tanks and how to remove them instead. If the worms are just featureless white threads, relax. You have detritus worms, and this article is your plan.
White worms can also accompany other common tank headaches. If your outbreak coincides with rotting roots, see rotting aquarium plant roots; if plants are melting at the same time, check plants dying after a water change.
What a Worm Bloom Is Really Telling You
A sudden bloom of detritus worms is not a crisis — it is a message. The worm population only explodes when its food supply explodes, so a tank suddenly full of white threads is reporting that something in your maintenance has drifted. Treat the worms as a dashboard light, not an emergency.
The usual causes, roughly in order of frequency:
- Overfeeding. The most common driver. Food that sinks uneaten into carpets or aquasoil is a worm feast, and planted tanks hide this waste from view.
- Infrequent substrate cleaning. Dense carpets and thick root zones accumulate mulm that a quick top-up water change never touches.
- Neglected filter maintenance. A clogged filter reduces turnover and oxygen, and the decaying gunk inside becomes worm nursery territory.
- Dead plant matter left to rot. A melted crypt leaf or decaying stem left in the back of a jungle tank feeds worms for weeks.
- New-tank cycling debris. Fresh aquasoil leaches organics early on, and temporary worm booms during cycling are common and self-correcting.
There is one exception to the "not a crisis" rule: if masses of worms are plastered on the glass above the waterline or waving from every surface, check your oxygen. Detritus worms live in the substrate, and low dissolved oxygen drives them upward, just as it drives fish to gasp at the top. In that case the worms are the least of your problems — increase surface agitation, clean the filter, and check for anything decomposing.
The Benefits Nobody Mentions
It helps to reframe these worms before reducing them, because they do genuinely useful unpaid labor in your tank:
- Waste processing. They consume waste and decaying organics that would otherwise fuel ammonia and feed green water algae blooms, converting debris into forms plants can use.
- Substrate aeration. Their burrowing moves water and oxygen through the top substrate layer, discouraging the anaerobic pockets that cause the rotten-egg smell in deep soil beds.
- Live food. To fish, a worm bloom is not a plague — it is a buffet. Many species hunt them enthusiastically, which is free enrichment and nutrition.
- Bioindicator. A small, stable population you almost never see means your tank's waste cycle is working. That is a success metric, not a failure.
None of this means you should cultivate them deliberately. It means the correct response to a bloom is maintenance, not extermination.
Step-by-Step: Reducing Detritus Worms Safely
Forget chemicals for now. The following plan starves the population back to invisibility over two to three weeks, and it is the only approach that works long-term because it addresses the food supply rather than the symptom.
- Feed less, starting today. Cut feeding to what fish consume completely in about two minutes, once or twice daily. Remove food still on the substrate after five minutes. For two weeks, err on the side of slightly hungry fish — they tolerate a lean period far better than chronic overfeeding.
- Vacuum the substrate 2–3 times per week. Work section by section with a gravel siphon, plunging gently into the top layer. Hover just above dense carpets rather than tearing through them. Each session doubles as a 20–30% water change.
- Clean the filter properly. Rinse mechanical media in old tank water (never tap water, which kills beneficial bacteria), clear the impeller and intake, and replace compacted filter floss. A canister full of decomposing debris is a worm factory.
- Remove dead and decaying plant matter. Trim melting leaves, pull dead stems, and clear mulm under hardscape and at the base of dense plants. If you are battling deficiency melt too, the plant nutrient deficiency guide helps you tell melt from starvation.
- Hold steady and repeat. The population will not vanish overnight — eggs already in the substrate will still hatch. Two to three weeks of disciplined maintenance collapses the population, and your normal weekly routine then keeps it invisible.
Do not expect a dramatic single-day transformation. What you should see is a gradual retreat: fewer worms on the glass after each water change, until one day you realize you have not noticed any in weeks. That is the victory condition.
Fish That Eat Detritus Worms (And the Shrimp-Tank Caveat)
In a fish-only or community planted tank, adding natural predators is the most enjoyable form of worm control:
- Bettas — avid worm hunters; a single betta in a planted tank will patrol for them relentlessly.
- Corydoras — root through the substrate exactly where the worms live, combining cleanup with predation.
- Loaches — most loach species treat substrate worms as a primary food source.
- Angelfish and small cichlids — pick worms out of the water column and off leaves efficiently.
- Guppies, tetras, and other small insectivores — will all snack on worms flushed into the water column during maintenance.
The important caveat: predator fish only work in tanks that have fish. In a shrimp-only tank, bettas and loaches are not compatible housemates for obvious reasons. Shrimp tank owners should focus entirely on the feeding and vacuuming routine above, and accept a slightly slower decline. Cherry shrimp themselves ignore the worms, and the worms ignore the shrimp — the two can coexist indefinitely.
Snails complicate the picture slightly: if you are also fighting a snail problem, see snails eating aquarium plants, since the same overfeeding that feeds worms feeds pest snails.
The Shrimp-Tank Special Case: Identify Before You Treat
Shrimp keepers are the hobbyists most tempted to reach for chemicals, because a worm-covered glass wall feels catastrophic in a pristine nano scape. Slow down. The stakes of misidentification are highest here: detritus worms are harmless to shrimp, but planaria prey on shrimp fry and eggs, so the identification table above matters most in shrimp tanks.
For detritus worms in shrimp tanks, the plan is simply: feed less (shrimp need far less food than most owners give), siphon gently without disturbing shrimplets, and be patient. The population will contract.
What NOT to Do
Panic responses cost more livestock than detritus worms ever will. Avoid these:
- Do not tear down the tank. Ripping out substrate and restarting your cycle does not produce a worm-free tank — the worms recolonize within weeks, minus your established bacteria and plant growth.
- Do not overdose chemicals "just in case." Broad-spectrum dewormers and copper-based medications wipe out invertebrates, stress fish, and damage the biological filter. Copper is lethal to shrimp, and aquarium science sources are clear: for harmless detritus worms, treat the underlying cause rather than reaching for a bottle — as explained on the aquariumscience.org detritus worms guide. Chemicals are a last resort for confirmed planaria in fish tanks, not a first response to harmless worms.
- Do not treat blindly. The most common expensive mistake: seeing white worms, assuming the worst, and dosing before checking for eyespots. Five minutes with a magnifying glass and the comparison table above prevents it.
- Do not boil, bleach, or throw away your plants. Plants are a worm vector, not an infestation. A brief dip or quarantine handles new arrivals; destroying established growth punishes the wrong suspect.
- Do not stop feeding entirely. Starving your fish to spite the worms is cruelty with extra steps. Feed lightly and consistently.
Prevention: The Routine That Keeps Worms Invisible
Once the bloom is down, prevention is just good planted-tank husbandry. None of this is exotic:
- Weekly water changes of 25–30%, with the siphon worked into open substrate areas every time.
- Feeding discipline: the two-minute rule, every day. Consider a fasting day once a week — healthy fish handle it well.
- Monthly filter maintenance: rinse mechanical media in tank water, inspect the impeller, replace spent floss.
- Prompt plant cleanup: remove melting leaves and dead stems during the weekly trim rather than letting them decay. If plants are browning broadly rather than just aging out leaves, the plants turning brown guide will help you diagnose.
- Quarantine new arrivals: dip new plants and rinse new substrate before planting. You cannot keep every worm out, but you can avoid importing a starter colony.
- Stock cleanup-appropriate livestock for your setup: a small corydoras school or a betta in community tanks keeps the baseline population permanently trimmed.
Worms also share their risk profile with another classic planted-tank nuisance. If white worms on your glass make you want to understand every possible surface pest, the hydra removal guide covers the other tiny predator that shows up in well-fed tanks.
Frequently Asked Questions
Are detritus worms harmful to fish or shrimp?
No. Detritus worms are harmless scavengers that feed on decaying organic matter, not living tissue. They do not bite fish, do not parasitize livestock, and do not bother adult shrimp. They are a normal part of the aquarium ecosystem, comparable to the microfauna in garden soil.
Will detritus worms eat my aquarium plants?
No. Detritus worms eat dead organic matter — fish waste, uneaten food, and already-decaying plant material. They do not eat healthy living plants, and they do not damage roots. If plants are melting at the same time as a worm bloom, the worms are feeding on the decay, not causing it. Diagnose the plant problem separately.
Why do the worms come out after a water change?
Disturbing the substrate during siphoning flushes worms out of their burrows into the water column, where they are suddenly visible and thrash wildly. This is the most common way owners first notice them, and it usually means nothing alarming — it simply reveals a population that was living quietly in the substrate all along. Fewer worms appear after disturbances as your maintenance improves.
Can I get rid of detritus worms completely?
Realistically, no — and you should not try. They arrive on plants, substrate, and decor, and their eggs are nearly impossible to exclude entirely. Even a fully torn-down tank will be recolonized within weeks. The correct goal is population control through feeding discipline and substrate hygiene, which renders them effectively invisible in normal viewing.
Should I use deworming medication for detritus worms?
No. Medications like fenbendazole or copper-based treatments are overkill for a harmless animal, and they carry real risks: copper is lethal to shrimp and snails, and any broad treatment stresses fish and the biological filter. Reserve chemical treatment for confirmed planaria or hydra infestations. For detritus worms, the maintenance routine in this guide is safer and more effective long-term.
How do I know if my worms are planaria instead?
Look for three planaria markers: an arrow or triangle-shaped head, two dark eyespots, and smooth gliding movement across the glass. Detritus worms have none of these — they are featureless threads that wiggle and thrash. If you see the triangular head and eyespots, stop and read a planaria-specific guide before treating, since planaria can threaten shrimp fry while detritus worms cannot.
The Bottom Line
Detritus worms are not an infestation — they are feedback. A visible population is your tank politely informing you that too much food and debris are going uneaten, and the fix is the same husbandry that makes planted tanks thrive anyway: measured feeding, regular substrate vacuuming, and a clean filter. Follow the plan above for two to three weeks and the worms will recede into the substrate, back to their useful invisible jobs of processing waste and aerating your soil. Your plants, fish, and shrimp were never in danger — and your tank will be healthier for having listened to what the worms were telling you.
Tissue-culture plants are the exception — they’re grown in sterile gel and adapt with minimal melting, which is part of what you’re paying for. Plants bought submersed from another hobbyist’s tank also transition with little melt, since they’re already in the right form.
Which Plants Melt Most (and Least)
Heavy melters (expect significant leaf loss)
- Cryptocorynes — infamous for “crypt melt,” sometimes dropping every leaf after any disturbance. They almost always recover from the roots within weeks.
- Stem plants grown emersed — rotala, ludwigia, and hygrophila often shed lower emersed leaves while the growing tips transition.
- Amazon swords — emersed-grown swords typically lose their broad oval aerial leaves and replace them with longer submersed ribbon leaves.
Light melters
- Anubias, java fern, bucephalandra — slow-growing rhizome plants transition gradually; occasional old-leaf melt but rarely dramatic.
- Vallisneria — usually transitions well, though it dislikes the move itself and may sulk for a week.
- Floating plants — minimal melt since their leaves were already at the air-water interface.
The Acclimation Protocol
Step 1: Quarantine or dip first
Before acclimating to your tank’s conditions, make sure you’re not acclimating pests along with the plant. Run new arrivals through our quarantine and dip protocol — it adds days upfront but prevents months of regret.
Step 2: Float to temperature-match (30 minutes)
Float the bag or container in your tank for 20–30 minutes to equalize temperature. Plants are less temperature-sensitive than fish, but a 10°F shock on top of transplant stress is an avoidable insult.
Step 3: Trim before planting
Remove any leaves that are already damaged, yellowing, or heavily algae-covered — they won’t recover and they’ll rot in your tank, feeding algae. For stem plants, trim off the bottom inch and any emersed leaves that look unlikely to adapt; the plant wastes energy maintaining leaves it’s going to shed anyway. Keep the healthy growing tips — that’s where recovery starts.
Step 4: Plant correctly the first time
Follow our planting guide — right depth, crown exposed on rosettes, rhizomes unburied on epiphytes. Every uprooting and replanting restarts the acclimation clock, so get placement right on the first attempt. Decide where each plant goes before it goes in the water.
Step 5: Run a gentle first week
For the first 7 days after planting:
- Moderate light — run your normal photoperiod but consider dropping intensity 20–30% if your light is dimmable. Blast-level light on a melting plant grows algae on the dying leaves, not recovery.
- Stable CO2 — if you inject CO2, keep it consistent. Fluctuating CO2 during acclimation is a melt accelerator. If you’re low-tech, this doesn’t apply — see growing without CO2.
- Half-strength fertilizer — new plants with damaged leaves can’t use full dosing, and the excess feeds algae. Ramp to full strength over 2–3 weeks per our fertilizer schedule.
- No disturbance — don’t move, trim, or “check on” new plants for at least two weeks. Every touch resets root establishment. This is especially critical for crypts.
Step 6: Remove melt, keep the base
As emersed leaves melt, remove the mushy material promptly — decaying leaves release ammonia and grow fungus that can spread to healthy tissue. But never discard the plant while the crown, rhizome, or roots are firm and alive. A crypt that’s lost every leaf but has firm roots is a plant that’s about to recover, not a dead plant. Give it 3–4 weeks before judging.
Telling Normal Melt From Real Problems
Normal transition melt:
- Affects oldest/emersed leaves first, newest growth last
- New submersed leaves emerge even as old ones dissolve
- Roots and crown stay firm and white/green
- Timeline: 1–4 weeks, then obvious new growth
Concerning melt (see our full melting diagnosis guide):
- New growth also melts or emerges deformed
- Rhizome or crown turns mushy and brown — this is rot, not transition
- Entire plant dissolves within days with no new growth after 4+ weeks
- Melting spreads to established plants that weren’t recently moved
Buying Tips to Minimize Melt
- Buy submersed-grown when available — hobbyist-grown cuttings transition with almost no melt.
- Choose tissue culture for sensitive species — crypts and delicate stems establish far more reliably from sterile cups.
- Avoid plants already melting in the store tank — some melt is normal, but a plant that’s mostly mush at purchase has less energy for recovery.
- Transport carefully — keep plants damp and out of direct sun/heat. A plant that dries out or cooks in a hot car melts far worse than one transported properly.
The First-Month Timeline: What to Expect Week by Week
Knowing what’s normal when removes most acclimation anxiety. Here’s the typical timeline for a healthy plant adapting to a new tank:
Week 1: The quiet week
Almost nothing visible happens. The plant is growing roots you can’t see and assessing its new environment. Some species (vallisneria, stem plants) may start shedding their lowest leaves. This is normal. Resist the urge to “help” — no moving, no extra fertilizer, no light changes. The most common beginner mistake is intervening during a week when the correct action is nothing.
Week 2: Melt peaks
This is when emersed leaves give up in earnest. Crypts may drop everything; swords shed their broad aerial leaves; stem plants lose lower foliage. It looks catastrophic and it’s usually fine. Keep removing mushy material, keep conditions stable, and watch the crown and growing tips — if those are firm and green, recovery is already underway.
Week 3: The turn
New submersed-adapted leaves emerge — smaller, thinner, often a slightly different shade of green than the emersed foliage. Stem plant tips start growing visibly; crypts push tiny curled leaves from the crown; swords unfurl narrow ribbon leaves. This is the moment most beginners exhale for the first time.
Week 4+: Established
New growth outpaces melt, and the plant is functionally yours. You can resume full-strength fertilizer, normal trimming, and stop treating it as fragile. Some slow growers (anubias, bucephalandra) take 6–8 weeks to show obvious progress — that’s their normal speed, not a problem.
Acclimating Different Plant Formats
Tissue-culture cups
Sterile, pest-free, and already adapted to high-humidity (not emersed) growth — tissue cultures melt the least of any format. Rinse the agar gel off gently (leftover gel rots and feeds fungus), split the portion into small plantlets, and plant per our planting guide. They establish slowly for the first two weeks, then accelerate. No dip needed, minimal acclimation stress — this is the premium experience you’re paying for.
Potted plants
Remove the pot and strip away the rockwool completely — leftover rockwool traps debris and rots. Tease the root mass apart gently; if it’s a dense mat, splitting it into 2–3 smaller portions actually establishes faster than planting one big clump (more growing points, better water flow around roots). Potted plants are usually emersed-grown, so expect the standard 2–4 week melt cycle.
Bare-root / bunched stems
Typically sold as weighted bunches. Remove any bands, foam, or weights, strip the lower leaves, and plant stems individually or in small groups. Bunched stems from the store are often already transitioning — check for new submersed growth at the tips, which tells you the plant is mid-adaptation and will settle quickly.
Hobbyist cuttings
Already submersed-grown and the fastest to establish — often showing new growth within days. The main acclimation factor is water-parameter difference between the two tanks. Float to temperature-match, plant promptly, and they’ll usually take off with minimal melt. This is why experienced hobbyists prefer trading cuttings over buying potted plants.
Frequently Asked Questions
Should I use a “plant starter” or transplant fertilizer?
Products marketed for transplant shock are mostly B-vitamins and mild hormones. They don’t hurt, but there’s no strong evidence they help aquarium plants specifically. Stable conditions and patience outperform any bottle. Save the money for more plants.
My new plant melted completely — bare crown, no leaves. Is it dead?
Probably not, if the crown or rhizome is firm. Crypts and swords routinely lose 100% of their leaves and regrow from the base within a month. The test is firmness: firm and pale/green means alive; mushy and brown/black means rot. Give firm-but-leafless plants a full 4 weeks before declaring them dead.
Can I speed up acclimation with extra light or CO2?
No — and trying usually backfires. A melting plant can’t use extra light; the excess just grows algae on its dying leaves. Keep light moderate and CO2 stable (not boosted) during acclimation. Growth speed comes from the plant’s own adaptation timeline, which you can’t rush, only avoid delaying.
Should new plants go straight into my main display tank?
After quarantine/dipping, yes — there’s no benefit to a separate “growing-in” tank for most plants. They acclimate to your water fastest in the tank they’ll live in. The exception is very delicate species going into a tank with boisterous fish; give those a few weeks in a calm corner or breeder box first.
The Patience Rule
The single most important acclimation skill is restraint: plant it right, set gentle conditions, remove decay, and then leave it alone for a month. The hobbyists with the best plant growth aren’t doing something clever in week one — they’re simply not interfering in weeks two through four while the plants do what they’ve evolved to do. Melt looks like failure and feels like failure, but in most cases it’s the visible part of a plant successfully becoming yours.