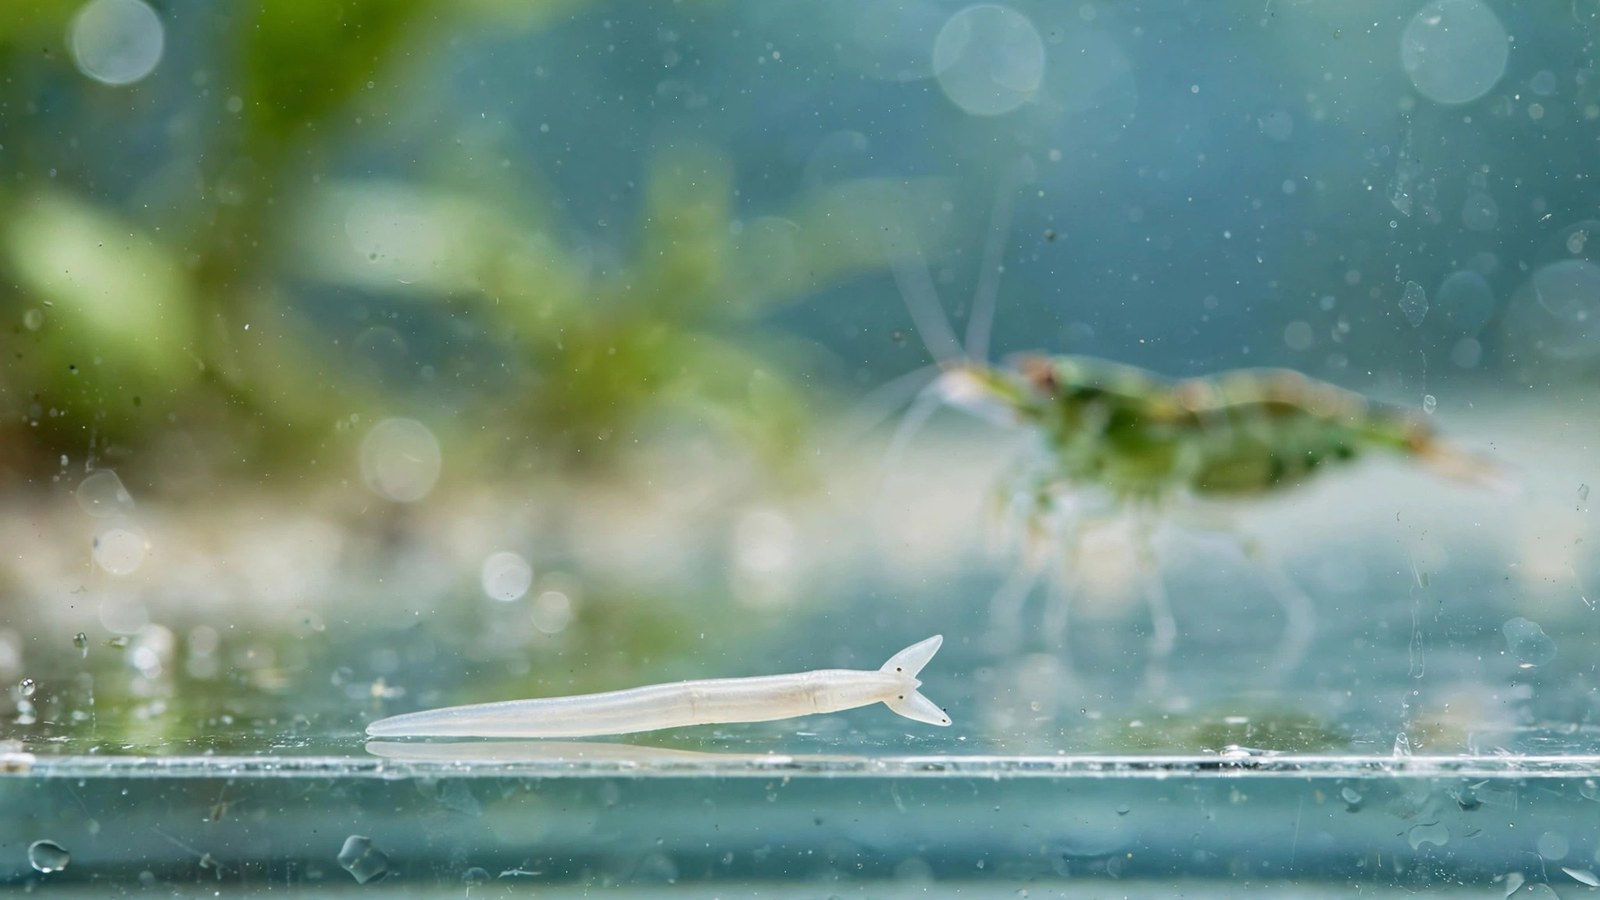
If you keep shrimp in a planted tank, few sights are as unsettling as spotting planaria in planted tanks — small, flat, almost ghostly worms gliding across the glass at night. Most are harmless detritus eaters, but certain species can stun adult shrimp and prey on shrimplets, which makes them a real problem in a breeding colony. The good news is that planaria are manageable with a clear ladder of shrimp-safe removal methods, from simple starvation and traps up to targeted treatments.
What Planaria Actually Are
Planaria are free-living flatworms in the class Turbellaria, and they're a classic example of a hitchhiker organism in planted aquariums. They don't swim freely through the water column. Instead, they glide slowly along surfaces — glass, leaves, hardscape — on a thin mucous film, moving with a smooth snail-like crawl rather than the wriggling motion of most worms.
How to Identify Them
Positive identification matters because several aquarium pests look similar. True planaria have a set of distinctive traits:
- Arrow-shaped or spade-shaped head — the head is visibly wider than the body, often with two tiny eye spots that look like cross-eyes. This triangular head is the single best field mark.
- Flattened, smooth body — unlike roundworms or detritus worms, planaria are flat like a ribbon, usually 5–15 mm long, in white, cream, or light brown.
- Gliding motion on surfaces — they crawl on glass and leaves via a mucous layer. If your "planaria" are swimming freely in the water column, you are more likely looking at leeches or free-swimming nematodes, not planaria.
- Nocturnal behavior — during the day they hide in the substrate and under hardscape. At night with a flashlight, you may find dozens on the front glass.
- Extreme regeneration — never cut one up out of frustration. Fragments regenerate into whole new worms, which is how planaria reproduce if physically broken apart.
A common look-alike is the rhabdocoela flatworm, which has a rounded rather than arrow-shaped head and is generally considered harmless. The species most associated with shrimp problems is Dugesia, which research notes describe as exuding a substance that can stun or paralyze shrimp, making them easier prey.
How They Get Into Your Tank
Planaria almost always arrive as hitchhikers on new live plants, in the water of a plant shipment, or occasionally with new livestock. A few microscopic worms or egg cases on a leaf are enough to seed a population, because they reproduce readily once food is available. Tissue-culture plants, which are grown sterile in gel, are the only plant source that is effectively planaria-free on arrival — and even they deserve a rinse.
Why Planaria Matter in a Shrimp Tank
In a fish-only planted tank, a small planaria population is mostly an aesthetic nuisance. In a shrimp breeding tank, the stakes are higher:
- Shrimplets and eggs are prey — planaria actively hunt tiny shrimplets, newly hatched fry, and eggs. A colony can lose a generation without the keeper ever seeing an attack, since the damage happens at night.
- Adult shrimp can be stunned — certain species, notably Dugesia, produce a secretion that can paralyze or stun shrimp on contact, letting the worms feed on them. This is the mechanism behind reports of shrimp mysteriously weakening and dying when planaria numbers are high.
- The classic symptom: breeding stops — if berried females stop appearing and baby shrimp vanish even though water parameters are good, a hidden planaria population is one of the usual suspects. Adults may survive fine while every batch of offspring disappears.
None of this means panicking at the first worm. It means identifying correctly and acting proportionally — a handful of worms in a fish tank can be starved out, while a breeding colony needs decisive treatment.
What Fuels a Planaria Outbreak
Planaria populations are limited by food. They explode only when the tank supplies a steady surplus of rich food, so an outbreak is always a symptom of an underlying feeding or maintenance problem:
- Overfeeding — excess food settling into the substrate is the number one driver.
- Protein-rich foods — heavy feeding of protein-dense foods like bloodworms, shrimp pellets, and meaty treats directly supports worm reproduction.
- Dead livestock — a dead shrimp, snail, or fish hidden behind hardscape becomes a planaria feast that sustains rapid multiplication.
- Dirty substrate — mulm, decaying plant matter, and compacted detritus in the substrate bed provide a constant food base.
Addressing these fuel sources is the foundation of every removal method below — treatments work best on a population that is already being starved.
The Removal Ladder: From Gentle to Decisive
Work through these methods in order. Each step is stronger than the last, so many infestations are solved before reaching chemical treatments.
Step 1 — Starve Them Out
The first and safest move is cutting feeding back hard. Feed your shrimp and fish only what they consume in a couple of minutes, remove uneaten food promptly, and switch temporarily to less protein-heavy foods. Pair this with thorough substrate vacuuming during water changes to remove the detritus and mulm the worms feed on. In lightly stocked tanks with a small worm population, starvation plus vacuuming over several weeks can collapse the infestation on its own.
Step 2 — DIY Planaria Traps
Simple traps exploit the worms' attraction to meaty bait. A classic DIY version uses a small plastic bottle or tube with entry holes too small for shrimp, baited with a piece of raw meat or fish, and placed in the tank overnight. Planaria enter to feed and cannot easily escape. In the morning, remove the trap with the captured worms and discard the contents. Repeat nightly for one to two weeks. Traps won't eradicate a large population, but they dramatically reduce numbers before other treatments and are completely shrimp-safe.
Step 3 — "No Planaria" Product
The commercial product sold as No Planaria is a widely used treatment in shrimp tanks. Common hobby practice is one scoop per 10 gallons on days 1 through 3, following the product's own dosing instructions. It is generally considered shrimp-safe, but note two caveats: it can cloud the water temporarily, and it may affect snails — ornamental snails in the tank can be harmed, so keep a close eye on them. Like all treatments, pair it with reduced feeding and good maintenance.
Step 4 — Fenbendazole (Panacur C)
Fenbendazole, sold as Panacur C dog dewormer, is a stronger option that hobbyists have used against planaria for years. This is a serious medication, so treat it with respect:
- Start at the standard conservative dose — commonly reported practice is 0.1 g per 10 gallons. Measure precisely with a gram scale; eyeballing powder doses is how livestock gets hurt.
- Dose, wait 24 hours, then water change — a typical schedule is one dose, 24 hours of contact time, then a large water change. Repeat only if worms persist after several days.
- Remove carbon and chemical filtration before dosing — activated carbon and chemical filter media will pull the medication out of the water and blunt the treatment.
- Remove snails you want to keep — fenbendazole can harm or kill snails, including nerites and Malaysian trumpet snails. Move valued snails to a separate container for the duration.
- Observe livestock closely — watch shrimp behavior during and after treatment; any distress means an immediate large water change.
This is presented as common hobby practice, not veterinary guidance. When in doubt, start with the gentler steps of the ladder.
Step 5 — Predators (Fish-Safe Tanks Only)
In tanks that can house them, assassin snails will prey on planaria, though they are slow and best viewed as a supplement rather than a cure. Certain fish — bettas and gouramis are the classic examples — will eat planaria, but they are obviously unsuitable for a shrimp breeding tank since they will also eat shrimplets. Only consider fish predators in fish-safe setups where shrimp breeding is not the goal.
Never Cut Them
It bears repeating: never crush or cut planaria inside the tank hoping to kill them. They regenerate from fragments, so slicing them apart multiplies your problem. Always remove them whole — via traps, siphoning during water changes, or a treatment that kills them in place.
Removal Methods Compared
| Method | Speed | Shrimp-safe | Snail-safe | Effort |
|---|---|---|---|---|
| Starvation + vacuuming | Slow (weeks) | Yes | Yes | Low |
| DIY bottle/tube traps | Moderate (1–2 weeks) | Yes | Yes | Moderate (nightly) |
| No Planaria product | Fast (days) | Yes | No — may harm snails | Low |
| Fenbendazole (Panacur C) | Fast (days) | Yes, at conservative dose | No — remove valued snails | Moderate (precise dosing) |
| Predators (assassin snails, fish) | Slow | Snails yes; fish risky for shrimplets | Assassins eat other snails | Low |
Preventing the Next Infestation
Removal is only half the battle — prevention keeps planaria from returning:
- Quarantine new plants — hold new plants in a separate container for a week or two and watch for worms before they join the display tank.
- Dip new plants — hydrogen peroxide or bleach dips are common hobby practice for killing hitchhikers on new plants. Research the correct dilution and timing for the plant species first, rinse thoroughly afterward, and never dip directly in the aquarium.
- Consider tissue-culture plants — sterile-grown plants arrive without planaria, snails, or algae hitchhikers.
- Inspect before planting — examine leaves and roots under good light and rinse plants well under running water.
- Fix the root cause — a tank with correct feeding and clean substrate rarely sustains a planaria outbreak in the first place.
For more on hitchhiker pests that arrive with plants, see our guide to hydra in planted tanks — hydra arrive the same way and threaten shrimplets too.
After Treatment: Recovery Steps
Once the planaria are gone, help the tank recover properly:
- Water changes — perform large water changes after any chemical treatment to remove residual medication and dead worm debris.
- Watch ammonia from die-off — a mass die-off of worms decomposes quickly. Test ammonia and nitrite for several days after treatment and be ready with extra water changes.
- Monitor shrimp behavior — active foraging, molting, and the eventual return of berried females are the signs the colony is back on track. If shrimp seem lethargic, another water change is the safest first response.
- Keep feeding lean for a few weeks — maintaining reduced, careful feeding prevents the food surplus that fueled the outbreak.
Planaria outbreaks feel alarming, but they are one of the most solvable problems in a planted shrimp tank. Identify correctly — arrow-shaped head, flat gliding body, nocturnal — cut off their food supply, work up the removal ladder as needed, and lock the door behind them with plant quarantine and dips. For a deeper dive into identification and removal methods, this planaria identification and removal guide from Pete's Aquatics is a solid external reference.
Related reading: if your tank troubles extend beyond pests, our guides to snails eating aquarium plants, hair algae removal, and why aquarium plants melt cover the other common planted-tank headaches.
Frequently Asked Questions
Are planaria harmful to shrimp?
Most planaria are harmless detritus eaters, but species in the genus Dugesia are a genuine threat in shrimp tanks. Research notes describe them as exuding a substance that can stun or paralyze shrimp, and they actively prey on shrimplets, eggs, and fry. If your colony mysteriously stops breeding while adults survive, planaria are a prime suspect worth investigating with a nighttime flashlight check.
How do I tell planaria apart from leeches or detritus worms?
Planaria have an arrow-shaped head that is wider than the body, a flat ribbon-like body, and glide on surfaces via a mucous film — they do not swim. Free-swimming worms are usually leeches or nematodes, not planaria. Rounded-head flatworms (rhabdocoela) are a harmless look-alike. The triangular head plus gliding motion is the reliable identification.
Is No Planaria safe for cherry shrimp?
No Planaria is generally considered shrimp-safe at the standard dose of one scoop per 10 gallons on days 1–3, and it is widely used in shrimp breeding tanks. However, it may harm snails and can temporarily cloud the water. Remove valued snails if possible, follow the product instructions exactly, and do a water change after treatment.
Can I use fenbendazole in a tank with snails?
Fenbendazole can harm or kill snails, including nerites and Malaysian trumpet snails, so remove any snails you want to keep before dosing. Use the standard conservative dose of 0.1 g per 10 gallons measured precisely with a gram scale, remove carbon and chemical filtration first, wait 24 hours, then perform a large water change while observing livestock.
Why did my planaria come back after treatment?
Recurrence almost always means the food supply wasn't fixed or new worms were reintroduced. Overfeeding, protein-heavy foods, dead livestock hidden in the scape, and dirty substrate all rebuild the population. Reinfestation can also come from new plants that weren't quarantined or dipped. Repeat treatment works best combined with starving them out and dipping all new plants.
Do planaria eat aquarium plants?
No — planaria do not eat healthy live plants. They feed on detritus, uneaten food, dead livestock, and small invertebrates like shrimplets. If your plants are being damaged, look at other culprits: our guides to snails eating aquarium plants, cladophora algae, and stem plants rotting at the base cover the usual suspects.
Tissue-culture plants are the exception — they’re grown in sterile gel and adapt with minimal melting, which is part of what you’re paying for. Plants bought submersed from another hobbyist’s tank also transition with little melt, since they’re already in the right form.
Which Plants Melt Most (and Least)
Heavy melters (expect significant leaf loss)
- Cryptocorynes — infamous for “crypt melt,” sometimes dropping every leaf after any disturbance. They almost always recover from the roots within weeks.
- Stem plants grown emersed — rotala, ludwigia, and hygrophila often shed lower emersed leaves while the growing tips transition.
- Amazon swords — emersed-grown swords typically lose their broad oval aerial leaves and replace them with longer submersed ribbon leaves.
Light melters
- Anubias, java fern, bucephalandra — slow-growing rhizome plants transition gradually; occasional old-leaf melt but rarely dramatic.
- Vallisneria — usually transitions well, though it dislikes the move itself and may sulk for a week.
- Floating plants — minimal melt since their leaves were already at the air-water interface.
The Acclimation Protocol
Step 1: Quarantine or dip first
Before acclimating to your tank’s conditions, make sure you’re not acclimating pests along with the plant. Run new arrivals through our quarantine and dip protocol — it adds days upfront but prevents months of regret.
Step 2: Float to temperature-match (30 minutes)
Float the bag or container in your tank for 20–30 minutes to equalize temperature. Plants are less temperature-sensitive than fish, but a 10°F shock on top of transplant stress is an avoidable insult.
Step 3: Trim before planting
Remove any leaves that are already damaged, yellowing, or heavily algae-covered — they won’t recover and they’ll rot in your tank, feeding algae. For stem plants, trim off the bottom inch and any emersed leaves that look unlikely to adapt; the plant wastes energy maintaining leaves it’s going to shed anyway. Keep the healthy growing tips — that’s where recovery starts.
Step 4: Plant correctly the first time
Follow our planting guide — right depth, crown exposed on rosettes, rhizomes unburied on epiphytes. Every uprooting and replanting restarts the acclimation clock, so get placement right on the first attempt. Decide where each plant goes before it goes in the water.
Step 5: Run a gentle first week
For the first 7 days after planting:
- Moderate light — run your normal photoperiod but consider dropping intensity 20–30% if your light is dimmable. Blast-level light on a melting plant grows algae on the dying leaves, not recovery.
- Stable CO2 — if you inject CO2, keep it consistent. Fluctuating CO2 during acclimation is a melt accelerator. If you’re low-tech, this doesn’t apply — see growing without CO2.
- Half-strength fertilizer — new plants with damaged leaves can’t use full dosing, and the excess feeds algae. Ramp to full strength over 2–3 weeks per our fertilizer schedule.
- No disturbance — don’t move, trim, or “check on” new plants for at least two weeks. Every touch resets root establishment. This is especially critical for crypts.
Step 6: Remove melt, keep the base
As emersed leaves melt, remove the mushy material promptly — decaying leaves release ammonia and grow fungus that can spread to healthy tissue. But never discard the plant while the crown, rhizome, or roots are firm and alive. A crypt that’s lost every leaf but has firm roots is a plant that’s about to recover, not a dead plant. Give it 3–4 weeks before judging.
Telling Normal Melt From Real Problems
Normal transition melt:
- Affects oldest/emersed leaves first, newest growth last
- New submersed leaves emerge even as old ones dissolve
- Roots and crown stay firm and white/green
- Timeline: 1–4 weeks, then obvious new growth
Concerning melt (see our full melting diagnosis guide):
- New growth also melts or emerges deformed
- Rhizome or crown turns mushy and brown — this is rot, not transition
- Entire plant dissolves within days with no new growth after 4+ weeks
- Melting spreads to established plants that weren’t recently moved
Buying Tips to Minimize Melt
- Buy submersed-grown when available — hobbyist-grown cuttings transition with almost no melt.
- Choose tissue culture for sensitive species — crypts and delicate stems establish far more reliably from sterile cups.
- Avoid plants already melting in the store tank — some melt is normal, but a plant that’s mostly mush at purchase has less energy for recovery.
- Transport carefully — keep plants damp and out of direct sun/heat. A plant that dries out or cooks in a hot car melts far worse than one transported properly.
The First-Month Timeline: What to Expect Week by Week
Knowing what’s normal when removes most acclimation anxiety. Here’s the typical timeline for a healthy plant adapting to a new tank:
Week 1: The quiet week
Almost nothing visible happens. The plant is growing roots you can’t see and assessing its new environment. Some species (vallisneria, stem plants) may start shedding their lowest leaves. This is normal. Resist the urge to “help” — no moving, no extra fertilizer, no light changes. The most common beginner mistake is intervening during a week when the correct action is nothing.
Week 2: Melt peaks
This is when emersed leaves give up in earnest. Crypts may drop everything; swords shed their broad aerial leaves; stem plants lose lower foliage. It looks catastrophic and it’s usually fine. Keep removing mushy material, keep conditions stable, and watch the crown and growing tips — if those are firm and green, recovery is already underway.
Week 3: The turn
New submersed-adapted leaves emerge — smaller, thinner, often a slightly different shade of green than the emersed foliage. Stem plant tips start growing visibly; crypts push tiny curled leaves from the crown; swords unfurl narrow ribbon leaves. This is the moment most beginners exhale for the first time.
Week 4+: Established
New growth outpaces melt, and the plant is functionally yours. You can resume full-strength fertilizer, normal trimming, and stop treating it as fragile. Some slow growers (anubias, bucephalandra) take 6–8 weeks to show obvious progress — that’s their normal speed, not a problem.
Acclimating Different Plant Formats
Tissue-culture cups
Sterile, pest-free, and already adapted to high-humidity (not emersed) growth — tissue cultures melt the least of any format. Rinse the agar gel off gently (leftover gel rots and feeds fungus), split the portion into small plantlets, and plant per our planting guide. They establish slowly for the first two weeks, then accelerate. No dip needed, minimal acclimation stress — this is the premium experience you’re paying for.
Potted plants
Remove the pot and strip away the rockwool completely — leftover rockwool traps debris and rots. Tease the root mass apart gently; if it’s a dense mat, splitting it into 2–3 smaller portions actually establishes faster than planting one big clump (more growing points, better water flow around roots). Potted plants are usually emersed-grown, so expect the standard 2–4 week melt cycle.
Bare-root / bunched stems
Typically sold as weighted bunches. Remove any bands, foam, or weights, strip the lower leaves, and plant stems individually or in small groups. Bunched stems from the store are often already transitioning — check for new submersed growth at the tips, which tells you the plant is mid-adaptation and will settle quickly.
Hobbyist cuttings
Already submersed-grown and the fastest to establish — often showing new growth within days. The main acclimation factor is water-parameter difference between the two tanks. Float to temperature-match, plant promptly, and they’ll usually take off with minimal melt. This is why experienced hobbyists prefer trading cuttings over buying potted plants.
Frequently Asked Questions
Should I use a “plant starter” or transplant fertilizer?
Products marketed for transplant shock are mostly B-vitamins and mild hormones. They don’t hurt, but there’s no strong evidence they help aquarium plants specifically. Stable conditions and patience outperform any bottle. Save the money for more plants.
My new plant melted completely — bare crown, no leaves. Is it dead?
Probably not, if the crown or rhizome is firm. Crypts and swords routinely lose 100% of their leaves and regrow from the base within a month. The test is firmness: firm and pale/green means alive; mushy and brown/black means rot. Give firm-but-leafless plants a full 4 weeks before declaring them dead.
Can I speed up acclimation with extra light or CO2?
No — and trying usually backfires. A melting plant can’t use extra light; the excess just grows algae on its dying leaves. Keep light moderate and CO2 stable (not boosted) during acclimation. Growth speed comes from the plant’s own adaptation timeline, which you can’t rush, only avoid delaying.
Should new plants go straight into my main display tank?
After quarantine/dipping, yes — there’s no benefit to a separate “growing-in” tank for most plants. They acclimate to your water fastest in the tank they’ll live in. The exception is very delicate species going into a tank with boisterous fish; give those a few weeks in a calm corner or breeder box first.
The Patience Rule
The single most important acclimation skill is restraint: plant it right, set gentle conditions, remove decay, and then leave it alone for a month. The hobbyists with the best plant growth aren’t doing something clever in week one — they’re simply not interfering in weeks two through four while the plants do what they’ve evolved to do. Melt looks like failure and feels like failure, but in most cases it’s the visible part of a plant successfully becoming yours.