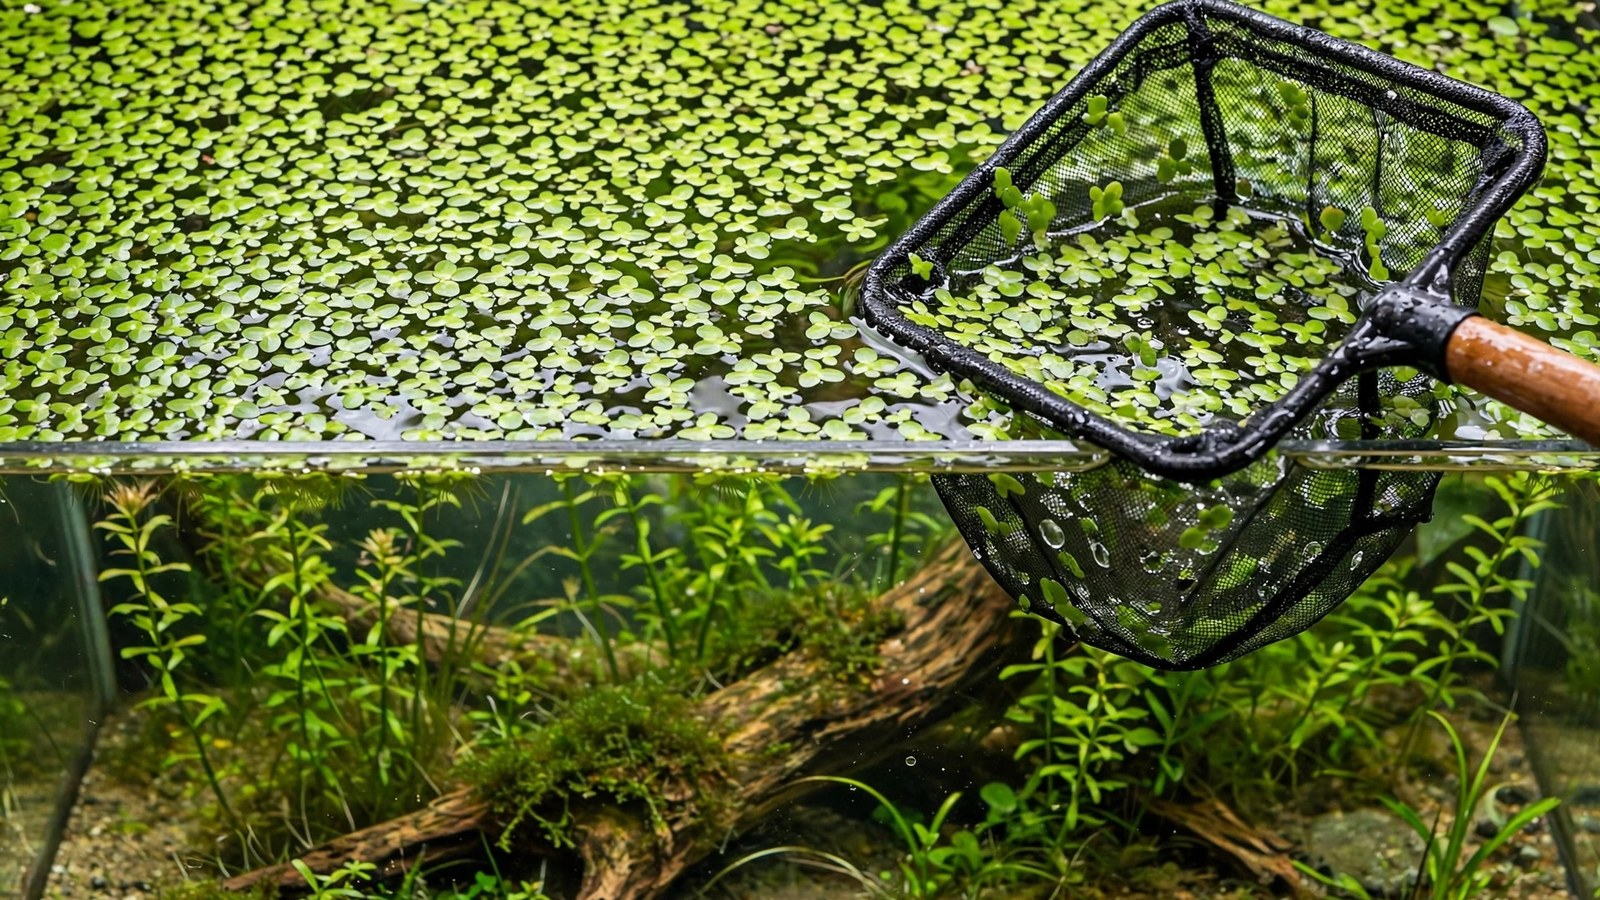
Duckweed has a way of making aquarium keepers question their life choices. One tiny frond hitchhikes in on a new plant, and a month later your tank's surface is a solid green carpet, your other plants are struggling for light, and every water change feels like scooping soup. If you're wondering how to get rid of duckweed in your aquarium for good, the good news is that it is absolutely beatable — but only if you stop treating it like a one-time cleanup job and start treating it like the fast-reproducing floating plant it is. This guide covers why duckweed explodes in the first place, the removal techniques that actually work, the prevention habits that keep it from coming back, and — if you ever reach a truce — how to turn it into a useful nutrient-export tool instead of a pest.
Why Duckweed Takes Over So Fast
Before reaching for the net, it helps to understand your opponent. Common duckweed (Lemna minor) and its larger cousins are among the fastest-growing plants in the hobby. Under warm, bright, nutrient-rich conditions a duckweed colony can double its biomass in as little as two to three days, reproducing by simple budding — no seeds, no runners, just endless cloning. A few stray fronds stuck to a filter cord can become a full surface mat before your next scheduled water change.
Duckweed explodes for four overlapping reasons, and your tank probably checks most of these boxes:
- Excess dissolved nutrients. Duckweed drinks nitrates and phosphates straight from the water column. Overfeeding, overstocking, or over-fertilizing with liquid nutrients all hand it a buffet.
- Strong light on the surface. Floaters sit closer to the light than anything else in your tank. Long photoperiods and intense lighting let duckweed outrun everything beneath it.
- Still water. Duckweed thrives where the surface barely moves. Gentle sponge-filter or low-flow setups are paradise for it.
- Reintroduction. A single frond survives nets, buckets, and filter media. Most "comeback" stories are really reintroduction stories — a survivor hiding in equipment or on a new plant.
Understanding this matters because it reframes the goal. You are not removing a pest; you are changing conditions. A single thorough cleanup without changing the underlying conditions just resets the clock.
Eradication vs. Control: Set the Right Expectation
Here's the honest truth most guides skip: complete eradication is hard, and control is usually the realistic goal. Duckweed fronds are tiny, fragile, and ridiculously good at hiding — in filter compartments, on hardscape, along waterlines, in the crevices of your heater mount. Missing five fronds today means a new mat next month.
That said, a genuinely duckweed-free tank is possible. If you want to know how to get rid of duckweed in your aquarium permanently, here's the honest commitment it takes: a multi-week campaign — aggressive manual removal plus environmental changes, sustained until every last survivor is gone. Think of it in two phases — Phase 1: knockback (remove 95%+ of the biomass in one or two big sessions), then Phase 2: extinction (weekly mop-up of every straggler until nothing returns). Expect Phase 2 to take three to six weeks. If that sounds exhausting, the "embrace it" section near the end offers a legitimate alternative.
How to Get Rid of Duckweed in Your Aquarium: Proven Manual Methods
Nothing beats hands-on removal for immediate results. Chemical shortcuts and hungry fish are unreliable; a net and a siphon are not.
The Surface-Skimming Technique
Turn off your filter and any powerheads first — moving water just scatters the fronds. Then work with a fine-mesh brine shrimp net or fish net:
- Start at one end of the tank and drag the net slowly across the surface in long, smooth passes, pushing the floating mat ahead of it into a corner.
- Each time the net fills, lift it straight out and empty it into a bucket. Repeat until the surface looks clear.
- Now hunt the stragglers: check the waterline around the glass, filter intakes, heater mounts, and driftwood that breaks the surface. A paper towel laid flat on the water's surface for a few seconds will pick up the tiny leftover fronds — repeat with fresh sheets.
- Run your fingers around filter compartments and the underside of the lid, where fronds collect.
The paper-towel trick is the difference between a cleanup that lasts two weeks and one that lasts two months. Stragglers are the entire game.
The Water-Change Siphon Trick
Combine removal with your regular water change:
- With the filter off, use your siphon hose at the surface rather than the substrate — hold the tube mouth just at the waterline so it draws water from the surface layer, pulling floating fronds in with it.
- Sweep the surface systematically. Because you're already draining water for the change, the duckweed leaves with it at no extra effort.
- As the water level drops, remaining fronds strand themselves on the glass above the waterline — wipe them away with a paper towel before refilling.
- Refill slowly, then restart the filter.
Make surface skimming a five-minute habit at every water change — the same principle applies to managing green water and other surface nuisances before they snowball.
Biological Control: What Actually Eats Duckweed
You'll read online that certain fish and shrimp will "eat all your duckweed." Treat such claims with caution. In practice, no common aquarium animal eradicates a duckweed infestation on its own, though a few will graze on it and slow the spread:
- Goldfish and koi genuinely eat duckweed — but they outgrow almost every indoor aquarium and uproot planted layouts.
- Mollies and some livebearers nibble at fronds occasionally, more out of curiosity than appetite. They won't control a real infestation.
- Ducks (outdoor ponds only) will demolish duckweed, which is literally where it gets its name — not an option for your living room tank.
Shrimp and snails mostly ignore duckweed. Don't buy livestock expecting duckweed control. If you already keep fish that nibble, treat them as a small bonus on top of manual removal — never the plan itself. Adding fish to fix a plant problem just adds more waste, feeding the nutrient surplus that caused the bloom. Get your nutrient and stocking balance right first.
Prevention: Starve It Out
Removal wins battles; prevention wins the war. Once the initial cleanup is done, these changes make your tank a hostile environment for duckweed while keeping your other plants happy.
Increase Surface Agitation
Duckweed is a still-water specialist. Surface movement is one of the most effective long-term deterrents because it pushes fronds into corners, submerges them briefly, and disrupts the calm film they need to multiply. Aim your filter outlet slightly upward so it ripples the surface, add a small powerhead angled at the surface, or run an airstone near the top. Your rooted plants won't mind — many even appreciate the extra gas exchange. The trade-off: strong surface agitation drives off some CO2, so if you inject CO2, check your drop checker after adjusting flow to keep CO2 levels stable.
Rebalance Light
Long, intense photoperiods supercharge duckweed. Dial your lights to a 6–8 hour photoperiod on a timer and make sure floating cover isn't trapping all the light for itself. If you run a high-light tank, consider floating rings (airline-tubing circles) that corral a controlled patch of duckweed to one corner — you get the nutrient-uptake benefits while the rest of the surface stays open for gas exchange and light penetration.
Rebalance Nutrients
Duckweed is a canary in the coal mine for excess nutrients. Review the fundamentals:
- Feed less, more carefully. Uneaten food decays into exactly the nitrates and phosphates duckweed loves. Feed only what fish finish in about two minutes.
- Check your fertilization. If you're dosing liquid fertilizers heavily while running modest lighting and slow-growing plants, you're fertilizing the duckweed. Signs of excess — like algae outbreaks and slimy plant leaves — are covered in our over-fertilizing symptoms guide.
- Keep up water changes. Regular 25–30% weekly changes dilute the dissolved nutrient pool that floaters exploit.
- Grow competitors. Fast-growing stem plants and larger floaters like frogbit consume the same nutrients, giving duckweed less to work with. Regular stem plant trimming keeps them vigorous.
Quarantine and Dip New Plants
Most duckweed invasions begin as stowaways on new plants. Never plant store-bought greenery straight into your display tank. Instead:
- Rinse new plants thoroughly under running water, rubbing leaves gently to dislodge hitchhiking fronds.
- Give them a dip — a brief soak in an alum solution or a diluted bleach dip (followed by a dechlorinator rinse) kills most hitchhikers, including duckweed, snails, and algae spores.
- Quarantine in a separate container for a week or two and inspect for survivors before planting.
This habit protects you from far worse than duckweed — hair algae and cyanobacteria hitchhike the same way.
Methods Compared: Effort vs. Effectiveness
Here's how the main approaches stack up, so you can pick the combination that fits your patience level:
| Method | Effort | Effectiveness | Best For |
|---|---|---|---|
| Surface skimming + paper towels | Moderate (one big session) | High — removes 95%+ immediately | Phase 1 knockback |
| Surface siphoning at water changes | Low (ongoing habit) | High over time | Phase 2 extinction; maintenance |
| Increased surface agitation | Low (one-time setup) | Medium — slows growth significantly | Long-term prevention |
| Light + nutrient rebalancing | Low–Moderate | Medium–High over weeks | Addressing the root cause |
| Fish/shrimp grazing | Low | Low — no species reliably eradicates it | Minor supplemental help only |
| Quarantine and plant dips | Low per new plant | High — prevents reintroduction | Keeping a clean tank clean |
| Algaecides / herbicides | Low | High but risky | Not recommended — harms plants, shrimp, and biofilter |
A note on that last row: chemical herbicides can kill duckweed, but they also damage your desirable plants, invertebrates, and beneficial bacteria. In a planted aquarium, the cure is worse than the disease. Stick with mechanical and environmental methods.
The "Embrace It" Alternative: Duckweed as a Nutrient Export Tool
Here's a perspective shift: duckweed is an extraordinarily efficient nutrient sponge. It pulls nitrates and phosphates directly from the water column faster than almost any plant you paid money for — and researchers have long noted its ability to strip excess nitrogen and phosphorus from nutrient-rich water (NC State Extension’s duckweed profile documents both its nutrient-removal capacity and its invasive spreading habit). Some aquarists stop fighting it and start farming it.
The "controlled duckweed" approach works like this:
- Corral it. Use floating rings made from airline tubing to confine duckweed to one section of the surface, leaving the rest open for light and gas exchange.
- Harvest it weekly. Scoop out a generous portion every week — each handful you remove carries locked-up nitrates and phosphates out of your system permanently. This is genuine nutrient export, the same principle behind refugium harvesting in reef tanks.
- Feed it to something. Duckweed is protein-rich; goldfish, koi, and pond fish eat it eagerly.
This approach works best in tanks where duckweed's weaknesses don't matter — no delicate carpeting plants starving for light below, no need for a pristine surface view. It's a legitimate, low-effort strategy, but be honest with yourself: it only works if you actually harvest consistently. Unmanaged "controlled" duckweed becomes an unmanaged mat within weeks. If you're not going to commit to the weekly scoop, go back to the eradication plan.
A Responsibility Note: Never Release Duckweed Into the Wild
Duckweed is harmless inside your tank, but it is a genuinely destructive plant in the wrong ecosystem. In nutrient-rich lakes and ponds it can form dense mats that block sunlight, crash oxygen levels, and kill fish — university extension services classify duckweed as an invasive threat to freshwater ecosystems in many regions. Never dump aquarium water, trimmings, or filter media into storm drains, streams, ponds, or even your garden. Dispose of harvested duckweed in the trash or compost — never down a drain that leads to waterways. The same responsibility applies to every plant in your tank, but duckweed's explosive growth rate makes it one of the riskiest hitchhikers of all.
Frequently Asked Questions
How long does it take to get rid of duckweed completely?
Plan on three to six weeks. The initial cleanup removes the bulk in one session, but stragglers hide in filter compartments, along waterlines, and on equipment. Weekly surface-siphoning plus the paper-towel trick usually achieves a duckweed-free tank within a month and a half, provided you also fix the underlying nutrient and flow conditions.
Will duckweed kill my other aquarium plants?
Not directly — the damage is indirect. A thick mat blocks light from everything below, which can starve carpeting plants and slow growers, and it reduces gas exchange at the surface. If submerged plants are yellowing under a duckweed mat, the mat is the prime suspect — removing it usually triggers visible recovery within one to two weeks.
Do any fish really eat duckweed?
Goldfish and koi genuinely eat it, but they're unsuitable for most planted aquariums due to size and behavior. Mollies and some other livebearers nibble occasionally, but no common tropical community fish will control a real infestation. Shrimp and snails largely ignore it. Treat grazing livestock as a minor bonus at best — manual removal and prevention do the real work.
Can I just use an algaecide to kill duckweed?
Duckweed isn't algae, so most algaecides are ineffective against it — and true aquatic herbicides will damage or kill your desirable plants, invertebrates, and beneficial bacteria. In a planted aquarium, chemical treatment is not worth the collateral damage. Mechanical removal combined with surface agitation and nutrient rebalancing is safer and more reliable.
Why does duckweed keep coming back after I remove it all?
Three usual culprits: missed stragglers (one surviving frond restarts the colony), reintroduction on new plants or shared equipment, and unchanged conditions — excess nutrients, long photoperiods, and still water that let survivors multiply exponentially. Fix all three and the comebacks stop.
Is duckweed good for anything in an aquarium?
Surprisingly, yes. It's one of the fastest nitrate and phosphate absorbers available, provides shade and cover that shy fish appreciate, and serves as a living indicator — if your duckweed is exploding, your tank has excess nutrients worth addressing. Many aquarists harvest it weekly as a nutrient-export tool or feed it to goldfish and pond fish. Managed deliberately, it's an asset; unmanaged, it's a pest.
The Bottom Line
Learning how to get rid of duckweed in your aquarium for good comes down to a simple formula: one thorough manual cleanup, then weekly mop-ups until nothing returns, while fixing the calm, nutrient-rich, brightly lit conditions that invited it in. Quarantine every new plant so it can't hitchhike back, and if you'd rather coexist, corral it and harvest it as the nutrient sponge it is. Either way, respect it — a plant that can double in days deserves either a committed eradication plan or a deliberate management plan, never benign neglect.
Tissue-culture plants are the exception — they’re grown in sterile gel and adapt with minimal melting, which is part of what you’re paying for. Plants bought submersed from another hobbyist’s tank also transition with little melt, since they’re already in the right form.
Which Plants Melt Most (and Least)
Heavy melters (expect significant leaf loss)
- Cryptocorynes — infamous for “crypt melt,” sometimes dropping every leaf after any disturbance. They almost always recover from the roots within weeks.
- Stem plants grown emersed — rotala, ludwigia, and hygrophila often shed lower emersed leaves while the growing tips transition.
- Amazon swords — emersed-grown swords typically lose their broad oval aerial leaves and replace them with longer submersed ribbon leaves.
Light melters
- Anubias, java fern, bucephalandra — slow-growing rhizome plants transition gradually; occasional old-leaf melt but rarely dramatic.
- Vallisneria — usually transitions well, though it dislikes the move itself and may sulk for a week.
- Floating plants — minimal melt since their leaves were already at the air-water interface.
The Acclimation Protocol
Step 1: Quarantine or dip first
Before acclimating to your tank’s conditions, make sure you’re not acclimating pests along with the plant. Run new arrivals through our quarantine and dip protocol — it adds days upfront but prevents months of regret.
Step 2: Float to temperature-match (30 minutes)
Float the bag or container in your tank for 20–30 minutes to equalize temperature. Plants are less temperature-sensitive than fish, but a 10°F shock on top of transplant stress is an avoidable insult.
Step 3: Trim before planting
Remove any leaves that are already damaged, yellowing, or heavily algae-covered — they won’t recover and they’ll rot in your tank, feeding algae. For stem plants, trim off the bottom inch and any emersed leaves that look unlikely to adapt; the plant wastes energy maintaining leaves it’s going to shed anyway. Keep the healthy growing tips — that’s where recovery starts.
Step 4: Plant correctly the first time
Follow our planting guide — right depth, crown exposed on rosettes, rhizomes unburied on epiphytes. Every uprooting and replanting restarts the acclimation clock, so get placement right on the first attempt. Decide where each plant goes before it goes in the water.
Step 5: Run a gentle first week
For the first 7 days after planting:
- Moderate light — run your normal photoperiod but consider dropping intensity 20–30% if your light is dimmable. Blast-level light on a melting plant grows algae on the dying leaves, not recovery.
- Stable CO2 — if you inject CO2, keep it consistent. Fluctuating CO2 during acclimation is a melt accelerator. If you’re low-tech, this doesn’t apply — see growing without CO2.
- Half-strength fertilizer — new plants with damaged leaves can’t use full dosing, and the excess feeds algae. Ramp to full strength over 2–3 weeks per our fertilizer schedule.
- No disturbance — don’t move, trim, or “check on” new plants for at least two weeks. Every touch resets root establishment. This is especially critical for crypts.
Step 6: Remove melt, keep the base
As emersed leaves melt, remove the mushy material promptly — decaying leaves release ammonia and grow fungus that can spread to healthy tissue. But never discard the plant while the crown, rhizome, or roots are firm and alive. A crypt that’s lost every leaf but has firm roots is a plant that’s about to recover, not a dead plant. Give it 3–4 weeks before judging.
Telling Normal Melt From Real Problems
Normal transition melt:
- Affects oldest/emersed leaves first, newest growth last
- New submersed leaves emerge even as old ones dissolve
- Roots and crown stay firm and white/green
- Timeline: 1–4 weeks, then obvious new growth
Concerning melt (see our full melting diagnosis guide):
- New growth also melts or emerges deformed
- Rhizome or crown turns mushy and brown — this is rot, not transition
- Entire plant dissolves within days with no new growth after 4+ weeks
- Melting spreads to established plants that weren’t recently moved
Buying Tips to Minimize Melt
- Buy submersed-grown when available — hobbyist-grown cuttings transition with almost no melt.
- Choose tissue culture for sensitive species — crypts and delicate stems establish far more reliably from sterile cups.
- Avoid plants already melting in the store tank — some melt is normal, but a plant that’s mostly mush at purchase has less energy for recovery.
- Transport carefully — keep plants damp and out of direct sun/heat. A plant that dries out or cooks in a hot car melts far worse than one transported properly.
The First-Month Timeline: What to Expect Week by Week
Knowing what’s normal when removes most acclimation anxiety. Here’s the typical timeline for a healthy plant adapting to a new tank:
Week 1: The quiet week
Almost nothing visible happens. The plant is growing roots you can’t see and assessing its new environment. Some species (vallisneria, stem plants) may start shedding their lowest leaves. This is normal. Resist the urge to “help” — no moving, no extra fertilizer, no light changes. The most common beginner mistake is intervening during a week when the correct action is nothing.
Week 2: Melt peaks
This is when emersed leaves give up in earnest. Crypts may drop everything; swords shed their broad aerial leaves; stem plants lose lower foliage. It looks catastrophic and it’s usually fine. Keep removing mushy material, keep conditions stable, and watch the crown and growing tips — if those are firm and green, recovery is already underway.
Week 3: The turn
New submersed-adapted leaves emerge — smaller, thinner, often a slightly different shade of green than the emersed foliage. Stem plant tips start growing visibly; crypts push tiny curled leaves from the crown; swords unfurl narrow ribbon leaves. This is the moment most beginners exhale for the first time.
Week 4+: Established
New growth outpaces melt, and the plant is functionally yours. You can resume full-strength fertilizer, normal trimming, and stop treating it as fragile. Some slow growers (anubias, bucephalandra) take 6–8 weeks to show obvious progress — that’s their normal speed, not a problem.
Acclimating Different Plant Formats
Tissue-culture cups
Sterile, pest-free, and already adapted to high-humidity (not emersed) growth — tissue cultures melt the least of any format. Rinse the agar gel off gently (leftover gel rots and feeds fungus), split the portion into small plantlets, and plant per our planting guide. They establish slowly for the first two weeks, then accelerate. No dip needed, minimal acclimation stress — this is the premium experience you’re paying for.
Potted plants
Remove the pot and strip away the rockwool completely — leftover rockwool traps debris and rots. Tease the root mass apart gently; if it’s a dense mat, splitting it into 2–3 smaller portions actually establishes faster than planting one big clump (more growing points, better water flow around roots). Potted plants are usually emersed-grown, so expect the standard 2–4 week melt cycle.
Bare-root / bunched stems
Typically sold as weighted bunches. Remove any bands, foam, or weights, strip the lower leaves, and plant stems individually or in small groups. Bunched stems from the store are often already transitioning — check for new submersed growth at the tips, which tells you the plant is mid-adaptation and will settle quickly.
Hobbyist cuttings
Already submersed-grown and the fastest to establish — often showing new growth within days. The main acclimation factor is water-parameter difference between the two tanks. Float to temperature-match, plant promptly, and they’ll usually take off with minimal melt. This is why experienced hobbyists prefer trading cuttings over buying potted plants.
Frequently Asked Questions
Should I use a “plant starter” or transplant fertilizer?
Products marketed for transplant shock are mostly B-vitamins and mild hormones. They don’t hurt, but there’s no strong evidence they help aquarium plants specifically. Stable conditions and patience outperform any bottle. Save the money for more plants.
My new plant melted completely — bare crown, no leaves. Is it dead?
Probably not, if the crown or rhizome is firm. Crypts and swords routinely lose 100% of their leaves and regrow from the base within a month. The test is firmness: firm and pale/green means alive; mushy and brown/black means rot. Give firm-but-leafless plants a full 4 weeks before declaring them dead.
Can I speed up acclimation with extra light or CO2?
No — and trying usually backfires. A melting plant can’t use extra light; the excess just grows algae on its dying leaves. Keep light moderate and CO2 stable (not boosted) during acclimation. Growth speed comes from the plant’s own adaptation timeline, which you can’t rush, only avoid delaying.
Should new plants go straight into my main display tank?
After quarantine/dipping, yes — there’s no benefit to a separate “growing-in” tank for most plants. They acclimate to your water fastest in the tank they’ll live in. The exception is very delicate species going into a tank with boisterous fish; give those a few weeks in a calm corner or breeder box first.
The Patience Rule
The single most important acclimation skill is restraint: plant it right, set gentle conditions, remove decay, and then leave it alone for a month. The hobbyists with the best plant growth aren’t doing something clever in week one — they’re simply not interfering in weeks two through four while the plants do what they’ve evolved to do. Melt looks like failure and feels like failure, but in most cases it’s the visible part of a plant successfully becoming yours.