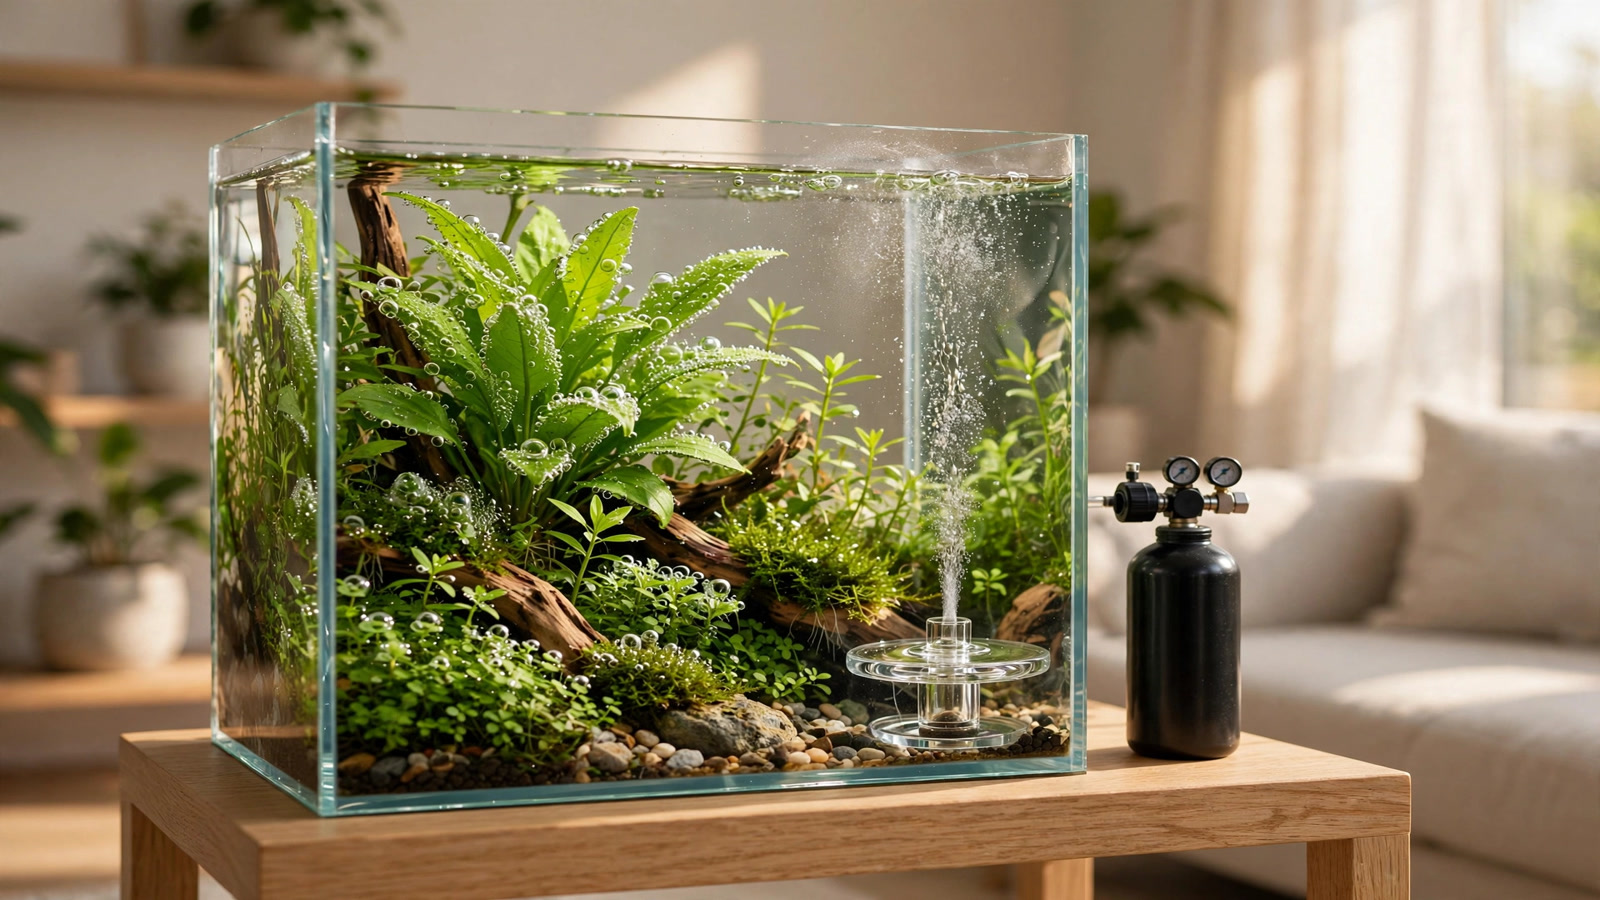
If you have been pricing pressurized CO2 for your planted tank, you have probably met the same frustration every aquascaper knows: sodastream co2 aquarium setups sit in a middle ground most guides barely explain. DIY yeast CO2 is cheap but maddeningly inconsistent, and a full 5lb cylinder with a quality regulator is a serious investment. A SodaStream bottle with the right adapter and mini regulator is the third option — real pressurized CO2, stable enough for demanding plants, at a fraction of the cost of a standard cylinder system. This guide covers the exact parts, step-by-step assembly, honest 12-month cost math against the alternatives, and how long a 60L cylinder actually lasts at different bubble rates.
Why SodaStream CO2 Sits in the Sweet Spot
Pressurized CO2 beats every other carbon source for planted tanks because it is consistent, adjustable, and controllable on a timer. DIY CO2 output swings as the yeast colony ramps up and dies off — feast-or-famine carbon levels that are a classic algae trigger. A pressurized system delivers the same bubble rate all day, every day, until the cylinder runs dry.
SodaStream CO2 occupies a genuine middle path. The cylinders are widely available through a consumer exchange program, and a full setup costs roughly half of a conventional 5lb system. The trade-off is capacity: these bottles are small, so this approach shines brightest on nano tanks through about 40 gallons, where consumption stays modest.
If you are comparing the two DIY-style approaches first, our guide to DIY CO2 for aquarium plants covers yeast and citric-acid methods in depth — read it to understand exactly what pressurized gas spares you from.
The Parts List: Exactly What to Buy
A SodaStream CO2 setup has four core parts plus the usual downstream fittings. Buying the wrong adapter thread is the single most common failure in this build, so read the adapter section carefully.
1. The SodaStream cylinder
Standard 60L SodaStream CO2 cylinders are the ones you want — the blue bottles sold at supermarkets and big-box stores and swapped through the exchange program. Each holds about 410 g of food-grade CO2. Buy the classic screw-in threaded bottles: the newer quick-connect "Terra" pink cylinders use a proprietary locking mechanism most adapters cannot fit. Verify the threaded neck before purchasing adapters.
2. The adapter
This is the crucial translator piece. SodaStream bottles use a TR21-4 thread, while aquarium regulators expect CGA-320 (US) or W21.8-14 (European DIN). You need a TR21-4 to CGA-320 (or DIN) adapter in brass or stainless steel, roughly $15–$30 from aquarium CO2 specialists. Buy from a vendor that sells them specifically for aquarium use — cheap adapters with sloppy threads are a leak waiting to happen. Match the adapter to your region: CGA-320 for the US, W21.8-14 for Europe.
3. The mini regulator
You do not need a full-size dual-stage regulator, but you want one with a needle valve fine enough for 1–2 bubbles per second and ideally a solenoid for timer control. Several suitable models appear in our roundup of the best CO2 regulators for planted tanks. Look for:
- A needle valve with smooth, fine adjustment (cheap valves jump from zero to 5 bps with a hair's touch)
- A low working-pressure range (you do not need 60 psi output for a nano diffuser)
- An optional solenoid so CO2 runs only with your lights — strongly recommended, since it roughly doubles cylinder life
- Bubble counter built in or attachable
4. Tubing, check valve, and diffuser
The downstream chain is identical to any pressurized setup: CO2-proof tubing (standard silicone lets CO2 bleed through its walls — use proper CO2-resistant polyurethane tubing), a check valve to protect the regulator from tank water back-siphoning, and a diffuser matched to your tank size. If this is your first diffuser, our CO2 diffuser setup and tuning guide walks through placement and maintenance. Every build also needs a drop checker — the only honest way to confirm your CO2 level is in the target zone.
| Part | What to get | Typical price (US) |
|---|---|---|
| SodaStream 60L cylinder (threaded) | Classic blue threaded bottle | $25–$35 first bottle |
| TR21-4 → CGA-320 adapter | Brass, aquarium-specific vendor | $15–$30 |
| Mini regulator + needle valve | Fine needle valve, solenoid preferred | $60–$110 |
| CO2 tubing + check valve | CO2-resistant tubing, quality check valve | $12–$20 |
| Diffuser | Sized to tank | $10–$25 |
| Drop checker + 4 dKH solution | Essential, not optional | $12–$20 |
| Total hardware | $135–$240 |
Assembly, Step by Step
Work slowly and keep the cylinder upright at all times — these bottles contain liquid CO2 under pressure, and tipping them during connection causes pressure spikes.
- Inspect everything. Check the cylinder neck threads for damage and confirm the adapter threads match on both sides.
- Fit the adapter to the cylinder. Screw it on hand-tight, then snug with a wrench — about a quarter-turn past hand-tight. Make sure the adapter's nylon or fiber washer is seated. Do not over-torque; stripped TR21-4 threads ruin the bottle.
- Mount the regulator. With the needle valve fully closed and the solenoid unpowered, thread the regulator onto the adapter and snug it with a wrench. Confirm the regulator's inlet washer is present — a missing washer is the number-one cause of loud leaks at this joint.
- Connect downstream fittings. Run CO2 tubing from the regulator barb through the check valve (mind the flow-direction arrow — it points toward the tank) to the diffuser. Keep the run short and unkinked.
- Place the diffuser and drop checker. Put the diffuser low in the tank in the filter outflow's path so the mist circulates instead of rising straight up. Fill the drop checker with 4 dKH solution and mount it on the glass opposite the diffuser.
- Open the cylinder valve slowly. Crack it gently — you should hear a brief hiss as the regulator pressurizes, then silence. Continuous hissing means a leak: close the valve and find it before proceeding.
- Set your bubble rate. With the solenoid energized (lights-on state), open the needle valve a hair until you see roughly 1 bubble per second, then fine-tune over the next few days using the drop checker.
- Wire the solenoid to a timer. Start CO2 about 1 hour before lights-on, stop about 1 hour before lights-off. Injecting overnight wastes gas and risks stressing livestock.
Leak-Checking: Do Not Skip This
A slow leak at the adapter joint can drain a 410 g bottle in days instead of weeks. After assembly, brush soapy water onto every joint: cylinder-to-adapter, adapter-to-regulator, regulator-to-tubing. Growing bubbles mean a leak — depressurize, reseat or replace the washer, and retest. Then leave the system pressurized overnight and weigh the bottle in the morning; any unexplained loss means gas is escaping. Our CO2 leak detection guide covers the full overnight-pressure-test method.
Dialing In: Bubbles per Second and Drop Checkers
Bubbles per second is a starting point, not a target — bubble size varies between counters. The drop checker is the real instrument: lime-green during the photoperiod means roughly 30 ppm CO2, which suits most planted tanks. Yellow means too much (back off immediately and watch your livestock); blue means too little.
Typical starting points:
- Nano tanks (5–10 gal): 1 bubble every 2–3 seconds to start
- 20-gallon tanks: 1 bubble per second
- 30–40 gallon tanks: 2 bubbles per second
Increase slowly — no more than a small adjustment per day — and always confirm with the drop checker before pushing further. Livestock behavior is your early-warning system: fish gasping at the surface means too much CO2, regardless of what any instrument says.
How Long Does a 60L Cylinder Last?
This is the question that decides whether SodaStream CO2 makes sense for your tank. Real-world hobbyist reports cluster around these figures, assuming a solenoid runs CO2 only during an 8-hour photoperiod:
| Tank size | Bubble rate | Typical cylinder life |
|---|---|---|
| 5–10 gal nano | ~0.5 bps | 3–4 months |
| 20 gal | 1 bps | 6–10 weeks |
| 30–40 gal | 2 bps | 3–5 weeks |
| 55+ gal | 3+ bps | Under 2 weeks — not practical |
Running CO2 24/7 roughly halves these figures, which is why the solenoid pays for itself quickly. Heavy surface agitation also burns gas faster by off-gassing CO2. Fine-tune with the drop checker rather than chasing a specific bubble count.
Honest 12-Month Cost Math
Here is where SodaStream CO2 earns its reputation — and where its limits show. Prices below are typical US figures for 2026 and vary by region; treat them as planning numbers, not quotes.
| System | Hardware (year 1) | Annual CO2 cost (20 gal, 1 bps) | Year-1 total | Effort |
|---|---|---|---|---|
| SodaStream 60L | $135–$240 | ~$100–$140 (6–7 exchanges at ~$16–$20 each) | $235–$380 | Low — swap bottles |
| DIY yeast | $30–$60 | ~$30–$50 (sugar, yeast, gelatin) | $60–$110 | High — remix every 1–3 weeks |
| Paintball (24 oz) | $90–$160 | ~$15–$30 (2–3 refills at ~$5–$10) | $105–$190 | Low — but refills need a paintball/sporting shop |
| 5 lb cylinder | $200–$350 | ~$15–$25 (one refill lasts 6–12 months) | $215–$375 | Lowest — one refill per year |
The honest read: in year one, SodaStream costs about the same as a 5lb setup but with far cheaper, more convenient refills to obtain. From year two onward, the 5lb cylinder wins on running cost — one $20 refill versus six SodaStream exchanges. DIY yeast is cheapest in dollars and most expensive in time and stability. Paintball is the closest rival: cheaper gas, but refill locations are harder to find. For standard-cylinder economics, see our CO2 cylinder refill costs guide, and for the nano-scale alternative, our paintball CO2 for nano planted tanks guide.
Where to Exchange Cylinders
SodaStream's exchange network is the system's killer feature. Empty 60L cylinders can be swapped for full ones at most major supermarkets, big-box retailers, and home-goods stores, or through SodaStream's official exchange program with mail-in returns. An exchange typically costs $16–$20 — dramatically cheaper than buying a new full cylinder outright. Keep one spare full bottle on hand: when your working bottle runs dry mid-week, you swap in seconds instead of letting your tank go CO2-less for days, which is exactly when algae moves in.
Food-Grade CO2 Safety: Is It Safe for Aquariums?
Yes. SodaStream CO2 is food-grade gas, which means it meets purity standards for human consumption — a stricter bar than industrial CO2, not a looser one. The persistent myth that it contains something harmful to fish has it backwards.
The real safety considerations are the same as any pressurized CO2 system:
- Ventilation: never store or run the system in a sealed cabinet without airflow; CO2 is odorless and displaces oxygen.
- Secure the bottle: a 410 g cylinder is small, but a knocked-over bottle with a damaged valve becomes a projectile. Strap it upright inside the stand.
- End-of-tank dump: single-stage and cheap mini regulators can "dump" remaining gas as cylinder pressure collapses — the classic sudden CO2 spike that kills livestock overnight. A solenoid plus drop checker monitoring catches this early, and higher-quality regulators resist it. This failure mode deserves respect on any small-bottle system.
- Check valves: a failed check valve lets tank water creep into the regulator, destroying it. Replace check valves yearly — they are cheap insurance.
SodaStream CO2 Aquarium Setups: When They're the Right Call
The sweet spot is nano tanks through about 40 gallons — exactly where DIY CO2 is too unstable for the plants you want to grow, but a 5lb cylinder feels like overkill. A 10-gallon aquascape sips a bottle for months; a 29-gallon Dutch-style tank at 2 bps still gets a reasonable 3–5 weeks per exchange.
Skip it and go 5lb if: your tank is 55 gallons or larger, you run very high light with demanding carpeting plants at 3+ bps, or you simply hate errands — a 5lb cylinder needs one refill a year versus monthly SodaStream swaps. Skip it and go DIY if: your budget is truly near zero and your plants are undemanding species that tolerate CO2 swings. And if you are still deciding between carbon sources entirely, our comparison of liquid carbon versus pressurized CO2 lays out the trade-offs of the non-gas route.
Frequently Asked Questions
Can I use the pink SodaStream Terra quick-connect cylinders for my aquarium?
Generally no — at least not with standard adapters. The Terra quick-connect bottles use a proprietary locking mechanism instead of the classic TR21-4 threaded neck, and most aquarium adapters are machined for the threaded version. Stick with the classic blue threaded 60L cylinders, which are universally compatible with TR21-4 adapters and accepted at every exchange location.
Do I need a solenoid, or can I run CO2 24/7?
You can, but you shouldn't. Plants only use CO2 while the lights are on; overnight injection wastes roughly half your gas and can stress fish while plants aren't consuming it. A solenoid on a timer roughly doubles cylinder life and pays for itself within two or three bottle exchanges.
Will a SodaStream setup work on a 55-gallon tank?
Technically yes, practically no. At the 3+ bubbles per second a 55-gallon high-light tank demands, a 410 g bottle lasts under two weeks — you'd be exchanging cylinders constantly, and the running cost quickly exceeds a 5lb system. For tanks above 40 gallons, a standard 5lb (or larger) cylinder is the economical and sane choice.
Is food-grade CO2 actually safe for fish and shrimp?
Yes. Food-grade CO2 meets purity standards for human consumption, which is stricter than industrial grades — there is nothing in it that harms aquarium livestock beyond CO2 itself. The dangers are the same as any CO2 system: overdosing (watch the drop checker and livestock behavior), leaks in enclosed stands, and end-of-tank dump on cheap regulators. The gas grade is not the risk; the dosing is.
How do I know when the cylinder is empty?
The honest method is weighing it: note the full weight when you install a fresh bottle, and when it has lost roughly 400 g, it's done. A sudden drop in bubble rate with the needle valve untouched is the late warning sign — by then you're nearly dry. Keep a spare exchanged bottle on hand so a mid-week empty doesn't leave your tank CO2-less for days.
SodaStream vs paintball CO2 — which is better for a nano tank?
Both work well for nanos. SodaStream wins on refill convenience — exchanges are available at ordinary supermarkets — while paintball wins on running cost, since a 24 oz tank holds more gas and refills cost less. Paintball's downside is finding refill locations (sporting-goods or paintball shops). If convenience matters more than a few dollars a year, choose SodaStream.
The Bottom Line
SodaStream CO2 for planted tanks is the rare middle option that deserves its hype: real pressurized stability, supermarket-convenient refills, and year-one costs comparable to a 5lb system — with the honest caveat that heavy users graduate to bigger cylinders. For nano tanks through 40 gallons, it removes every excuse DIY CO2 ever gave you. Buy the threaded bottles, buy a decent adapter, leak-check like your livestock depends on it, and let the drop checker — not the bubble counter — tell you when the CO2 is right.
Tissue-culture plants are the exception — they’re grown in sterile gel and adapt with minimal melting, which is part of what you’re paying for. Plants bought submersed from another hobbyist’s tank also transition with little melt, since they’re already in the right form.
Which Plants Melt Most (and Least)
Heavy melters (expect significant leaf loss)
- Cryptocorynes — infamous for “crypt melt,” sometimes dropping every leaf after any disturbance. They almost always recover from the roots within weeks.
- Stem plants grown emersed — rotala, ludwigia, and hygrophila often shed lower emersed leaves while the growing tips transition.
- Amazon swords — emersed-grown swords typically lose their broad oval aerial leaves and replace them with longer submersed ribbon leaves.
Light melters
- Anubias, java fern, bucephalandra — slow-growing rhizome plants transition gradually; occasional old-leaf melt but rarely dramatic.
- Vallisneria — usually transitions well, though it dislikes the move itself and may sulk for a week.
- Floating plants — minimal melt since their leaves were already at the air-water interface.
The Acclimation Protocol
Step 1: Quarantine or dip first
Before acclimating to your tank’s conditions, make sure you’re not acclimating pests along with the plant. Run new arrivals through our quarantine and dip protocol — it adds days upfront but prevents months of regret.
Step 2: Float to temperature-match (30 minutes)
Float the bag or container in your tank for 20–30 minutes to equalize temperature. Plants are less temperature-sensitive than fish, but a 10°F shock on top of transplant stress is an avoidable insult.
Step 3: Trim before planting
Remove any leaves that are already damaged, yellowing, or heavily algae-covered — they won’t recover and they’ll rot in your tank, feeding algae. For stem plants, trim off the bottom inch and any emersed leaves that look unlikely to adapt; the plant wastes energy maintaining leaves it’s going to shed anyway. Keep the healthy growing tips — that’s where recovery starts.
Step 4: Plant correctly the first time
Follow our planting guide — right depth, crown exposed on rosettes, rhizomes unburied on epiphytes. Every uprooting and replanting restarts the acclimation clock, so get placement right on the first attempt. Decide where each plant goes before it goes in the water.
Step 5: Run a gentle first week
For the first 7 days after planting:
- Moderate light — run your normal photoperiod but consider dropping intensity 20–30% if your light is dimmable. Blast-level light on a melting plant grows algae on the dying leaves, not recovery.
- Stable CO2 — if you inject CO2, keep it consistent. Fluctuating CO2 during acclimation is a melt accelerator. If you’re low-tech, this doesn’t apply — see growing without CO2.
- Half-strength fertilizer — new plants with damaged leaves can’t use full dosing, and the excess feeds algae. Ramp to full strength over 2–3 weeks per our fertilizer schedule.
- No disturbance — don’t move, trim, or “check on” new plants for at least two weeks. Every touch resets root establishment. This is especially critical for crypts.
Step 6: Remove melt, keep the base
As emersed leaves melt, remove the mushy material promptly — decaying leaves release ammonia and grow fungus that can spread to healthy tissue. But never discard the plant while the crown, rhizome, or roots are firm and alive. A crypt that’s lost every leaf but has firm roots is a plant that’s about to recover, not a dead plant. Give it 3–4 weeks before judging.
Telling Normal Melt From Real Problems
Normal transition melt:
- Affects oldest/emersed leaves first, newest growth last
- New submersed leaves emerge even as old ones dissolve
- Roots and crown stay firm and white/green
- Timeline: 1–4 weeks, then obvious new growth
Concerning melt (see our full melting diagnosis guide):
- New growth also melts or emerges deformed
- Rhizome or crown turns mushy and brown — this is rot, not transition
- Entire plant dissolves within days with no new growth after 4+ weeks
- Melting spreads to established plants that weren’t recently moved
Buying Tips to Minimize Melt
- Buy submersed-grown when available — hobbyist-grown cuttings transition with almost no melt.
- Choose tissue culture for sensitive species — crypts and delicate stems establish far more reliably from sterile cups.
- Avoid plants already melting in the store tank — some melt is normal, but a plant that’s mostly mush at purchase has less energy for recovery.
- Transport carefully — keep plants damp and out of direct sun/heat. A plant that dries out or cooks in a hot car melts far worse than one transported properly.
The First-Month Timeline: What to Expect Week by Week
Knowing what’s normal when removes most acclimation anxiety. Here’s the typical timeline for a healthy plant adapting to a new tank:
Week 1: The quiet week
Almost nothing visible happens. The plant is growing roots you can’t see and assessing its new environment. Some species (vallisneria, stem plants) may start shedding their lowest leaves. This is normal. Resist the urge to “help” — no moving, no extra fertilizer, no light changes. The most common beginner mistake is intervening during a week when the correct action is nothing.
Week 2: Melt peaks
This is when emersed leaves give up in earnest. Crypts may drop everything; swords shed their broad aerial leaves; stem plants lose lower foliage. It looks catastrophic and it’s usually fine. Keep removing mushy material, keep conditions stable, and watch the crown and growing tips — if those are firm and green, recovery is already underway.
Week 3: The turn
New submersed-adapted leaves emerge — smaller, thinner, often a slightly different shade of green than the emersed foliage. Stem plant tips start growing visibly; crypts push tiny curled leaves from the crown; swords unfurl narrow ribbon leaves. This is the moment most beginners exhale for the first time.
Week 4+: Established
New growth outpaces melt, and the plant is functionally yours. You can resume full-strength fertilizer, normal trimming, and stop treating it as fragile. Some slow growers (anubias, bucephalandra) take 6–8 weeks to show obvious progress — that’s their normal speed, not a problem.
Acclimating Different Plant Formats
Tissue-culture cups
Sterile, pest-free, and already adapted to high-humidity (not emersed) growth — tissue cultures melt the least of any format. Rinse the agar gel off gently (leftover gel rots and feeds fungus), split the portion into small plantlets, and plant per our planting guide. They establish slowly for the first two weeks, then accelerate. No dip needed, minimal acclimation stress — this is the premium experience you’re paying for.
Potted plants
Remove the pot and strip away the rockwool completely — leftover rockwool traps debris and rots. Tease the root mass apart gently; if it’s a dense mat, splitting it into 2–3 smaller portions actually establishes faster than planting one big clump (more growing points, better water flow around roots). Potted plants are usually emersed-grown, so expect the standard 2–4 week melt cycle.
Bare-root / bunched stems
Typically sold as weighted bunches. Remove any bands, foam, or weights, strip the lower leaves, and plant stems individually or in small groups. Bunched stems from the store are often already transitioning — check for new submersed growth at the tips, which tells you the plant is mid-adaptation and will settle quickly.
Hobbyist cuttings
Already submersed-grown and the fastest to establish — often showing new growth within days. The main acclimation factor is water-parameter difference between the two tanks. Float to temperature-match, plant promptly, and they’ll usually take off with minimal melt. This is why experienced hobbyists prefer trading cuttings over buying potted plants.
Frequently Asked Questions
Should I use a “plant starter” or transplant fertilizer?
Products marketed for transplant shock are mostly B-vitamins and mild hormones. They don’t hurt, but there’s no strong evidence they help aquarium plants specifically. Stable conditions and patience outperform any bottle. Save the money for more plants.
My new plant melted completely — bare crown, no leaves. Is it dead?
Probably not, if the crown or rhizome is firm. Crypts and swords routinely lose 100% of their leaves and regrow from the base within a month. The test is firmness: firm and pale/green means alive; mushy and brown/black means rot. Give firm-but-leafless plants a full 4 weeks before declaring them dead.
Can I speed up acclimation with extra light or CO2?
No — and trying usually backfires. A melting plant can’t use extra light; the excess just grows algae on its dying leaves. Keep light moderate and CO2 stable (not boosted) during acclimation. Growth speed comes from the plant’s own adaptation timeline, which you can’t rush, only avoid delaying.
Should new plants go straight into my main display tank?
After quarantine/dipping, yes — there’s no benefit to a separate “growing-in” tank for most plants. They acclimate to your water fastest in the tank they’ll live in. The exception is very delicate species going into a tank with boisterous fish; give those a few weeks in a calm corner or breeder box first.
The Patience Rule
The single most important acclimation skill is restraint: plant it right, set gentle conditions, remove decay, and then leave it alone for a month. The hobbyists with the best plant growth aren’t doing something clever in week one — they’re simply not interfering in weeks two through four while the plants do what they’ve evolved to do. Melt looks like failure and feels like failure, but in most cases it’s the visible part of a plant successfully becoming yours.