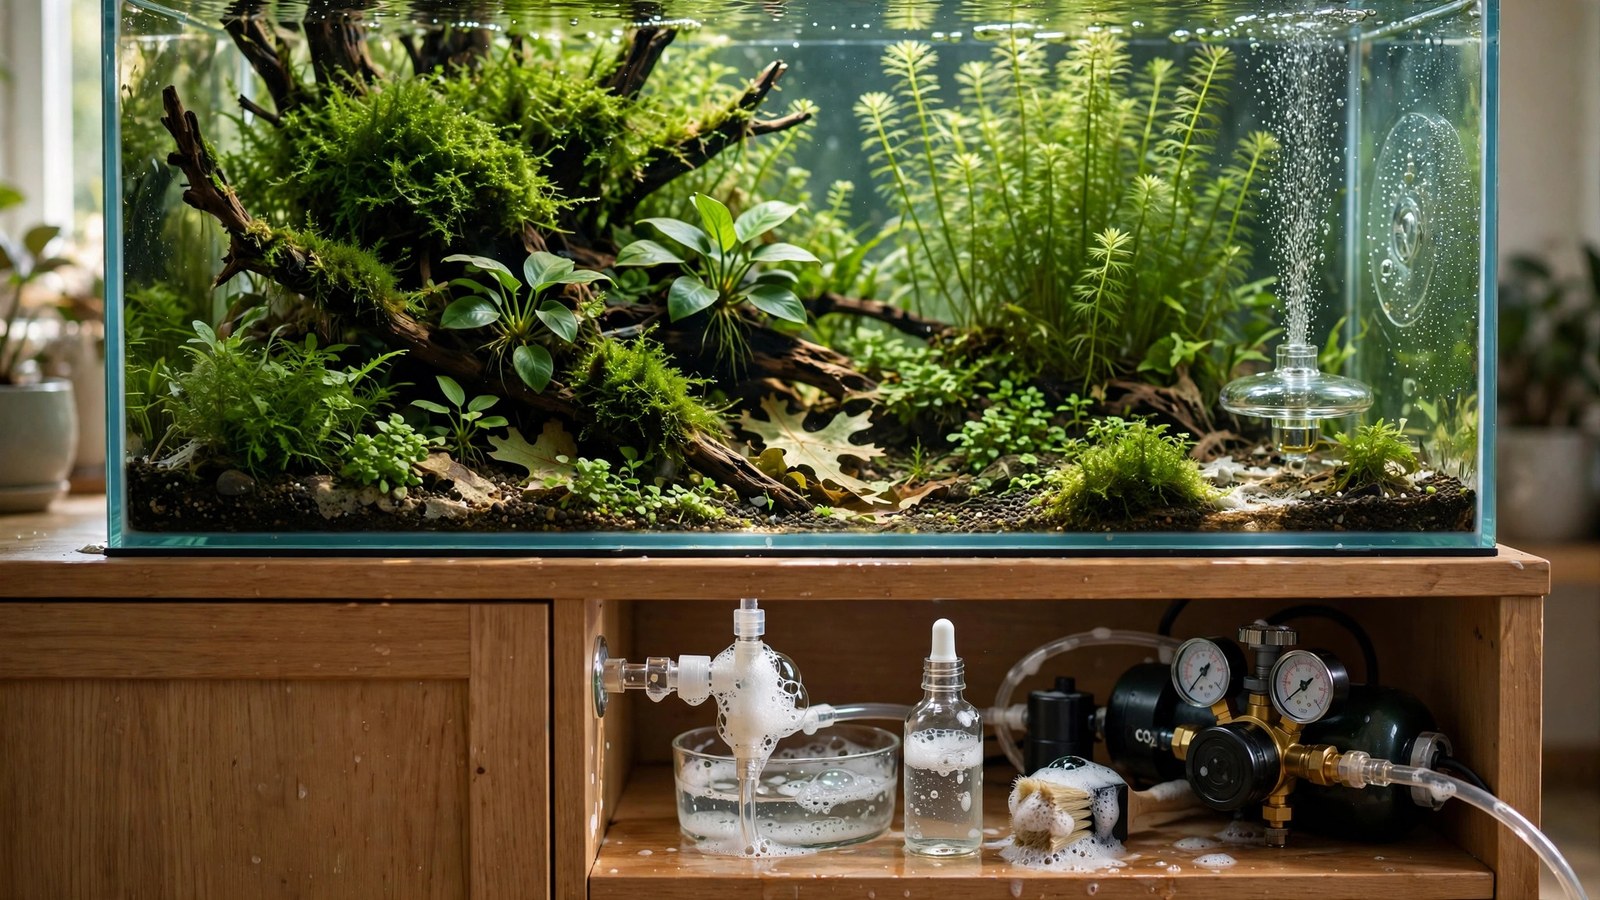
Your 5 lb cylinder should last three months, but it's empty after five weeks. Nothing looks broken, the bubble counter reads normally, yet gas is vanishing. In nearly every case, the culprit is a slow CO2 leak — and the fix is the humble soapy water test, the same method gas fitters have used for a century. It takes ten minutes, costs nothing, and finds leaks no visual inspection ever will.
Why CO2 Leaks Are So Common (and So Sneaky)
A pressurized CO2 system has a dozen potential leak points: the cylinder-to-regulator connection, gauge threads, the solenoid joints, needle valve fittings, bubble counter caps, tubing push-fits, check valves, and every diffusion connection. CO2 is colorless and odorless, and a leak small enough to drain a cylinder in weeks is far too small to hear or feel. If you're still assembling your first setup, our complete CO2 guide walks through the whole gas path so you know every joint you're responsible for — and the 2Hr Aquarist CO2 system guide is another excellent systematic reference.
The telltale sign is cylinder life shorter than the math predicts. Run the numbers from our cylinder sizes guide: if a 5 lb cylinder at 2 bubbles per second should last ~3 months and yours lasts 6 weeks, roughly half your gas is going somewhere other than the tank. That "somewhere" is almost always a fitting, not the diffuser.
Other symptoms: bubble rate that slowly creeps up over days (you keep adjusting the needle valve to compensate), a faint hissing audible only with your ear near the regulator in a quiet room, or the high-pressure gauge dropping faster than expected between checks.
The Soapy Water Test: Step by Step
This is the definitive DIY leak test. Professional leak-detection fluid exists, but dish soap works just as well.
- Mix the solution: a squirt of dish soap in a cup of water — you want it noticeably soapy but not a foam bath. Some aquarists add a little glycerin to make bubbles last longer; optional.
- Pressurize the system: open the cylinder valve and set your normal working pressure. The system must be at full operating pressure — leaks that only appear under pressure won't show on a depressurized system.
- Apply to every joint: with a small brush, cotton swab, or spray bottle, coat each connection: cylinder-to-regulator nut, both gauge threads, solenoid inlet/outlet, needle valve fittings, bubble counter top and bottom caps, every tubing push-fit, the check valve barbs, and the diffuser connection. Work methodically from the cylinder outward.
- Watch for 30–60 seconds per joint: a leak shows as growing bubbles or foam at the joint — not just the soap sitting there, but active bubbling that inflates. Even tiny leaks produce a slowly growing bubble cluster. Mark each leaker with a piece of tape.
- Don't forget hidden spots: the back of the regulator where gauges thread in, the solenoid's electrical housing seam (rare, but possible), and tubing itself — run soapy fingers along the full tubing length feeling for pinholes, especially near tight bends.
- Fix, re-pressurize, re-test. After tightening or resealing, test again. Repeat until a full pass shows zero bubbling.
The Usual Suspects: Where Leaks Hide
1. The cylinder-to-regulator connection
The #1 leak point. Causes: missing or flattened fiber/nylon washer, insufficient tightening, or cross-threading. Always use a fresh washer at every cylinder swap — they're pennies, and a compressed old washer is the classic slow leaker. Tighten firmly with a wrench; hand-tight is not enough at 800 PSI.
2. Bubble counter caps
Plastic bubble counter caps with O-rings are notorious for weeping, especially cheap ones and especially after they've been opened for refilling the counter fluid. Check the O-ring for nicks, make sure the cap is threaded straight (cross-threading is easy on plastic), and don't overfill — fluid above the max line can compromise the seal.
3. Push-fit tubing connections
CO2-resistant tubing (polyurethane or proper CO2 tubing — not soft silicone airline, which CO2 diffuses straight through) must be cut square and pushed fully onto barbs. A tube that's merely "on" rather than fully seated leaks slowly. Trim 1/2 inch off and reseat any suspect joint — tubing ends deform over time.
4. Check valve barbs
Cheap plastic check valves crack at the barbs, especially if tubing was forced on. Flex the valve gently while soapy — hairline cracks open under flex and bubble. Replace yearly as preventive maintenance regardless.
5. Solenoid and needle valve threads
Threaded brass-to-brass joints need PTFE (Teflon) tape: 3–4 wraps, wound in the tightening direction. Missing tape, tape wound backward (it unwinds as you tighten), or tape on a fitting designed for an O-ring seal are all common errors. Note: don't put tape on compression or O-ring fittings — it prevents the actual seal from seating.
6. Diffuser and in-tank connections
Suction-cup-mounted diffusers get bumped during maintenance; tubing works loose over months. Since these joints are underwater, leaks here show as streams of larger bubbles escaping the joint rather than mist from the ceramic — easy to spot once you look for it.
Fixing What You Find
- Loose threaded joint: depressurize, apply fresh PTFE tape correctly, retighten, retest.
- Flattened washer: replace with new fiber/nylon washer (keep spares — they come in multi-packs).
- Poorly seated tubing: cut the end square with a sharp blade, push fully onto the barb. Consider small hose clamps or zip ties on barbs for high-pressure sections.
- Cracked check valve or bubble counter: replace — these are consumables, not heirlooms.
- Leaking gauge threads: remove, re-tape, reinstall. If the gauge itself leaks at the case seam, replace the gauge.
- Porous tubing: if you're using silicone airline tubing anywhere in the pressurized path, replace it with proper CO2-resistant tubing. Silicone is fine after the bubble counter at low pressure in some setups, but it wastes gas — just use the right tubing everywhere.
When to Test
- At initial setup — before connecting to the tank. Non-negotiable.
- After every cylinder swap — the cylinder connection is disturbed, so retest at least that joint and ideally the full chain.
- After any plumbing change — new diffuser, new tubing run, added manifold.
- When cylinder life drops unexpectedly — the diagnostic test.
- Annually — as preventive maintenance; O-rings age and tubing hardens. Pair it with your yearly review of CO2 timing — a timer that's drifted and a fitting that's weeping often arrive together.
Beyond Soap: Electronic Detectors
Handheld CO2 leak detectors (or ultrasonic leak detectors) exist and can pinpoint leaks in hard-to-soap locations, like inside a crowded cabinet. They're a luxury, not a necessity — the soapy water test finds the same leaks for free. One legitimate use case: if you've soaped everything twice and the cylinder is still draining fast, a detector can check whether the leak is somewhere truly inaccessible, like inside the regulator body itself (rare, but it happens — usually a failed internal seal, meaning regulator service or replacement).
Frequently Asked Questions
How much cylinder life does a small leak actually cost?
More than you'd think. A leak of just 1 bubble per second equivalent — invisible, inaudible — doubles the gas consumption of a tank running 1 bps. That's the difference between a 5 lb cylinder lasting 5 months and lasting 10 weeks. Slow leaks are the most expensive kind because they run 24/7, including all night when the solenoid is closed.
Can I use Windex or commercial leak detector instead of soapy water?
Plain soapy water is ideal and residue-free. Avoid ammonia-based cleaners on brass fittings (ammonia can stress-corrode brass over time) and avoid getting any fluid inside the bubble counter or tubing. Dedicated gas-leak detection fluid from a hardware store also works well and is inexpensive.
My bubble counter fluid keeps disappearing — is that a leak?
Usually it's evaporation (especially with plain water as counter fluid — use mineral oil or glycerin to slow it) or minor weeping at the cap seal. But a counter that empties in days rather than weeks deserves the soapy test on its caps — cap-seal weeping is a genuine gas leak, not just lost fluid.
Should I test with the solenoid on or off?
Test with the system pressurized in its normal running state (solenoid open, gas flowing). Also worth a separate check: close the solenoid and soap the upstream joints — a leak upstream of the solenoid wastes gas 24/7 even when injection is "off," which is the worst kind. Test both states.
I found no leaks but the cylinder still drains fast — now what?
Recheck your bubble-rate math against the cylinder lifespan table — maybe consumption is actually normal for your rate. Verify the cylinder was filled to its rated weight (under-filled swaps happen). And soap-test once more, slowly — the leaks that survive a first pass are usually at the cylinder washer or a tubing joint you were sure was fine.
Is a tiny leak dangerous to me or my family?
A slow aquarium CO2 leak in a normal ventilated room is not a health hazard — the volumes are small and rooms exchange air. The exception is a sealed, unventilated cabinet or closet housing the cylinder: CO2 is heavier than air and can accumulate. Keep cylinder cabinets slightly vented, and fix leaks promptly for your wallet's sake if not your lungs'.
Ten Minutes That Pay for Themselves
The soapy water test is the highest-ROI maintenance in pressurized CO2: ten minutes with dish soap routinely finds the leak that's been halving your cylinder life for months. Make it part of every cylinder swap and every setup change, and your gas budget becomes predictable — which means one less variable in the already complex equation of a great planted tank.
Tissue-culture plants are the exception — they’re grown in sterile gel and adapt with minimal melting, which is part of what you’re paying for. Plants bought submersed from another hobbyist’s tank also transition with little melt, since they’re already in the right form.
Which Plants Melt Most (and Least)
Heavy melters (expect significant leaf loss)
- Cryptocorynes — infamous for “crypt melt,” sometimes dropping every leaf after any disturbance. They almost always recover from the roots within weeks.
- Stem plants grown emersed — rotala, ludwigia, and hygrophila often shed lower emersed leaves while the growing tips transition.
- Amazon swords — emersed-grown swords typically lose their broad oval aerial leaves and replace them with longer submersed ribbon leaves.
Light melters
- Anubias, java fern, bucephalandra — slow-growing rhizome plants transition gradually; occasional old-leaf melt but rarely dramatic.
- Vallisneria — usually transitions well, though it dislikes the move itself and may sulk for a week.
- Floating plants — minimal melt since their leaves were already at the air-water interface.
The Acclimation Protocol
Step 1: Quarantine or dip first
Before acclimating to your tank’s conditions, make sure you’re not acclimating pests along with the plant. Run new arrivals through our quarantine and dip protocol — it adds days upfront but prevents months of regret.
Step 2: Float to temperature-match (30 minutes)
Float the bag or container in your tank for 20–30 minutes to equalize temperature. Plants are less temperature-sensitive than fish, but a 10°F shock on top of transplant stress is an avoidable insult.
Step 3: Trim before planting
Remove any leaves that are already damaged, yellowing, or heavily algae-covered — they won’t recover and they’ll rot in your tank, feeding algae. For stem plants, trim off the bottom inch and any emersed leaves that look unlikely to adapt; the plant wastes energy maintaining leaves it’s going to shed anyway. Keep the healthy growing tips — that’s where recovery starts.
Step 4: Plant correctly the first time
Follow our planting guide — right depth, crown exposed on rosettes, rhizomes unburied on epiphytes. Every uprooting and replanting restarts the acclimation clock, so get placement right on the first attempt. Decide where each plant goes before it goes in the water.
Step 5: Run a gentle first week
For the first 7 days after planting:
- Moderate light — run your normal photoperiod but consider dropping intensity 20–30% if your light is dimmable. Blast-level light on a melting plant grows algae on the dying leaves, not recovery.
- Stable CO2 — if you inject CO2, keep it consistent. Fluctuating CO2 during acclimation is a melt accelerator. If you’re low-tech, this doesn’t apply — see growing without CO2.
- Half-strength fertilizer — new plants with damaged leaves can’t use full dosing, and the excess feeds algae. Ramp to full strength over 2–3 weeks per our fertilizer schedule.
- No disturbance — don’t move, trim, or “check on” new plants for at least two weeks. Every touch resets root establishment. This is especially critical for crypts.
Step 6: Remove melt, keep the base
As emersed leaves melt, remove the mushy material promptly — decaying leaves release ammonia and grow fungus that can spread to healthy tissue. But never discard the plant while the crown, rhizome, or roots are firm and alive. A crypt that’s lost every leaf but has firm roots is a plant that’s about to recover, not a dead plant. Give it 3–4 weeks before judging.
Telling Normal Melt From Real Problems
Normal transition melt:
- Affects oldest/emersed leaves first, newest growth last
- New submersed leaves emerge even as old ones dissolve
- Roots and crown stay firm and white/green
- Timeline: 1–4 weeks, then obvious new growth
Concerning melt (see our full melting diagnosis guide):
- New growth also melts or emerges deformed
- Rhizome or crown turns mushy and brown — this is rot, not transition
- Entire plant dissolves within days with no new growth after 4+ weeks
- Melting spreads to established plants that weren’t recently moved
Buying Tips to Minimize Melt
- Buy submersed-grown when available — hobbyist-grown cuttings transition with almost no melt.
- Choose tissue culture for sensitive species — crypts and delicate stems establish far more reliably from sterile cups.
- Avoid plants already melting in the store tank — some melt is normal, but a plant that’s mostly mush at purchase has less energy for recovery.
- Transport carefully — keep plants damp and out of direct sun/heat. A plant that dries out or cooks in a hot car melts far worse than one transported properly.
The First-Month Timeline: What to Expect Week by Week
Knowing what’s normal when removes most acclimation anxiety. Here’s the typical timeline for a healthy plant adapting to a new tank:
Week 1: The quiet week
Almost nothing visible happens. The plant is growing roots you can’t see and assessing its new environment. Some species (vallisneria, stem plants) may start shedding their lowest leaves. This is normal. Resist the urge to “help” — no moving, no extra fertilizer, no light changes. The most common beginner mistake is intervening during a week when the correct action is nothing.
Week 2: Melt peaks
This is when emersed leaves give up in earnest. Crypts may drop everything; swords shed their broad aerial leaves; stem plants lose lower foliage. It looks catastrophic and it’s usually fine. Keep removing mushy material, keep conditions stable, and watch the crown and growing tips — if those are firm and green, recovery is already underway.
Week 3: The turn
New submersed-adapted leaves emerge — smaller, thinner, often a slightly different shade of green than the emersed foliage. Stem plant tips start growing visibly; crypts push tiny curled leaves from the crown; swords unfurl narrow ribbon leaves. This is the moment most beginners exhale for the first time.
Week 4+: Established
New growth outpaces melt, and the plant is functionally yours. You can resume full-strength fertilizer, normal trimming, and stop treating it as fragile. Some slow growers (anubias, bucephalandra) take 6–8 weeks to show obvious progress — that’s their normal speed, not a problem.
Acclimating Different Plant Formats
Tissue-culture cups
Sterile, pest-free, and already adapted to high-humidity (not emersed) growth — tissue cultures melt the least of any format. Rinse the agar gel off gently (leftover gel rots and feeds fungus), split the portion into small plantlets, and plant per our planting guide. They establish slowly for the first two weeks, then accelerate. No dip needed, minimal acclimation stress — this is the premium experience you’re paying for.
Potted plants
Remove the pot and strip away the rockwool completely — leftover rockwool traps debris and rots. Tease the root mass apart gently; if it’s a dense mat, splitting it into 2–3 smaller portions actually establishes faster than planting one big clump (more growing points, better water flow around roots). Potted plants are usually emersed-grown, so expect the standard 2–4 week melt cycle.
Bare-root / bunched stems
Typically sold as weighted bunches. Remove any bands, foam, or weights, strip the lower leaves, and plant stems individually or in small groups. Bunched stems from the store are often already transitioning — check for new submersed growth at the tips, which tells you the plant is mid-adaptation and will settle quickly.
Hobbyist cuttings
Already submersed-grown and the fastest to establish — often showing new growth within days. The main acclimation factor is water-parameter difference between the two tanks. Float to temperature-match, plant promptly, and they’ll usually take off with minimal melt. This is why experienced hobbyists prefer trading cuttings over buying potted plants.
Frequently Asked Questions
Should I use a “plant starter” or transplant fertilizer?
Products marketed for transplant shock are mostly B-vitamins and mild hormones. They don’t hurt, but there’s no strong evidence they help aquarium plants specifically. Stable conditions and patience outperform any bottle. Save the money for more plants.
My new plant melted completely — bare crown, no leaves. Is it dead?
Probably not, if the crown or rhizome is firm. Crypts and swords routinely lose 100% of their leaves and regrow from the base within a month. The test is firmness: firm and pale/green means alive; mushy and brown/black means rot. Give firm-but-leafless plants a full 4 weeks before declaring them dead.
Can I speed up acclimation with extra light or CO2?
No — and trying usually backfires. A melting plant can’t use extra light; the excess just grows algae on its dying leaves. Keep light moderate and CO2 stable (not boosted) during acclimation. Growth speed comes from the plant’s own adaptation timeline, which you can’t rush, only avoid delaying.
Should new plants go straight into my main display tank?
After quarantine/dipping, yes — there’s no benefit to a separate “growing-in” tank for most plants. They acclimate to your water fastest in the tank they’ll live in. The exception is very delicate species going into a tank with boisterous fish; give those a few weeks in a calm corner or breeder box first.
The Patience Rule
The single most important acclimation skill is restraint: plant it right, set gentle conditions, remove decay, and then leave it alone for a month. The hobbyists with the best plant growth aren’t doing something clever in week one — they’re simply not interfering in weeks two through four while the plants do what they’ve evolved to do. Melt looks like failure and feels like failure, but in most cases it’s the visible part of a plant successfully becoming yours.