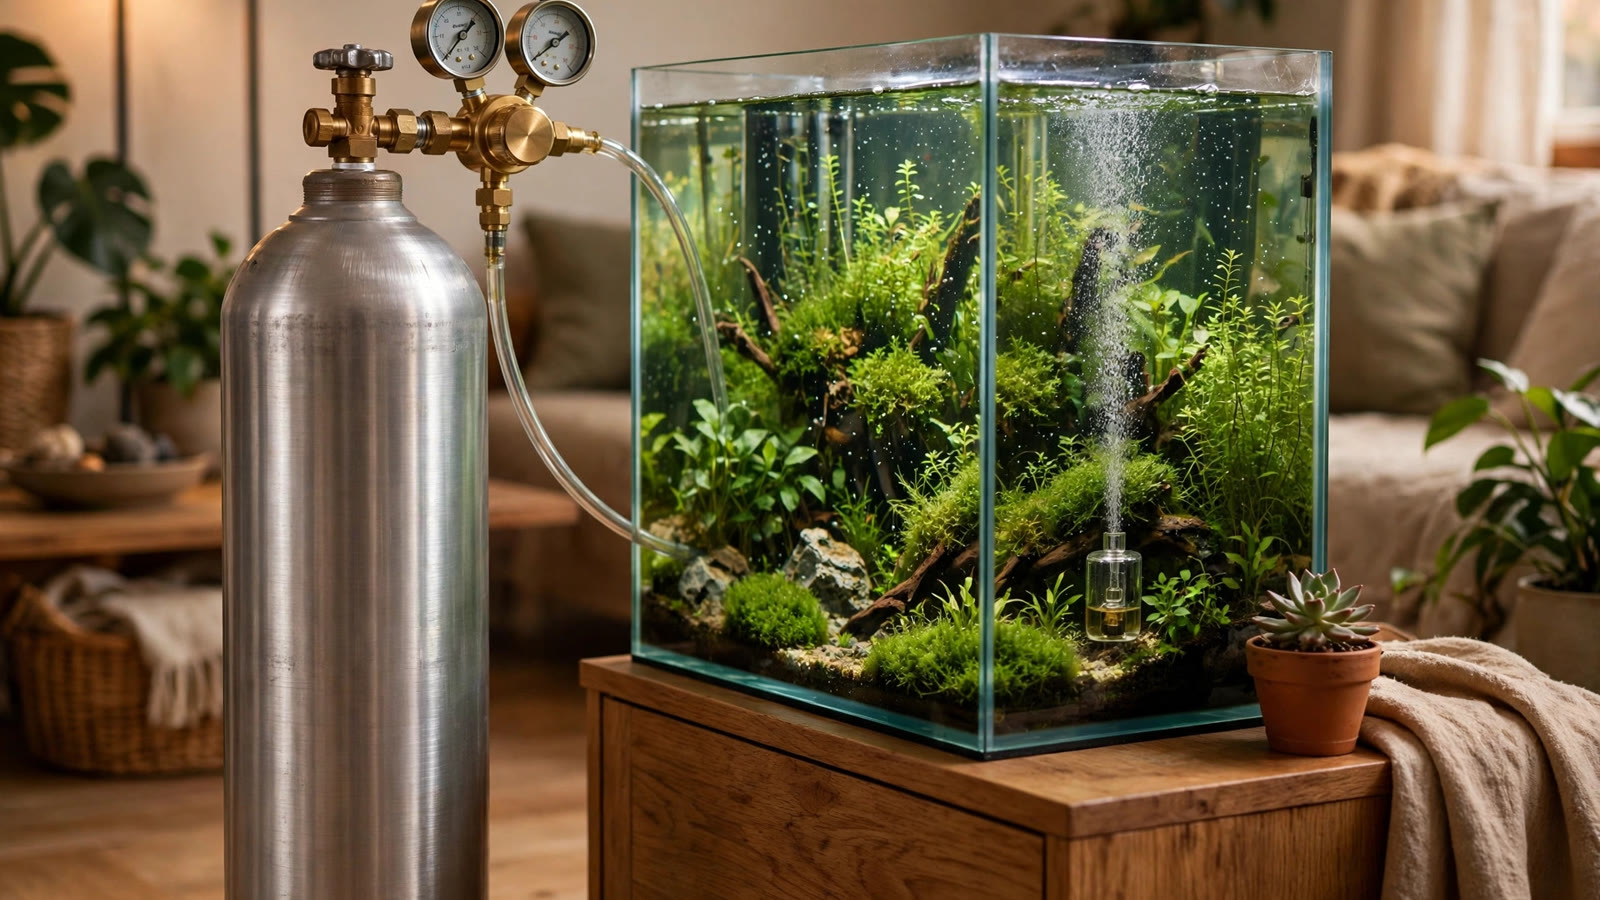
Before you invest in a pressurized system, it's worth asking a very practical question: what will the co2 cylinder refill cost look like year after year? A great regulator and a full cylinder mean little if the nearest refill point is an hour's drive away or charges more than the cylinder is worth. The good news is that carbon dioxide is one of the cheapest consumables in the planted-tank hobby. Refills typically run $15 to $30 depending on cylinder size and where you live, and a single 5 lb cylinder can keep a nano tank bubbling for months. This guide breaks down real-world refill prices by source and cylinder size, explains why costs vary, and shows you how to get your tank filled cheaply and safely the first time.
How Much Does a CO2 Refill Cost?
Across most US markets, refilling (not exchanging) a CO2 cylinder costs roughly:
- 5 lb cylinder: $14–$18
- 10 lb cylinder: $18–$24
- 20 lb cylinder: $24–$30
These are typical walk-in refill prices at welding supply and beverage-gas shops. Full exchanges — where you hand over your empty cylinder and receive a different full one — usually cost more, in the $20–$50 range, because the service bakes in inspection, cleaning, and cylinder depreciation.
Why prices vary so much
The same 5 lb cylinder might cost $12 to refill in an industrial district and $25 in a small town — and both prices can be legitimate. Here's what drives the difference:
- Region and competition. Cities with multiple welding supply houses and beverage-gas distributors keep prices down. If only one shop within 50 miles fills CO2, expect to pay more.
- Gas grade. Food-grade CO2 (beverage gas) is slightly more expensive than industrial grade in some shops, but for aquarium use either works fine — the CO2 molecule is the same, and reputable shops test their gas regardless. Don't overpay for a grade you don't need.
- Refill vs. exchange vs. rental. Walk-in refills of your own cylinder are cheapest. Exchanges cost more per fill but save you waiting time and testing headaches (more on that below). Some shops only sell rented cylinders with gas included — fine for welders, usually overkill for hobbyists.
- Cylinder condition. A cylinder that fails visual inspection or is past its hydrotest date may be refused, or the shop may charge a re-certification fee. A quick look at your date stamps before you go avoids surprises.
Where to Get a CO2 Cylinder Refilled
Most hobbyists are surprised to learn their aquarium gas comes from the same places that fill soda machines and welding tanks. Here are the main options, compared:
| Refill source | Typical price range (5 lb) | Pros | Cons |
|---|---|---|---|
| Welding supply shop | $15–$22 | Cheapest refills; fills while you wait; often exchanges too; knows cylinder handling | May not fill small or odd-sized cylinders; limited weekend hours |
| Homebrew / beer-gas supplier | $15–$25 | Hobbyist-friendly staff; food-grade gas standard; often open Saturdays | Can be pricier than welding shops; some only sell their own cylinders |
| Paintball / sporting goods store | $4–$10 (paintball tanks) | Cheap fills for small cylinders; easy to find in suburbs | Usually can't fill standard 5–20 lb cylinders with CGA320 valves |
| Fire extinguisher service | $12–$20 | Often the cheapest option; fills on-site; familiar with pressure vessels | Not all service companies fill customer cylinders; may need to call ahead |
| Local fish store | $20–$30+ | Convenient; staff understands aquarium needs | Highest per-fill cost; many shops only exchange, not refill |
Which source is best for hobbyists?
For most planted-tank keepers, a welding supply shop is the sweet spot: lowest prices, fast service, and staff who handle pressure vessels all day. Homebrew shops are a close second and tend to be more welcoming if you've never refilled a cylinder before. Fire extinguisher services are an underrated gem — many hobbyists report them as the cheapest local option, though availability varies. Call before driving: ask specifically whether they fill customer-owned cylinders with CGA320 valves.
If you're still deciding what size to buy, our CO2 cylinder sizes guide for planted tanks walks through which cylinder fits your tank and cabinet. And when your cylinder arrives, remember that new cylinders ship empty under transport regulations — so verifying a local fill option before you buy saves you a frustrating first weekend. The best CO2 regulators for planted tanks article also covers which regulator fittings match standard cylinder valves.
Refill vs. Exchange: Which Is Better?
Shops generally offer two models. Understanding the trade-off helps you pick the one that matches how you like to run your setup.
Refill (keep your cylinder)
You drop off your own cylinder, it's filled (sometimes while you wait), and you take the same bottle home. Pros: cheaper per fill, and you keep the cylinder you maintain. Cons: if your cylinder is near its re-test date, some shops won't fill it until it's re-certified — a hassle you handle yourself. Refills also take longer at busy shops since your bottle joins a queue.
Exchange (swap for a full one)
You hand over your empty cylinder and receive a pre-filled one on the spot. Pros: instant, no waiting, and the service company owns the inspection and testing burden. Cons: you pay $20–$50 for the convenience, and you lose your specific cylinder — including any cosmetic pride you had in a shiny new bottle. Exchanged cylinders are perfectly safe but often look well-used.
For hobbyists, the simple rule: refill if you have time and a good local shop; exchange if you need gas today and can't wait. Many keepers refill their main cylinder and keep a small backup bottle for exchanges in a pinch.
What to Ask Before You Go
A two-minute phone call saves a wasted trip. Confirm these details before loading the cylinder into your car:
- "Do you fill customer-owned CO2 cylinders with CGA320 valves?" This is the single most important question. Aquarium regulators use the CGA320 fitting, and not every gas shop stocks or fills that valve type.
- "Do you refill while I wait, or is it drop-off?" Drop-off refills can take a day or two — fine if you planned ahead, bad if your drop checker is already fading.
- "Food grade or industrial?" Either is safe for aquariums, but food-grade shops (homebrew stores) sometimes charge a small premium. Knowing which you're buying keeps the price quote accurate.
- "Is my hydrotest date still valid?" Check the date stamp on your cylinder's shoulder. In the US, CO2 cylinders need re-testing every 5 years (the date is stamped as month/year). An out-of-date cylinder will be refused at reputable shops.
- "Any minimum charge or cylinder-size limits?" Some shops won't bother with very small cylinders; others have a flat minimum that makes tiny fills poor value.
While you're at it, check the valve condition — it should turn smoothly, and the cylinder shouldn't hiss at rest. A bottle that's sat in a garage for years with an unknown history deserves a visual inspection at the fill shop before it lives next to your living room.
How Long Does a Cylinder Last? (Budgeting Your Refills)
The co2 cylinder refill cost only matters in context: how often will you actually pay it? That depends on tank size, bubble rate, and how many hours a day your CO2 runs.
- Nano tanks (5–10 gal, ~1 bubble/second): a 5 lb cylinder typically lasts 3–6 months. At $15 a refill, that's under $5 a month.
- Mid-size tanks (20–40 gal, 2–3 bubbles/second): a 5 lb cylinder lasts roughly 2–3 months; a 10 lb cylinder stretches to 4–6 months.
- Large tanks (55+ gal, higher injection): a 10 lb cylinder lasts about 2–4 months, and many keepers step up to a 20 lb bottle to cut refill trips in half.
These are realistic working ranges, not lab figures — leaks, surface agitation, and CO2 diffusion methods compared (diffusers waste more than inline reactors) all shift the numbers. Running CO2 on a timer via a CO2 solenoid and timer setup instead of 24/7 roughly halves consumption, which is one of the easiest ways to stretch a fill.
Do the annual math: a nano keeper refilling a 5 lb cylinder three times a year at $16 spends about $48 a year on gas. That's less than most fertilizer regimes. CO2 refills are a small recurring cost — the real budget decision is buying the right cylinder size up front so you're not driving to the welding shop every six weeks.
Signs Your Cylinder Is Running Low
Catching a nearly-empty cylinder early protects your livestock from the classic end-of-tank dump, where falling pressure lets the regulator deliver a CO2 surge. Watch for:
- Working pressure dropping. The high-pressure gauge (cylinder side) creeps down over weeks. When it starts falling faster, a refill is near.
- Needle drift. If your CO2 bubble counter rate keeps dropping and you keep nudging the needle valve open to compensate, the cylinder is nearly spent.
- Drop checker fading. A CO2 drop checker shifting from green back toward blue over several days means dissolved CO2 is declining — check the gauges.
- Regulator "breathing." On single-stage regulators, fluctuating output as the cylinder empties is the warning sign of an impending dump. This is the moment to close the cylinder valve and schedule a refill, not to squeeze out another week.
Keep a mental (or written) note of each refill date and roughly how long it lasted. Your own consumption history is the most reliable predictor of when the next trip is due — and most keepers find their second cylinder lasts exactly as long as the math says it will.
Transport Safety Basics
A full CO2 cylinder is a pressure vessel, and a little respect goes a long way. The rules are simple:
- Keep it upright and secured. Wedge it so it can't tip or roll — a seatbelted back seat or a strapped trunk corner works. Never transport it lying loose where it can become a projectile in a sudden stop.
- Never leave it in a hot car. Heat raises internal pressure. Park in shade, run the AC, and get the cylinder indoors promptly.
- Keep the valve cap on during transport to protect the valve from knocks.
- At home, store it upright in a ventilated spot, secured so it can't fall — inside the stand, strapped to a wall bracket, or in a cylinder holder.
If a cylinder ever hisses continuously, ices over rapidly, or the valve is damaged, don't try to fix it yourself — ventilate the area and contact the fill shop. These events are rare with well-maintained cylinders, but knowing the response matters.
First-Time Refill Checklist
Heading out with your first empty cylinder? Run through this list:
- Confirm by phone that the shop fills customer-owned CGA320 cylinders (and note whether it's same-day or drop-off).
- Check your hydrotest date stamp — it must be current.
- Close the cylinder valve fully and cap it before transport.
- Secure the cylinder upright in the vehicle; never leave it in a hot car.
- Bring the regulator's fitting size (CGA320) and ask for the right gas grade — food or industrial both work for aquariums.
- Ask for a receipt with the fill date and weight, and jot the date in your tank log.
- Back home, reconnect the regulator, check all connections for leaks with soapy water, and reopen the valve slowly.
- Start low, observe livestock. After any refill or reconnection, run CO2 conservatively for the first day and watch fish and shrimp for signs of distress before returning to your normal bubble rate. If you want a deeper safety primer, read our CO2 and fish safety guide.
For context on typical costs across sources, the CryoFX CO2 tank refill guide lists refill and exchange price ranges by cylinder size, and the IDS water treatment CO2 cost breakdown shows a sample food-grade price table — both are useful sanity checks against whatever your local shop quotes.
Frequently Asked Questions
How much does it cost to refill a 5 lb CO2 cylinder for an aquarium?
Typically $14–$18 at a welding supply or homebrew shop, though prices run higher in areas with little competition. Exchanges cost more ($20–$50) because the service handles inspection and re-certification. A 5 lb cylinder on a nano tank lasts several months, so the annual gas cost for a small setup often lands under $60 — one of the cheapest recurring expenses in the hobby.
Can I refill my aquarium CO2 cylinder at a paintball shop?
Usually not, if it's a standard aquarium cylinder. Paintball and sporting goods stores fill small paintball tanks (often 20–24 oz) with a different fitting, and most can't handle full-size cylinders with CGA320 valves. If you run a paintball-style CO2 setup, they're a cheap and convenient option at roughly $4–$8 a fill; otherwise, stick with welding supply shops, homebrew stores, or fire extinguisher services.
Do CO2 cylinders come filled when you buy them?
No. New cylinders ship empty because transport regulations prohibit shipping pressurized vessels through standard carriers. This catches many first-time buyers off guard. Before ordering a cylinder online, verify that a shop near you fills or exchanges customer-owned CGA320 tanks — otherwise you'll own an expensive paperweight until you find one.
Is food-grade CO2 better than industrial grade for aquariums?
For planted tanks, there's no meaningful difference. Food-grade (beverage) CO2 goes through the same basic production and purity testing as industrial CO2, and both are overwhelmingly pure carbon dioxide. Some shops charge slightly more for food-grade fills, so there's no reason to pay the premium specifically for aquarium use — buy whichever your local shop offers at the better price.
How do I know when my CO2 cylinder is almost empty?
Watch your gauges: the high-pressure (cylinder-side) reading drops steadily, and near the end it falls faster. Practical signs include needing to constantly open the needle valve to hold your bubble rate, your drop checker drifting from green back to blue, and fluctuating output on single-stage regulators. Track your refill dates — your own history is the best predictor of when the next trip is due.
What happens if my CO2 cylinder fails its hydrotest date?
Reputable shops will refuse to fill an out-of-date cylinder — that's normal and safe. The cylinder needs re-certification (hydrostatic testing) at a qualified facility, which typically costs $25–$40 and is required every 5 years in the US. Check the month/year stamp on your cylinder's shoulder before every refill trip so an expired test never strands you with an empty bottle.
Refills Are the Cheap Part — Plan Them Well
The co2 cylinder refill cost is rarely the barrier people fear: $15–$30 a few times a year, from a welding shop or homebrew store ten minutes away. The expensive mistakes are buying a cylinder before finding a fill source, letting an expired hydrotest date strand you, and running a tank dry without noticing. Pick the right cylinder size, find your local shop, log your refill dates, and CO2 becomes what it should be — a quiet background utility that keeps your plants thriving.
Tissue-culture plants are the exception — they’re grown in sterile gel and adapt with minimal melting, which is part of what you’re paying for. Plants bought submersed from another hobbyist’s tank also transition with little melt, since they’re already in the right form.
Which Plants Melt Most (and Least)
Heavy melters (expect significant leaf loss)
- Cryptocorynes — infamous for “crypt melt,” sometimes dropping every leaf after any disturbance. They almost always recover from the roots within weeks.
- Stem plants grown emersed — rotala, ludwigia, and hygrophila often shed lower emersed leaves while the growing tips transition.
- Amazon swords — emersed-grown swords typically lose their broad oval aerial leaves and replace them with longer submersed ribbon leaves.
Light melters
- Anubias, java fern, bucephalandra — slow-growing rhizome plants transition gradually; occasional old-leaf melt but rarely dramatic.
- Vallisneria — usually transitions well, though it dislikes the move itself and may sulk for a week.
- Floating plants — minimal melt since their leaves were already at the air-water interface.
The Acclimation Protocol
Step 1: Quarantine or dip first
Before acclimating to your tank’s conditions, make sure you’re not acclimating pests along with the plant. Run new arrivals through our quarantine and dip protocol — it adds days upfront but prevents months of regret.
Step 2: Float to temperature-match (30 minutes)
Float the bag or container in your tank for 20–30 minutes to equalize temperature. Plants are less temperature-sensitive than fish, but a 10°F shock on top of transplant stress is an avoidable insult.
Step 3: Trim before planting
Remove any leaves that are already damaged, yellowing, or heavily algae-covered — they won’t recover and they’ll rot in your tank, feeding algae. For stem plants, trim off the bottom inch and any emersed leaves that look unlikely to adapt; the plant wastes energy maintaining leaves it’s going to shed anyway. Keep the healthy growing tips — that’s where recovery starts.
Step 4: Plant correctly the first time
Follow our planting guide — right depth, crown exposed on rosettes, rhizomes unburied on epiphytes. Every uprooting and replanting restarts the acclimation clock, so get placement right on the first attempt. Decide where each plant goes before it goes in the water.
Step 5: Run a gentle first week
For the first 7 days after planting:
- Moderate light — run your normal photoperiod but consider dropping intensity 20–30% if your light is dimmable. Blast-level light on a melting plant grows algae on the dying leaves, not recovery.
- Stable CO2 — if you inject CO2, keep it consistent. Fluctuating CO2 during acclimation is a melt accelerator. If you’re low-tech, this doesn’t apply — see growing without CO2.
- Half-strength fertilizer — new plants with damaged leaves can’t use full dosing, and the excess feeds algae. Ramp to full strength over 2–3 weeks per our fertilizer schedule.
- No disturbance — don’t move, trim, or “check on” new plants for at least two weeks. Every touch resets root establishment. This is especially critical for crypts.
Step 6: Remove melt, keep the base
As emersed leaves melt, remove the mushy material promptly — decaying leaves release ammonia and grow fungus that can spread to healthy tissue. But never discard the plant while the crown, rhizome, or roots are firm and alive. A crypt that’s lost every leaf but has firm roots is a plant that’s about to recover, not a dead plant. Give it 3–4 weeks before judging.
Telling Normal Melt From Real Problems
Normal transition melt:
- Affects oldest/emersed leaves first, newest growth last
- New submersed leaves emerge even as old ones dissolve
- Roots and crown stay firm and white/green
- Timeline: 1–4 weeks, then obvious new growth
Concerning melt (see our full melting diagnosis guide):
- New growth also melts or emerges deformed
- Rhizome or crown turns mushy and brown — this is rot, not transition
- Entire plant dissolves within days with no new growth after 4+ weeks
- Melting spreads to established plants that weren’t recently moved
Buying Tips to Minimize Melt
- Buy submersed-grown when available — hobbyist-grown cuttings transition with almost no melt.
- Choose tissue culture for sensitive species — crypts and delicate stems establish far more reliably from sterile cups.
- Avoid plants already melting in the store tank — some melt is normal, but a plant that’s mostly mush at purchase has less energy for recovery.
- Transport carefully — keep plants damp and out of direct sun/heat. A plant that dries out or cooks in a hot car melts far worse than one transported properly.
The First-Month Timeline: What to Expect Week by Week
Knowing what’s normal when removes most acclimation anxiety. Here’s the typical timeline for a healthy plant adapting to a new tank:
Week 1: The quiet week
Almost nothing visible happens. The plant is growing roots you can’t see and assessing its new environment. Some species (vallisneria, stem plants) may start shedding their lowest leaves. This is normal. Resist the urge to “help” — no moving, no extra fertilizer, no light changes. The most common beginner mistake is intervening during a week when the correct action is nothing.
Week 2: Melt peaks
This is when emersed leaves give up in earnest. Crypts may drop everything; swords shed their broad aerial leaves; stem plants lose lower foliage. It looks catastrophic and it’s usually fine. Keep removing mushy material, keep conditions stable, and watch the crown and growing tips — if those are firm and green, recovery is already underway.
Week 3: The turn
New submersed-adapted leaves emerge — smaller, thinner, often a slightly different shade of green than the emersed foliage. Stem plant tips start growing visibly; crypts push tiny curled leaves from the crown; swords unfurl narrow ribbon leaves. This is the moment most beginners exhale for the first time.
Week 4+: Established
New growth outpaces melt, and the plant is functionally yours. You can resume full-strength fertilizer, normal trimming, and stop treating it as fragile. Some slow growers (anubias, bucephalandra) take 6–8 weeks to show obvious progress — that’s their normal speed, not a problem.
Acclimating Different Plant Formats
Tissue-culture cups
Sterile, pest-free, and already adapted to high-humidity (not emersed) growth — tissue cultures melt the least of any format. Rinse the agar gel off gently (leftover gel rots and feeds fungus), split the portion into small plantlets, and plant per our planting guide. They establish slowly for the first two weeks, then accelerate. No dip needed, minimal acclimation stress — this is the premium experience you’re paying for.
Potted plants
Remove the pot and strip away the rockwool completely — leftover rockwool traps debris and rots. Tease the root mass apart gently; if it’s a dense mat, splitting it into 2–3 smaller portions actually establishes faster than planting one big clump (more growing points, better water flow around roots). Potted plants are usually emersed-grown, so expect the standard 2–4 week melt cycle.
Bare-root / bunched stems
Typically sold as weighted bunches. Remove any bands, foam, or weights, strip the lower leaves, and plant stems individually or in small groups. Bunched stems from the store are often already transitioning — check for new submersed growth at the tips, which tells you the plant is mid-adaptation and will settle quickly.
Hobbyist cuttings
Already submersed-grown and the fastest to establish — often showing new growth within days. The main acclimation factor is water-parameter difference between the two tanks. Float to temperature-match, plant promptly, and they’ll usually take off with minimal melt. This is why experienced hobbyists prefer trading cuttings over buying potted plants.
Frequently Asked Questions
Should I use a “plant starter” or transplant fertilizer?
Products marketed for transplant shock are mostly B-vitamins and mild hormones. They don’t hurt, but there’s no strong evidence they help aquarium plants specifically. Stable conditions and patience outperform any bottle. Save the money for more plants.
My new plant melted completely — bare crown, no leaves. Is it dead?
Probably not, if the crown or rhizome is firm. Crypts and swords routinely lose 100% of their leaves and regrow from the base within a month. The test is firmness: firm and pale/green means alive; mushy and brown/black means rot. Give firm-but-leafless plants a full 4 weeks before declaring them dead.
Can I speed up acclimation with extra light or CO2?
No — and trying usually backfires. A melting plant can’t use extra light; the excess just grows algae on its dying leaves. Keep light moderate and CO2 stable (not boosted) during acclimation. Growth speed comes from the plant’s own adaptation timeline, which you can’t rush, only avoid delaying.
Should new plants go straight into my main display tank?
After quarantine/dipping, yes — there’s no benefit to a separate “growing-in” tank for most plants. They acclimate to your water fastest in the tank they’ll live in. The exception is very delicate species going into a tank with boisterous fish; give those a few weeks in a calm corner or breeder box first.
The Patience Rule
The single most important acclimation skill is restraint: plant it right, set gentle conditions, remove decay, and then leave it alone for a month. The hobbyists with the best plant growth aren’t doing something clever in week one — they’re simply not interfering in weeks two through four while the plants do what they’ve evolved to do. Melt looks like failure and feels like failure, but in most cases it’s the visible part of a plant successfully becoming yours.