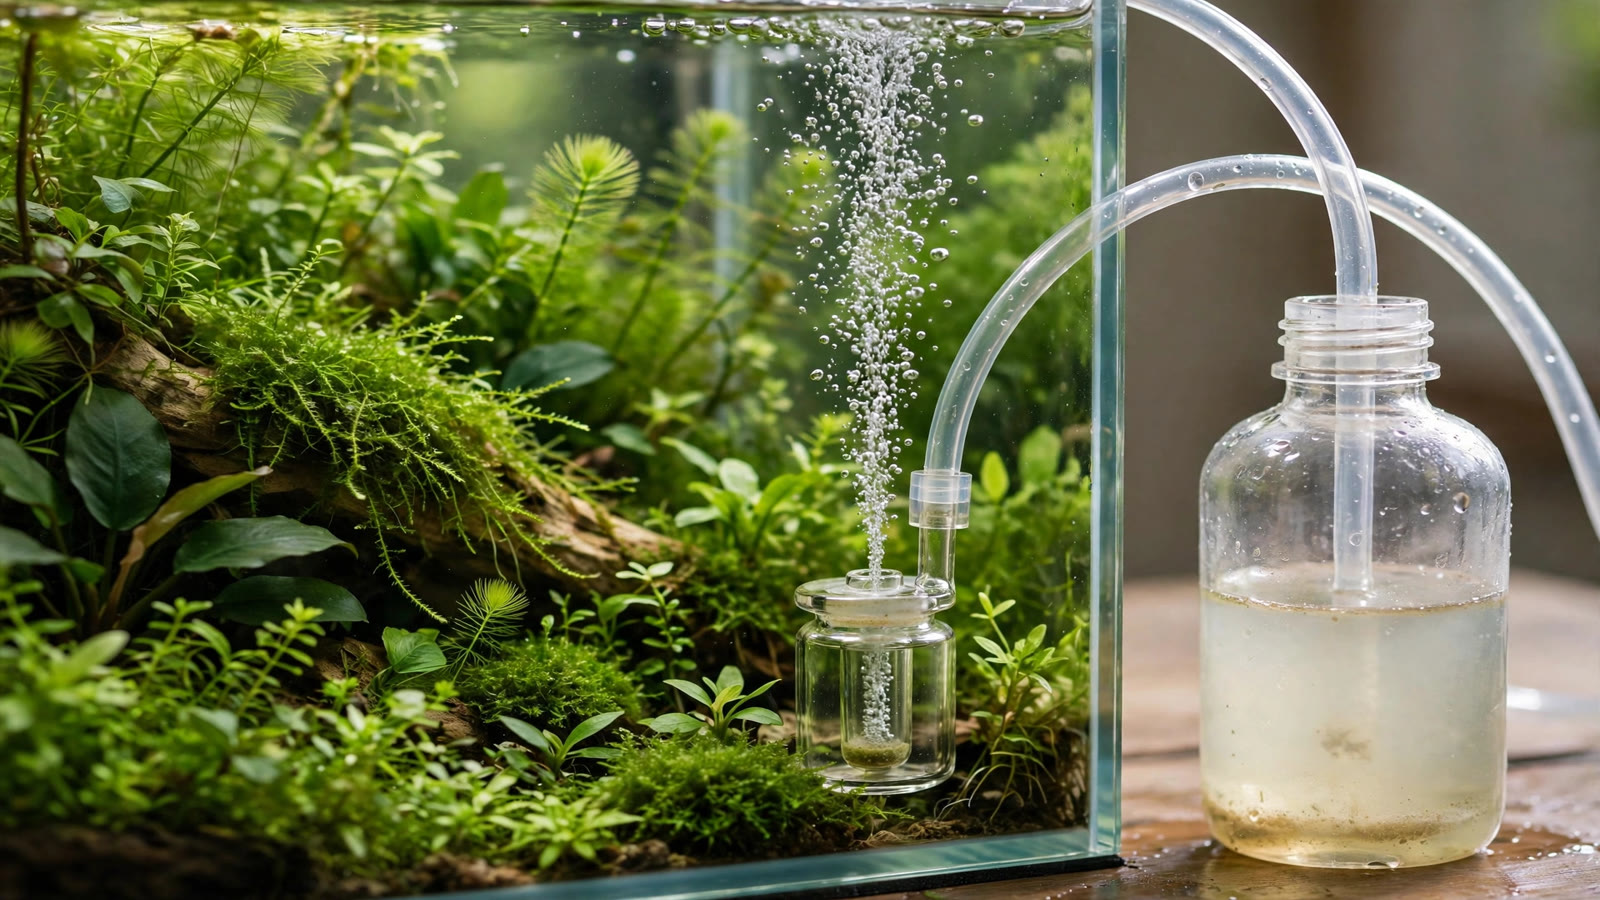
A bio fermentation CO2 kit for the aquarium promises the middle ground every beginner planted-tank owner dreams of: more CO2 than a glug-glug yeast bottle, without the upfront cost and learning curve of a pressurized cylinder. Popularized by kits like the Aquario NEO and FZone biological CO2 generators, these self-contained fermentation reactors are now a distinct product category. Do they actually deliver stable, plant-meaningful CO2? How do they compare to classic DIY yeast or citric-acid systems? This guide breaks down how they work, walks through setup, shares realistic expectations for output and batch lifespan, and gives conservative dosing advice so your livestock stays safe.
What a Bio-Fermentation CO2 Kit Actually Is
A bio-fermentation CO2 kit is a refined, pre-packaged version of the old DIY yeast reactor. A sealed vessel holds a sugar solution; a yeast-based mixture is added; fermentation begins, and the CO2 produced travels through tubing into the aquarium via a diffuser. The chemistry is identical to a classic DIY yeast bottle — what changed is the packaging, the starter culture, and the consistency of the reaction.
The 2025–2026 generation of kits stands apart from a DIY bottle in a few ways:
- Standardized sachets. Pre-dosed refill packs mean the same recipe every time — far less batch-to-batch variation than measuring baker's yeast by eye.
- Designed reactor geometry. Purpose-built vessels with wider necks and foam guards that keep the culture from creeping up the tubing, the most common DIY failure point.
- Pressure-safe sealed caps. Threaded, sealed caps rated for the modest pressure fermentation generates, usually with a small pressure relief valve — no hand-drilled soda-bottle caps.
- Diffusion hardware included. Most kits bundle an atomizer-style diffuser and tubing, so it's a single-box solution rather than a hardware-store scavenger hunt.
Same biology, much better execution — and whether it is worth the price is the real question.
How Fermentation CO2 Production Works (and How It Differs From the Alternatives)
The yeast fermentation cycle
Fermentation CO2 comes from yeast consuming sugar without oxygen: one glucose molecule yields two of CO2 plus ethanol. Output follows a predictable arc — a lag of several hours as the culture wakes, a peak over the first 3–5 days, then a long taper as sugar depletes and alcohol builds. A well-sized batch gives roughly 2–3 weeks of genuinely useful output, though it may bubble weakly for longer.
Bio kit vs classic DIY yeast
The classic DIY recipe (two cups of sugar, a pinch of yeast, warm water in a 2-liter bottle) works, but it's inconsistent: temperatures fluctuate, yeast packets vary, and over-pitching produces a frothy eruption that creeps up the airline. Bio kits fix this with standardized cultures and foam management for a cleaner curve. Chemically there's no magic — just repeatability. Our yeast vs citric acid DIY CO2 breakdown explains why fermentation's slow taper frustrates aquascapers who want steady dosing.
Bio kit vs citric acid and baking soda generators
Citric-acid/baking-soda generators — the metal canisters with a pressure gauge — are the bio kit's real rival. They produce far higher pressure and, critically, let you throttle output with a real needle valve and shut the system off at night. They cost more and carry genuine pressure-safety concerns, but behave much more like a mini pressurized rig. Bio kits can't throttle or pause; fermentation runs 24/7 regardless of lights. Compare all the homemade approaches in our DIY CO2 for aquarium plants guide.
Bio kit vs pressurized CO2
A pressurized setup (cylinder, regulator, solenoid, needle valve, drop checker) is the gold standard: adjustable, pausable, stable for months. The downside is cost — several times the price of a bio kit. Bio kits win on price and simplicity; pressurized wins on everything else. Think of the bio kit as an upgrade from DIY, not a substitute for a cylinder.
Aquarium Setup: Bio-Fermentation CO2 Kit, Step by Step
- Install the diffuser first. Place the included diffuser low in the tank, near the filter outflow, which carries the fine mist around the aquarium. If the kit didn't include one, read our CO2 diffuser guide before choosing.
- Run the tubing. Connect CO2-resistant tubing from the reactor cap to the diffuser; keep the run short, with no sags where condensate collects.
- Fit a check valve. Even if the kit omits one, add one: if fermentation back-siphons, tank water in the sugar bottle stalls the batch. Our CO2 tubing and check valve guide covers placement.
- Mix the batch. Add room-temperature water to the fill line, pour in one refill sachet, and shake gently to dissolve. Don't use hot water — it kills the culture; around 25–28°C (77–82°F) is the sweet spot.
- Seal and wait. Screw the cap down firmly and leave the reactor at stable room temperature, out of direct sun. Bubbles usually appear at the diffuser within 2–8 hours.
- Give it 24 hours before judging. Early output is weak by design — don't shake the bottle; agitation spikes a burst of CO2, then stalls the culture.
- Monitor with a drop checker. A drop checker with 4 dKH solution is your objective measure: lime-green is the productive zone, yellow means ventilate and back off, blue means the batch is spent.
No valve to tune, no gauge to read. The simplicity is the whole point.
Realistic Output and Batch Lifespan
Marketing sometimes implies pressurized-like performance. Reality is kinder kept honest:
- CO2 levels. On a 20–60 liter (5–15 gallon) tank, a fresh batch typically pushes the drop checker into the green zone — roughly 20–30 ppm at peak — and holds useful levels for the first week to ten days. By week three you're usually back near blue unless the batch is refreshed.
- Consistency. Fermentation output is a curve, not a line. The start of a batch risks overshooting on small tanks while the end undershoots. Staggering two smaller reactors a week apart flattens the curve — start one, then the second a week later.
- Tank-size fit. These kits shine on nano and small tanks (roughly 10–60 liters / 3–15 gallons), where the modest output is proportional and the cost math beats pressurized. Above ~100 liters, one kit is usually insufficient; two or three staggered reactors become fiddly and expensive.
- Plant response. Expect faster growth, better red-plant coloration, and tighter carpeting in low-to-medium light. Demanding stems and high-light carpets will still hit a ceiling — a real step up from none, but not pressurized-tier.
- Temperature drives everything. A reactor at 22°C lasts longer and peaks lower; one at 28°C peaks harder and burns out faster — stable room temperature beats warm and variable.
- Refresh timing. Swap the batch when the drop checker drifts blue over two consecutive days, not when bubbles stop. If staggering two reactors, alternate refreshes so one is always near peak.
One honest caveat: fermentation never pauses, so CO2 keeps dissolving at night when plants aren't photosynthesizing. Keep the surface gently rippling so excess gas off-gasses overnight — your main guardrail against dawn CO2 spikes.
Pros and Cons, Honestly
What bio kits do well
- Genuinely plug-and-play. The closest thing to a foolproof first CO2 system: no tools, no gauges, no regulator fittings to leak-check.
- Low entry cost. A fraction of a pressurized setup, and refills are cheap sugar-culture sachets rather than cylinder exchanges.
- No electricity or solenoid needed. It runs itself wherever it sits — handy for tanks without free outlets or timers.
- Far more consistent than DIY bottles. Standardized sachets plus purpose-built vessels fix the worst DIY failures: foam eruptions, cap leaks, and wild batch-to-batch swings.
Where they fall short
- No throttle, no timer. The single biggest functional gap. Fermentation runs 24/7, including at night when plants can't use the gas — overnight accumulation is a real livestock risk you must manage with surface agitation.
- The taper. Output inevitably declines. Aquarists who don't watch the drop checker end up with a month where only week one was productive.
- Scaling limits. Great for one small tank; clumsy and ultimately costly as a multi-tank or large-tank solution, and refill sachets keep you buying from the brand.
- The "no needle valve needed" claim. Marketed as a feature — less to leak, nothing to tune. It is also an absence: you cannot fine-tune output. On a 10-liter tank with shrimp, that lack of control is worth weighing.
Cost Comparison
| System | Typical upfront cost | Annual running cost (one small tank) | Control |
|---|---|---|---|
| Bio-fermentation kit | Low (~$25–45) | Low (~$30–60 in refills) | None — 24/7 output |
| DIY yeast bottle | Minimal (~$5–10) | Minimal (sugar + yeast) | None — 24/7 output |
| Citric acid / baking soda generator | Medium (~$50–90) | Low–medium (ingredients) | Needle valve + shutoff |
| Pressurized cylinder + regulator | High (~$120–250) | Low (cylinder refills) | Full: valve, timer |
| Liquid carbon dosing | Low (~$10–15 per bottle) | Medium (recurring bottles) | Daily dose you control |
Bio kits have the friendliest entry price and modest running costs, but never achieve the per-month economy or control of pressurized CO2. Liquid carbon (our liquid carbon dosing guide covers it) is a fair nano-tank comparison: cheaper to start, but recurring bottles eventually cost more, and it doesn't equal dissolved CO2 for demanding plants.
Safety: What Can Actually Go Wrong
Fermentation CO2 is among the safest CO2 methods — pressures are a small fraction of what citric-acid generators or cylinders produce. But "safest" isn't "risk-free":
- Pressure relief. Never block or tape the relief valve, never seal the reactor with a homemade cap mod, and keep it upright so liquid can't block the vent.
- Overnight accumulation. The real hazard isn't the vessel — it's dissolved CO2 at 3 a.m. when plants respire instead of photosynthesizing. Good surface agitation is non-negotiable on a 24/7 system.
- Batch-start spikes. A fresh batch in warm water can surge on day one or two. Start new batches in the morning so you can observe livestock through the day.
- Culture spills. Fermentation mix is just sugar water and yeast, but a siphoned bottle dumping into a nano tank can foul water quality fast. The check valve and upright placement are your defenses.
- Sachet storage. Keep refills cool and dry; heat kills the dried culture and you'll blame the kit for a chemistry failure.
Conservative Dosing Advice: Start Low, Observe Livestock
The section that matters most if you have fish or shrimp. A bio kit's fixed output means your only dosing levers are placement, agitation, and timing:
- Start with one reactor at the low end of the kit's rating — you can always add a second later.
- Run a sensible photoperiod duration. You can't shut fermentation off, but a 6–8 hour photoperiod still matters: plants take up CO2 while they can, and shorter light periods reduce total injection against total uptake.
- Watch livestock, not just the drop checker. Fish gasping at the surface, shrimp climbing the glass, or sudden lethargy at dawn are the early warnings. If you see them, increase surface agitation immediately.
- Keep a drop checker in the tank permanently. It's a lagging indicator that tells the truth your bubbles don't. Recheck after every batch change — output varies enough between sachets to matter.
- Be extra cautious with shrimp and nano tanks. Invertebrates are more CO2-sensitive than fish, and small tanks have little buffering margin. Run a generous surface ripple and observe a new batch for a week before judging it safe.
Worth noting: in softer, lower-pH water the CO2/carbonate balance shifts faster, so CO2 additions move pH more quickly there — check the pH/KH/CO2 chart method to track where you stand, and review our CO2 and fish safety guide before dialing anything in. Start-low applies doubly.
The Honest Verdict
Bio-fermentation CO2 kits are the best entry-level CO2 system for small planted tanks: genuinely simple, honestly priced, and meaningfully better than the DIY bottle they descend from. They're right for nano and small aquascapes where you want a real CO2 boost without learning regulators — provided you can live with, and manage, 24/7 uncontrolled output. They're wrong if you want pressurized-tier growth on demanding carpets and stems, run tanks above ~100 liters, or need pause-at-night automation for sensitive livestock. The upgrade path is clean: start with a bio kit, learn to read your drop checker and your plants, and when you find yourself wishing for a throttle or a night shutoff, graduate to a citric-acid generator or a pressurized rig. The diffuser, tubing, drop checker, and the habit of observation all carry over.
Frequently Asked Questions
How long does one bio-fermentation refill actually last?
Manufacturers claim 30–60 days of bubbling, and the reactor will indeed produce gas that long. Expect 2–3 weeks of genuinely useful, drop-checker-green CO2 per refill, then a declining tail. Refresh when the drop checker drifts back toward blue over two consecutive days rather than waiting for bubbles to stop — the final stretch is mostly false confidence.
Can I use a bio CO2 kit on a 100-liter tank?
One kit usually can't hold green drop-checker levels across that volume with real plant mass. Staggering two or three reactors is possible, but the cost, clutter, and batch management then rival a basic pressurized setup — which gives full control and stable output for months per cylinder.
Is fermentation CO2 safe for shrimp?
Yes, with caution. Shrimp are more sensitive to dissolved CO2 than most fish, and nano shrimp tanks have little buffering margin. Run generous surface agitation overnight, when plants stop using CO2, start with the kit's lower-rated configuration, and watch for shrimp clustering at the surface or acting sluggish at dawn — signs of excess CO2 that call for immediate increased aeration.
Do bio-fermentation kits need a needle valve?
No — that's both the appeal and the limitation. Fixed-rate output is why the kits are so simple, but you also can't throttle a hot batch or shut the system down at night. Your control levers are reactor count, batch strength, surface agitation, and photoperiod length.
Can I make my own refills instead of buying sachets?
Yes — the vessels are just fermentation reactors, so standard DIY yeast recipes work in them, and many aquarists refill with bulk yeast to cut costs. The trade-off is consistency: the pre-dosed sachets deliver the repeatable, foam-free performance you're paying for, while homemade recipes reintroduce the batch-to-batch swings the kit was meant to eliminate.
Bio kit or liquid carbon — which should I choose for a nano tank?
For boosting plant growth, a bio kit wins: it adds real dissolved CO2, while liquid carbon is a supplement that doesn't equal gas injection for demanding plants. Liquid carbon is simpler (a daily squirt) and safer for sensitive livestock since you control the dose — a reasonable choice if CO2 plumbing feels like too much. Many aquarists run both.
The Bottom Line
A bio fermentation CO2 kit won't replace a pressurized system — and it shouldn't try to. Judge it for what it is: the most convenient, consistent way to give a small planted tank a real CO2 boost without the cost or complexity of a cylinder. Buy one if your tank is nano to small, keep a drop checker in the water, and start low.
Tissue-culture plants are the exception — they’re grown in sterile gel and adapt with minimal melting, which is part of what you’re paying for. Plants bought submersed from another hobbyist’s tank also transition with little melt, since they’re already in the right form.
Which Plants Melt Most (and Least)
Heavy melters (expect significant leaf loss)
- Cryptocorynes — infamous for “crypt melt,” sometimes dropping every leaf after any disturbance. They almost always recover from the roots within weeks.
- Stem plants grown emersed — rotala, ludwigia, and hygrophila often shed lower emersed leaves while the growing tips transition.
- Amazon swords — emersed-grown swords typically lose their broad oval aerial leaves and replace them with longer submersed ribbon leaves.
Light melters
- Anubias, java fern, bucephalandra — slow-growing rhizome plants transition gradually; occasional old-leaf melt but rarely dramatic.
- Vallisneria — usually transitions well, though it dislikes the move itself and may sulk for a week.
- Floating plants — minimal melt since their leaves were already at the air-water interface.
The Acclimation Protocol
Step 1: Quarantine or dip first
Before acclimating to your tank’s conditions, make sure you’re not acclimating pests along with the plant. Run new arrivals through our quarantine and dip protocol — it adds days upfront but prevents months of regret.
Step 2: Float to temperature-match (30 minutes)
Float the bag or container in your tank for 20–30 minutes to equalize temperature. Plants are less temperature-sensitive than fish, but a 10°F shock on top of transplant stress is an avoidable insult.
Step 3: Trim before planting
Remove any leaves that are already damaged, yellowing, or heavily algae-covered — they won’t recover and they’ll rot in your tank, feeding algae. For stem plants, trim off the bottom inch and any emersed leaves that look unlikely to adapt; the plant wastes energy maintaining leaves it’s going to shed anyway. Keep the healthy growing tips — that’s where recovery starts.
Step 4: Plant correctly the first time
Follow our planting guide — right depth, crown exposed on rosettes, rhizomes unburied on epiphytes. Every uprooting and replanting restarts the acclimation clock, so get placement right on the first attempt. Decide where each plant goes before it goes in the water.
Step 5: Run a gentle first week
For the first 7 days after planting:
- Moderate light — run your normal photoperiod but consider dropping intensity 20–30% if your light is dimmable. Blast-level light on a melting plant grows algae on the dying leaves, not recovery.
- Stable CO2 — if you inject CO2, keep it consistent. Fluctuating CO2 during acclimation is a melt accelerator. If you’re low-tech, this doesn’t apply — see growing without CO2.
- Half-strength fertilizer — new plants with damaged leaves can’t use full dosing, and the excess feeds algae. Ramp to full strength over 2–3 weeks per our fertilizer schedule.
- No disturbance — don’t move, trim, or “check on” new plants for at least two weeks. Every touch resets root establishment. This is especially critical for crypts.
Step 6: Remove melt, keep the base
As emersed leaves melt, remove the mushy material promptly — decaying leaves release ammonia and grow fungus that can spread to healthy tissue. But never discard the plant while the crown, rhizome, or roots are firm and alive. A crypt that’s lost every leaf but has firm roots is a plant that’s about to recover, not a dead plant. Give it 3–4 weeks before judging.
Telling Normal Melt From Real Problems
Normal transition melt:
- Affects oldest/emersed leaves first, newest growth last
- New submersed leaves emerge even as old ones dissolve
- Roots and crown stay firm and white/green
- Timeline: 1–4 weeks, then obvious new growth
Concerning melt (see our full melting diagnosis guide):
- New growth also melts or emerges deformed
- Rhizome or crown turns mushy and brown — this is rot, not transition
- Entire plant dissolves within days with no new growth after 4+ weeks
- Melting spreads to established plants that weren’t recently moved
Buying Tips to Minimize Melt
- Buy submersed-grown when available — hobbyist-grown cuttings transition with almost no melt.
- Choose tissue culture for sensitive species — crypts and delicate stems establish far more reliably from sterile cups.
- Avoid plants already melting in the store tank — some melt is normal, but a plant that’s mostly mush at purchase has less energy for recovery.
- Transport carefully — keep plants damp and out of direct sun/heat. A plant that dries out or cooks in a hot car melts far worse than one transported properly.
The First-Month Timeline: What to Expect Week by Week
Knowing what’s normal when removes most acclimation anxiety. Here’s the typical timeline for a healthy plant adapting to a new tank:
Week 1: The quiet week
Almost nothing visible happens. The plant is growing roots you can’t see and assessing its new environment. Some species (vallisneria, stem plants) may start shedding their lowest leaves. This is normal. Resist the urge to “help” — no moving, no extra fertilizer, no light changes. The most common beginner mistake is intervening during a week when the correct action is nothing.
Week 2: Melt peaks
This is when emersed leaves give up in earnest. Crypts may drop everything; swords shed their broad aerial leaves; stem plants lose lower foliage. It looks catastrophic and it’s usually fine. Keep removing mushy material, keep conditions stable, and watch the crown and growing tips — if those are firm and green, recovery is already underway.
Week 3: The turn
New submersed-adapted leaves emerge — smaller, thinner, often a slightly different shade of green than the emersed foliage. Stem plant tips start growing visibly; crypts push tiny curled leaves from the crown; swords unfurl narrow ribbon leaves. This is the moment most beginners exhale for the first time.
Week 4+: Established
New growth outpaces melt, and the plant is functionally yours. You can resume full-strength fertilizer, normal trimming, and stop treating it as fragile. Some slow growers (anubias, bucephalandra) take 6–8 weeks to show obvious progress — that’s their normal speed, not a problem.
Acclimating Different Plant Formats
Tissue-culture cups
Sterile, pest-free, and already adapted to high-humidity (not emersed) growth — tissue cultures melt the least of any format. Rinse the agar gel off gently (leftover gel rots and feeds fungus), split the portion into small plantlets, and plant per our planting guide. They establish slowly for the first two weeks, then accelerate. No dip needed, minimal acclimation stress — this is the premium experience you’re paying for.
Potted plants
Remove the pot and strip away the rockwool completely — leftover rockwool traps debris and rots. Tease the root mass apart gently; if it’s a dense mat, splitting it into 2–3 smaller portions actually establishes faster than planting one big clump (more growing points, better water flow around roots). Potted plants are usually emersed-grown, so expect the standard 2–4 week melt cycle.
Bare-root / bunched stems
Typically sold as weighted bunches. Remove any bands, foam, or weights, strip the lower leaves, and plant stems individually or in small groups. Bunched stems from the store are often already transitioning — check for new submersed growth at the tips, which tells you the plant is mid-adaptation and will settle quickly.
Hobbyist cuttings
Already submersed-grown and the fastest to establish — often showing new growth within days. The main acclimation factor is water-parameter difference between the two tanks. Float to temperature-match, plant promptly, and they’ll usually take off with minimal melt. This is why experienced hobbyists prefer trading cuttings over buying potted plants.
Frequently Asked Questions
Should I use a “plant starter” or transplant fertilizer?
Products marketed for transplant shock are mostly B-vitamins and mild hormones. They don’t hurt, but there’s no strong evidence they help aquarium plants specifically. Stable conditions and patience outperform any bottle. Save the money for more plants.
My new plant melted completely — bare crown, no leaves. Is it dead?
Probably not, if the crown or rhizome is firm. Crypts and swords routinely lose 100% of their leaves and regrow from the base within a month. The test is firmness: firm and pale/green means alive; mushy and brown/black means rot. Give firm-but-leafless plants a full 4 weeks before declaring them dead.
Can I speed up acclimation with extra light or CO2?
No — and trying usually backfires. A melting plant can’t use extra light; the excess just grows algae on its dying leaves. Keep light moderate and CO2 stable (not boosted) during acclimation. Growth speed comes from the plant’s own adaptation timeline, which you can’t rush, only avoid delaying.
Should new plants go straight into my main display tank?
After quarantine/dipping, yes — there’s no benefit to a separate “growing-in” tank for most plants. They acclimate to your water fastest in the tank they’ll live in. The exception is very delicate species going into a tank with boisterous fish; give those a few weeks in a calm corner or breeder box first.
The Patience Rule
The single most important acclimation skill is restraint: plant it right, set gentle conditions, remove decay, and then leave it alone for a month. The hobbyists with the best plant growth aren’t doing something clever in week one — they’re simply not interfering in weeks two through four while the plants do what they’ve evolved to do. Melt looks like failure and feels like failure, but in most cases it’s the visible part of a plant successfully becoming yours.