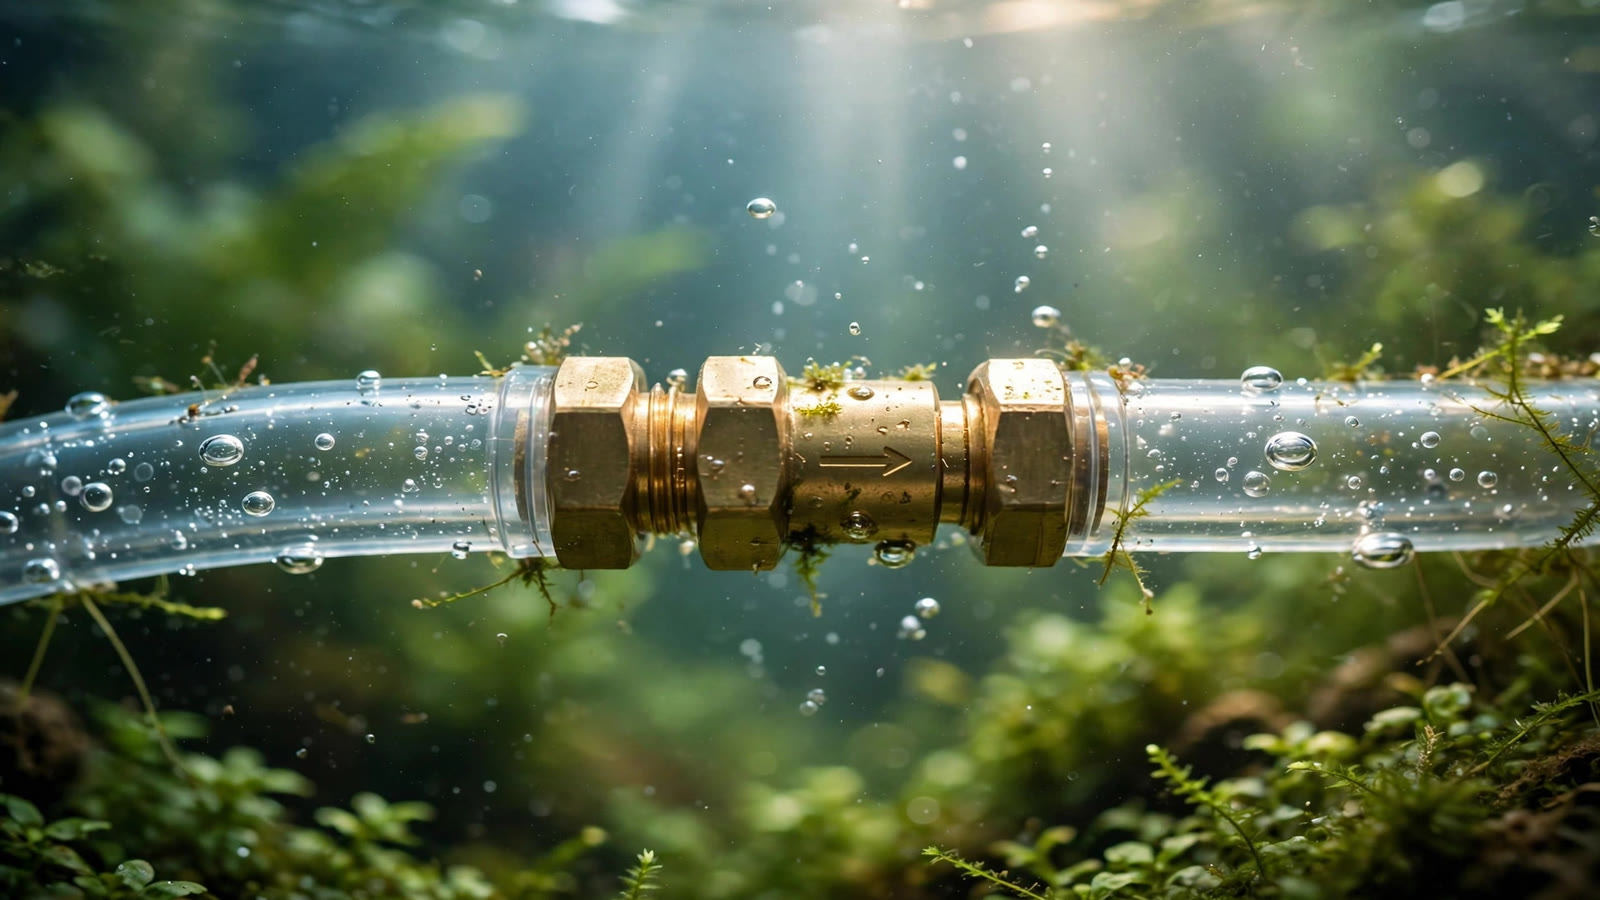
Ask any planted-tank keeper where their CO2 budget disappears and most will blame the cylinder size or the bubble rate. In practice, the silent thief is usually the line itself: stretchy airline tubing that bleeds gas straight through its walls, plus a check valve that quietly stopped sealing months ago. Get your CO2 tubing aquarium setup right and the whole system behaves — steady pressure, a bubble count that means something, and no slow leak draining the bottle. This guide covers CO2-proof tubing materials, line sizing, check valve placement, and leak fixes.
Why Ordinary Airline Tubing Can't Carry CO2
Standard silicone airline tubing is engineered for one job: moving air at very low pressure from an air pump into a tank. CO2 injection breaks every assumption that tubing was designed around, and the failure modes are slow, invisible, and expensive.
CO2 leaks through silicone walls
Silicone rubber is remarkably permeable to carbon dioxide — far more so than to the nitrogen and oxygen in air. Gas molecules migrate straight through the tubing wall along its entire length, so a long silicone run quietly wastes a meaningful share of your injection every day, as hobbyists who measured the loss have discussed. The tubing material itself is the leak — no patch exists. If your cylinder drains faster than your bubble rate suggests, run a full leak check with the soapy-water method, but check the tubing material first: soapy water only finds joint leaks, not gas diffusing through walls.
CO2 degrades rubber and some plastics
Carbon dioxide is not an inert passenger. It dissolves into certain rubbers and soft plastics, gradually hardening silicone and crazing cheap plastic fittings. That is why standard airline tubing on CO2 duty feels stiff and brittle after six to eight months and starts weeping gas at the barbs. CO2 also attacks the rubber flaps inside ordinary air-pump check valves: the flap swells or sticks and your CO2 simply dies at the gate. A materials problem, not a maintenance problem — replacing like-for-like only restarts the countdown.
Pressure blows hoses off barbs
The pressure downstream of a CO2 regulator working pressure is far higher than anything an air pump produces — typically one to two bar, and more against a diffuser with real back-pressure. Soft silicone stretches and slips; pair that with a slowly clogging diffuser and the hose can pop off a barb overnight, dumping gas until the cylinder runs dry. Tighter-fitting CO2-proof tubing plus secured connections is what stands between a tuned system and an emptied gas budget.
The CO2-Proof Tubing Options
Real CO2 tubing is sold explicitly as CO2-resistant or CO2-proof. Three materials dominate the market, and they are not interchangeable.
Polyurethane (PU) tubing — the standard
Polyurethane is the workhorse of planted-tank CO2 lines: far less permeable to CO2 than silicone, it stays flexible without hardening and grips barbed fittings tightly because it stretches less. Most aquarium-brand CO2-proof tubing is PU in the standard 4 mm inner / 6 mm outer diameter. One rule to remember: PU tubing is the correct default for every CO2 line in a home aquarium.
Vinyl / PVC CO2-rated tubing
Vinyl tubing rated for CO2 use performs well on permeability and is inexpensive, but it is stiffer than PU and can kink around tight cabinet bends. Serviceable on a budget with gentle routing — though most aquarists end up preferring PU.
What to avoid
- Standard silicone airline tubing — a gas-wasting liability anywhere pressurized. Acceptable for short runs on low-pressure DIY setups, but replace it every six to eight months as it hardens.
- Garden or braided hardware-store hose — oversized, often leaching plasticizers, and the barbs are not sized for aquarium CO2 fittings.
- Old, hardened tubing of any kind — stiffness at a barb is a leak waiting to happen; tubing is a consumable.
| Material | CO2 permeation | Longevity on CO2 duty | Flexibility | Verdict |
|---|---|---|---|---|
| Polyurethane (PU) | Low | 2–3+ years | Good | Best choice |
| CO2-rated vinyl | Low | 2+ years | Stiff | Good budget option |
| Silicone airline | High | 6–8 months before hardening | Very flexible | Avoid on pressurized runs |
| Generic hardware hose | Varies | Unknown | Varies | Not worth the risk |
Sizing Your CO2 Tubing Line for an Aquarium: Diameters, Barbs, and Length
The planted-aquarium world has converged on one de-facto standard, which makes shopping simple — but only if you know what to measure.
The 4/6 mm standard
Almost every CO2 regulator outlet, bubble counter, check valve, diffuser, and atomizer in the hobby is built around 4 mm inner diameter / 6 mm outer diameter tubing. Buy CO2-proof 4/6 mm PU tubing and it will fit everything. The exception: larger reactors and inline diffusers on big tanks use 6 mm ID / 8 mm OD line or adapt to filter hose. When stepping sizes, use a proper reducer fitting — a stretched fit is the classic blow-off point.
Measuring before you buy
Tubing is always specified as inner diameter × outer diameter. A digital caliper is ideal, but comparing against a known 4/6 sample at the shop works too. Cheap unbranded "CO2 tubing" that is actually 4/7 or 3/5 will fight you on every barb, so verify before you route the whole cabinet.
Keep runs short and kink-free
Shorter lines mean less gas lost through the walls, less pressure drop, and fewer places to fail. Route the line directly with gentle curves — no tight U-turns, where vinyl kinks. Leave a service loop of spare tubing so you can pull the diffuser out for cleaning without unplumbing the system.
Check Valves: The Flood Insurance You Maintain
A check valve is a one-way gate: gas flows toward the tank, water cannot flow back toward your regulator, solenoid, or bubble counter. The night the solenoid closes — or the morning a power cut kills pressure — tank water wants to siphon back down the line. Without a working valve, water reaches the bubble counter, the solenoid, and eventually the regulator, and regulators do not survive tank water. ADA's own check-valve manual treats the valve as a consumable that requires periodic inspection and replacement — not a fit-and-forget part.
Check valve types, compared
- Spring-loaded valves — a spring presses a plunger or disk against a seat. More reliable at holding back pressure; the gas needs slightly more pressure to open it. The premium choice.
- Flap / duckbill valves — a flexible membrane opens one way. Low resistance but more failure-prone; ordinary air-pump flap valves often use rubbers that CO2 degrades, which is exactly why "CO2-rated" matters here.
- Metal vs plastic bodies — brass or stainless bodies resist the crazing that CO2 causes in some plastics, and valves with compression or locking-nut ends grip tubing far more securely than push-fit plastic ones. They cost more and last longer.
Whatever the type, buy valves explicitly rated for CO2 — ordinary air-pump check valves are the most common check-valve mistake in the hobby, and they fail silently.
Placement: high up, in the right order
Two placement rules come straight from manufacturer guidance and decades of hard lessons:
- Mount the check valve high — near the top of the tank or cabinet, above the water line if possible. ADA explicitly warns against installing a valve extremely low relative to the tank, because strong water pressure on the outflow side can defeat the valve.
- Orient it correctly — every valve has IN and OUT (or an arrow). The IN side faces the regulator; the OUT side faces the tank. PU or other pressure-resistant tubing must be used on the IN side. Reversed valves are a top cause of "my CO2 won't flow" panic.
The classic chain order is: regulator → bubble counter → check valve → diffuser, with the valve high on the cabinet or tank rim. Some bubble counters have a valve built in — that protects the counter, but most keepers still add a dedicated valve near the tank. For canister reactors with high back-pressure, two valves in series is cheap redundancy against the failure that destroys equipment.
Building a Leak-Free Line, Step by Step
Follow this order once and most CO2 plumbing problems never happen:
- Cut tubing square. Use a sharp blade or tube cutter; angled cuts seat badly on barbs. A warm blade slides through PU cleanly.
- Soften before pushing on. Dip the last centimetre of tubing in hot (not boiling) water for ten seconds. It slides over the barb fully; on cooling it contracts and grips.
- Push tubing fully home. The tube should cover the entire barb past its last ridge. Half-seated tubing is the most common leak point in the hobby.
- Secure large fittings. On 6 mm+ barbs or high-pressure runs, add small hose clips or zip ties behind the barb ridge — especially on reactor plumbing.
- Mount the check valve high and near-vertical, arrow pointing toward the tank, with CO2-proof tubing on the IN side.
- Keep joints minimal. Every connection is a potential leak; one run of tubing beats two joined runs. Fewer joints is also why many keepers drop a second bubble counter once a valve is in place.
- Leak-test before tuning. Pressurize the line, brush every joint with soapy water, and watch for five full minutes.
Leak Symptoms and How to Fix Them
CO2 leaks rarely announce themselves. Treat each of these as a plumbing problem first, not a dosing problem:
- Bubble rate drifts downward between adjustments — steady working pressure but fading bubbles usually means gas escaping upstream of the counter. Check every joint with soapy water.
- Hissing from the cabinet — a tiny but audible leak at a regulator fitting or barb. Tighten, re-seat, re-test.
- Water in the line or bubble counter — your check valve is failing. Replace it immediately; a stuck-open valve that let water through once will do it again.
- Cylinder empties weeks early — after joint-testing, suspect the tubing material itself (silicone on a pressurized run) or the valve body seams. Cylinder lifespan tables help you judge whether consumption is actually abnormal before you chase ghosts.
- Algae bloom alongside unstable CO2 — fluctuating dissolved CO2 is one of the most reliable algae triggers there is. Stabilize the plumbing before you touch light or fertilizer.
Two safety notes. A line that pops off a barb vents an entire cylinder into the room — ventilate the area and never ignore a new hissing sound. If a failed check valve lets water reach the solenoid or regulator, dry it thoroughly and test function before trusting it again. Our CO2 fish-safety guide covers the classic gas disasters and how layered protection — check valve included — prevents them.
Replacement Schedule and Maintenance
Plumbing is consumable. Put these on the calendar and stop thinking about them:
- CO2-proof tubing: inspect every six months, replace every 2–3 years or sooner if it stiffens, discolors, or cracks at the barbs. Silicone on any pressurized run: replace every 6–8 months.
- Check valves: test quarterly — with the system off, blow gently from the tank side toward the regulator side; nothing should pass. Replace at least annually, and immediately if water ever appears upstream of the valve.
- Bubble counters and fittings: clean mineral buildup during filter maintenance; re-seat any fitting you disturb and re-run the soapy-water test.
- Night shutoff systems: switching CO2 off at night cycles line pressure daily, which works joints loose over time — another reason for the quarterly leak test.
A few metres of PU tubing and a quality metal check valve cost less than one premature cylinder refill, and far less than a replacement solenoid. Cheap gas hardware is fine; cheap plumbing is not.
Frequently Asked Questions
Can I use regular airline tubing for CO2?
You can, but you will pay in wasted gas. Silicone airline tubing is highly permeable to CO2, so a share of your injection bleeds through the walls along the whole run. CO2 also hardens silicone within six to eight months, after which it leaks at the barbs. For a short-term low-pressure DIY setup it is tolerable, but pressurized systems should use CO2-proof polyurethane tubing throughout.
Where exactly should the check valve go?
In the line between the regulator (or bubble counter) and the diffuser, mounted as high as practical — ideally above the water line — with the IN side facing the regulator. Never install it extremely low relative to the tank, since strong back-pressure on the outflow side can overwhelm it. Use CO2-proof tubing on the IN side, because gas can leak through silicone before reaching the valve.
Do I need a check valve if my bubble counter has one built in?
A built-in valve protects the bubble counter, but most keepers add a second dedicated CO2-rated valve high near the tank. It is cheap redundancy against the one failure — water reaching the solenoid or regulator — that destroys expensive equipment. On high back-pressure setups like canister reactors, two valves in series are standard practice.
How do I know my check valve has failed?
The classic sign is water visible in the tubing or inside the bubble counter upstream of the valve. You can test manually: with the system depressurized, blow gently from the tank side toward the regulator side — no air should pass. If it leaks, replace the valve rather than cleaning it, and consider upgrading from a plastic flap valve to a spring-loaded metal one.
How often should I replace CO2 tubing and check valves?
Check valves are consumables: test quarterly and replace at least annually, or immediately after any backflow incident. CO2-proof polyurethane tubing lasts two to three years — inspect it every six months for stiffening or cracks at the barbs. Standard silicone on a CO2 line should be replaced every six to eight months, which is why upgrading to PU tubing pays for itself quickly.
Why does my tubing keep popping off the barbs?
Soft silicone stretches under pressure and creeps off barbs, especially as a clogging diffuser raises working pressure. Switch to CO2-proof PU tubing, soften the end in hot water before pushing it fully past the last barb ridge, and add hose clips or zip ties on high-pressure fittings. Also check that the tubing ID matches the barb size — mismatched diameters are a blow-off waiting to happen.
Set It, Seal It, and Stop Worrying About It
CO2 tubing and check valves are the least glamorous hardware in a planted tank and the most punished by neglect. One upgrade to PU tubing, one properly placed CO2-rated check valve, a careful leak test at setup, and a quarterly five-minute inspection turn your CO2 line from the system's weakest link into its most boring component — which is exactly what you want. Trustworthy plumbing makes the bubble count a measurement again, and stable CO2 lets plants outgrow algae. Boring plumbing grows beautiful tanks.
Tissue-culture plants are the exception — they’re grown in sterile gel and adapt with minimal melting, which is part of what you’re paying for. Plants bought submersed from another hobbyist’s tank also transition with little melt, since they’re already in the right form.
Which Plants Melt Most (and Least)
Heavy melters (expect significant leaf loss)
- Cryptocorynes — infamous for “crypt melt,” sometimes dropping every leaf after any disturbance. They almost always recover from the roots within weeks.
- Stem plants grown emersed — rotala, ludwigia, and hygrophila often shed lower emersed leaves while the growing tips transition.
- Amazon swords — emersed-grown swords typically lose their broad oval aerial leaves and replace them with longer submersed ribbon leaves.
Light melters
- Anubias, java fern, bucephalandra — slow-growing rhizome plants transition gradually; occasional old-leaf melt but rarely dramatic.
- Vallisneria — usually transitions well, though it dislikes the move itself and may sulk for a week.
- Floating plants — minimal melt since their leaves were already at the air-water interface.
The Acclimation Protocol
Step 1: Quarantine or dip first
Before acclimating to your tank’s conditions, make sure you’re not acclimating pests along with the plant. Run new arrivals through our quarantine and dip protocol — it adds days upfront but prevents months of regret.
Step 2: Float to temperature-match (30 minutes)
Float the bag or container in your tank for 20–30 minutes to equalize temperature. Plants are less temperature-sensitive than fish, but a 10°F shock on top of transplant stress is an avoidable insult.
Step 3: Trim before planting
Remove any leaves that are already damaged, yellowing, or heavily algae-covered — they won’t recover and they’ll rot in your tank, feeding algae. For stem plants, trim off the bottom inch and any emersed leaves that look unlikely to adapt; the plant wastes energy maintaining leaves it’s going to shed anyway. Keep the healthy growing tips — that’s where recovery starts.
Step 4: Plant correctly the first time
Follow our planting guide — right depth, crown exposed on rosettes, rhizomes unburied on epiphytes. Every uprooting and replanting restarts the acclimation clock, so get placement right on the first attempt. Decide where each plant goes before it goes in the water.
Step 5: Run a gentle first week
For the first 7 days after planting:
- Moderate light — run your normal photoperiod but consider dropping intensity 20–30% if your light is dimmable. Blast-level light on a melting plant grows algae on the dying leaves, not recovery.
- Stable CO2 — if you inject CO2, keep it consistent. Fluctuating CO2 during acclimation is a melt accelerator. If you’re low-tech, this doesn’t apply — see growing without CO2.
- Half-strength fertilizer — new plants with damaged leaves can’t use full dosing, and the excess feeds algae. Ramp to full strength over 2–3 weeks per our fertilizer schedule.
- No disturbance — don’t move, trim, or “check on” new plants for at least two weeks. Every touch resets root establishment. This is especially critical for crypts.
Step 6: Remove melt, keep the base
As emersed leaves melt, remove the mushy material promptly — decaying leaves release ammonia and grow fungus that can spread to healthy tissue. But never discard the plant while the crown, rhizome, or roots are firm and alive. A crypt that’s lost every leaf but has firm roots is a plant that’s about to recover, not a dead plant. Give it 3–4 weeks before judging.
Telling Normal Melt From Real Problems
Normal transition melt:
- Affects oldest/emersed leaves first, newest growth last
- New submersed leaves emerge even as old ones dissolve
- Roots and crown stay firm and white/green
- Timeline: 1–4 weeks, then obvious new growth
Concerning melt (see our full melting diagnosis guide):
- New growth also melts or emerges deformed
- Rhizome or crown turns mushy and brown — this is rot, not transition
- Entire plant dissolves within days with no new growth after 4+ weeks
- Melting spreads to established plants that weren’t recently moved
Buying Tips to Minimize Melt
- Buy submersed-grown when available — hobbyist-grown cuttings transition with almost no melt.
- Choose tissue culture for sensitive species — crypts and delicate stems establish far more reliably from sterile cups.
- Avoid plants already melting in the store tank — some melt is normal, but a plant that’s mostly mush at purchase has less energy for recovery.
- Transport carefully — keep plants damp and out of direct sun/heat. A plant that dries out or cooks in a hot car melts far worse than one transported properly.
The First-Month Timeline: What to Expect Week by Week
Knowing what’s normal when removes most acclimation anxiety. Here’s the typical timeline for a healthy plant adapting to a new tank:
Week 1: The quiet week
Almost nothing visible happens. The plant is growing roots you can’t see and assessing its new environment. Some species (vallisneria, stem plants) may start shedding their lowest leaves. This is normal. Resist the urge to “help” — no moving, no extra fertilizer, no light changes. The most common beginner mistake is intervening during a week when the correct action is nothing.
Week 2: Melt peaks
This is when emersed leaves give up in earnest. Crypts may drop everything; swords shed their broad aerial leaves; stem plants lose lower foliage. It looks catastrophic and it’s usually fine. Keep removing mushy material, keep conditions stable, and watch the crown and growing tips — if those are firm and green, recovery is already underway.
Week 3: The turn
New submersed-adapted leaves emerge — smaller, thinner, often a slightly different shade of green than the emersed foliage. Stem plant tips start growing visibly; crypts push tiny curled leaves from the crown; swords unfurl narrow ribbon leaves. This is the moment most beginners exhale for the first time.
Week 4+: Established
New growth outpaces melt, and the plant is functionally yours. You can resume full-strength fertilizer, normal trimming, and stop treating it as fragile. Some slow growers (anubias, bucephalandra) take 6–8 weeks to show obvious progress — that’s their normal speed, not a problem.
Acclimating Different Plant Formats
Tissue-culture cups
Sterile, pest-free, and already adapted to high-humidity (not emersed) growth — tissue cultures melt the least of any format. Rinse the agar gel off gently (leftover gel rots and feeds fungus), split the portion into small plantlets, and plant per our planting guide. They establish slowly for the first two weeks, then accelerate. No dip needed, minimal acclimation stress — this is the premium experience you’re paying for.
Potted plants
Remove the pot and strip away the rockwool completely — leftover rockwool traps debris and rots. Tease the root mass apart gently; if it’s a dense mat, splitting it into 2–3 smaller portions actually establishes faster than planting one big clump (more growing points, better water flow around roots). Potted plants are usually emersed-grown, so expect the standard 2–4 week melt cycle.
Bare-root / bunched stems
Typically sold as weighted bunches. Remove any bands, foam, or weights, strip the lower leaves, and plant stems individually or in small groups. Bunched stems from the store are often already transitioning — check for new submersed growth at the tips, which tells you the plant is mid-adaptation and will settle quickly.
Hobbyist cuttings
Already submersed-grown and the fastest to establish — often showing new growth within days. The main acclimation factor is water-parameter difference between the two tanks. Float to temperature-match, plant promptly, and they’ll usually take off with minimal melt. This is why experienced hobbyists prefer trading cuttings over buying potted plants.
Frequently Asked Questions
Should I use a “plant starter” or transplant fertilizer?
Products marketed for transplant shock are mostly B-vitamins and mild hormones. They don’t hurt, but there’s no strong evidence they help aquarium plants specifically. Stable conditions and patience outperform any bottle. Save the money for more plants.
My new plant melted completely — bare crown, no leaves. Is it dead?
Probably not, if the crown or rhizome is firm. Crypts and swords routinely lose 100% of their leaves and regrow from the base within a month. The test is firmness: firm and pale/green means alive; mushy and brown/black means rot. Give firm-but-leafless plants a full 4 weeks before declaring them dead.
Can I speed up acclimation with extra light or CO2?
No — and trying usually backfires. A melting plant can’t use extra light; the excess just grows algae on its dying leaves. Keep light moderate and CO2 stable (not boosted) during acclimation. Growth speed comes from the plant’s own adaptation timeline, which you can’t rush, only avoid delaying.
Should new plants go straight into my main display tank?
After quarantine/dipping, yes — there’s no benefit to a separate “growing-in” tank for most plants. They acclimate to your water fastest in the tank they’ll live in. The exception is very delicate species going into a tank with boisterous fish; give those a few weeks in a calm corner or breeder box first.
The Patience Rule
The single most important acclimation skill is restraint: plant it right, set gentle conditions, remove decay, and then leave it alone for a month. The hobbyists with the best plant growth aren’t doing something clever in week one — they’re simply not interfering in weeks two through four while the plants do what they’ve evolved to do. Melt looks like failure and feels like failure, but in most cases it’s the visible part of a plant successfully becoming yours.