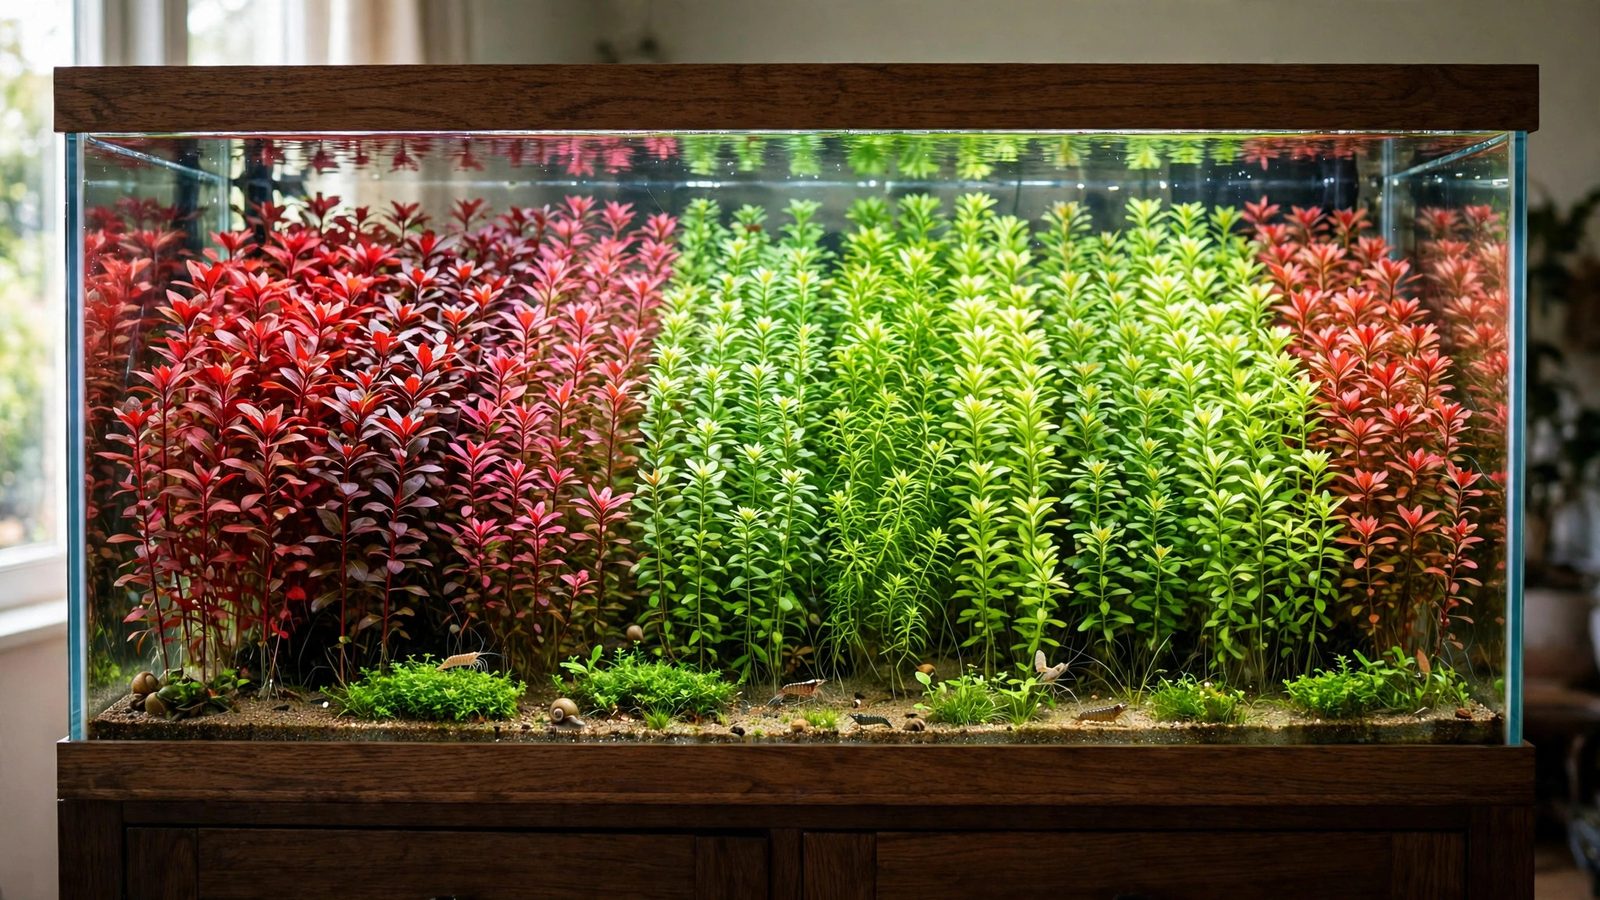
The dutch style aquascape is the oldest of the classic aquascaping schools, and in many ways still the most demanding. Born in the Netherlands in the mid-20th century, it treats the aquarium like a terraced flower garden seen through glass: dense rows of carefully chosen plants rise in planned steps, bold reds and yellows sit against deep greens, and every group of stems seems to lean slightly toward the center as if drawn by an invisible hand. There is no driftwood, no stone mountain, no dramatic cave — the plants themselves are the entire architecture. This guide walks you through the complete system, from the strict layout rules Dutch scapers follow to the planting technique, plant selection, and weekly maintenance rhythm that keep a Dutch tank looking like a contest entry rather than a jungle.
What Makes Dutch Aquascaping Different
Most aquascaping styles rely on hardscape for structure. A nature-style tank leans on its rocks and wood; an Iwagumi leans on its stones. The Dutch style deliberately throws that crutch away. The original Dutch rule is simple: at least 70–80% of the tank's visible floor space must be covered in living plants, and hardscape is either absent or reduced to tiny accents that disappear into the planting. Because there is nothing else to look at, every plant group has to earn its place through contrast — of height, of color, and of leaf shape.
That density is what makes Dutch tanks so striking and so difficult. A sparsely planted tank hides mistakes; a Dutch tank magnifies them. A group of stems that stalls while its neighbors race upward creates a visible hole. A red plant that fades to orange throws the whole color scheme off balance. The style rewards planning and punishes neglect, which is exactly why it remains the gold standard in aquascaping competitions — and why a well-run Dutch tank actually improves over 3–6 months as its plant groups mature, thicken, and knit together.
The Dutch Layout Rules
Dutch aquascaping isn't a vibe; it's a system of interlocking rules. The Dutch aquascaping societies codified them decades ago, and the Aquatic Gardeners Association maintains an English summary of the classic Dutch-style aquascaping rules (PDF) for anyone who wants the source in full. While modern contest scapers bend these rules, they still start here. Learn them first, then earn the right to break them.
1. Plant Streets: Distinct Groups, Not Blends
The heart of the Dutch style is the plant street — a group of one single species planted in a row or wedge that reads as one solid block of texture and color from the front glass. Classic guidelines call for three to five plant groups in a medium tank, scaling up with size: a 60 cm tank might carry 5–7 streets, a 120 cm show tank a dozen. Each street must be visually distinct from its neighbors — separate two similar greens with a contrasting street, like a hedge of deep green Cryptocoryne dividing two red Rotala groups.
Streets should lean. The traditional trick is to plant each group angled so the row appears to slant toward the center of the tank, pulling the eye inward. A few degrees is enough; without it, the layout reads as flat wallpaper.
2. The Terracing Rule: Depth Through Steps
Dutch tanks use terracing instead of hardscape to create depth. The rule of thumb: at least one-third of the substrate should slope visibly from front to back, rising as much as 10–15 cm in a large tank. Terracing lifts plants into the light and makes a 50 cm deep tank feel twice as deep. Build the slope with extra substrate before planting; if it creeps forward over months, bury thin acrylic or stone edging as invisible retaining walls. A deeper breakdown of substrate layering is covered in our guide to sloping substrate for depth in aquascapes.
3. Color Contrast: The Three-to-One Balance
Red plants are the soul of a Dutch scape, but they only sing against the right amount of green. Traditional guidance keeps roughly two-thirds green to one-third red, yellow, and orange. Push reds past half the tank and the scape loses its tension; the eye has nowhere to rest. Place red streets where they interrupt the eye's journey — flanking the visual center, never dead center. Deep reds (Ludwigia super red, Alternanthera reineckii) read heavier than bright reds, so give them more separation. Our walkthrough of aquascaping color theory explains exactly how warm and cool plant colors interact across a layout.
4. Leaf Shape Contrast Between Neighbors
Texture matters as much as color. Dutch rules demand that neighboring streets differ clearly in leaf shape or size: fine-leaved Rotala wallichii next to broad-leaved Alternanthera, needle-leaf Limnophila next to the paddle leaves of Blyxa japonica. Two fine-leafed species side by side merge into one blob; a fine leaf against a bold leaf reads as deliberate design. For a systematic approach, see our guide to texture contrast in aquascaping.
5. Height Layering: Low Front, Tall Back — Almost
The standard rule is that height increases toward the back, with one classic exception: Dutch scapers plant one tall accent species off-center in the front or midground — a feathery Myriophyllum, a bold Crinum — to break the staircase monotony and pull the eye into the depth. It only works because everything else obeys the rule. More on this is in our guide to creating depth in an aquascape.
Planning Your Dutch Style Aquascape
Never buy plants before you plan the layout. Start with a front-view sketch of the tank, dividing it into zones and assigning each street a species, color, and target height. A 60 cm tank (roughly 55 liters) is the sweet spot for a first Dutch attempt: big enough for six to eight distinct streets, small enough that trimming doesn't become a second job.
Count your groups before you plant. A 60 cm tank needs one foreground group, two to three midground streets, and two to four background streets, with 8–15 stems per group to look established quickly. Sparse starts invite algae; dense starts establish fast. Choose tank dimensions with the style in mind — Dutch tanks shine in standard rectangles with at least 40 cm of front-to-back depth, because terracing and streets need room to read. Tall, narrow tanks compress the streets into visual mush.
Choosing the Right Dutch-Style Plants
Dutch plant selection follows function: each street has a job, and the species must fit it. The table below maps classic choices to their positions.
| Position | Classic Species | Height | Notes |
|---|---|---|---|
| Foreground | Pogostemon helferi, Marsilea hirsuta, low Cryptocoryne | 2–8 cm | Dutch foregrounds are planted, not carpeted — individual rosettes, not lawns |
| Midground red | Alternanthera reineckii 'mini', Nesaea pedicellata | 10–20 cm | Broad leaves that hold red even under moderate light |
| Midground green | Cryptocoryne wendtii, Blyxa japonica | 8–20 cm | Deep-green anchors between bolder streets |
| Background fine | Rotala wallichii, Limnophila sessiliflora | 25–40 cm | Feathery texture; wallichii needs strong light and CO₂ for red tips |
| Background bold | Ludwigia palustris 'super red', Rotala rotundifolia | 25–40 cm | The heavy reds that flank the visual center |
| Accent | Crinum calamistratum, Myriophyllum mattogrossense | 30–50 cm | One or two off-center specimens that break the height rules on purpose |
Buy for the layout you drew, not the bargain bin. The most common beginner failure is substituting a species that looks similar in the shop but grows wrong — a coarse plant where a fine one belonged destroys the street contrast. Resist moss and floating plants: classic Dutch rules exclude them because they blur the crisp group boundaries the style depends on.
Red plants are demanding tenants. The reds above need medium-to-high light, injected CO₂, and regular iron and micronutrient dosing; starved, they revert to dull green-orange and the whole scheme collapses. If your setup is low-tech, build your first Dutch tank mostly green with one modest red street — discipline with few reds beats a failed all-red attempt.
Planting Technique for Clean Streets
Plant in a filled tank using long tweezers — easier to judge true depth and spacing — pushing each stem 2–3 cm into the substrate at a slight rearward angle so the street leans toward the center line. Space stems 1–2 cm apart and stagger them rather than lining them in rows; staggered planting thickens into a street faster. Between groups, leave a 1–2 cm bare gap at planting time; it closes as plants mature, but starting tight risks species tangling.
Plant background streets on the terraces, front streets on the low front substrate. Don't "save" gaps for later — every empty patch in a Dutch tank is an algae invitation. If you're short on plants, plant fewer streets densely rather than more streets sparsely.
The Maintenance Rhythm That Keeps Dutch Tanks Sharp
A Dutch tank is maintained like a garden, on a strict weekly rhythm. Skip a week and the streets blur; skip two and it becomes a jungle.
- Trim weekly, not monthly. Cut stem plants to the street's target height before they breach the surface. Fast growers every 7–10 days; slower midground groups every 2–3 weeks.
- Replant the tops. When stems get leggy, cut the healthy top 10–15 cm and replant it in the same street, discarding the bare lower stem. This "top and replant" cycle keeps streets dense and resets legginess — the single most important Dutch maintenance skill.
- Thin the foregrounds. Rosette plants like Cryptocoryne throw runners that wander into neighboring streets. Pull strays weekly to keep boundaries crisp.
- Water change and dose on schedule. 40–50% weekly water changes plus consistent fertilizer dosing keep growth rates predictable. Erratic dosing creates erratic growth, which ruins street edges.
- Prune dead leaves promptly. Dutch judging rewards plant health above all; one melting Cryptocoryne leaf left for three days can melt five more.
For the full trimming workflow — tools, cutting angles, and how to shape streets without flattening them — see our guide to aquascape trimming and maintenance.
A reliable pick here is aquascaping tool kit.
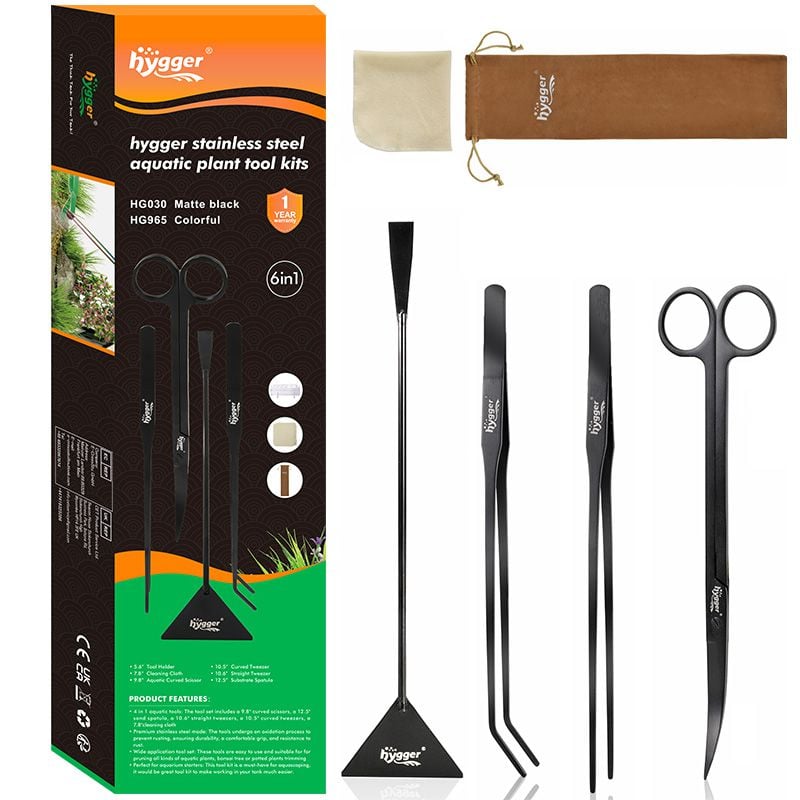 ★4.6
hygger 6-in-1 Long Aquarium Aquascaping Tools Kit
Check Price on Amazon ★4.6Contest Judging Basics for Dutch Tanks
Dutch tanks are judged differently from other styles. Where nature-style judges weigh hardscape composition, Dutch judges score almost entirely on the plants: health, density, color contrast, and rule execution.
The typical judging checklist runs: (1) overall impression and harmony from two meters away; (2) plant health — no algae on leaves, no melting, no deficiencies; (3) contrast execution — color, texture, and height contrasts all clearly deliberate; (4) rule adherence — terracing, street separation, the red-to-green balance; (5) maturity — streets fully filled in; (6) photography — Dutch tanks live or die on photo day, so lights-on timing, clean glass, and hidden equipment all count.
One reality to internalize: health beats rarity. A tank of common Ludwigia and Cryptocoryne grown flawlessly will outscore a tank of exotic stems with algae on the leaves. If your goal is a contest photo, start "photo prep" six weeks out: lock the trimming schedule, stop rescaping, and photograph at the same time of day to learn how your light renders the reds.
When you're ready to think about entering, our aquascaping competitions guide covers the major contests and timelines, and the contest submission prep guide walks through photography, file formats, and entry logistics. For how the Dutch school sits alongside the other major styles, the UK Aquatic Plant Society's overview of aquascaping styles is a solid reference.
Common Dutch Mistakes to Avoid
- Too many species. Twelve half-filled streets look worse than six full ones. Earn density before adding variety.
- Red plants everywhere. Reds without green neighbors become a red blob. Respect the two-thirds green balance.
- Flat substrate. Without terracing, a Dutch tank loses half its depth. Slope before the first plant goes in.
- Stopping at month two. Dutch tanks peak at 3–6 months. Quitting during the fill-in phase is like judging a garden by its seedlings.
The Mathematics of a Plant Street
Where streets meet the glass: the 1/3 and 2/3 entry points
The most consequential measurement in a Dutch layout happens before a single stem is planted: where each street touches the front glass. The working rule is to drop those entry points on the vertical one-third and two-thirds lines of the tank's width — the same division behind the rule of thirds in aquascaping. On a 120 cm tank, that puts the street openings at roughly 40 cm and 80 cm. Why does it matter? A street that starts dead center splits the layout into mirror halves, and symmetry reads as flat; the viewer's eye has nowhere to travel. Entry points at the thirds create an immediate asymmetry, so the eye enters at an off-center point and travels diagonally across the tank. If two streets share the front glass, give them the two thirds marks and let the remaining third act as breathing room for a foreground accent — crowding all three thirds with street mouths erases the asymmetry you just built.
How wide the funnel opens: street width ratios
Every Dutch street widens toward the viewer — narrow at the back, broad at the front — and the ratio of that taper is the single biggest lever on perceived depth. The practical range is a front-to-back width ratio of about 3:1 to 4:1. A street that is 12 cm wide where it meets the front glass should shrink to 3–4 cm where it vanishes behind the plants at the back. Expressed as an angle, the street's edges diverge at roughly 8 to 15 degrees of total spread: deeper tanks (60 cm front-to-back and beyond) can carry the steeper end, while shallow 30–40 cm tanks need the gentler end or the funnel looks cartoonish. The ratio must also be consistent: if the left street tapers at 3:1 and the right at 6:1, the viewer's brain detects the mismatch instantly, and the illusion of uniform depth breaks.
Terrace sight lines: why the back of a street must stay visible
Width ratios only work if the whole street can actually be seen. On a flat substrate, the trimmed canopy of a front street hides the base of the street behind it, so the taper you so carefully planted is invisible — the viewer sees color bands, not geometry. Terraces solve this as a sight-line problem: each step of substrate lifts the rear street high enough that its base clears the canopy in front of it when viewed straight through the front glass. The related technique of sloping substrate for depth uses the same principle in miniature. As a working figure, terrace risers of 5–8 cm per step on a standard-height tank keep rear street bases visible over a trimmed front canopy, and the steps should run parallel to the front glass so every street climbs at the same rate. A terrace that tilts or steps unevenly shows up immediately as one street's taper looking "wrong" while its neighbors look right.
The Color-Pairing Catalog: Species by Species
General palettes are for planning; competitions are won on specific pairings. Each pair below names two species, the contrast mechanism, and why it survives the squint test — browse the Tropica plant database by color and leaf form to confirm how each species colors up under strong light before committing a street to it.
| Pair | Species A (warm) | Species B (cool) | Why the contrast works |
|---|---|---|---|
| 1 | Alternanthera reineckii 'Mini' — crimson | Hemianthus micranthemoides (pearl weed) — lime green | True red/green complementary opposition, plus broad mini leaves against fine pearl-weed foliage, so color and form reinforce each other. The classic focal-point pairing. |
| 2 | Ludwigia palustris 'Super Red' — deep red | Bacopa caroliniana — light green | Saturated deep red against a pale bright green: the lightness gap is as wide as the hue gap. Round Bacopa leaves versus oval Ludwigia leaves keep the boundary crisp. |
| 3 | Rotala macrandra — magenta-red | Mayaca fluviatilis — vivid green | Magenta against neon green is the highest-chroma pairing in the hobby; broad Macrandra leaves versus needle-fine Mayaca makes the street edge unmistakable even in a photograph. |
| 4 | Ammania gracilis — orange-pink | Limnophila aquatica — feathery green | Warm orange-pink against cool feathery green; fine Limnophila texture reads as a backdrop wash, making the Ammania street look denser and more solid. |
| 5 | Rotala rotundifolia 'H'ra' — pink-red tips | Pogostemon helferi — curly lime green | Pink-red needle foliage against a curly lime rosette: opposing hues and opposing leaf architecture. Excellent as the secondary contrast flanking a focal pair. |
| 6 | Nymphaea lotus 'Zenkeri' — dark red round leaves | Vallisneria nana — green ribbons | Dark round red leaves against vertical green ribbons. Use as the single accent at the focal point — the lotus is a soloist, not a street, and the Vallisneria curtain behind it is its green partner. |
| 7 | Hygrophila pinnatifida — bronze-brown | Staurogyne repens — compact bright green | Muted warm tone against bright cool green: contrast carried by saturation difference, not hue opposition. Ideal midground pairing where a full red would overpower the foreground. |
The Front-On Photo Test
Your camera is the most honest judge your layout will ever meet. Set the lens at the vertical center of the front glass, perfectly perpendicular to it — no angle, no tilt. Angled shots are how broken street geometry hides: a street whose edge wanders looks straight from the side, but front-on the wander shows as a kink. Kill the room lights, run only the tank lights, and take the shot on a tripod so you can compare attempts week to week. In the photo, check three things: every street edge runs straight from its thirds entry point to its vanishing point at the back; every street's taper is even on both edges; and the highest-contrast pairing sits on the focal thirds intersection. If a street fails any of the three, replant the offending group before its roots knit the substrate together — geometry is cheapest to fix in the first two weeks. For the full technique, see our guide to photographing your aquascape.
The Dutch Trimming Discipline
This is where Dutch tanks are won or lost. Stem plants must be trimmed every 1–2 weeks:
- Top and replant: cut stems at the desired height, replant the healthy tops, discard or compost the leggy bottoms. This keeps streets dense from base to tip.
- Never let streets shade each other. A tall street shading its neighbor for two weeks can melt the shaded street’s lower leaves, opening a bare patch that takes a month to fill.
- Thin aggressively. Dutch streets get denser with each trim cycle; remove excess stems ruthlessly or the street chokes itself and rots from the inside.
- Keep street boundaries crisp. Runners and stray stems crossing into the neighboring street blur the contrast the whole style depends on. Weed the boundaries weekly.
Expect to spend 45–90 minutes per week maintaining a Dutch tank. If that sounds like too much, the style will punish you — consider jungle style or a nature-style triangle layout instead. Honesty here saves you a failed scape.
A reliable pick here is aquascaping tool kit.
Sample Dutch Street Plan (60 cm Tank)
Here’s a concrete 12-street plan for a standard 60×30×36 cm tank, left to right. Every boundary contrasts in color, leaf size, or texture:
- Left edge: Hygrophila polysperma (broad green, tall) — the calm anchor
- Street 2: Ludwigia super red (red, medium leaf) — first color hit
- Street 3: Rotala rotundifolia green (fine green) — texture contrast
- Street 4: Alternanthera reineckii ‘Mini’ (red rosette, compact) — focal street at the one-third mark
- Street 5: Limnophila sessiliflora (feathery bright green) — fine texture against the compact red
- Street 6: Ammannia gracilis (broad orange-gold) — warm color mass
- Street 7: Rotala wallichii (fine pink-red) — delicate contrast to the broad Ammannia
- Street 8: Bacopa caroliniana (round succulent green) — calm green rest
- Street 9: Ludwigia palustris (red-green) — color return
- Street 10: Hygrophila corymbosa (broad green, tall) — structural backbone
- Right edge: Vallisneria nana (grassy vertical) — edge screen
- Foreground throughout: Staurogyne repens carpet with a Cryptocoryne parva accent
Check every adjacent pair: green→red (color), red→fine-green (texture), fine→rosette (form)… no two neighbors share both color and leaf type. That’s the discipline. Adapt the species to what your local shop stocks — the pattern of contrasts matters more than exact species.
The Dutch Learning Curve: Year One
- Months 1–3: streets establish; you’re learning each species’ growth rate. Some streets will outrun others — replant slower streets with more stems to compensate.
- Months 4–6: the trimming rhythm clicks. Streets get denser with each cut-and-replant cycle. This is when the tank starts looking like the plan.
- Months 6–12: maturity. Streets are thick, colors are saturated, and you’re propagating enough trimmings to start a second tank (every Dutch keeper’s inevitable fate).
- Month 12+: substrate exhaustion begins — aquasoil depletes around the one-year mark under heavy feeding. Add root tabs or plan a substrate refresh. Some keepers rescape annually; the teardown is also a deep-clean opportunity.