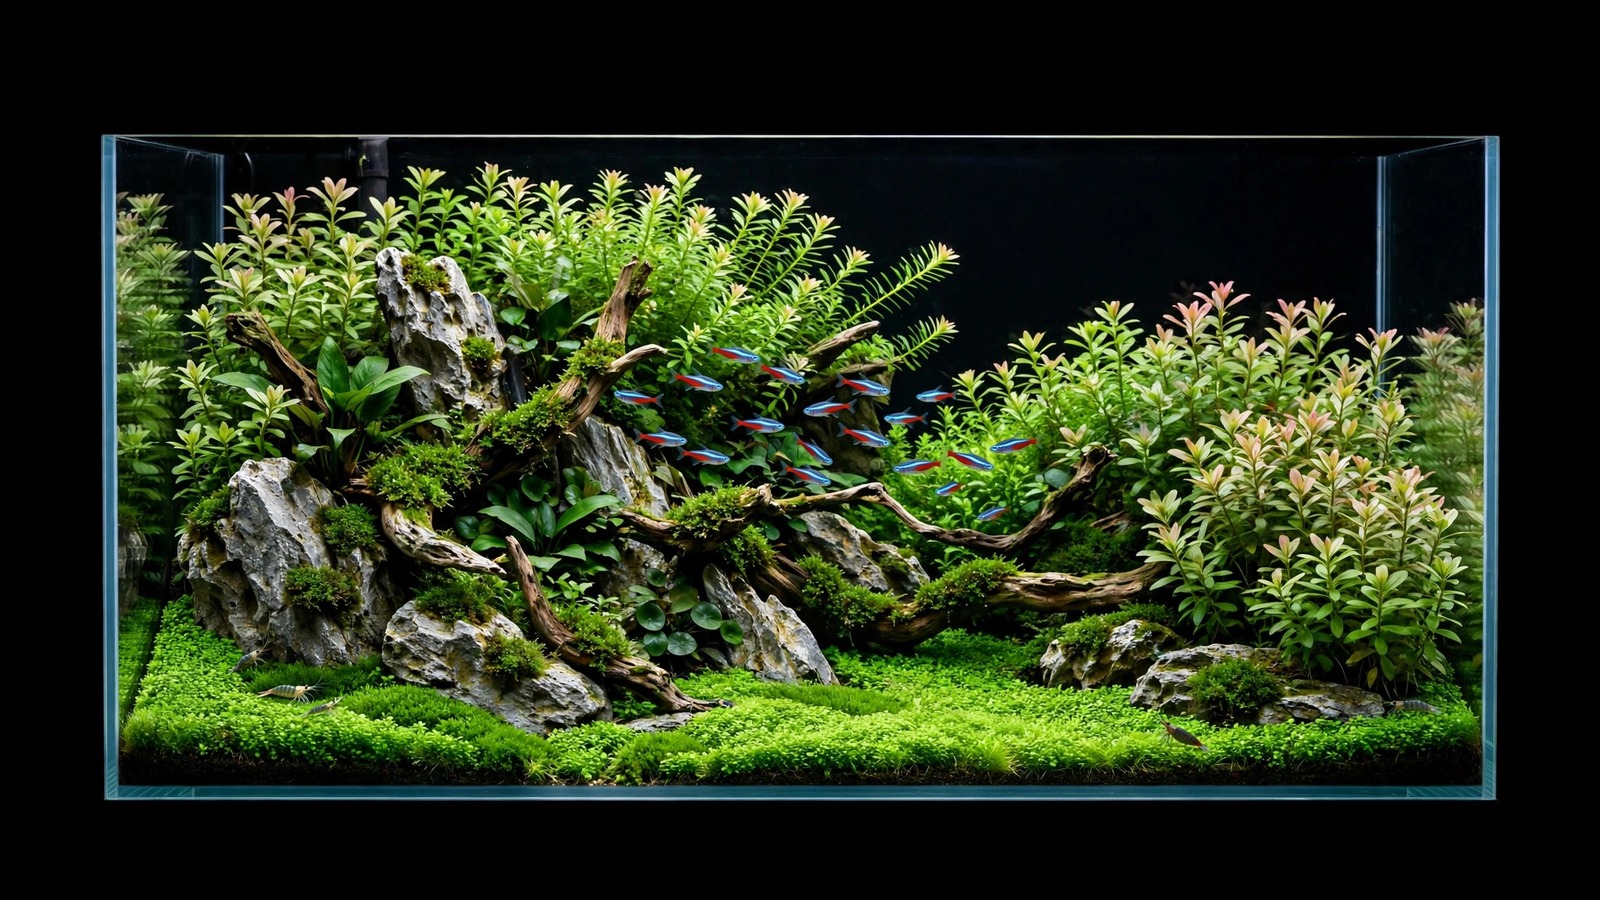
A great aquascaping contest submission is won or lost weeks before the shutter clicks — in the trim cycle, the glass-polishing ritual, and the hundred tiny details judges notice but beginners never think to fix. Whether you are entering the International Aquatic Plants Layout Contest (IAPLC), the TGIAC (The Great Indian Aquascaping Contest), or a local club show, the same preparation logic applies: understand what is judged, peak your layout on photo day, and eliminate everything that can get you disqualified before judging begins.
This guide walks you through the whole arc: how contests score layouts, a week-by-week prep timeline, photography techniques that make your tank look like it does in your best memories, how to write a compelling layout description, and the common disqualifications that end promising entries early. Date-sensitive details change every year — always check each contest's official website for the current year's deadlines and rules rather than treating anything here as permanent.
How Your Aquascaping Contest Submission Is Judged
Most major contests judge entries on a similar set of criteria, even when the scoring breakdowns differ. Every task in your prep timeline maps to one of them.
Layout and composition
This is the biggest single factor in most contests: the arrangement of hardscape, the flow of planting groups, negative space, depth, and focal points. Classic composition principles — the rule of thirds, strong perspective lines — show up in winning layouts because they are legible in a two-second first glance. When you plan an aquascape with contest ambitions, choose one idea and execute it with discipline. A simple, confident composition photographed at peak health will outscore an ambitious one that looks unfinished.
Plant health and condition
Judges zoom into your plants: lush, algae-free growth, consistent color, no melting leaves, no pinholes or yellowing edges, natural-looking density. A layout with perfect composition but visible algae or sparse patches signals a tank that peaked two weeks too early or too late. This is why the trim cycle matters — you want fresh, clean regrowth on display, not a jungle that has been fighting itself for a month.
Equipment concealment
Visible heaters, filter pipes, thermometers, or power cords cost points in nearly every contest. Judges want the illusion of a self-contained world. Remove or hide everything artificial on photo day: take heaters out temporarily, swap to glass lily pipes, pull thermometers off the glass. Many experienced competitors keep a "photo-day kit" — clean glass pipes, a background panel, black gaffer tape. Our guide to hiding aquarium equipment in an aquascape covers the permanent concealment techniques worth building into the layout itself.
Water clarity and cleanliness
Crystal-clear water, spotless glass, and a clean substrate surface are baseline expectations. Cloudiness, suspended particles, detritus on the sand, or smudges on the front glass read as carelessness no matter how beautiful the layout. A partial water change the day before photo day, a fine polishing pad in the filter for 48 hours beforehand, and a meticulous glass-cleaning routine on the day are standard practice.
Overall impression and originality
Beyond the technical categories, judges respond to layouts that feel authored rather than assembled from a template — a distinctive hardscape arrangement, an unusual species combination, a perspective trick, a mood. If your design leans on a classic style, study its masters — our Dutch-style aquascape layout guide breaks down one of the most demanding traditions — and then find the detail that makes it yours.
The Prep Timeline: Working Backward From Photo Day
Most contests judge you on a single photograph, so your timeline exists to make one moment perfect. Decide your photo day, then work backward. This assumes a mature tank; a new layout needs months of maturation before it is contest-ready.
| When | What to do | Why it matters |
|---|---|---|
| 6–8 weeks out | Finalize layout changes. No more moving hardscape or adding species. Stabilize fertilization and CO₂ at conservative, steady levels. | Late changes never look natural in time. Stability now produces clean growth later. |
| 4 weeks out | Last major trim — a hard reset on stems and carpets. Address any algae decisively (spot treatment, cleanup crew, manual removal). | Algae and ragged growth need weeks to fully clear. This is your last big correction. |
| 2–3 weeks out | Light, frequent shaping trims for dense, even regrowth. Remove old leaves by hand. Service the filter: clean impellers, replace fine floss. | Plants should look freshly grown but fully filled in on photo day, not freshly cut. |
| 1 week out | Final light shaping trim. Stop moving anything. Large water change mid-week, then let water stabilize. Test your photo setup on the tank. | Plants need days to settle after trimming. Test cameras now, not on photo day. |
| Photo day −1 | 30–50% water change with temperature-matched water. Siphon detritus. Wipe all glass inside and out. Add a polishing pad overnight. | The tank should look untouched and pristine 24 hours before the shoot. |
| Photo day | Lights on 1–2 hours before shooting so plants open fully. Remove equipment. Final glass wipe. Shoot, review on a large screen, reshoot. | Plants look best a few hours into the photoperiod. Never accept the first take. |
The most common timing mistake is photographing too early. A tank that looks "almost ready" in week three of regrowth will look noticeably better in week four. Where the contest window allows — many contests accept entries over several weeks — schedule photo day near the end of your tank's peak, not the beginning.
Photography Prep: Making the Tank Look Its Best
Contest judging is photography judging. Treat the photo session as its own craft.
Clean the glass twice
Every fingerprint and water spot shows under contest lighting. Clean outside glass with a microfiber cloth (spray cleaner on the cloth, never toward the tank), the inside with a scraper or magnetic cleaner, then the outside once more. Check at an angle with a flashlight — glancing light reveals smears that head-on viewing hides.
Time the peak
Shoot 1–2 hours after lights-on, when stem plants have opened and fish are active and colored up. Feed lightly an hour before the session so fish school naturally — hungry fish hide, overfed fish scatter.
Remove everything artificial
Pull the heater, thermometer, drop checker, skimmer, and visible filter hardware. Swap stock plastic nozzles for clean glass lily pipes — the highest-impact single equipment swap in contest photography. Hide cables behind the stand, and make sure nothing bright is visible behind or beside the tank in the frame.
Lighting tricks
Shoot in a darkened room with only the aquarium light on — room light creates reflections and flattens contrast. Avoid on-camera flash; if you need fill, bounce soft light off the ceiling. Zoom in to 100% on a monitor to check focus — phone screens hide flaws that judges will find.
Background and framing
Use a clean, dark background — matte black or deep blue, applied bubble-free. Frame the tank to fill the image with a small even margin, camera level with the tank's midline to avoid distortion. Check the contest rules for required aspect ratios and minimum resolutions before cropping — violating the format spec is a disqualification risk, not a style choice.
Writing the Layout Description
Most contests ask for a short description alongside the photo. It rarely decides a winner, but it frames the judges' reading of your work. Keep it honest, specific, and brief — typically 100–200 words.
- Name the concept in one line. "A forest floor in late autumn" tells the judge what to look for before studying the image.
- List materials plainly. Hardscape types, substrate, and main plant species by botanical name. Precision earns trust.
- Explain one design decision. Why the focal point sits where it does, how you created depth. One thoughtful sentence beats a paragraph of adjectives.
- Skip the purple prose. Avoid superlatives and backstory that does not show in the photo. The image is the argument; the text is the caption.
- Double-check every fact. Tank dimensions and species names must be accurate — a misidentified species undermines the whole entry.
Common Disqualifications and How to Avoid Them
Contests disqualify entries more often than newcomers expect, almost always for avoidable reasons. Read the specific contest's rulebook, then check against this list:
- Wrong image format or size. Export exactly to the specified resolution, file type, and aspect ratio. "Close enough" does not pass.
- Editing violations. Most contests allow exposure and white-balance correction but forbid compositing, cloning, or adding/removing elements. When in doubt, submit the cleaner original.
- Wrong category or duplicate entries. Entering the same photo in two categories, or the wrong size class, can void both.
- Previously published layouts. Many top contests require the layout to be unpublished and unawarded elsewhere — posting photo-day shots on social media before results can violate this.
- Inaccurate information. Wrong tank dimensions or species names are grounds for removal. Fill every field carefully.
- Deadline misses. Portals close at the stated time in the stated timezone. Upload at least 48 hours early — servers slow down on deadline day.
Fertilization and Water Stability During Prep
The six weeks before photo day are not the time to experiment. Lock in a routine that already works and resist the urge to push growth harder — late overdosing causes algae blooms and deformed new growth exactly when you can least afford them. If you mix your own nutrients, our guide to mixing dry fertilizers for planted tanks covers the conservative approach contest prep demands: consistent, moderate, unchanged.
Keep CO₂ stable and water changes regular — one skipped water change in week three can seed an algae outbreak that eats your entire buffer. Also consider the style fit before committing weeks of prep: if you are experimenting with something unusual like a paludarium, confirm the contest accepts above-water elements, and if you run a bonsai driftwood tree aquascape, test it on camera early — details that charm in person sometimes dissolve into visual noise in a flat image.
Frequently Asked Questions
When should I start preparing my tank for a contest?
For a mature, healthy tank, six to eight weeks of dedicated prep is standard: no layout changes at six weeks out, a hard reset trim at four weeks, shaping trims through weeks two and three, and a final polish in the last week. A new tank needs months of maturation before prep begins. Check the official site of your target contest for the current year's submission window, then count backward to find your start date.
Can I enter a contest with a low-tech tank without CO₂ injection?
Yes. Judges score what they see — composition, plant health, presentation — not your equipment list. Choose species that genuinely thrive without injected CO₂ and give the layout extra maturation time, since low-tech growth is slower. A modest low-tech tank in flawless condition will always outscore a high-tech tank fighting algae.
How much photo editing is allowed in aquascaping contests?
It depends on the contest. Most permit basic global adjustments — exposure, contrast, white balance, cropping to the required format — but forbid compositing, cloning out flaws, or adding elements. The exact line is in each contest's rulebook, which you should read before shooting. The safest approach is getting the photo right in-camera so editing stays minimal and unquestionably within the rules.
Do I need an expensive camera to submit a competitive photo?
No. A modern smartphone on a tripod, in a darkened room with the tank as the only light source, can produce a submission-quality image. What matters more is the prep: clean glass, removed equipment, a proper background, level framing, and the highest quality mode available. Invest your effort in the tank and the setup, not the camera body.
Should I remove my fish for the contest photo?
Usually not — healthy, well-chosen livestock adds life and scale, and many winning photos feature fish prominently. Remove fish only if they are stressed, sick, or visually distracting. If you keep them, feed lightly an hour before the shoot so they are active and schooled, and be patient: the best livestock moments often take twenty minutes of waiting.
What is the biggest mistake first-time contestants make?
Photographing too early. Beginners shoot the moment the tank looks "good enough," weeks before its actual peak, and the photo locks in a version that had another fortnight of improvement in it. The second biggest mistake is skipping the rulebook — wrong image dimensions, a visible thermometer, or a social media post that violates the unpublished-layout rule can end an entry that would otherwise have placed.
Your Contest Season Starts Now
Aquascaping contests reward a specific discipline: the patience to let a layout mature, the restraint to stop changing it, and the rigor to prepare one photograph as carefully as the tank itself. Start with the rulebook, count backward from the submission deadline, and give your tank the calm, stable weeks it needs to peak. For current-year dates and entry details, see the IAPLC official site and the TGIAC contest page, and verify every deadline on the official pages before planning around it. Win or not, a tank prepped to contest standard is a tank you will enjoy for months.
Tissue-culture plants are the exception — they’re grown in sterile gel and adapt with minimal melting, which is part of what you’re paying for. Plants bought submersed from another hobbyist’s tank also transition with little melt, since they’re already in the right form.
Which Plants Melt Most (and Least)
Heavy melters (expect significant leaf loss)
- Cryptocorynes — infamous for “crypt melt,” sometimes dropping every leaf after any disturbance. They almost always recover from the roots within weeks.
- Stem plants grown emersed — rotala, ludwigia, and hygrophila often shed lower emersed leaves while the growing tips transition.
- Amazon swords — emersed-grown swords typically lose their broad oval aerial leaves and replace them with longer submersed ribbon leaves.
Light melters
- Anubias, java fern, bucephalandra — slow-growing rhizome plants transition gradually; occasional old-leaf melt but rarely dramatic.
- Vallisneria — usually transitions well, though it dislikes the move itself and may sulk for a week.
- Floating plants — minimal melt since their leaves were already at the air-water interface.
The Acclimation Protocol
Step 1: Quarantine or dip first
Before acclimating to your tank’s conditions, make sure you’re not acclimating pests along with the plant. Run new arrivals through our quarantine and dip protocol — it adds days upfront but prevents months of regret.
Step 2: Float to temperature-match (30 minutes)
Float the bag or container in your tank for 20–30 minutes to equalize temperature. Plants are less temperature-sensitive than fish, but a 10°F shock on top of transplant stress is an avoidable insult.
Step 3: Trim before planting
Remove any leaves that are already damaged, yellowing, or heavily algae-covered — they won’t recover and they’ll rot in your tank, feeding algae. For stem plants, trim off the bottom inch and any emersed leaves that look unlikely to adapt; the plant wastes energy maintaining leaves it’s going to shed anyway. Keep the healthy growing tips — that’s where recovery starts.
Step 4: Plant correctly the first time
Follow our planting guide — right depth, crown exposed on rosettes, rhizomes unburied on epiphytes. Every uprooting and replanting restarts the acclimation clock, so get placement right on the first attempt. Decide where each plant goes before it goes in the water.
Step 5: Run a gentle first week
For the first 7 days after planting:
- Moderate light — run your normal photoperiod but consider dropping intensity 20–30% if your light is dimmable. Blast-level light on a melting plant grows algae on the dying leaves, not recovery.
- Stable CO2 — if you inject CO2, keep it consistent. Fluctuating CO2 during acclimation is a melt accelerator. If you’re low-tech, this doesn’t apply — see growing without CO2.
- Half-strength fertilizer — new plants with damaged leaves can’t use full dosing, and the excess feeds algae. Ramp to full strength over 2–3 weeks per our fertilizer schedule.
- No disturbance — don’t move, trim, or “check on” new plants for at least two weeks. Every touch resets root establishment. This is especially critical for crypts.
Step 6: Remove melt, keep the base
As emersed leaves melt, remove the mushy material promptly — decaying leaves release ammonia and grow fungus that can spread to healthy tissue. But never discard the plant while the crown, rhizome, or roots are firm and alive. A crypt that’s lost every leaf but has firm roots is a plant that’s about to recover, not a dead plant. Give it 3–4 weeks before judging.
Telling Normal Melt From Real Problems
Normal transition melt:
- Affects oldest/emersed leaves first, newest growth last
- New submersed leaves emerge even as old ones dissolve
- Roots and crown stay firm and white/green
- Timeline: 1–4 weeks, then obvious new growth
Concerning melt (see our full melting diagnosis guide):
- New growth also melts or emerges deformed
- Rhizome or crown turns mushy and brown — this is rot, not transition
- Entire plant dissolves within days with no new growth after 4+ weeks
- Melting spreads to established plants that weren’t recently moved
Buying Tips to Minimize Melt
- Buy submersed-grown when available — hobbyist-grown cuttings transition with almost no melt.
- Choose tissue culture for sensitive species — crypts and delicate stems establish far more reliably from sterile cups.
- Avoid plants already melting in the store tank — some melt is normal, but a plant that’s mostly mush at purchase has less energy for recovery.
- Transport carefully — keep plants damp and out of direct sun/heat. A plant that dries out or cooks in a hot car melts far worse than one transported properly.
The First-Month Timeline: What to Expect Week by Week
Knowing what’s normal when removes most acclimation anxiety. Here’s the typical timeline for a healthy plant adapting to a new tank:
Week 1: The quiet week
Almost nothing visible happens. The plant is growing roots you can’t see and assessing its new environment. Some species (vallisneria, stem plants) may start shedding their lowest leaves. This is normal. Resist the urge to “help” — no moving, no extra fertilizer, no light changes. The most common beginner mistake is intervening during a week when the correct action is nothing.
Week 2: Melt peaks
This is when emersed leaves give up in earnest. Crypts may drop everything; swords shed their broad aerial leaves; stem plants lose lower foliage. It looks catastrophic and it’s usually fine. Keep removing mushy material, keep conditions stable, and watch the crown and growing tips — if those are firm and green, recovery is already underway.
Week 3: The turn
New submersed-adapted leaves emerge — smaller, thinner, often a slightly different shade of green than the emersed foliage. Stem plant tips start growing visibly; crypts push tiny curled leaves from the crown; swords unfurl narrow ribbon leaves. This is the moment most beginners exhale for the first time.
Week 4+: Established
New growth outpaces melt, and the plant is functionally yours. You can resume full-strength fertilizer, normal trimming, and stop treating it as fragile. Some slow growers (anubias, bucephalandra) take 6–8 weeks to show obvious progress — that’s their normal speed, not a problem.
Acclimating Different Plant Formats
Tissue-culture cups
Sterile, pest-free, and already adapted to high-humidity (not emersed) growth — tissue cultures melt the least of any format. Rinse the agar gel off gently (leftover gel rots and feeds fungus), split the portion into small plantlets, and plant per our planting guide. They establish slowly for the first two weeks, then accelerate. No dip needed, minimal acclimation stress — this is the premium experience you’re paying for.
Potted plants
Remove the pot and strip away the rockwool completely — leftover rockwool traps debris and rots. Tease the root mass apart gently; if it’s a dense mat, splitting it into 2–3 smaller portions actually establishes faster than planting one big clump (more growing points, better water flow around roots). Potted plants are usually emersed-grown, so expect the standard 2–4 week melt cycle.
Bare-root / bunched stems
Typically sold as weighted bunches. Remove any bands, foam, or weights, strip the lower leaves, and plant stems individually or in small groups. Bunched stems from the store are often already transitioning — check for new submersed growth at the tips, which tells you the plant is mid-adaptation and will settle quickly.
Hobbyist cuttings
Already submersed-grown and the fastest to establish — often showing new growth within days. The main acclimation factor is water-parameter difference between the two tanks. Float to temperature-match, plant promptly, and they’ll usually take off with minimal melt. This is why experienced hobbyists prefer trading cuttings over buying potted plants.
Frequently Asked Questions
Should I use a “plant starter” or transplant fertilizer?
Products marketed for transplant shock are mostly B-vitamins and mild hormones. They don’t hurt, but there’s no strong evidence they help aquarium plants specifically. Stable conditions and patience outperform any bottle. Save the money for more plants.
My new plant melted completely — bare crown, no leaves. Is it dead?
Probably not, if the crown or rhizome is firm. Crypts and swords routinely lose 100% of their leaves and regrow from the base within a month. The test is firmness: firm and pale/green means alive; mushy and brown/black means rot. Give firm-but-leafless plants a full 4 weeks before declaring them dead.
Can I speed up acclimation with extra light or CO2?
No — and trying usually backfires. A melting plant can’t use extra light; the excess just grows algae on its dying leaves. Keep light moderate and CO2 stable (not boosted) during acclimation. Growth speed comes from the plant’s own adaptation timeline, which you can’t rush, only avoid delaying.
Should new plants go straight into my main display tank?
After quarantine/dipping, yes — there’s no benefit to a separate “growing-in” tank for most plants. They acclimate to your water fastest in the tank they’ll live in. The exception is very delicate species going into a tank with boisterous fish; give those a few weeks in a calm corner or breeder box first.
The Patience Rule
The single most important acclimation skill is restraint: plant it right, set gentle conditions, remove decay, and then leave it alone for a month. The hobbyists with the best plant growth aren’t doing something clever in week one — they’re simply not interfering in weeks two through four while the plants do what they’ve evolved to do. Melt looks like failure and feels like failure, but in most cases it’s the visible part of a plant successfully becoming yours.