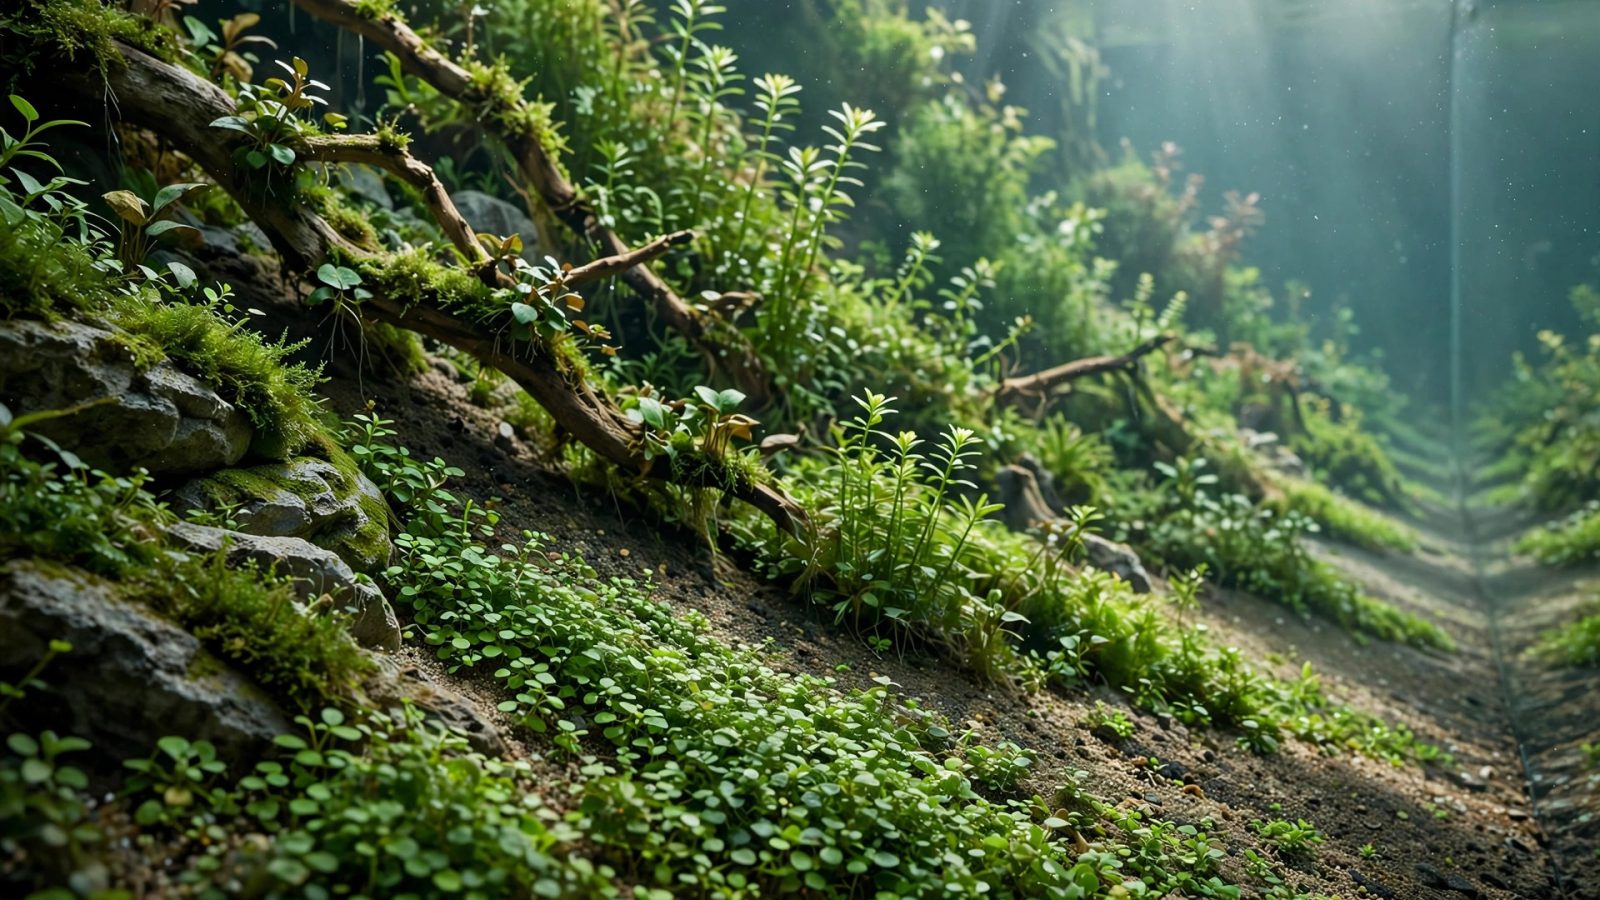
Creating depth in aquascaping is what separates a tank that looks like a glass box of plants from one that looks like a window into another world. Depth is an illusion — your tank is only 30–60 cm front to back — but with the right techniques you can make it feel like meters. This guide covers 9 proven techniques, from substrate sculpting to forced perspective, that add visual depth to any layout style.
Why Depth Matters
A flat-looking aquascape has one plane: everything sits at the same visual distance, and the brain reads it as “objects in a box.” A deep-looking aquascape has foreground, midground, and background planes with smooth transitions between them — the brain reads it as “landscape.” Every technique below is about strengthening those planes and transitions.
Technique 1 — Slope the Substrate Front to Back
The single highest-impact depth technique. A substrate that rises from 2–3 cm at the front glass to 8–15 cm at the back does three things: it lifts background plants into view, it makes the floor plane recede like a hillside, and it hides the back glass bottom edge (a notorious depth-killer).
Use supports under the back — lava rock rubble in mesh bags or cut filter foam — so the slope doesn’t flatten over time. This applies to every style from iwagumi to jungle.
Technique 2 — Small Leaves in Back, Big Leaves in Front
This is forced perspective borrowed from painting and theater: smaller textures read as farther away. Plant fine-leaved species (Rotala, Limnophila, hairgrass) in the background and broader-leaved species (Anubias, swords, Hygrophila) in the foreground and midground. The brain interprets the fine background texture as distance haze, even though it’s only centimeters behind.
The reverse — big leaves in back, small in front — flattens the tank instantly. Check your layout for this mistake; it’s the most common depth error.
Technique 3 — Scale Hardscape Down Toward the Back
Place your largest stones or wood pieces in the midground and progressively smaller pieces toward the back. A big rock up front with pebbles behind reads as a mountain range receding into the distance. Same-size rocks front to back read as a rock pile.
This pairs beautifully with the odd-number stone discipline from iwagumi layouts: your oyaishi sits midground-forward, soeishi shrink toward the rear.
Technique 4 — Create a Vanishing Path or Valley
Leave a wedge of open substrate — sand, fine gravel, or low carpet — running from the front glass toward the back, narrowing as it goes. This “path” or “river” gives the eye a corridor into the scene, and the narrowing shape screams perspective. It’s the centerpiece trick of island-style layouts and works in nature-style tanks generally.
Flank the path with hardscape or midground plants on both sides so it reads as a valley, not just an empty patch. The path should aim slightly off-center (rule of thirds) for the most natural look.
Technique 5 — Layer Three Distinct Plant Heights
Depth needs readable planes: a foreground under 5 cm, a midground of 10–25 cm, and a background reaching the surface. When all plants are one height, there’s one plane. When the three layers step up cleanly, the eye travels back through them.
Keep the transitions gradual — a sudden jump from 3 cm carpet to 50 cm background stems looks like a wall, not a landscape. Midground plants are the bridge; don’t skip them.
Technique 6 — Darken the Background
A dark background (black or deep blue film, or a painted back glass) pushes the rear of the tank visually backward. Light or transparent backgrounds pull the eye to the wall behind the tank and collapse depth. This is a five-minute, few-dollar upgrade with outsized impact — especially in small tanks where every centimeter of perceived depth counts.
Bonus: dark backgrounds make green plants and colorful fish pop, which is why competition scapers almost universally use them.
Technique 7 — Light the Back Brighter Than the Front
If your fixture allows it (twin fixtures, adjustable LEDs), run the rear slightly brighter than the front. Brighter areas advance visually, which seems backward — but the real effect is that a bright background with slightly shadowed foreground plants creates aerial-perspective contrast: the lit distance glows behind darker near objects, exactly like sunlight through a forest. Even simpler: let background stems grow tall enough to catch full light while foreground stays in their soft shadow.
Technique 8 — Use Hardscape to Frame, Not Fill
Place your main hardscape off-center and angled, with open water or low plants on the opposite side. A centered, symmetrical hardscape pile divides the tank into two shallow halves. An angled, asymmetric arrangement creates a diagonal sightline that the eye follows deep into the scene. See focal point placement for the positioning math.
Technique 9 — Mist and Atmosphere (Photography Bonus)
For photos: mist the front glass interior lightly before shooting? No — actually, the pro trick is fine particulate control. Slightly hazy water (a touch of suspended particulates after a water change, or tannins from driftwood) creates genuine aerial perspective in photos — distant objects soften exactly like atmospheric haze in landscape photography. Keep it subtle; pea-soup water isn’t depth, it’s a water-quality problem.
Putting It Together: The Depth Checklist
Before calling a layout finished, run this checklist:
- Substrate slopes up at least 6 cm front to back? (Technique 1)
- Finest leaves in the back third? (Technique 2)
- Hardscape shrinking toward the rear? (Technique 3)
- A path, valley, or open corridor leading back? (Technique 4)
- Three readable plant height layers? (Technique 5)
- Dark background installed? (Technique 6)
- Hardscape angled and off-center? (Technique 8)
Hit five of seven and your tank will photograph deep. Hit all seven and visitors will ask how big the tank “really” is.
Depth Mistakes That Flatten Tanks
- Flat substrate. The #1 depth killer. Even 5 cm of slope transforms a tank.
- Tall plants across the entire back in a straight row. A flat green wall has no depth — break it with height variation and gaps.
- Big-leaf plants in the back. Swords belong midground-forward in a depth composition, not against the back glass.
- Centered hardscape. Symmetry reads shallow; asymmetry reads deep.
- Visible back-glass bottom edge. Substrate slope or background plants should hide where the back glass meets the floor.
For more layout fundamentals, see triangle composition and common aquascaping mistakes.
Frequently Asked Questions
How do you make a small aquarium look bigger?
Slope the substrate steeply, use small-leaved plants throughout (they scale the scene down, making the tank feel larger by comparison), keep hardscape small, and install a dark background. These four moves add the most perceived size per dollar.
Should substrate be deeper in the back?
Yes — 2–3 cm at the front rising to 8–15 cm at the back is the standard depth-building slope. Use supports underneath so it holds.
What plants are best for creating depth?
Fine-textured background plants (Rotala, Limnophila, Vallisneria), midground bridges (crypts, Hygrophila), and low foregrounds (carpets, dwarf sagittaria) — the three-layer structure is what creates the planes your eye reads as depth.
Style-Specific Depth Recipes
Iwagumi depth recipe
Steep substrate slope (the style’s clean geometry shows it off), stones shrinking toward the back, dark background, and a single carpet species whose fine texture reads as distance. The iwagumi’s minimalism means each depth technique shows clearly — there’s nothing to hide behind. See the full iwagumi guide.
Dutch depth recipe
Terraces do the heavy lifting — each terrace is a depth plane by construction. Add the fine-leaf-background rule within streets (fine Rotala behind, broad Hygrophila forward) and a dark background. Dutch tanks are naturally deep-looking because the terrace structure enforces layering. See Dutch arrangement rules.
Jungle depth recipe
Layer heights aggressively: tall background giants, midground epiphytes on wood, low foreground. Let one “window” of lower plants open in the midground so the eye travels through the layers rather than hitting a wall. Floaters at 30% coverage add a ceiling plane. See jungle aquascaping.
Nano depth recipe
Small tanks need depth most and have the least room for it. Exaggerate the slope (4 cm front to 12 cm back in a 5-gallon), use only small-leaved species, one small hardscape piece placed off-center, dark background mandatory. Our nano plant picks keep the scale right.
Advanced: Aerial Perspective With Tannins
Driftwood tannins tint water faintly amber — and that tint creates genuine aerial perspective: distant objects seen through more tinted water look hazier, exactly like atmospheric haze in landscapes. A lightly tannin-stained blackwater-influenced scape photographs with remarkable depth. Keep it subtle (visible tint, not tea-colored) and use activated carbon or water changes to control the level. It’s a stylistic choice — crystal-clear water suits iwagumi; a whisper of tannin suits nature and jungle styles.
Measuring Your Depth: The Photo Test
Depth is hard to judge in person (binocular vision cheats). Test with photos:
- Photograph the tank front-on, lens at mid-tank height.
- Convert to black and white. Color distracts; value structure reveals planes.
- Count distinct value planes from front to back. Three or more = good depth. One or two = flat.
- Check the back third: can you distinguish individual plant masses, or is it one dark blur? Blurred-together background = needs thinning or better layering.
Run this test monthly during grow-in. The photo reveals what daily viewing hides — and the month-to-month comparison shows your depth techniques compounding as plants mature. For realistic grow-in timelines, see how long aquascapes take to fill in.
Depth on a Budget: Free and Cheap Wins
Most depth techniques cost nothing — they’re arrangement decisions, not purchases:
- Free: substrate slope, off-center hardscape, small-leaves-back rule, three height layers, the squint test, angling existing hardscape.
- Under $10: dark background film, a sand path bag, slope support foam.
- Worth it: an extra tissue-culture cup or two to plant the background densely — bare background substrate kills depth faster than anything.
Depth is 90% design, 10% materials. A $30 tank with a slope, dark background, and good layering looks deeper than a $300 tank that’s flat, centered, and single-height.
Common Depth Illusions That Backfire
- Mirrored back glass: some beginners leave the back glass reflective hoping for “more tank.” It reads as confusing, not deep — fish get stressed by their reflections too. Dark and matte, always.
- Background posters with printed landscapes: the perspective in the print never matches your tank’s viewing angle; the mismatch looks cheap. Solid dark beats scenic prints.
- Too many layers: five or six height tiers in a 40 cm tank reads as cluttered steps, not depth. Three clean layers maximum in small tanks.
- Depth without light penetration: a deep-feeling layout where the background is too dark to see wastes the effect. Make sure background plants get enough light to read clearly — depth you can’t see isn’t depth.
Depth and Photography: Making It Show
Depth that the eye perceives in person doesn’t always survive the camera. To capture it:
- Shoot with a narrow aperture (high f-number) if your camera allows — deep focus keeps all planes sharp, which is what sells the layered look.
- Side-light slightly: a small light source from one side rakes across the layers, separating planes with shadow. Flat front flash kills depth.
- Include a depth cue in frame: the sand path, a receding stone line — give the viewer the visual corridor the techniques built.
- Clean the front glass. Every speck of algae or water spot sits on the nearest plane and reminds the viewer it’s a glass box.
More Depth Questions, Answered
Can you create depth in a shallow tank?
Yes — shallow tanks (30 cm or less front-to-back) benefit most from these techniques. Exaggerate the substrate slope, keep hardscape small, use only fine-leaved plants, and install a dark background. The slope does the heaviest lifting when physical depth is limited.
Does a background image add depth?
Solid dark backgrounds add depth; printed scenic posters usually subtract it. The poster’s painted perspective never matches your viewing angle, and the mismatch reads as fake. Matte black or deep blue film is the reliable choice.
How important is substrate color for depth?
Moderately. Dark substrates recede (good for depth); pale substrates advance (they can make the foreground feel closer, which actually enhances the foreground-background separation). A dark back substrate grading to a lighter front sand path is a classic depth combination — the path advances, the back recedes, and the distance between them feels larger.