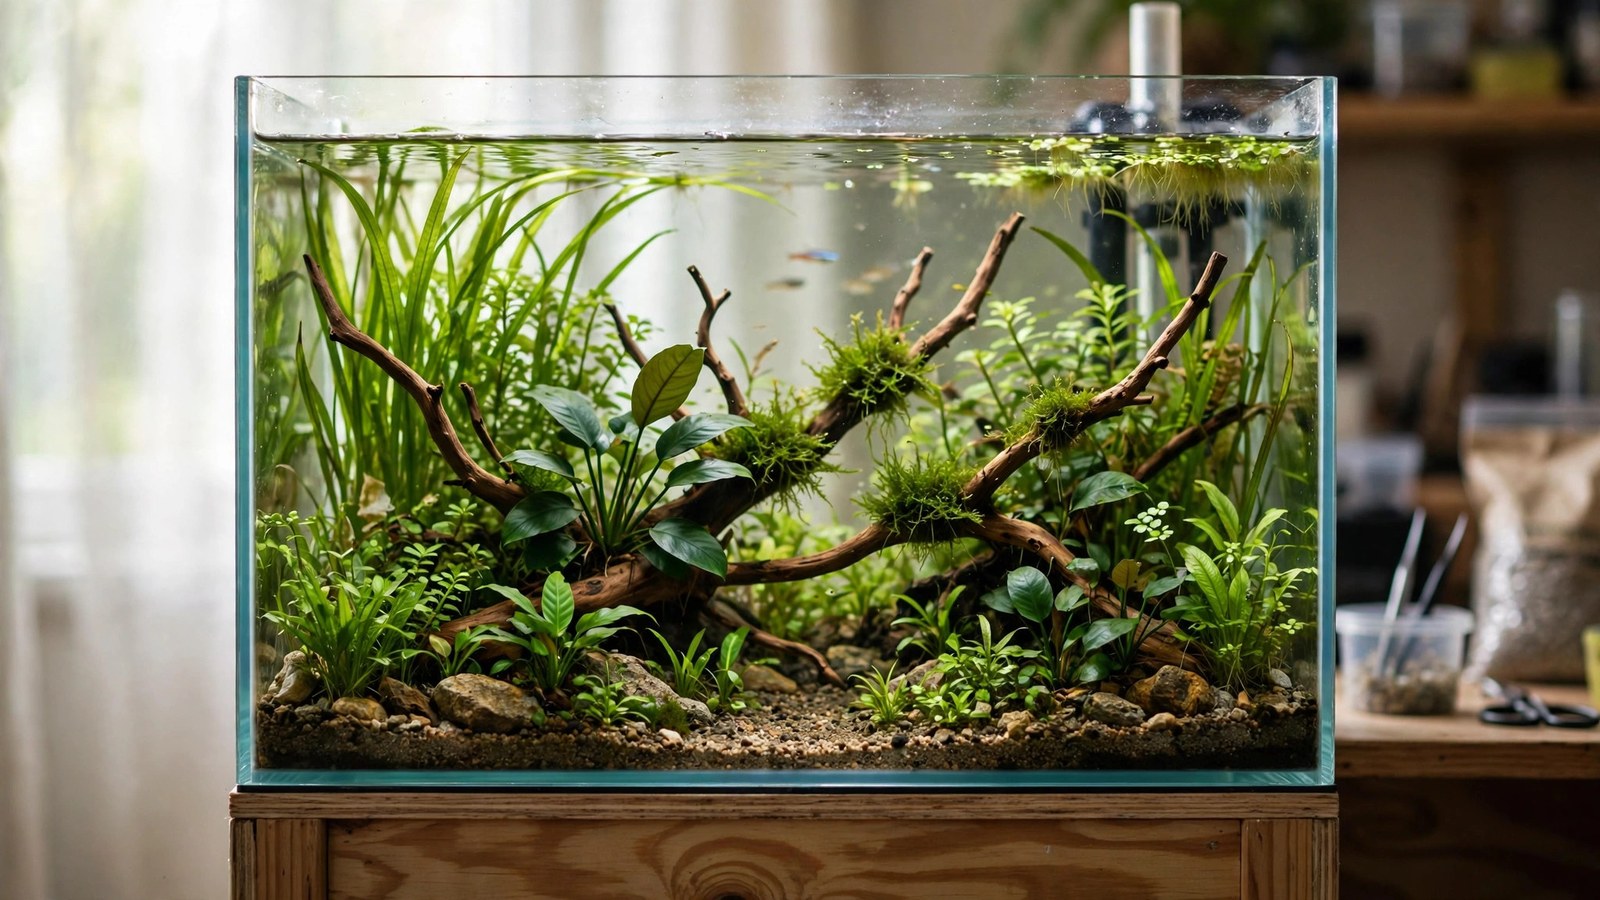
Beautiful aquascapes don't require expensive gear — they require good decisions. Some of the most admired tanks in the hobby were built for under $100, because aquascaping is fundamentally about composition, not equipment: a $30 tank with great hardscape placement beats a $3,000 tank with random rocks every time. This guide is the complete budget playbook — where to spend, where to save, DIY alternatives that actually work, and a full under-$100 build plan.
The Budget Philosophy: Spend on What Shows
Budget aquascaping allocates money by visual impact per dollar:
- Spend: hardscape (the skeleton — visible forever), substrate (the foundation — hard to change later), light (drives everything biological).
- Save: tank (glass is glass), filter (a $15 sponge filter cycles like a $150 canister), CO2 (skip it — go low-tech), brand names (generic aquasoil grows plants like ADA soil).
- DIY: backgrounds, stands, lids, some hardscape, fertilizer (dry salts cost pennies per dose).
The corollary: never budget-cut knowledge. Free resources — this site, forums, YouTube build threads — are worth more than any equipment upgrade. A hobbyist who understands composition with a $100 setup out-scapes a rich beginner with $2,000 of gear.
The Tank: Glass Is Glass
- Secondhand: the #1 budget move. Check local marketplaces — 10 and 20-gallon tanks sell for $10–25 used. Inspect silicone (intact, no peeling), fill-test before buying.
- Pet-store dollar sales: chain stores run periodic $1/gallon sales — a 20-long for $20 new.
- Standard sizes: 10-gallon and 20-long have the cheapest everything (lights, filters, lids are mass-produced for them). Odd sizes cost more to equip.
- Rimless premium: skip it on a budget. A standard braced tank scapes identically; rimless is aesthetics tax. (If you must have the look, remove the top brace only on small tanks — and research the risks first.)
Hardscape on a Budget: The Free Stuff Is Best
Hardscape is where budget builders have a secret advantage: the best-looking stone is often free.
- Field-collected stone: river rock, slate, granite, basalt — free from riversides, lakeshores, and quarries (where collecting is legal). Scrub, boil, test with vinegar (fizzing = carbonate = raises pH — fine unless you're keeping soft-water species). Some of the most characterful aquascaping stone ever used was picked up, not purchased.
- Landscaping yards: buy stone by the pound — often $0.30–0.80/lb versus $4–8/lb at fish stores. Same rock, different markup. Bring a bucket and pick through the piles.
- Found driftwood: hardwood only (oak, beech, manzanita-type), never softwood; scrub, boil repeatedly, soak for weeks. Free and often more characterful than farmed wood. Our single-wood guide applies — one great found piece beats five store-bought sticks.
- Construction lava rock: $5 for a huge bag at garden centers — the perfect hidden hill-core material (see substrate sloping) and a decent visible stone when you pick the craggy pieces.
- Minimalism as budget strategy: our one-rock and one-wood guides are inherently budget guides — one excellent piece costs less than a box of mediocre ones.
Substrate: Feed Plants Cheaply
- Generic aquasoil: half the price of ADA with 90% of the performance. Any reputable aquasoil grows plants.
- Dirted tanks (Walstad method): organic potting soil ($5/bag) capped with sand or gravel — the legendary budget substrate. Rich, effective, and nearly free. The cap prevents mess; mineralize the soil first (wet/dry cycles) to avoid ammonia spikes.
- Pool filter sand + root tabs: $10 for 50 lbs of sand, root tabs for heavy feeders — the cheapest viable planted substrate. Inert, clean, and perfectly fine for water-column feeders and epiphytes.
- Skip: exotic layered systems on a budget. One good substrate, done well, beats a fancy system done cheaply.
Light, Filter, Heater: The Budget Picks
- Light: a basic full-spectrum LED ($25–40 for 10–20 gallons) grows 90% of beginner plants. You don't need app control and sunrise simulation — you need photons. Our low-tech plant lists thrive under budget lights; reserve premium lighting for when your skills demand it.
- Filter: sponge filter + air pump ($15–20 total) — biologically excellent, shrimp-safe, nearly silent with a good pump. HOBs ($20–30) work too. Either cycles a tank as well as a $200 canister; you're paying for silence and aesthetics with premium filters, not filtration.
- Heater: adjustable 50–100W ($15–20). Don't go cheaper — heater failure is the budget cut that kills livestock. This is the one "cheap" item to buy mid-range.
- CO2: skip it. Budget + low-tech is a proven combination — our carpeting without CO2 and low-tech jungle guides are the budget aquascaper's canon. A citric-acid DIY kit ($30) is the only budget CO2 worth considering, and even that's optional.
Plants: The Cheapest Part (If You're Smart)
- Buy tissue culture: $8–12 per cup, pest-free, and each cup divides into many plantlets — the best value in the hobby.
- Hobbyist cuttings: local clubs and forums sell/swap stem-plant trimmings for pennies — a sandwich bag of Rotala for $5 plants a background.
- Start with fast growers: water sprite, guppy grass, hornwort — nearly free, outcompete algae while slow plants establish, then thin them out.
- One purchase, many tanks: stem plants propagate infinitely from cuttings; a $20 initial plant order becomes hundreds of dollars of plants within months. Buy once, propagate forever.
- Emersed/dry-start: our dry start method multiplies carpeting plants for free — one cup of Monte Carlo becomes a full carpet via emersed spread.
Fertilizer for Pennies: Dry Salts
Commercial liquid fertilizers cost $15–25 per bottle; dry fertilizer salts (potassium nitrate, monopotassium phosphate, CSM+B micros) cost ~$20 for a multi-year supply. Mix your own all-in-one per EI (Estimative Index) recipes freely available online. A $20 digital scale and some bottles, and you're dosing like a pro for less than one bottle of branded ferts. This is the highest-ROI budget move in the hobby after secondhand tanks.
The Under-$100 Build: Complete Plan
A real, beautiful 10-gallon aquascape for under $100:
| Item | Budget source | Cost |
|---|---|---|
| 10-gallon tank | Secondhand / sale | $15 |
| Clip-on LED | Basic full-spectrum | $25 |
| Sponge filter + air pump | Generic | $18 |
| Heater 50W adjustable | Mid-range generic | $16 |
| Substrate (aquasoil, 1 bag) | Generic brand | $22 |
| Hardscape | Found stone/wood | $0 |
| Plants | 2 tissue-culture cups + cuttings | $20 |
| Dechlorinator | Concentrate (lasts a year) | $8 |
| Total | $124 |
Slightly over $100 — trim it by going dirted ($5 soil + sand cap instead of aquasoil: saves $15) or finding a free tank (saves $15), and you're under $100 with a tank that can genuinely win a local contest. The fish come later, after cycling — a betta ($5–15) or a school of ember tetras completes it. See our 10-gallon layouts and 5-gallon ideas for designs that fit this budget.
What NOT to Cheap Out On
- Heater reliability: a $10 preset heater that sticks on kills everything. Buy adjustable, reputable, and consider it non-negotiable.
- Dechlorinator: $8 of concentrate protects every water change for a year. Skipping it kills beneficial bacteria and livestock.
- Test kit: a $25 liquid test kit (not strips) during the first months prevents disasters that cost far more than the kit.
- Patience: free, and the most expensive thing to lack. Rushing the cycle, overstocking early, and "fixing" problems with products instead of water changes are how budget builds become money pits.
Frequently Asked Questions
Can a budget tank really look as good as an expensive one?
In photographs and at first glance: often yes — composition is free, and a well-composed $120 tank beats a poorly composed $1,200 tank. Where money shows: long-term plant health (premium lights/CO2 grow demanding species), convenience (automation, silent gear), and scale. But 90% of what makes visitors say "wow" is layout, and layout costs nothing.
Is secondhand equipment safe?
Tanks: yes, with inspection (silicone, fill-test). Filters/heaters/lights: generally yes — test before trusting with livestock. Never buy secondhand: filter media (toss it, start fresh), anything with visible damage, and heaters older than a few years (replace — they're the highest-failure item).
What's the cheapest way to get CO2?
A citric-acid/baking-soda DIY kit (~$30 initial, pennies per refill) — the only budget CO2 worth running. But honestly, the cheapest CO2 is none: design low-tech from the start (our low-tech jungle and carpet without CO2 guides) and you'll never miss it. Bad CO2 (inconsistent DIY yeast) causes more algae than no CO2.
How do I find a local aquarium club for cheap plants?
Search "[your city] aquarium society" or check forums and social media groups — most metro areas have one. Meetings often include auctions where plants sell for $1–5 per bag. Members give away trimmings freely. A single club meeting can stock a 20-gallon for under $20 while connecting you with mentors.
Should I buy the cheap version of everything and upgrade later?
Strategic cheapness beats universal cheapness: buy cheap where upgrades are easy later (light — swap the fixture; filter — add a second), and buy right where replacement is painful (substrate — tearing out soil to upgrade is a rescape; hardscape — the layout's skeleton). Our rescape guide exists because people learn this the hard way.
What's the #1 budget mistake?
Buying twice — the cheap thing that fails, then the good thing. A $10 heater that kills $40 of fish, "bargain" plants riddled with algae that infest the tank, substrate so bad you rescape in month two. The rule: cheap is fine when it's adequate (sponge filters, generic soil, found stone); it's expensive when it's inadequate and must be replaced.
Wealth Is Optional; Taste Isn't
The budget aquascaper's edge is focus: every dollar spent deliberately, every free resource exploited, every technique learned instead of bought. A found stone, dirted substrate, dry-salt ferts, hobbyist cuttings, and a $25 light — assembled with compositional knowledge — produce tanks that embarrass gear-heavy beginners. Start with the under-$100 plan, join a club, propagate everything, and let skill compound. When your eye eventually demands equipment your wallet can't yet justify, you'll know exactly what to buy and why — which is the real victory. For design inspiration that costs nothing, our Nature Aquarium guide and diagonal composition guide are free masterclasses.
Tissue-culture plants are the exception — they’re grown in sterile gel and adapt with minimal melting, which is part of what you’re paying for. Plants bought submersed from another hobbyist’s tank also transition with little melt, since they’re already in the right form.
Which Plants Melt Most (and Least)
Heavy melters (expect significant leaf loss)
- Cryptocorynes — infamous for “crypt melt,” sometimes dropping every leaf after any disturbance. They almost always recover from the roots within weeks.
- Stem plants grown emersed — rotala, ludwigia, and hygrophila often shed lower emersed leaves while the growing tips transition.
- Amazon swords — emersed-grown swords typically lose their broad oval aerial leaves and replace them with longer submersed ribbon leaves.
Light melters
- Anubias, java fern, bucephalandra — slow-growing rhizome plants transition gradually; occasional old-leaf melt but rarely dramatic.
- Vallisneria — usually transitions well, though it dislikes the move itself and may sulk for a week.
- Floating plants — minimal melt since their leaves were already at the air-water interface.
The Acclimation Protocol
Step 1: Quarantine or dip first
Before acclimating to your tank’s conditions, make sure you’re not acclimating pests along with the plant. Run new arrivals through our quarantine and dip protocol — it adds days upfront but prevents months of regret.
Step 2: Float to temperature-match (30 minutes)
Float the bag or container in your tank for 20–30 minutes to equalize temperature. Plants are less temperature-sensitive than fish, but a 10°F shock on top of transplant stress is an avoidable insult.
Step 3: Trim before planting
Remove any leaves that are already damaged, yellowing, or heavily algae-covered — they won’t recover and they’ll rot in your tank, feeding algae. For stem plants, trim off the bottom inch and any emersed leaves that look unlikely to adapt; the plant wastes energy maintaining leaves it’s going to shed anyway. Keep the healthy growing tips — that’s where recovery starts.
Step 4: Plant correctly the first time
Follow our planting guide — right depth, crown exposed on rosettes, rhizomes unburied on epiphytes. Every uprooting and replanting restarts the acclimation clock, so get placement right on the first attempt. Decide where each plant goes before it goes in the water.
Step 5: Run a gentle first week
For the first 7 days after planting:
- Moderate light — run your normal photoperiod but consider dropping intensity 20–30% if your light is dimmable. Blast-level light on a melting plant grows algae on the dying leaves, not recovery.
- Stable CO2 — if you inject CO2, keep it consistent. Fluctuating CO2 during acclimation is a melt accelerator. If you’re low-tech, this doesn’t apply — see growing without CO2.
- Half-strength fertilizer — new plants with damaged leaves can’t use full dosing, and the excess feeds algae. Ramp to full strength over 2–3 weeks per our fertilizer schedule.
- No disturbance — don’t move, trim, or “check on” new plants for at least two weeks. Every touch resets root establishment. This is especially critical for crypts.
Step 6: Remove melt, keep the base
As emersed leaves melt, remove the mushy material promptly — decaying leaves release ammonia and grow fungus that can spread to healthy tissue. But never discard the plant while the crown, rhizome, or roots are firm and alive. A crypt that’s lost every leaf but has firm roots is a plant that’s about to recover, not a dead plant. Give it 3–4 weeks before judging.
Telling Normal Melt From Real Problems
Normal transition melt:
- Affects oldest/emersed leaves first, newest growth last
- New submersed leaves emerge even as old ones dissolve
- Roots and crown stay firm and white/green
- Timeline: 1–4 weeks, then obvious new growth
Concerning melt (see our full melting diagnosis guide):
- New growth also melts or emerges deformed
- Rhizome or crown turns mushy and brown — this is rot, not transition
- Entire plant dissolves within days with no new growth after 4+ weeks
- Melting spreads to established plants that weren’t recently moved
Buying Tips to Minimize Melt
- Buy submersed-grown when available — hobbyist-grown cuttings transition with almost no melt.
- Choose tissue culture for sensitive species — crypts and delicate stems establish far more reliably from sterile cups.
- Avoid plants already melting in the store tank — some melt is normal, but a plant that’s mostly mush at purchase has less energy for recovery.
- Transport carefully — keep plants damp and out of direct sun/heat. A plant that dries out or cooks in a hot car melts far worse than one transported properly.
The First-Month Timeline: What to Expect Week by Week
Knowing what’s normal when removes most acclimation anxiety. Here’s the typical timeline for a healthy plant adapting to a new tank:
Week 1: The quiet week
Almost nothing visible happens. The plant is growing roots you can’t see and assessing its new environment. Some species (vallisneria, stem plants) may start shedding their lowest leaves. This is normal. Resist the urge to “help” — no moving, no extra fertilizer, no light changes. The most common beginner mistake is intervening during a week when the correct action is nothing.
Week 2: Melt peaks
This is when emersed leaves give up in earnest. Crypts may drop everything; swords shed their broad aerial leaves; stem plants lose lower foliage. It looks catastrophic and it’s usually fine. Keep removing mushy material, keep conditions stable, and watch the crown and growing tips — if those are firm and green, recovery is already underway.
Week 3: The turn
New submersed-adapted leaves emerge — smaller, thinner, often a slightly different shade of green than the emersed foliage. Stem plant tips start growing visibly; crypts push tiny curled leaves from the crown; swords unfurl narrow ribbon leaves. This is the moment most beginners exhale for the first time.
Week 4+: Established
New growth outpaces melt, and the plant is functionally yours. You can resume full-strength fertilizer, normal trimming, and stop treating it as fragile. Some slow growers (anubias, bucephalandra) take 6–8 weeks to show obvious progress — that’s their normal speed, not a problem.
Acclimating Different Plant Formats
Tissue-culture cups
Sterile, pest-free, and already adapted to high-humidity (not emersed) growth — tissue cultures melt the least of any format. Rinse the agar gel off gently (leftover gel rots and feeds fungus), split the portion into small plantlets, and plant per our planting guide. They establish slowly for the first two weeks, then accelerate. No dip needed, minimal acclimation stress — this is the premium experience you’re paying for.
Potted plants
Remove the pot and strip away the rockwool completely — leftover rockwool traps debris and rots. Tease the root mass apart gently; if it’s a dense mat, splitting it into 2–3 smaller portions actually establishes faster than planting one big clump (more growing points, better water flow around roots). Potted plants are usually emersed-grown, so expect the standard 2–4 week melt cycle.
Bare-root / bunched stems
Typically sold as weighted bunches. Remove any bands, foam, or weights, strip the lower leaves, and plant stems individually or in small groups. Bunched stems from the store are often already transitioning — check for new submersed growth at the tips, which tells you the plant is mid-adaptation and will settle quickly.
Hobbyist cuttings
Already submersed-grown and the fastest to establish — often showing new growth within days. The main acclimation factor is water-parameter difference between the two tanks. Float to temperature-match, plant promptly, and they’ll usually take off with minimal melt. This is why experienced hobbyists prefer trading cuttings over buying potted plants.
Frequently Asked Questions
Should I use a “plant starter” or transplant fertilizer?
Products marketed for transplant shock are mostly B-vitamins and mild hormones. They don’t hurt, but there’s no strong evidence they help aquarium plants specifically. Stable conditions and patience outperform any bottle. Save the money for more plants.
My new plant melted completely — bare crown, no leaves. Is it dead?
Probably not, if the crown or rhizome is firm. Crypts and swords routinely lose 100% of their leaves and regrow from the base within a month. The test is firmness: firm and pale/green means alive; mushy and brown/black means rot. Give firm-but-leafless plants a full 4 weeks before declaring them dead.
Can I speed up acclimation with extra light or CO2?
No — and trying usually backfires. A melting plant can’t use extra light; the excess just grows algae on its dying leaves. Keep light moderate and CO2 stable (not boosted) during acclimation. Growth speed comes from the plant’s own adaptation timeline, which you can’t rush, only avoid delaying.
Should new plants go straight into my main display tank?
After quarantine/dipping, yes — there’s no benefit to a separate “growing-in” tank for most plants. They acclimate to your water fastest in the tank they’ll live in. The exception is very delicate species going into a tank with boisterous fish; give those a few weeks in a calm corner or breeder box first.
The Patience Rule
The single most important acclimation skill is restraint: plant it right, set gentle conditions, remove decay, and then leave it alone for a month. The hobbyists with the best plant growth aren’t doing something clever in week one — they’re simply not interfering in weeks two through four while the plants do what they’ve evolved to do. Melt looks like failure and feels like failure, but in most cases it’s the visible part of a plant successfully becoming yours.