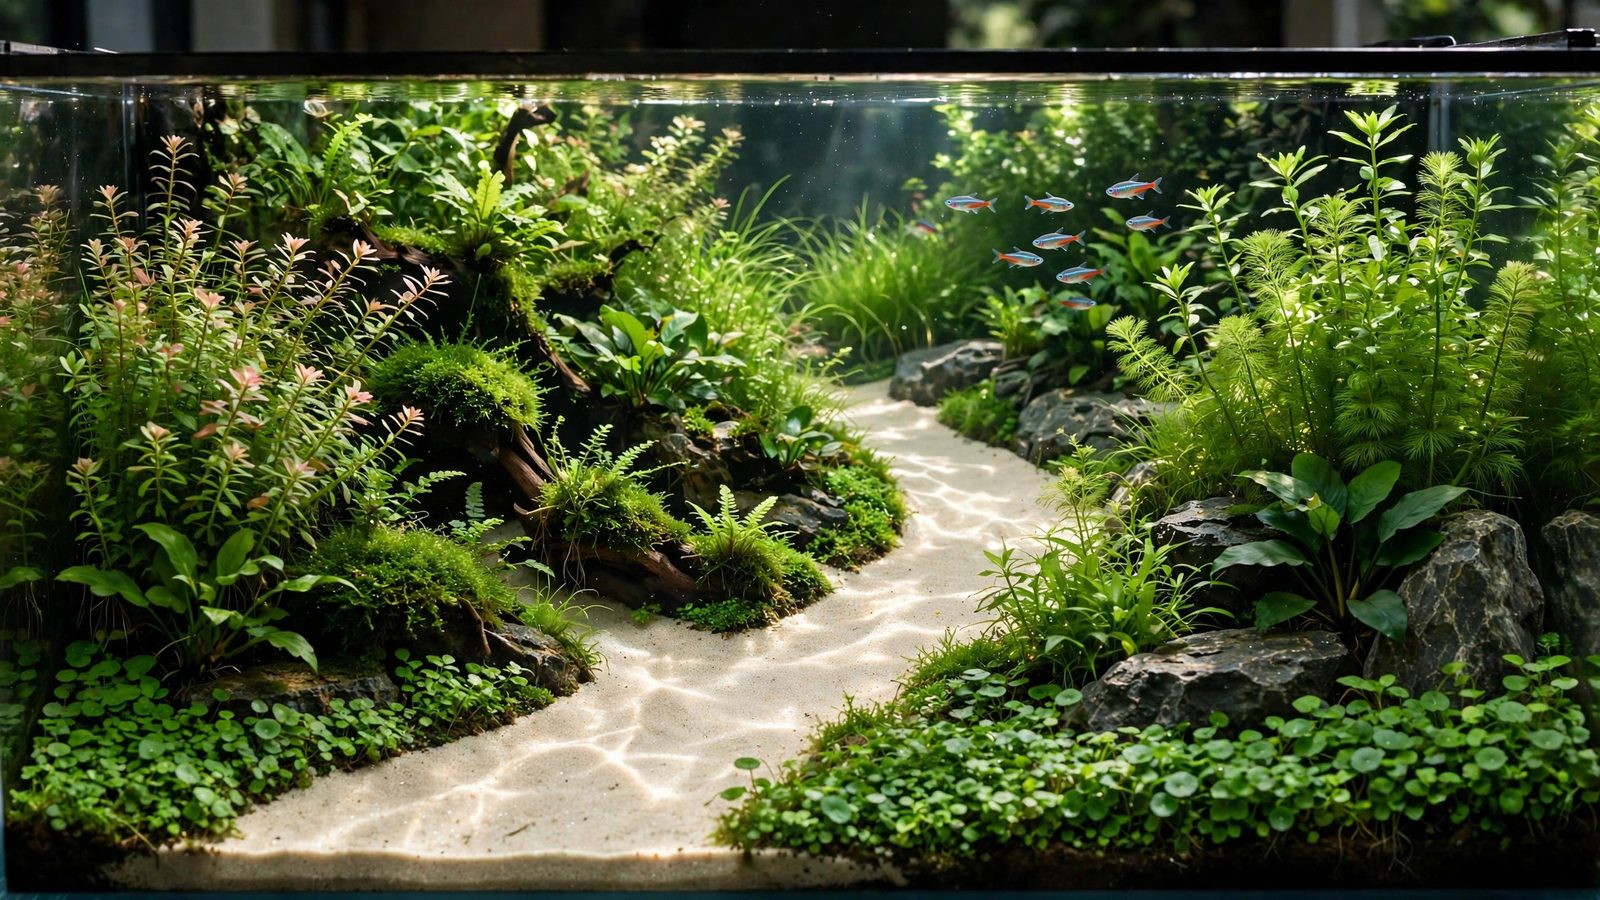
A winding ribbon of pale sand cutting through green planting can transform an ordinary planted tank into a scene with real depth and direction. An aquascape sand path gives the eye somewhere to travel: it suggests a river running through a valley, a trail through a forest, or a quiet shoreline curve, and it makes even a modest aquarium feel bigger than it is. Done well, it looks effortless. Done badly, it blurs into the surrounding substrate within weeks, littered with soil grains, algae dust, and fallen leaves.
This guide walks you through building sand paths that stay clean and crisp: choosing the right sand, shaping the layout, separating the sand from nutrient-rich aqua soil so the two never mix, planting the banks so they frame rather than invade the path, and maintaining it long-term. Most hobbyists find the barrier step — not the sand itself — is what separates a lasting path from a fading one.
Why a Sand Path Changes a Layout
Sand paths do three jobs at once. First, visual flow: a diagonal or curving line leads the eye from the foreground into the background, faking distance in a small tank. Second, contrast: bright sand against darker aqua soil and dense planting reads as open space, the quiet area that lets planted zones breathe. Third, they anchor focal points — a path naturally draws attention to wherever it leads.
Different path styles suit different layouts: a narrow, meandering sand river where planting rises on both sides, a straighter diagonal line that becomes the composition's backbone, or a beach-style apron around an island layout. The construction principles below apply to all of them.
Choosing the Right Sand
Not all sand behaves the same in an aquarium. Most hobbyists reach for one of these:
- River sand (natural tan or beige): looks organic and warm, mixes convincingly with most hardscape.
- White silica sand: dramatic contrast, bright and clean-looking — but it shows every speck of dirt and algae, so it demands stricter maintenance.
- Cosmetic/pool-filter sand: fine, uniform grains that settle into a smooth, flat surface; a favorite for clean minimalist paths.
- Aquarium-specific decorative sands (e.g., ADA Colorado or Congo sand): color-matched to popular hardscape palettes and sized for stable aquascaping.
Grain size matters more than brand. Medium-fine sand (roughly 0.4–0.8 mm) holds its shape without compacting the way ultra-fine powder sand can. Avoid jagged grains with bottom-dwellers, and rinse everything thoroughly before use — cloudy water on day one is almost always dusty sand.
A reliable pick here is CaribSea Super Naturals Moonlight Sand.
Planning the Path Before You Scoop a Single Grain
Sketch the path first using composition rules that keep it looking intentional:
- Vary the width. Natural rivers widen and narrow; a path that pinches in the mid-ground and opens near the front glass looks far more convincing than a uniform stripe.
- Avoid the center. Placing the path's main curve near a golden ratio intersection or a rule-of-thirds line keeps the tank from looking symmetrical and staged.
- Exit the scene. Let the path disappear behind hardscape or into dense planting at the back rather than running straight into the rear glass — it implies the world continues beyond the frame.
- Mind the scale. In a 60 cm tank, a path 4–8 cm wide usually reads best; too wide and it dominates, too narrow and it vanishes under plant overgrowth.
Build the path during the hardscape-first layout process, before flooding — dry layout lets you reshape without clouding the water.
Substrate Separation: The Barrier System
This is the make-or-break step. Sand sitting directly against aqua soil will mix within weeks: soil pellets migrate outward, sand sinks in, and the crisp edge becomes a muddy gradient.
Barrier Materials That Work
| Material | Pros | Watch out for |
|---|---|---|
| Thin acrylic or PET strips | Invisible, rigid, holds a tall edge | Cut edges can be sharp — soften or bury the top rim |
| Coarse filter foam | Flexible curves, roots can pass through harmlessly | Visible if sand shifts; trim flush with soil height |
| Stones or small rocks | Looks natural, doubles as edging | Gaps between stones let soil through; pack tightly |
| Cardboard or paper template | Great for dry layout shaping | Temporary only — remove before flooding |
Installation Sequence
- Lay out the soil first. Build your aqua soil slopes (see sloping substrate for depth) everywhere except where the path will go.
- Set the barrier along the planned path edge, pressing it 1–2 cm into the soil so nothing tunnels underneath. For curves, use flexible foam or bendable plastic.
- Pour the sand last. Fill the path channel up to the same height as the surrounding soil, or a touch lower so debris lands where you can see and remove it.
- Fine-tune the edge with tweezers or an old credit card, brushing soil back behind the barrier and smoothing the sand into a gentle, natural crown.
Most hobbyists bury the barrier so its top edge sits just below the substrate surface — visible barriers are the most common reason a path looks artificial. Plant densely right up to the barrier on the soil side and the seam disappears once grown in.
Building Depth Around the Path
A path only reads as a river or trail if the banks rise above it: surrounding soil should slope upward away from the path, toward the back and sides. Low foreground edges with higher rear soil make the path feel like it runs through a valley — one of the most reliable tricks in creating depth in an aquascape.
Taller hardscape alongside the path reinforces this: a few well-set stones along one bank turn a sand stripe into a riverbed.
Planting the Banks
Plants frame the path and keep the edge from looking raw, but overgrown plants swallow it. The rule is simple: low and tight near the sand, taller as you move away.
- Path edges: carpeting plants like Monte Carlo, dwarf hairgrass, or pearl weed, trimmed short so they creep to the barrier without spilling over it.
- Mid banks: medium stem plants or bushy species (rotala, ludwigia) that add texture contrast without arching over the path.
- Behind and above: taller background stems that close the scene and hide equipment, keeping the focal point placement anchored at the path's destination.
Trim the carpet edge along the path every week or two during your regular water change — five minutes of edging keeps the line razor-sharp.
Keeping Your Aquascape Sand Path Clean Long-Term
White and pale sands show everything: fish waste, melted leaves, soil crumbs, and algae films. Clean sand is a routine, not a product:
- Gentle siphoning weekly. Hover a gravel vacuum 1–2 cm above the sand during water changes; debris lifts without removing sand. A turkey baster works for spot-cleaning tight spots between stones.
- Angle your flow. A gentle current across the path sweeps light debris toward the filter intake instead of letting it settle into the sand bed.
- Address algae early. Diatom dust wipes off with a soft brush; algae mats signal excess organics — clean the sand and check feeding.
- Top up, don't stir. Thin spots appear where sand migrates over months — add a thin fresh layer rather than deep-stirring, which releases trapped waste.
- Keep diggers in mind. Cichlids and loaches will bulldoze your edges — with enthusiastic diggers, choose a narrower path.
Many hobbyists keep a small cleanup crew — a few Amano shrimp or a nerite snail patrolling the path picks off loose film algae between siphon sessions. No animal replaces the siphon, though.
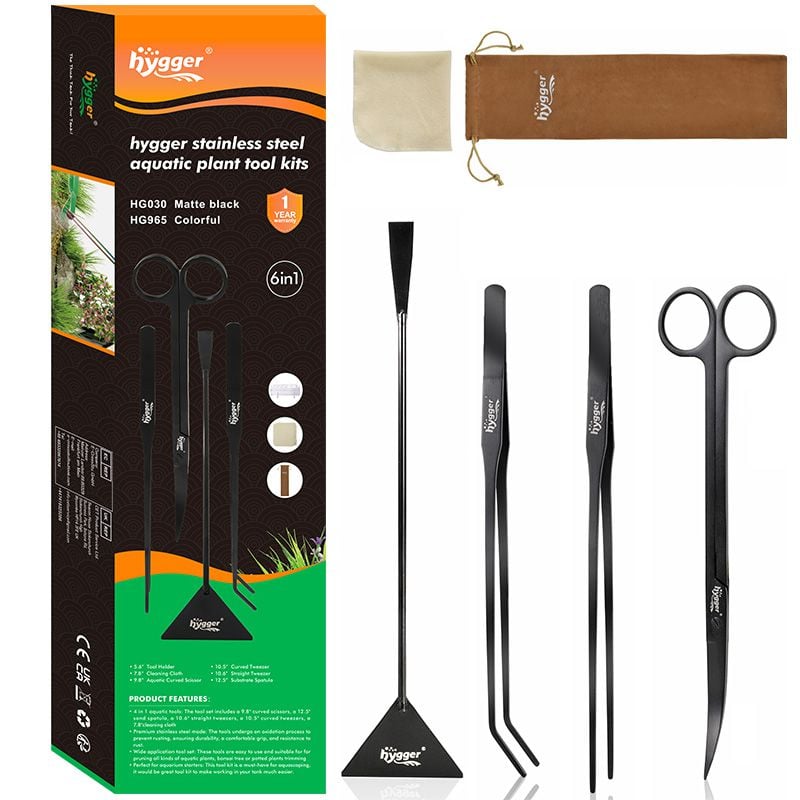
A reliable pick here is aquascaping tool kit.
 ★4.6
hygger 6-in-1 Long Aquarium Aquascaping Tools Kit
Check Price on Amazon ★4.6Common Sand Path Mistakes
- No barrier. The number-one beginner error, and the single item most aquascaping mistakes beginners make lists flag in path builds. The path blurs within a month.
- Soil much higher than sand. A big height gap lets soil pellets rain onto the path every time you bump the tank. Keep the step small or terrace it with stones.
- Path too wide for the tank. In small tanks, an oversized path eats the planting area and looks like a beach, not a river.
- Ignoring negative space. A path surrounded by equally loud detail on both banks loses its power — leave negative space somewhere in the composition so the path can be the quiet element.
- Mixing sand shades. Topping up later with a different shade creates visible patches — buy extra from the same bag at the start.
If a path has already blurred beyond saving, a rescape of just that zone — scoop out the mixed area, reset the barrier, refill with fresh sand — is usually a one-evening job that saves the layout.
Frequently Asked Questions
How deep should the sand be in a pathway?
Most hobbyists use 2–4 cm of sand in the path channel — enough to fully cover the tank bottom and hide the barrier's lower edge, but shallow enough that debris stays on top where the siphon can reach it. Deeper sand risks compacting into low-oxygen pockets, especially with very fine grains. If your path crosses a naturally low spot in the layout, build the surrounding soil up rather than piling extra sand in the path itself.
Can I build a sand path in an already-flooded tank?
Yes, but it takes more patience. Turn off filtration to keep water still, lay a flexible foam barrier by pressing it into the existing soil with long tweezers, then spoon sand into the channel in thin layers. Expect some cloudiness and do a water change afterward. It is messier than a dry build, so most hobbyists prefer installing paths during the initial dry start or pre-flood layout stage whenever possible.
Why does my white sand keep turning green or brown?
Green or brown films on pale sand are almost always diatoms or algae feeding on light plus organics. Reduce excess light on the path, siphon debris weekly, and improve circulation over it. Brushing the top layer lightly with a soft toothbrush during water changes removes the film. Persistent issues usually point to overfeeding or an immature filter rather than the sand itself.
What is the best way to stop soil and sand from mixing?
A buried physical barrier is the standard solution: thin acrylic strips for straight edges, coarse filter foam for curves, or tightly packed small stones for a natural look. Press the barrier 1–2 cm into the soil so nothing tunnels beneath it, and keep its top edge just below the substrate surface. Planting densely right against the barrier hides the seam as the plants grow in.
Is a sand path safe for bottom-dwelling fish and shrimp?
Yes — most hobbyists consider smooth, fine sand one of the safest substrates for corydoras, loaches, and shrimp, since it won't scratch barbels the way coarse gravel can. Choose rounded-grain sand if you keep diggers. The only caveat: heavy digging species will rearrange your path edges, so plan barriers accordingly and expect more frequent touch-ups with enthusiastic diggers like Malawi cichlids.
Can I use play sand or construction sand from a hardware store?
You can, with caution. Rinse it extremely thoroughly — hardware sand is dustier than aquarium-branded options — and test a sample in a bucket of water for several days to check it doesn't alter pH. Avoid sands with added chemicals, dyes, or fragrances. Many hobbyists succeed with hardware-store sand, but aquarium-specific sands save the testing time, which is worth it for a first path build.
Bringing It All Together
A lasting aquascape sand path comes down to five habits: choose a fine-to-medium rounded sand, plan the route with width and composition in mind, install a buried barrier between sand and soil before flooding, plant the banks low-to-high with regular edging, and siphon the path gently every week.
Start modestly: a single curved river through a concave layout teaches you more than an ambitious multi-path design you can't maintain. Pair your path with thoughtful texture contrast between planting zones and the whole tank will feel richer. Once your first path survives six months crisp and clean, you'll have a technique you can reuse in every tank you build afterward.
For further reading on professional layout composition, Amano's own Nature Aquarium concept articles at ADA explain how open sand foregrounds became a signature of the style, and the Tropica layout inspiration gallery offers dozens of planted-tank examples where sand rivers and paths set the composition's direction.