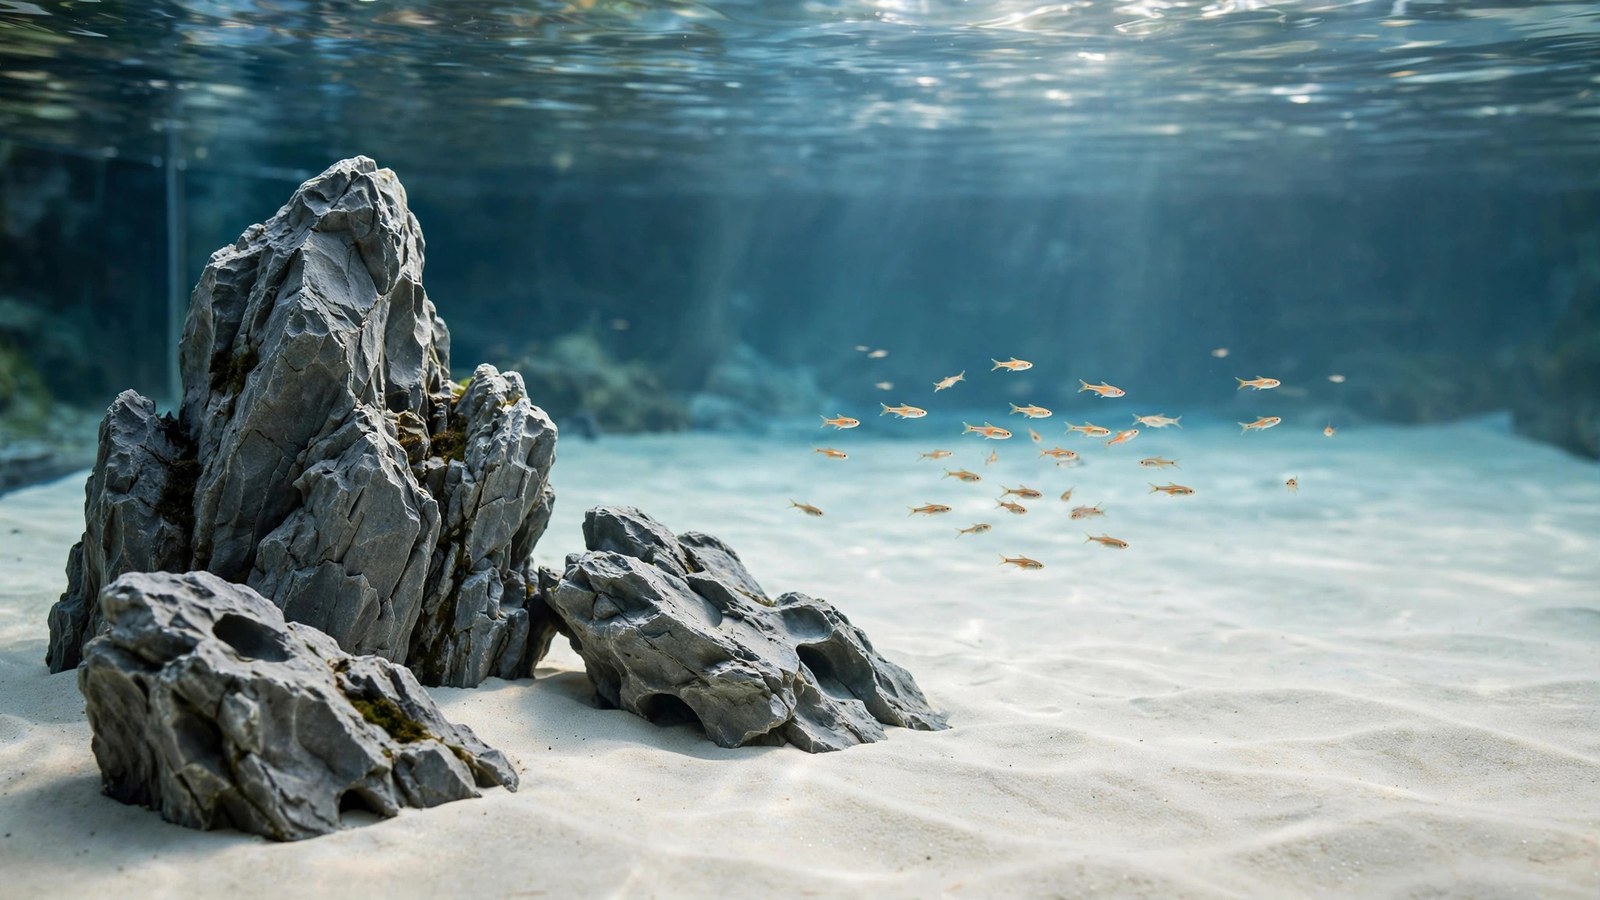
The most underrated design tool in aquascaping isn't a plant, a stone, or a piece of driftwood — it's the empty space between them. Negative space aquascaping is the deliberate use of open water, bare sand, and visual breathing room to make everything else in the tank look better. Walk into any competition-grade aquarium and you'll notice the same thing: the layout doesn't fight for your attention, it guides it. This article explains why negative space works, how to create it, and how the pros use it across every major aquascaping style.
What Negative Space Actually Means in an Aquarium
In aquascaping, negative space is any area deliberately left open — an unplanted sand foreground, a column of clear water above a low layout, a shadowed gap between two stones, a swimming corridor between plant groups. It is not laziness or an unfinished tank; it is a compositional decision made before a single plant goes in.
Beginners almost always do the opposite. The instinct with a new tank is to fill every square inch: carpet across the whole foreground, stems packed wall to wall, hardscape wherever a gap appears. The result feels busy rather than beautiful — a crowded garden with nowhere for the eye to rest. Competition-level aquascapes treat emptiness as a material, budgeting for it the same way they budget for plants and hardscape.
Understanding negative space starts with a shift in how you read a layout. Stop looking only at what is planted and start looking at the shapes of what is not. In a well-composed tank, the open areas have shapes too — a sweeping sand curve, a clean diagonal of open water, a wedge of shadow. When those empty shapes are interesting, the whole scape feels intentional.
Why Empty Space Makes a Scape Look Better
Negative space works on your eye in several concrete ways:
It gives the eye a resting place
A tank packed edge to edge with detail forces the eye to process everything at once, which registers as visual noise. Open areas let the eye pause, reset, and return to the planted zones with fresh attention — which is why a modestly planted layout with generous open water often looks more impressive than a densely packed one.
It makes planted areas look lusher by contrast
A thicket of stems looks denser next to an open sand flat than when it stretches uninterrupted from glass to glass. The bare patch becomes a measuring stick: the eye compares the full area against the empty one and reads the planted zone as abundant. A single well-placed stone looks monumental in an iwagumi but disappears in a crowded layout for exactly this reason.
It creates depth and a sense of scale
In nature you see further across a sand flat than through a dense thicket, so your brain interprets unobstructed areas as far and deep. A layout that keeps its front open automatically feels larger than its glass footprint — the cheapest way to make a 60-liter tank feel like 200. For more on building the illusion of distance, see our guide on how to create depth in an aquascape.
It draws attention to the focal point
An open corridor of sand naturally points at whatever sits at its end, and a clear water column above a feature stone makes it the undisputed hero of the layout. The emptiness is not wasted space — it is a spotlight. Our article on focal point placement in aquascaping shows how open space around a feature makes it command the whole tank.
It mimics natural underwater landscapes
Real underwater scenery is full of emptiness: open sand flats between reefs, clear water above low rock formations, bare gravel beds in streams. A tank that includes these open zones reads as natural because nature itself leaves gaps — one reason nature-style aquascapes feel so convincing.
Techniques for Building Negative Space Into a Layout
Negative space is planned, not accidental: aim for roughly a 60/40 or 70/30 planted-to-open split, decided before planting while hardscape can still move freely.
Foreground sand rivers and beaches
The single most effective negative-space move is a bold, unplanted sand foreground — a river winding between hardscape or a beach sweeping across the front glass. Keep it genuinely bare, with its own clean shape, not a planting bed you haven't gotten around to yet.
Vertical open water above low layouts
Negative space has a vertical dimension too. A low layout with tall open water above it feels serene and grand. This is why nature-style tanks often cap planting at the lower two-thirds of the glass — if every plant reaches the surface, the composition flattens.
Shadowed gaps between hardscape
The dark gaps between stones or wood are negative space too, carrying a different tone — mystery instead of serenity. Leave breathing room between hardscape elements rather than cramming them together: a single-stone layout works because the gap around the stone gives it presence.
Resist planting the front glass line
Do not let plants touch the front glass. A clean strip of open water along the front pane acts as a visual "frame mat" that adds instant depth and makes algae scraping far easier.
Trim to maintain open swimming lanes
Negative space is a maintenance commitment: stem plants will march into open corridors within weeks, so trim specifically to preserve swimming lanes. Many fish, from tetras to rasboras, display far better schooling behavior with clear water to move through.
How the Major Styles Use Negative Space
Every recognized aquascaping style uses negative space — they just use it differently.
| Style | How negative space is used | What it achieves |
|---|---|---|
| Iwagumi | Open sand plains surrounding a few carefully placed stones; very little vertical planting | Stones gain monumental presence; the layout feels calm, minimal, and balanced |
| Nature style | Clear open water above low hardscape; gaps between plant masses suggesting valleys | Recreates the proportions of real lakes and riverbeds; strong sense of depth |
| Jungle style | Carved-out viewing corridors and open foreground pockets within dense planting | Tunnels of visibility through lush growth create mystery and draw the eye inward |
| Dutch style | Restrained "streets" — narrow lanes of contrasting substrate between plant groups | Organizes dense planting into readable rows; color contrast reads as deliberate design |
| Concave layout | A central open area flanked by higher planted sides | The empty center acts as a visual valley, amplifying depth toward the back |
| Triangle composition | Open space on the side opposite the triangle's mass | Asymmetry feels intentional; the eye sweeps from the full side across the empty one |
The iwagumi tradition is the purest study of the subject — with only stones, sand, and carpeting plants, every square centimeter of open sand is a visible design choice. Our iwagumi aquascape layout guide breaks down how those empty areas do the heavy lifting.
Composition frameworks lean on emptiness too. A triangle composition reads as a triangle because the open side defines the diagonal; a concave layout reads as a valley because the center stays clear. And color contrast is amplified by separation — our aquascaping color theory guide shows how spacing colors apart with open areas makes each one more vivid.
Common Mistakes With Negative Space
Leaving parts of a tank empty sounds simple, but it goes wrong in predictable ways. Here are the traps to avoid.
Filling the foreground completely
The most common error: a carpet running unbroken from front glass to back wall. It looks impressive up close but removes the foreground-to-background transition that creates depth. Leave a sand beach or an open margin at the front — the carpet will look lusher for having something to contrast against.
Symmetrical emptiness that looks accidental
A blank patch in the exact center, or equal empty areas on both sides, reads as "something is missing" rather than "this is a design choice." Negative space works best asymmetrically — weighted to one side, sweeping on a diagonal, or clustered in one clean shape. If your empty area looks like a mistake, reshape it until it has a confident, deliberate form.
Open areas that collect detritus
The practical downside: bare areas with no flow become detritus traps. Aim gentle flow across open sand so waste drifts toward the filter intake, and keep open areas accessible for siphoning. Fine sand (1–2 mm grain) helps too, since detritus sits on top instead of sinking in.
Treating emptiness as a leftover
Space that is merely "where nothing grew" never looks as good as space designed from the start. Sketch your layout and draw the empty shapes with the same care as the planted ones, each with a job: a corridor leading to the focal point, a beach transitioning into the background. If you can't describe what an empty area is for, it probably needs redesigning.
Practice Exercise: The Squint Test
Photograph your tank, then squint at the photo (or blur it slightly in your phone's editor) until you see only masses of dark and light. Ask three questions: Do the open areas have interesting shapes? — shapeless blobs need reshaping into curves and confident edges. Do planted and open masses balance? — if the tank is 90 percent planted mass, you have a filling problem. Is there one clear focal point? — the blur should reveal a single dominant mass; if two areas compete, use open space to subordinate the weaker one. Run this test monthly, because tanks evolve and yesterday's balanced composition becomes today's crowded one.
Maintaining Negative Space Long-Term
A layout that breathes on day one can suffocate by month three. Build these habits into your routine: trim every session to keep swimming lanes fully clear; siphon open sand weekly (bare sand shows detritus fast, which enforces good cleaning discipline); re-sculpt sand curves monthly with a flat tool, since substrate migrates; edge carpet plants back from the front glass line; and rerun the squint test after any major rescape, because one change can unbalance the whole composition.
Frequently Asked Questions
How much of my tank should be negative space?
Thirty to forty percent open space is a reliable target for most planted layouts; iwagumi runs closer to half open, dense jungle as little as 20 percent. Choose the ratio that fits your style, and verify it with the squint test once planted.
Won't empty areas just look unfinished?
Only if the emptiness is accidental. A sand beach with clean curves and a clear purpose looks designed, while a random bare patch looks like plants died there. Shape your open areas with intent, keep them clean, and the whole tank looks more polished, not less.
What is the best substrate for open sand areas?
Fine, light-colored river sand works best — its brightness contrasts with planted zones. Grain size of 1–2 mm keeps detritus on the surface for easy siphoning. Avoid mixing open-area substrate with nutrient soil layers at the edges, or the boundary will look muddy.
Do fish need negative space?
Many popular species benefit: schooling fish like tetras and rasboras need clear lanes to display natural schooling, bottom dwellers like corydoras need open sand to forage, and shy species use open sightlines to feel secure. Well-kept open areas are measurably better habitat for most community fish.
How do I stop plants from invading open areas?
Combine physical barriers with weekly edging. Hardscape borders slow runners from crossing into sand zones, but no barrier is permanent. Trim creepers back during every water change before they establish — catching invasions early takes minutes, while reclaiming a sand beach from a mature carpet takes hours.
Can negative space work in a small nano tank?
It matters even more in nano tanks, where every square inch counts visually. A tiny tank filled wall to wall looks cramped, but one with a clear sand foreground and open water above a low layout feels spacious. Scale the technique down — smaller sand shapes, slimmer corridors — but keep the same planted-to-open ratio you would use in a large tank.
Negative space is the difference between a tank that shows off your plants and a tank that shows off your judgment. Plan your emptiness with the same care you plan your planting, keep it clean, and your scape will have the calm, spacious quality that separates good tanks from great ones.
Tissue-culture plants are the exception — they’re grown in sterile gel and adapt with minimal melting, which is part of what you’re paying for. Plants bought submersed from another hobbyist’s tank also transition with little melt, since they’re already in the right form.
Which Plants Melt Most (and Least)
Heavy melters (expect significant leaf loss)
- Cryptocorynes — infamous for “crypt melt,” sometimes dropping every leaf after any disturbance. They almost always recover from the roots within weeks.
- Stem plants grown emersed — rotala, ludwigia, and hygrophila often shed lower emersed leaves while the growing tips transition.
- Amazon swords — emersed-grown swords typically lose their broad oval aerial leaves and replace them with longer submersed ribbon leaves.
Light melters
- Anubias, java fern, bucephalandra — slow-growing rhizome plants transition gradually; occasional old-leaf melt but rarely dramatic.
- Vallisneria — usually transitions well, though it dislikes the move itself and may sulk for a week.
- Floating plants — minimal melt since their leaves were already at the air-water interface.
The Acclimation Protocol
Step 1: Quarantine or dip first
Before acclimating to your tank’s conditions, make sure you’re not acclimating pests along with the plant. Run new arrivals through our quarantine and dip protocol — it adds days upfront but prevents months of regret.
Step 2: Float to temperature-match (30 minutes)
Float the bag or container in your tank for 20–30 minutes to equalize temperature. Plants are less temperature-sensitive than fish, but a 10°F shock on top of transplant stress is an avoidable insult.
Step 3: Trim before planting
Remove any leaves that are already damaged, yellowing, or heavily algae-covered — they won’t recover and they’ll rot in your tank, feeding algae. For stem plants, trim off the bottom inch and any emersed leaves that look unlikely to adapt; the plant wastes energy maintaining leaves it’s going to shed anyway. Keep the healthy growing tips — that’s where recovery starts.
Step 4: Plant correctly the first time
Follow our planting guide — right depth, crown exposed on rosettes, rhizomes unburied on epiphytes. Every uprooting and replanting restarts the acclimation clock, so get placement right on the first attempt. Decide where each plant goes before it goes in the water.
Step 5: Run a gentle first week
For the first 7 days after planting:
- Moderate light — run your normal photoperiod but consider dropping intensity 20–30% if your light is dimmable. Blast-level light on a melting plant grows algae on the dying leaves, not recovery.
- Stable CO2 — if you inject CO2, keep it consistent. Fluctuating CO2 during acclimation is a melt accelerator. If you’re low-tech, this doesn’t apply — see growing without CO2.
- Half-strength fertilizer — new plants with damaged leaves can’t use full dosing, and the excess feeds algae. Ramp to full strength over 2–3 weeks per our fertilizer schedule.
- No disturbance — don’t move, trim, or “check on” new plants for at least two weeks. Every touch resets root establishment. This is especially critical for crypts.
Step 6: Remove melt, keep the base
As emersed leaves melt, remove the mushy material promptly — decaying leaves release ammonia and grow fungus that can spread to healthy tissue. But never discard the plant while the crown, rhizome, or roots are firm and alive. A crypt that’s lost every leaf but has firm roots is a plant that’s about to recover, not a dead plant. Give it 3–4 weeks before judging.
Telling Normal Melt From Real Problems
Normal transition melt:
- Affects oldest/emersed leaves first, newest growth last
- New submersed leaves emerge even as old ones dissolve
- Roots and crown stay firm and white/green
- Timeline: 1–4 weeks, then obvious new growth
Concerning melt (see our full melting diagnosis guide):
- New growth also melts or emerges deformed
- Rhizome or crown turns mushy and brown — this is rot, not transition
- Entire plant dissolves within days with no new growth after 4+ weeks
- Melting spreads to established plants that weren’t recently moved
Buying Tips to Minimize Melt
- Buy submersed-grown when available — hobbyist-grown cuttings transition with almost no melt.
- Choose tissue culture for sensitive species — crypts and delicate stems establish far more reliably from sterile cups.
- Avoid plants already melting in the store tank — some melt is normal, but a plant that’s mostly mush at purchase has less energy for recovery.
- Transport carefully — keep plants damp and out of direct sun/heat. A plant that dries out or cooks in a hot car melts far worse than one transported properly.
The First-Month Timeline: What to Expect Week by Week
Knowing what’s normal when removes most acclimation anxiety. Here’s the typical timeline for a healthy plant adapting to a new tank:
Week 1: The quiet week
Almost nothing visible happens. The plant is growing roots you can’t see and assessing its new environment. Some species (vallisneria, stem plants) may start shedding their lowest leaves. This is normal. Resist the urge to “help” — no moving, no extra fertilizer, no light changes. The most common beginner mistake is intervening during a week when the correct action is nothing.
Week 2: Melt peaks
This is when emersed leaves give up in earnest. Crypts may drop everything; swords shed their broad aerial leaves; stem plants lose lower foliage. It looks catastrophic and it’s usually fine. Keep removing mushy material, keep conditions stable, and watch the crown and growing tips — if those are firm and green, recovery is already underway.
Week 3: The turn
New submersed-adapted leaves emerge — smaller, thinner, often a slightly different shade of green than the emersed foliage. Stem plant tips start growing visibly; crypts push tiny curled leaves from the crown; swords unfurl narrow ribbon leaves. This is the moment most beginners exhale for the first time.
Week 4+: Established
New growth outpaces melt, and the plant is functionally yours. You can resume full-strength fertilizer, normal trimming, and stop treating it as fragile. Some slow growers (anubias, bucephalandra) take 6–8 weeks to show obvious progress — that’s their normal speed, not a problem.
Acclimating Different Plant Formats
Tissue-culture cups
Sterile, pest-free, and already adapted to high-humidity (not emersed) growth — tissue cultures melt the least of any format. Rinse the agar gel off gently (leftover gel rots and feeds fungus), split the portion into small plantlets, and plant per our planting guide. They establish slowly for the first two weeks, then accelerate. No dip needed, minimal acclimation stress — this is the premium experience you’re paying for.
Potted plants
Remove the pot and strip away the rockwool completely — leftover rockwool traps debris and rots. Tease the root mass apart gently; if it’s a dense mat, splitting it into 2–3 smaller portions actually establishes faster than planting one big clump (more growing points, better water flow around roots). Potted plants are usually emersed-grown, so expect the standard 2–4 week melt cycle.
Bare-root / bunched stems
Typically sold as weighted bunches. Remove any bands, foam, or weights, strip the lower leaves, and plant stems individually or in small groups. Bunched stems from the store are often already transitioning — check for new submersed growth at the tips, which tells you the plant is mid-adaptation and will settle quickly.
Hobbyist cuttings
Already submersed-grown and the fastest to establish — often showing new growth within days. The main acclimation factor is water-parameter difference between the two tanks. Float to temperature-match, plant promptly, and they’ll usually take off with minimal melt. This is why experienced hobbyists prefer trading cuttings over buying potted plants.
Frequently Asked Questions
Should I use a “plant starter” or transplant fertilizer?
Products marketed for transplant shock are mostly B-vitamins and mild hormones. They don’t hurt, but there’s no strong evidence they help aquarium plants specifically. Stable conditions and patience outperform any bottle. Save the money for more plants.
My new plant melted completely — bare crown, no leaves. Is it dead?
Probably not, if the crown or rhizome is firm. Crypts and swords routinely lose 100% of their leaves and regrow from the base within a month. The test is firmness: firm and pale/green means alive; mushy and brown/black means rot. Give firm-but-leafless plants a full 4 weeks before declaring them dead.
Can I speed up acclimation with extra light or CO2?
No — and trying usually backfires. A melting plant can’t use extra light; the excess just grows algae on its dying leaves. Keep light moderate and CO2 stable (not boosted) during acclimation. Growth speed comes from the plant’s own adaptation timeline, which you can’t rush, only avoid delaying.
Should new plants go straight into my main display tank?
After quarantine/dipping, yes — there’s no benefit to a separate “growing-in” tank for most plants. They acclimate to your water fastest in the tank they’ll live in. The exception is very delicate species going into a tank with boisterous fish; give those a few weeks in a calm corner or breeder box first.
The Patience Rule
The single most important acclimation skill is restraint: plant it right, set gentle conditions, remove decay, and then leave it alone for a month. The hobbyists with the best plant growth aren’t doing something clever in week one — they’re simply not interfering in weeks two through four while the plants do what they’ve evolved to do. Melt looks like failure and feels like failure, but in most cases it’s the visible part of a plant successfully becoming yours.