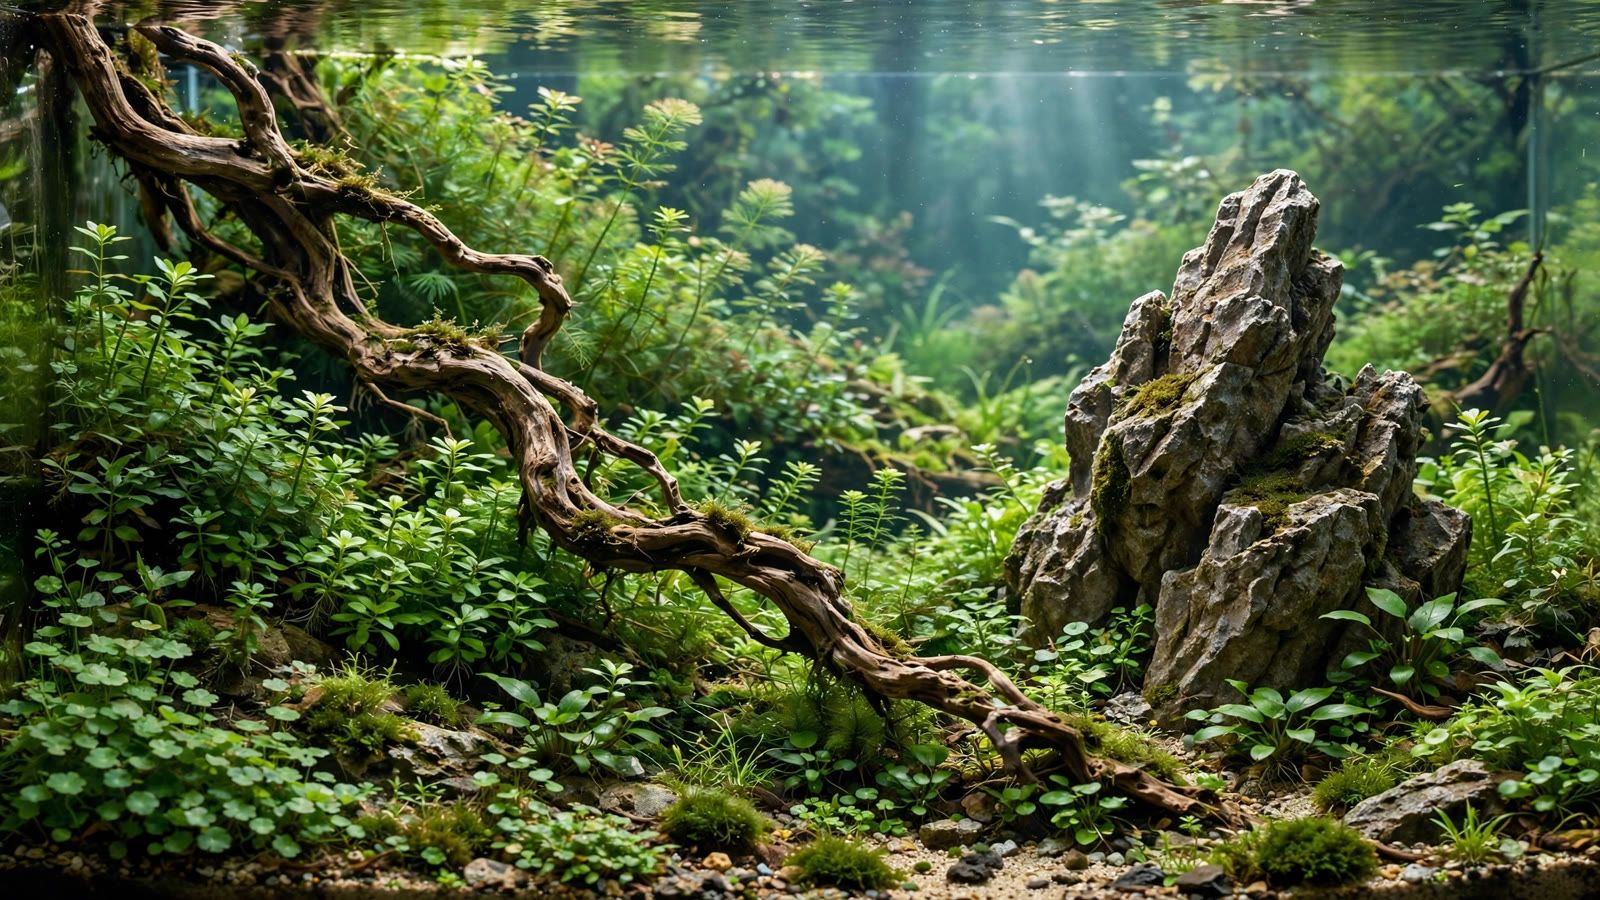
Some aquascapes feel calm and inevitable, the way a river bend or a stand of trees feels — you never wonder where to look, because the layout leads you there. Often those layouts were built on golden ratio aquascaping, the practice of dividing a tank's length, height, and planting heights according to the ratio 1:1.618. It is the same proportion found in nautilus shells, pine cones, and branching trees, and it is why a scape built on it reads as "natural" even when every stone was deliberately placed.
What the Golden Ratio Is — and Why It Reads as Natural
The golden ratio, denoted by the Greek letter phi (φ), is approximately 1.618 — a number with a thoroughly documented mathematical definition on Wikipedia. It has one defining property: if you divide a length into a larger segment and a smaller segment, the ratio of the whole to the larger segment equals the ratio of the larger segment to the smaller one. In plain terms, 1.618 ÷ 1 = 1 ÷ 0.618. The parts relate to each other the way the whole relates to the parts, and that self-similarity shows up constantly in nature — the spiral of a sunflower head, the branching of river systems, the proportions of leaves around a stem.
Human vision seems tuned to that self-similarity, a tendency documented in design and aesthetics research going back centuries. In aquascaping, that translates into a practical advantage: a layout built on φ looks less "designed" than one built on even halves or perfect symmetry, which is exactly the illusion a nature-style scape is trying to create.
Golden Ratio Aquascaping vs the Rule of Thirds: How They Differ
The rule of thirds and the golden ratio are often confused, and they do overlap in purpose — both keep the focal point off-center. But they are different systems, and knowing the difference helps you choose the right one. The rule of thirds divides the tank into three equal columns and puts focal elements on the grid intersections, at roughly 33% and 67% of the tank length. Our site's rule of thirds aquascaping guide covers that 3×3 grid approach in full, including worked examples for standard tank sizes.
The golden ratio divides the tank at roughly 38% and 62% of its length instead of 33% and 67%. That 4–5% shift matters more than it sounds: the golden-ratio focal zone sits slightly closer to the center than the thirds grid, which makes the composition feel a touch more anchored while still avoiding the dead, static feel of a centered focal point. Think of thirds as the bold, simple option and phi as the subtle one.
The differences go further than placement. Thirds is a two-dimensional grid system — it tells you where to put things on the viewing plane. The golden ratio is a proportion system that extends into three dimensions: it also governs planting heights (via Fibonacci numbers), hardscape flow (via the golden spiral), and the relative depth of foreground, midground, and background. If you only care about horizontal placement, the thirds grid is faster. If you want the ratio to organize the whole scape — height, depth, and flow — the golden ratio is the more complete system. Many scapers use both: thirds for quick initial placement, then refine toward golden-ratio points.
Dividing Your Tank Into Golden Sections
The core technique takes five minutes:
- Measure your tank's internal length (glass to glass, not the advertised size).
- Divide it by 1.618 — or multiply it by 0.618 — to get the golden line's distance from one end.
- Mark that line with a small piece of masking tape on the top rim.
- Place your main focal element on the line, and the composition's weight in the larger zone.
- Leave the smaller zone open: carpet, open sand, or a single subordinate element.
Worked example: a 60 cm tank
60 ÷ 1.618 = 37.1 cm. Measure 37.1 cm from the left edge (or the right — pick the side that suits your viewing room) and mark that line. Your main focal element sits there. The remaining section is 22.9 cm, and 37.1 : 22.9 is itself a golden ratio — the two zones relate the way nature's branches relate. Place the composition's weight in the 37 cm zone, and let the 23 cm zone breathe: open sand, low carpeting plants, or a single subordinate stone. This is the classic golden-section split, and it is the single most useful measurement in golden ratio aquascaping.
Worked example: a 90 cm tank
90 ÷ 1.618 = 55.6 cm. The golden line sits 55.6 cm from your chosen end, leaving a 34.4 cm secondary zone. In a 90 cm tank you have room to subdivide further: divide the 55.6 cm primary zone by 1.618 again to find a subordinate focal line inside it, ideal for a second stone grouping or a trailing wood branch. Each recursive division yields zones that relate harmoniously, so layered compositions feel inevitable rather than cluttered.
You don't need to carry a calculator to the fish room — mark the measurement once with masking tape on the tank's top rim while you build, then remove it when the hardscape is set. For other common lengths: 30 cm tanks mark at 18.5 cm, 45 cm at 27.8 cm, and 120 cm at 74.2 cm. Within a centimeter is close enough; phi is a guideline, not a laser line.
The Golden Spiral in Hardscape Flow
The golden rectangle can be subdivided into squares whose side lengths follow the Fibonacci sequence (1, 1, 2, 3, 5, 8…), and drawing quarter-circle arcs through those squares produces the golden spiral — the curve of a nautilus shell. In aquascaping, that spiral becomes a flow line for hardscape.
Imagine the spiral's tight inner coil over your primary golden line, then let it unfurl across the tank: the largest stone at the coil, progressively smaller stones trailing along the spiral's path, each roughly 0.618 the size of the previous one. Wood works the same way — the thickest trunk or root mass at the focal line, branches thinning and sweeping along the spiral direction toward the open zone. The result is a composition that seems to "grow" across the tank, because the eye follows the same expanding curve it follows in a shell or a fern frond.
Combine the spiral with thoughtful focal point placement and you get layouts where the focal stone doesn't just sit in the right place — it anchors a visible current that pulls the viewer through the whole scape. Contest-winning nature layouts almost always have this quality, whether or not the scaper measured it.
Fibonacci Planting Heights
Phi organizes the vertical axis through the Fibonacci sequence (1, 1, 2, 3, 5, 8, 13…), in which each number is the sum of the two before it. The ratio of consecutive Fibonacci numbers converges on 1.618, so planting heights arranged in Fibonacci steps echo the golden ratio naturally.
In practice, assign your background plants to height tiers following the sequence. If your tallest background stem is 8 "units" tall, the next tier down should be about 5 units, then 3, then 2, then 1 at the front. Just think in tiered steps where each step is visibly shorter than the last, with the biggest drop between the tallest and next-tallest tiers. This produces the stepped, naturalistic hedge of a mature nature aquarium rather than the flat wall of a trimmed Dutch street.
The same thinking applies to stone groupings: a primary stone of, say, 15 cm pairs with a secondary stone near 9 cm (15 × 0.618) and a tertiary near 6 cm. When your hardscape sizes relate by 0.618, the group reads as one formation rather than a pile of unrelated rocks. This sizing discipline pairs well with triangle composition principles, where the tallest element and the lowest corner define the slope.
| Planting tier (front to back) | Fibonacci unit | Typical height |
|---|---|---|
| Foreground carpet | 1 | 2–3 cm |
| Low midground | 2 | 5–6 cm |
| Midground | 3 | 8–10 cm |
| Tall background | 5 | 13–16 cm |
| Backdrop stems | 8 | 20–25 cm |
Golden Depth: Foreground, Midground, and Background
The golden ratio also organizes the tank front-to-back. In a standard tank, apply phi to the depth the same way you applied it to the length: the background zone — where the tallest plants and the main hardscape mass live — should occupy roughly the back 62% of the substrate depth, with the foreground carpet occupying the front 38%. In a 45 cm deep tank, that means about 28 cm of planted depth behind and 17 cm of open foreground in front.
This 62/38 split is why creating depth in an aquascape so often involves a generously sloped substrate: the slope builds the golden depth division in three dimensions. Layer a second division on top — the midground band at the golden section of the background zone — and you get the classic three-band nature layout: a wide midground, a deep planted background, and a foreground that feels spacious rather than cramped.
Height works the same way. If your tank is 45 cm tall, the visual "horizon" — the highest point your hardscape or planting reaches — reads most naturally at about 28 cm (45 × 0.618), leaving the top third as open water. That headroom is the negative space that lets the scape breathe, which is why negative space technique and golden-ratio layouts are such natural partners.
Common Mistakes With the Golden Ratio
Centering the focal point anyway. The single most common failure: scapers learn the measurement, then drift the main stone back toward the middle "because it looks better." It looks better for about a minute. A centered focal point splits the viewer's attention into two equal halves, which is precisely the static, poster-like feeling the ratio exists to avoid. Trust the measurement through the awkward phase — compositions almost always look wrong halfway through a build.
Making it symmetric. A mirror-image layout with golden points on both sides is just symmetry with extra steps. The golden ratio organizes asymmetry; if your left and right sides balance exactly, you've built two competing focal zones and the composition has no resting place. Keep the weight on one golden line.
Using it as a grid. Phi is a proportion system, not a placement grid. Scapers who mark every golden subdivision and then put something on each line end up with busy, over-designed layouts — the exact opposite of the natural look. One primary golden line, one subordinate line at most; the rest of the tank should feel unmeasured.
Forgetting it in the planting. A hardscape placed at golden sections but planted in uniform-height hedges wastes the ratio. The planting heights need the Fibonacci treatment too, or the scape's vertical axis contradicts its horizontal one. When a layout looks "designed but flat," uniform plant heights are usually the culprit.
Adapting the Ratio for Cube Tanks vs Long Tanks
Long tanks (90 cm and up). This is phi's home territory: room for recursive subdivision and a full golden spiral across the hardscape. The length also lets you express the ratio as texture — a densely planted 55 cm zone against an open 35 cm zone in a 90 cm tank is the ratio made visible, not just measured.
Cube tanks (25–35 cm). In a cube, the length and depth are equal, so horizontal golden divisions matter less. Shift the ratio to the vertical axis: place the focal stone's peak at about 62% of the tank height, and arrange the hardscape dimensions — width, depth, height — in Fibonacci proportion to each other. A cube scape with a 15 cm tall main stone, a 9 cm secondary, and 6 cm of foreground depth is still golden-ratio aquascaping, just working in volume rather than in length.
Nano tanks. Below about 25 cm, measuring becomes theater — you can barely fit two zones. Instead, work the ratio into relative sizes: plants and stones sized by 0.618 relationships to each other, and one clear dominant element with clearly subordinate companions. The eye reads proportion, not centimeters.
For style-specific applications — how phi behaves inside a minimalist stone layout versus a lush nature composition — our iwagumi layout guide and the broader aquascape planning process build on these foundations. Mark the golden line before a single stone goes in; the ratio only works if it shapes decisions from the beginning.
Frequently Asked Questions
Is the golden ratio really found in nature, or is that a myth?
Both, honestly. Phi appears genuinely in plant phyllotaxis, nautilus shells, and branching patterns — but it is also over-claimed for famous buildings where the measurements don't hold up. For aquascaping, the debate doesn't matter: compositions built on 1.618 consistently read as more natural than those built on halves or thirds, which you can verify by comparing layouts yourself.
Do I need special tools to lay out golden sections?
No. Divide your tank length by 1.618 — or multiply it by 0.618 — and mark the line with a small piece of masking tape on the top rim. Remove it once the hardscape is set. The golden spiral can be sketched freehand on paper as a placement guide; precision beyond a centimeter or two has no visible payoff in a planted tank.
Can I combine the golden ratio with the rule of thirds?
Yes, and most experienced scapers do. Use the thirds grid for fast initial placement, then shift focal elements toward the golden line (about 4–5% closer to center) and organize heights and depth by phi. The systems agree on the important thing — keep the focal point off-center — and the golden ratio simply extends that logic into the vertical and depth axes.
Does the golden ratio work for Dutch-style tanks?
Partially. The Fibonacci height tiers translate beautifully to Dutch streets, where terraced plant heights are the whole art form. But Dutch style deliberately uses symmetry and centered groupings for its formal effect, so the golden focal placement conflicts with the style's intent. Use phi for heights in Dutch tanks; leave the asymmetric focal placement to nature and iwagumi styles.
What if my tank is already set up — can I retrofit the ratio?
Usually, yes. Shift the perceived focal line without moving hardscape: trim or let grow the background plants so the tallest point lands on the golden line, thin one side to open a breathing zone, or move a single subordinate stone to strengthen the spiral. A perfectly centered hardscape usually needs at least one stone relocated.
Let Phi Do the Quiet Work
The golden ratio's power is that it disappears. Nobody looks at a great nature scape and thinks "nice phi division" — they think the tank looks like a place, not a display. Measure once, place deliberately, then let planting, growth, and time blur the geometry into something that feels found rather than made. That quiet naturalness is the whole point of golden ratio aquascaping.
Tissue-culture plants are the exception — they’re grown in sterile gel and adapt with minimal melting, which is part of what you’re paying for. Plants bought submersed from another hobbyist’s tank also transition with little melt, since they’re already in the right form.
Which Plants Melt Most (and Least)
Heavy melters (expect significant leaf loss)
- Cryptocorynes — infamous for “crypt melt,” sometimes dropping every leaf after any disturbance. They almost always recover from the roots within weeks.
- Stem plants grown emersed — rotala, ludwigia, and hygrophila often shed lower emersed leaves while the growing tips transition.
- Amazon swords — emersed-grown swords typically lose their broad oval aerial leaves and replace them with longer submersed ribbon leaves.
Light melters
- Anubias, java fern, bucephalandra — slow-growing rhizome plants transition gradually; occasional old-leaf melt but rarely dramatic.
- Vallisneria — usually transitions well, though it dislikes the move itself and may sulk for a week.
- Floating plants — minimal melt since their leaves were already at the air-water interface.
The Acclimation Protocol
Step 1: Quarantine or dip first
Before acclimating to your tank’s conditions, make sure you’re not acclimating pests along with the plant. Run new arrivals through our quarantine and dip protocol — it adds days upfront but prevents months of regret.
Step 2: Float to temperature-match (30 minutes)
Float the bag or container in your tank for 20–30 minutes to equalize temperature. Plants are less temperature-sensitive than fish, but a 10°F shock on top of transplant stress is an avoidable insult.
Step 3: Trim before planting
Remove any leaves that are already damaged, yellowing, or heavily algae-covered — they won’t recover and they’ll rot in your tank, feeding algae. For stem plants, trim off the bottom inch and any emersed leaves that look unlikely to adapt; the plant wastes energy maintaining leaves it’s going to shed anyway. Keep the healthy growing tips — that’s where recovery starts.
Step 4: Plant correctly the first time
Follow our planting guide — right depth, crown exposed on rosettes, rhizomes unburied on epiphytes. Every uprooting and replanting restarts the acclimation clock, so get placement right on the first attempt. Decide where each plant goes before it goes in the water.
Step 5: Run a gentle first week
For the first 7 days after planting:
- Moderate light — run your normal photoperiod but consider dropping intensity 20–30% if your light is dimmable. Blast-level light on a melting plant grows algae on the dying leaves, not recovery.
- Stable CO2 — if you inject CO2, keep it consistent. Fluctuating CO2 during acclimation is a melt accelerator. If you’re low-tech, this doesn’t apply — see growing without CO2.
- Half-strength fertilizer — new plants with damaged leaves can’t use full dosing, and the excess feeds algae. Ramp to full strength over 2–3 weeks per our fertilizer schedule.
- No disturbance — don’t move, trim, or “check on” new plants for at least two weeks. Every touch resets root establishment. This is especially critical for crypts.
Step 6: Remove melt, keep the base
As emersed leaves melt, remove the mushy material promptly — decaying leaves release ammonia and grow fungus that can spread to healthy tissue. But never discard the plant while the crown, rhizome, or roots are firm and alive. A crypt that’s lost every leaf but has firm roots is a plant that’s about to recover, not a dead plant. Give it 3–4 weeks before judging.
Telling Normal Melt From Real Problems
Normal transition melt:
- Affects oldest/emersed leaves first, newest growth last
- New submersed leaves emerge even as old ones dissolve
- Roots and crown stay firm and white/green
- Timeline: 1–4 weeks, then obvious new growth
Concerning melt (see our full melting diagnosis guide):
- New growth also melts or emerges deformed
- Rhizome or crown turns mushy and brown — this is rot, not transition
- Entire plant dissolves within days with no new growth after 4+ weeks
- Melting spreads to established plants that weren’t recently moved
Buying Tips to Minimize Melt
- Buy submersed-grown when available — hobbyist-grown cuttings transition with almost no melt.
- Choose tissue culture for sensitive species — crypts and delicate stems establish far more reliably from sterile cups.
- Avoid plants already melting in the store tank — some melt is normal, but a plant that’s mostly mush at purchase has less energy for recovery.
- Transport carefully — keep plants damp and out of direct sun/heat. A plant that dries out or cooks in a hot car melts far worse than one transported properly.
The First-Month Timeline: What to Expect Week by Week
Knowing what’s normal when removes most acclimation anxiety. Here’s the typical timeline for a healthy plant adapting to a new tank:
Week 1: The quiet week
Almost nothing visible happens. The plant is growing roots you can’t see and assessing its new environment. Some species (vallisneria, stem plants) may start shedding their lowest leaves. This is normal. Resist the urge to “help” — no moving, no extra fertilizer, no light changes. The most common beginner mistake is intervening during a week when the correct action is nothing.
Week 2: Melt peaks
This is when emersed leaves give up in earnest. Crypts may drop everything; swords shed their broad aerial leaves; stem plants lose lower foliage. It looks catastrophic and it’s usually fine. Keep removing mushy material, keep conditions stable, and watch the crown and growing tips — if those are firm and green, recovery is already underway.
Week 3: The turn
New submersed-adapted leaves emerge — smaller, thinner, often a slightly different shade of green than the emersed foliage. Stem plant tips start growing visibly; crypts push tiny curled leaves from the crown; swords unfurl narrow ribbon leaves. This is the moment most beginners exhale for the first time.
Week 4+: Established
New growth outpaces melt, and the plant is functionally yours. You can resume full-strength fertilizer, normal trimming, and stop treating it as fragile. Some slow growers (anubias, bucephalandra) take 6–8 weeks to show obvious progress — that’s their normal speed, not a problem.
Acclimating Different Plant Formats
Tissue-culture cups
Sterile, pest-free, and already adapted to high-humidity (not emersed) growth — tissue cultures melt the least of any format. Rinse the agar gel off gently (leftover gel rots and feeds fungus), split the portion into small plantlets, and plant per our planting guide. They establish slowly for the first two weeks, then accelerate. No dip needed, minimal acclimation stress — this is the premium experience you’re paying for.
Potted plants
Remove the pot and strip away the rockwool completely — leftover rockwool traps debris and rots. Tease the root mass apart gently; if it’s a dense mat, splitting it into 2–3 smaller portions actually establishes faster than planting one big clump (more growing points, better water flow around roots). Potted plants are usually emersed-grown, so expect the standard 2–4 week melt cycle.
Bare-root / bunched stems
Typically sold as weighted bunches. Remove any bands, foam, or weights, strip the lower leaves, and plant stems individually or in small groups. Bunched stems from the store are often already transitioning — check for new submersed growth at the tips, which tells you the plant is mid-adaptation and will settle quickly.
Hobbyist cuttings
Already submersed-grown and the fastest to establish — often showing new growth within days. The main acclimation factor is water-parameter difference between the two tanks. Float to temperature-match, plant promptly, and they’ll usually take off with minimal melt. This is why experienced hobbyists prefer trading cuttings over buying potted plants.
Frequently Asked Questions
Should I use a “plant starter” or transplant fertilizer?
Products marketed for transplant shock are mostly B-vitamins and mild hormones. They don’t hurt, but there’s no strong evidence they help aquarium plants specifically. Stable conditions and patience outperform any bottle. Save the money for more plants.
My new plant melted completely — bare crown, no leaves. Is it dead?
Probably not, if the crown or rhizome is firm. Crypts and swords routinely lose 100% of their leaves and regrow from the base within a month. The test is firmness: firm and pale/green means alive; mushy and brown/black means rot. Give firm-but-leafless plants a full 4 weeks before declaring them dead.
Can I speed up acclimation with extra light or CO2?
No — and trying usually backfires. A melting plant can’t use extra light; the excess just grows algae on its dying leaves. Keep light moderate and CO2 stable (not boosted) during acclimation. Growth speed comes from the plant’s own adaptation timeline, which you can’t rush, only avoid delaying.
Should new plants go straight into my main display tank?
After quarantine/dipping, yes — there’s no benefit to a separate “growing-in” tank for most plants. They acclimate to your water fastest in the tank they’ll live in. The exception is very delicate species going into a tank with boisterous fish; give those a few weeks in a calm corner or breeder box first.
The Patience Rule
The single most important acclimation skill is restraint: plant it right, set gentle conditions, remove decay, and then leave it alone for a month. The hobbyists with the best plant growth aren’t doing something clever in week one — they’re simply not interfering in weeks two through four while the plants do what they’ve evolved to do. Melt looks like failure and feels like failure, but in most cases it’s the visible part of a plant successfully becoming yours.