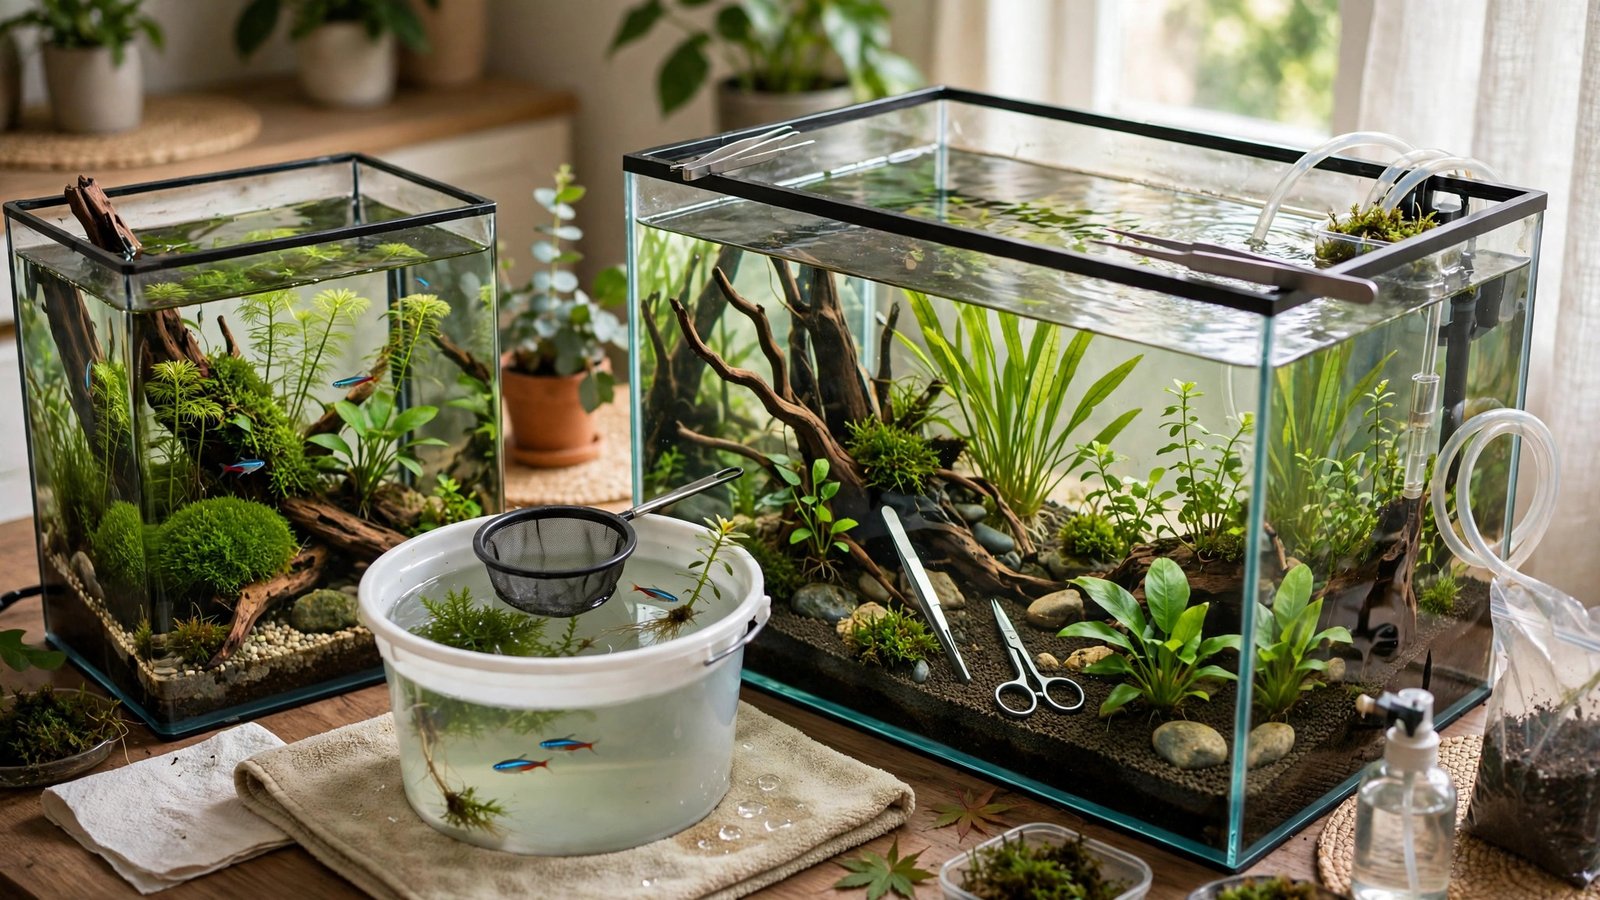
Outgrowing your first planted tank is one of the happiest problems in the hobby — and upgrading to a bigger planted tank is one of the riskiest days your livestock will ever have. When you upgrade, you are not starting from zero: your plants, substrate, filter bacteria, and fish are assets you can carry over, and moving them intelligently can give you an instant-cycled aquarium instead of a six-week waiting room. This guide walks through the full transfer in order: planning and equipment, moving livestock safely, preserving your beneficial bacteria, reusing substrate without triggering a meltdown, replanting, refilling, and the watchful first two weeks that decide whether the upgrade thrives or crashes.
Why Tank Upgrades Fail
Almost every failed upgrade traces back to one of four mistakes. The first is treating the new tank like a brand-new setup: scrubbing everything, replacing all substrate, rinsing filter media under the tap — and then wondering why fish are gasping at the surface on day two. A cycled tank is a living system, and your cycle lives in the filter media, substrate, and plant surfaces you are carrying over. Destroy those on transfer day and you have built yourself a very expensive fish-in cycle.
The second mistake is the opposite: dumping an entire old tank into a new one in one chaotic hour. Pouring buckets of mulm-loaded water into fresh substrate creates an ammonia soup. The third is logistics — no spare containers, no holding tank for fish, a new stand that isn't level — which turns a careful plan into improvisation at exactly the moment your livestock is most vulnerable. The fourth is impatience after the move: restocking and cranking CO2 before the system has stabilized, inviting algae blooms and plant melt.
Done properly, an upgrade transfer runs on a simple principle: keep the biology alive, keep the water clean, and change only one variable at a time. Expect the whole operation to take one long day — morning for teardown, afternoon for the build, evening for livestock.
Planning the Upgrade: Timeline and Equipment for Upgrading to a Bigger Planted Tank
A week before transfer day, decide the two big questions: what substrate to use, and whether the old filter survives. Reusing mature substrate is the single fastest way to an instant cycle, but aquasoil that is more than two years old is often exhausted and dusty — great for bacteria, poor for roots. A common winning recipe is a base layer of rinsed old substrate for biology topped with fresh aquasoil or capped with your chosen new substrate for nutrition. Our deep substrate guide explains layering strategies that work well in this exact situation.
Also decide the filter question now. If the old filter fits the new tank's volume, run it — that canister or hang-on-back holds the majority of your nitrifying bacteria and is your golden ticket. If you are buying a bigger filter, run both in parallel for at least three weeks after the transfer; the old filter seeds the new one. Order any missing hardware — heater wattage for the larger volume, lighting with enough spread, extra substrate, buckets, and a fish-holding tote — so nothing is bought on panic the morning of.
Equipment checklist for transfer day
- Clean food-grade buckets (5-gallon/20-liter) — one per livestock group plus one for plants
- A sturdy fish-holding tote or spare tank with heater and airstone
- Battery or mains air pump, spare heater, thermometer
- Gravel vacuum, planting tweezers, scissors, nets
- New substrate if refreshing, pre-rinsed if required
- Dechlorinator, water test kit (ammonia, nitrite, nitrate, pH)
- Towels, a level, a friend — the new tank will be heavy
Size the new filtration for the bigger tank — a canister rated for the new volume: EHEIM Classic 150 canister filter.
Step 1: Set Up the New Tank Shell First
Before anything living is disturbed, get the new aquarium positioned, leveled, and checked for leaks with plain water — fill it a quarter full, wait an hour, and inspect every seam. Place hardscape dry first: stone and driftwood arrangements are far easier to adjust without water, and this is your chance at a fresh scape rather than a copy of the old one. Decide now whether you are keeping your lighting regime or stepping up — if the new tank is deeper or you want faster growth, read our high-tech setup guide before committing to CO2 plumbing changes on the same day you move livestock.
Then drain the test water, install substrate (old, new, or layered), position hardscape, and mount equipment — but do not fill or start the filter yet. The goal is a dry-built stage waiting for plants, so nothing sits idle in buckets longer than necessary.
Step 2: Move the Livestock to a Safe Holding Station
Fish and shrimp go first, before the tank gets murky. Siphon old tank water into the holding tote (matching water is half the acclimation battle), catch the fish with a soft net, and move them with minimal chasing — corner them against glass gently rather than sweeping the whole tank. Add the heater, airstone, and a piece of filter media or a sponge filter running off your existing filter to keep ammonia processed in the holding water. Cover the tote: stressed fish jump.
Do not feed the morning of the move. Fasting fish produce less ammonia, and a 12–24 hour fast is harmless. Shrimp and snails can ride in a separate bucket with some old water and a plant clump for cover — they are far more sensitive to temperature swings than most fish, so float their bag or bucket near the heater.
Step 3: Preserve Your Beneficial Bacteria
Nitrifying bacteria are your upgrade's most valuable cargo, and they are also the most fragile. They live on surfaces — filter media, sponges, biomedia, substrate grains — and they die when they dry out or meet chlorinated water. The rule is simple: filter media goes straight from the old filter into old tank water or the running new filter, and never dries for more than minutes.
If the old filter is transferring to the new tank, keep it running on a bucket of old tank water during the build so the bacteria colony stays fed and oxygenated. If a new filter is taking over, squeeze a portion of old sponge media directly into the new filter and add the rest of the biomedia alongside the new media. Run both filters in parallel for three weeks minimum — the old one is your insurance policy. Learn what that bacteria is actually doing in our beneficial bacteria guide, because understanding the colony's needs on transfer day is what keeps it alive.
Also carry over some old tank water — not for chemistry, but because plants and fish prefer a familiar environment. However, old water alone does not carry a meaningful bacteria population, so do not rely on it. The bacteria are on the surfaces, and the surfaces are what you must protect.
Re-seed after the move: bottled bacteria backs up the transferred media: API Quick Start.
Step 4: Substrate — Reuse, Refresh, or Replace
Here is the decision matrix:
- Reuse as-is: substrate under two years old, no chronic algae or cyanobacteria, and you like its look. Scoop it into buckets wet, spread it in the new tank first.
- Reuse as a base layer: older aquasoil with tired nutrients. Spread it as the bottom inch, cap with fresh aquasoil or your new substrate of choice.
- Replace: substrate with persistent pest problems (hydra eggs, planaria cysts, snail invasions), or a complete style change. Note: replacing all substrate means you are relying entirely on the old filter for bacteria — make sure it transfers with you.
Do not aggressively wash old substrate on transfer day. Rinsing in tap water kills bacteria; rinsing in old tank water to remove the worst sludge is fine, but the mulm worked into substrate is part of your ecosystem. Fresh aquasoil releases ammonia for its first weeks — a known and manageable phase — so if you are topping with fresh aquasoil, run the filters and do the accelerated cycling routine before livestock goes in.
Step 5: Move and Replant the Plants
Plants travel best in damp, dark conditions — bag stem plants and epiphytes in wet newspaper inside a bucket, or float them in old tank water. Never let roots dry out; even twenty minutes of dry air damages fine root hairs. Uproot gently: wiggle stems out rather than yanking, and trim damaged roots back to healthy white or firm tissue before replanting. This is also the perfect moment to divide overgrown clumps and replant only the healthiest tops.
Plant the new tank while it is shallow — fill to just two or three inches of water so stems stand upright but tweezers still work easily. Work from back to front, tall plants first, carpet last. Epiphytes like anubias, java fern, and bucephalandra get tied or glued to hardscape before any water goes in, exactly as they did in the old tank. Tropica's official plant guides are worth a refresher on correct planting depth and rhizome placement, since rhizome plants buried in substrate rot regardless of how healthy the rest of the transfer was: Tropica's official plant database covers planting technique for every common species.
Expect some plants to look rough for a week or two after the move. Uprooting and replanting stresses roots, and a new substrate chemistry can trigger melt — particularly in cryptocorynes. Do not panic and start dosing everything you own; stable water and patience fix most post-transfer melt.
Step 6: Refill Slowly and Restart the System
Fill the new tank slowly — a plate or plastic bag on the substrate breaks the stream and keeps your careful planting intact. Use dechlorinated water matched to the old tank's temperature. Start the filter (or both filters), heater, and lights on a shortened photoperiod of about six hours for the first week; reduced light while the system settles starves algae of the window it wants most.
Test ammonia and nitrite before adding any livestock. If you carried over filter media and substrate, readings should be zero within hours — this is the instant-cycle payoff. If ammonia reads above 0.25 ppm, hold the fish in the tote with its airstone and do large water changes in the new tank until it reads zero. There is no prize for moving fish on schedule into an ammonia spike.
Condition the full refill volume before restarting the system: Seachem Prime.
The First Two Weeks: What to Watch
Monitor water parameters daily for the first week: ammonia, nitrite, nitrate, and pH. A small nitrite blip around day 3–5 is common even in good transfers — the bacteria colony is recalibrating to the new water volume and substrate. Respond with a 30–50% water change, not chemicals. Daily 20–30% water changes for the first week are the single best habit for a transfer, flushing the dissolved organics that disturbance releases.
Hold off on CO2 changes if you inject — run your existing bubble rate and adjust only after plants show settled growth, usually week two or three. Keep dosing at pre-upgrade levels; do not "feed the bigger tank" proportionally until you see the growth to match. Ramp the photoperiod back to your normal 7–8 hours over the second week, and then fold the new tank into your normal maintenance schedule.
Algae spotters should expect a brief diatom or green-dust cameo. Resist the urge to blackout or nuke with algicides — manual removal, water changes, and the maturing biology will clear it. The upgrade is not truly "done" until the tank has run a full month with stable readings and new growth on the plants; only then resume your normal stocking plans.
Frequently Asked Questions
Will my tank mini-cycle after an upgrade even if I reuse the filter and substrate?
A small one, usually. Moving disturbs bacterial films, the bacteria colony must recalibrate to a larger water volume, and fresh substrate releases organics. Most well-executed transfers show zero or barely-detectable ammonia with a possible brief nitrite blip around days 3–5. Daily testing and water changes for the first week handle it. A full re-cycle only happens if the filter media dried out, met chlorinated water, or was thrown away.
How long can fish stay in the holding tote?
A day or two comfortably with a heater, airstone, and some cycled media; up to a week if you keep up daily partial water changes on the tote. The tote's small volume means ammonia accumulates fast, so do not just leave them — test and change water. Fasting on transfer day helps, but feed lightly after 24 hours. The bigger risk is temperature swing, so keep the tote indoors away from drafts.
Should I keep the same aquascape or redesign it?
An upgrade is the best opportunity you will ever get for a fresh design, since everything is uprooted anyway. Keep it practical though: replicate the old planting zones if your livestock depends on them (shrimp colonies need familiar cover), and remember taller tanks change light requirements. Photograph the old scape before teardown — future you will thank present you when deciding plant placement.
Can I reuse aquasoil that is two or three years old?
As a biological base layer, yes — it is packed with bacteria and mulm. As the main nutrient source, no — exhausted aquasoil has spent its buffering and fertilizer capacity and can crumble into dust that clouds the water. The standard move is an inch of old soil underneath fresh aquasoil or new substrate. Never bake or boil old aquasoil to "clean" it; you would destroy the biology that makes it valuable.
How soon can I add new fish after upgrading?
Wait at least two to four weeks of stable readings and visible new plant growth. The bacteria colony needs time to grow into the larger volume, and the disturbed system is still settling. Adding stock early is the classic way to turn a successful transfer into a mini-crash. When you do add fish, add them in small groups with quarantine, just like any new stocking.
Is CO2 more complicated in a bigger tank?
Slightly: larger water volumes need higher injection rates for the same dissolved CO2 concentration, and diffusion time is longer, so start conservatively and measure with a drop checker over several days rather than copying a bubble count from a smaller tank. Keep CO2 stable during the first two weeks — fluctuating CO2 causes more melt and algae than a low but steady level. Adjust only after plants show settled new growth.
The Upgrade Done Right
Upgrading to a bigger planted tank is really three operations stacked into one day: a livestock evacuation, a biology transplant, and a fresh aquascape build. Plan it as three phases, protect the bacteria and keep the water clean, and the payoff is a larger, instantly mature aquarium instead of a month of anxious cycling. The extra volume buys your fish more stability and your plants more room — and now that you have done a full transfer once, every future tank move will feel routine.