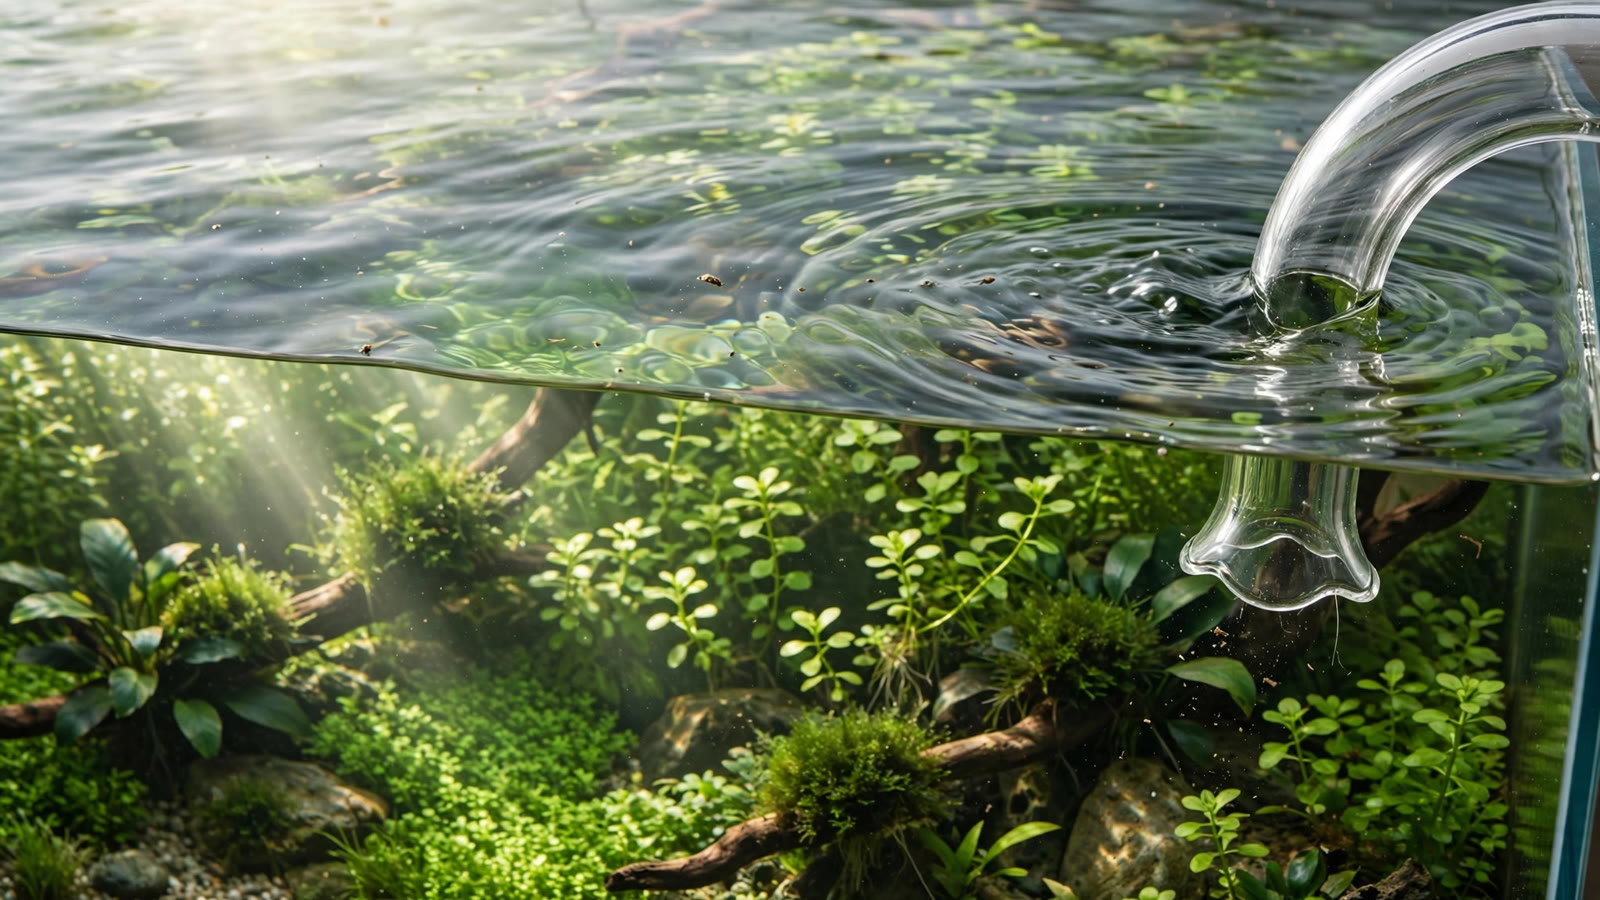
That thin mat is one of the most common cosmetic problems in planted tanks, and a surface skimmer planted tank setup is the most reliable fix for it. The film steals light from your plants, slows gas exchange at the surface, and makes an open-top aquascape look neglected. A surface skimmer — a small intake attachment for your canister filter that drinks from the very top layer of water — clears that film continuously. This guide covers how skimmers work, which type fits your filter, and how to run one without venting the CO2 your plants depend on.
What Is That Film on Your Water?
The sheen on the surface is a protein film (also called a biofilm), a thin mat of dissolved organics, bacteria, uneaten fish food, and plant decomposition products that gather where air meets water. In a planted tank it is almost inevitable: healthy plants shed cells, microorganisms bloom, and proteins from food and waste drift upward. As one veteran aquarist put it, a thin film in a thriving planted tank is a sign that your plants are alive — normal, not a disaster.
Still, "normal" does not mean "desirable." The film blocks light from your carpeting and stem plants, acts like a lid on gas exchange (slowing oxygen in at night and CO2 movement by day), and looks bad in open-top tanks where the surface is part of the display. Skimming is mostly about aesthetics and light — not emergency chemistry. A paper towel laid flat on the surface and lifted off absorbs the film instantly, and a gentle ripple from your outflow disperses it, but both are temporary. A skimmer is the only fix that runs continuously on its own.
How a Surface Skimmer Works
A surface skimmer is not a filter by itself. It is an inflow attachment — it replaces or modifies the intake side of your canister filter so water is pulled from the top millimeter of the water column instead of mid-depth. On glass lily-pipe models, the intake is a self-floating head with a 360-degree intake that rides up and down as the water level changes, so it keeps skimming evenly even after some evaporation.
Surface water — film and all — flows into the floating intake, down through the pipe, into the canister where your media strip out the organics, and back out clean. You add no new powered device; your existing filter does the work. The skimmer simply changes where the filter drinks.
Types of Surface Skimmers
Skimmers come in three broad designs, and the right one depends on your filter, your tank's look, and your budget. Read the fit details after the table — a skimmer that does not match your tubing is just an expensive ornament.
| Type | Best fit | Filter compatibility | Price tier |
|---|---|---|---|
| Standalone cup skimmer | Tanks without a canister filter (hang-on-back or internal filters) | Self-contained or sump-fed; no canister needed | $ (budget) |
| Lily-pipe skimmer inflow | Aquascaped canister-filtered tanks, open-top displays | Replaces the stock canister intake; must match hose size | $$–$$$ (glass premium) |
| Built-in canister skimmer | Users buying or upgrading a canister filter anyway | Ships with compatible canister models only | $$ (bundled) |
Standalone Cup Skimmers
The standalone cup skimmer is a small self-contained unit that sits at the surface, usually powered by an air pump or a small internal pump. It is the budget answer for tanks with a hang-on-back or internal filter and no canister to attach a skimmer inflow to. It works, but it is bulkier and less elegant than lily-pipe designs.
Lily-Pipe Skimmer Inflows
The lily-pipe skimmer is the aquascaper's choice: a glass or stainless steel inflow pipe whose intake floats on the surface. Glass versions are nearly invisible underwater; stainless steel (304-grade, rust-proof) costs more but survives bumps that would shatter glass. Glass demands careful handling and regular pipe-brush cleaning. You are replacing your canister's stock intake, so this is the pick if you already run a canister and care how the hardware looks.
Built-in Canister Skimmers
Some canister filters ship with a surface-skimming intake in the box or as a matched accessory. These are the lowest-friction option: the manufacturer has solved the fit problem, and the skimmer is tuned to that filter's flow rate. If you are choosing filtration for a planted tank or replacing an aging canister, check whether a bundled skimmer intake is included.
Sizing and Compatibility: Measure First
This is where most skimmer purchases go wrong, so slow down here. The skimmer pipe must match your canister filter's hose diameter. 12mm pipe fits 12/16mm hose (nano and mid-size canisters); 17mm pipe fits 16/22mm hose (large canisters on 60–120 gallon tanks).
Measure your existing tubing before ordering, not just the filter model — some manufacturers ship different hose sizes on different versions of the same filter. A mismatched skimmer either will not seal or will choke flow. When in doubt, remove the intake, measure the hose inner diameter, and order to that number.
Also check the floating head's travel range. In open-top tanks with heavy evaporation, a floater that only travels a few millimeters will suck air once the level drops. Skimmers are happiest in lidded tanks where the level barely moves.
Dialing In the Skimming Strength
Most lily-pipe skimmers adjust the surface-to-bottom intake ratio with a small rotating knob at the pipe's base: open the bottom intake more and less water comes from the surface; close it and surface skimming intensifies. Start with the bottom mostly open, then tune.
Your target: the film clears within an hour or two of lights-on, and the intake never gulps air. Air-gulping means you have gone too far — it introduces microbubbles and filter noise. Back the bottom intake open a quarter-turn and watch for a day. Small adjustments, one at a time, beat frantic fiddling.
Skimmers also clog. The same biofilm you are removing coats the intake, the slots, and the floating head until the skimmer stops skimming. A pipe brush and a soak in warm water every two to four weeks keeps a glass skimmer performing like new; stainless steel deserves a wipe-down too.
The CO2 Question: Skimming Without Off-Gassing
Here is the safety issue that matters most for planted tanks. Surface agitation drives gas exchange in both directions — it lets oxygen in, and it lets injected CO2 out. Run a skimmer too aggressively on a CO2-injected tank and you can literally vent your expensive CO2 into the room, drop your target water parameters, and stall your plants' growth.
The fix is balance, not avoidance. You want just enough surface movement to clear the film, and no more:
- Start low and observe. Set skimming to the weakest setting that clears the film, then watch your drop checker for 24–48 hours. If the checker drifts toward blue, you are off-gassing too much — open the bottom intake a little more.
- Skim hardest when CO2 is off. The film builds overnight when plants are not using CO2, so stronger skimming then and gentler during the photoperiod is a common compromise.
- Pick one priority. If your scape depends on a glassy surface for reflections, accept a little film; if film removal matters more, accept a little ripple. A lily-pipe outflow aimed slightly downward with the skimmer doing the surface work splits the difference.
On low-tech setups without injected CO2, this concern mostly disappears — the tank's only CO2 source is the atmosphere, so extra surface exchange helps. On high-tech systems, a slightly stronger skim is usually worth the small CO2 cost because the film was blocking so much light.
Shrimp and Small Fish Safety
Quality skimmer pipes come with slotted guards on the floating head, but shrimplets and newly hatched fry are small enough to slip through anything short of a sponge. In a shrimp-breeding tank: run the skimmer at lower flow, add a prefilter sponge over the intake (coarse enough not to choke flow, fine enough to stop shrimplets), and check the sponge weekly — a clogged prefilter starves the filter and the skimmer stops working.
Adult cherry shrimp and amanos are generally safe around guarded intakes, and they will graze the biofilm off the skimmer itself — free cleaning labor. Keep this in mind when building your planted tank cleanup crew: shrimp and skimmers work well together as long as the babies are protected.
When the Film Won't Go Away
A skimmer that suddenly stops working usually has one of three causes: a clog in the floating head's slots, evaporation dropping the water level below the floater's travel range, or a film that has changed character. A film that reappears within hours can signal overfeeding, a hidden casualty, or a bacterial bloom in a tank that is still cycling. The skimmer handles the symptom; you still fix the cause.
Persistent film despite a clean, correctly adjusted skimmer is diagnostic information, not a skimmer failure. Cut feeding for a few days, check for casualties, and test ammonia and nitrite. The film is telling you the organics load is rising — listen to it.
Frequently Asked Questions
Do I actually need a surface skimmer for a planted tank?
No — it is a quality-of-life upgrade, not a requirement. You need one when the film blocks enough light to matter, when it ruins an open-top display, or when you are tired of the paper-towel ritual. If your tank has a lid and you barely see the surface, skip it.
Will a skimmer remove all my CO2?
Not if adjusted sensibly. Start with the weakest setting that clears the film and watch your drop checker for a day or two. A well-tuned skimmer costs a little CO2 while returning more light to your plants — usually a net win for growth.
Can I use a skimmer with a hang-on-back filter?
A lily-pipe skimmer inflow needs a canister filter to attach to. With a hang-on-back or internal filter, use a standalone cup skimmer instead — it is self-contained and sits at the surface on its own, doing the same continuous film removal.
How often should I clean the skimmer?
Every two to four weeks. The intake slots, floating head, and pipe interior accumulate the same biofilm you are skimming off, and a clogged skimmer quietly stops working. Add it to your water-change routine — glass needs a pipe brush, stainless steel a wipe-down.
Is the film dangerous to my fish?
A normal thin film is not dangerous — just organics and bacteria, present in plenty of thriving tanks. It becomes a concern only when thick enough to seriously restrict gas exchange, which usually coincides with an underlying problem like overfeeding or a hidden casualty. Skim for light and looks; investigate for causes.
Will the skimmer suck up my baby shrimp?
It can. Slotted guards stop adults, but shrimplets fit through most slots, so in a breeding tank run lower flow and fit a coarse prefilter sponge over the intake. Check the sponge weekly — shrimp also graze biofilm off the skimmer itself, so the guards need cleaning regardless.
The Bottom Line
A surface skimmer is one of the smallest upgrades with the most visible payoff in a planted tank: clearer water, more light on your plants, and a surface that looks as intentional as the scape beneath it. Match the pipe to your hose size, start the skimming gentle, keep the CO2 balance in mind, and clean the intake on schedule. Do that, and the rainbow sheen becomes something you used to deal with — along with the other small emergencies every planted-tank keeper eventually faces. For manufacturer sizing charts and model-specific specs, check the product documentation for lily-pipe skimmer lines from established aquascaping brands such as ADA's lily pipe range or Aquasabi's glassware guides before you order.
Tissue-culture plants are the exception — they’re grown in sterile gel and adapt with minimal melting, which is part of what you’re paying for. Plants bought submersed from another hobbyist’s tank also transition with little melt, since they’re already in the right form.
Which Plants Melt Most (and Least)
Heavy melters (expect significant leaf loss)
- Cryptocorynes — infamous for “crypt melt,” sometimes dropping every leaf after any disturbance. They almost always recover from the roots within weeks.
- Stem plants grown emersed — rotala, ludwigia, and hygrophila often shed lower emersed leaves while the growing tips transition.
- Amazon swords — emersed-grown swords typically lose their broad oval aerial leaves and replace them with longer submersed ribbon leaves.
Light melters
- Anubias, java fern, bucephalandra — slow-growing rhizome plants transition gradually; occasional old-leaf melt but rarely dramatic.
- Vallisneria — usually transitions well, though it dislikes the move itself and may sulk for a week.
- Floating plants — minimal melt since their leaves were already at the air-water interface.
The Acclimation Protocol
Step 1: Quarantine or dip first
Before acclimating to your tank’s conditions, make sure you’re not acclimating pests along with the plant. Run new arrivals through our quarantine and dip protocol — it adds days upfront but prevents months of regret.
Step 2: Float to temperature-match (30 minutes)
Float the bag or container in your tank for 20–30 minutes to equalize temperature. Plants are less temperature-sensitive than fish, but a 10°F shock on top of transplant stress is an avoidable insult.
Step 3: Trim before planting
Remove any leaves that are already damaged, yellowing, or heavily algae-covered — they won’t recover and they’ll rot in your tank, feeding algae. For stem plants, trim off the bottom inch and any emersed leaves that look unlikely to adapt; the plant wastes energy maintaining leaves it’s going to shed anyway. Keep the healthy growing tips — that’s where recovery starts.
Step 4: Plant correctly the first time
Follow our planting guide — right depth, crown exposed on rosettes, rhizomes unburied on epiphytes. Every uprooting and replanting restarts the acclimation clock, so get placement right on the first attempt. Decide where each plant goes before it goes in the water.
Step 5: Run a gentle first week
For the first 7 days after planting:
- Moderate light — run your normal photoperiod but consider dropping intensity 20–30% if your light is dimmable. Blast-level light on a melting plant grows algae on the dying leaves, not recovery.
- Stable CO2 — if you inject CO2, keep it consistent. Fluctuating CO2 during acclimation is a melt accelerator. If you’re low-tech, this doesn’t apply — see growing without CO2.
- Half-strength fertilizer — new plants with damaged leaves can’t use full dosing, and the excess feeds algae. Ramp to full strength over 2–3 weeks per our fertilizer schedule.
- No disturbance — don’t move, trim, or “check on” new plants for at least two weeks. Every touch resets root establishment. This is especially critical for crypts.
Step 6: Remove melt, keep the base
As emersed leaves melt, remove the mushy material promptly — decaying leaves release ammonia and grow fungus that can spread to healthy tissue. But never discard the plant while the crown, rhizome, or roots are firm and alive. A crypt that’s lost every leaf but has firm roots is a plant that’s about to recover, not a dead plant. Give it 3–4 weeks before judging.
Telling Normal Melt From Real Problems
Normal transition melt:
- Affects oldest/emersed leaves first, newest growth last
- New submersed leaves emerge even as old ones dissolve
- Roots and crown stay firm and white/green
- Timeline: 1–4 weeks, then obvious new growth
Concerning melt (see our full melting diagnosis guide):
- New growth also melts or emerges deformed
- Rhizome or crown turns mushy and brown — this is rot, not transition
- Entire plant dissolves within days with no new growth after 4+ weeks
- Melting spreads to established plants that weren’t recently moved
Buying Tips to Minimize Melt
- Buy submersed-grown when available — hobbyist-grown cuttings transition with almost no melt.
- Choose tissue culture for sensitive species — crypts and delicate stems establish far more reliably from sterile cups.
- Avoid plants already melting in the store tank — some melt is normal, but a plant that’s mostly mush at purchase has less energy for recovery.
- Transport carefully — keep plants damp and out of direct sun/heat. A plant that dries out or cooks in a hot car melts far worse than one transported properly.
The First-Month Timeline: What to Expect Week by Week
Knowing what’s normal when removes most acclimation anxiety. Here’s the typical timeline for a healthy plant adapting to a new tank:
Week 1: The quiet week
Almost nothing visible happens. The plant is growing roots you can’t see and assessing its new environment. Some species (vallisneria, stem plants) may start shedding their lowest leaves. This is normal. Resist the urge to “help” — no moving, no extra fertilizer, no light changes. The most common beginner mistake is intervening during a week when the correct action is nothing.
Week 2: Melt peaks
This is when emersed leaves give up in earnest. Crypts may drop everything; swords shed their broad aerial leaves; stem plants lose lower foliage. It looks catastrophic and it’s usually fine. Keep removing mushy material, keep conditions stable, and watch the crown and growing tips — if those are firm and green, recovery is already underway.
Week 3: The turn
New submersed-adapted leaves emerge — smaller, thinner, often a slightly different shade of green than the emersed foliage. Stem plant tips start growing visibly; crypts push tiny curled leaves from the crown; swords unfurl narrow ribbon leaves. This is the moment most beginners exhale for the first time.
Week 4+: Established
New growth outpaces melt, and the plant is functionally yours. You can resume full-strength fertilizer, normal trimming, and stop treating it as fragile. Some slow growers (anubias, bucephalandra) take 6–8 weeks to show obvious progress — that’s their normal speed, not a problem.
Acclimating Different Plant Formats
Tissue-culture cups
Sterile, pest-free, and already adapted to high-humidity (not emersed) growth — tissue cultures melt the least of any format. Rinse the agar gel off gently (leftover gel rots and feeds fungus), split the portion into small plantlets, and plant per our planting guide. They establish slowly for the first two weeks, then accelerate. No dip needed, minimal acclimation stress — this is the premium experience you’re paying for.
Potted plants
Remove the pot and strip away the rockwool completely — leftover rockwool traps debris and rots. Tease the root mass apart gently; if it’s a dense mat, splitting it into 2–3 smaller portions actually establishes faster than planting one big clump (more growing points, better water flow around roots). Potted plants are usually emersed-grown, so expect the standard 2–4 week melt cycle.
Bare-root / bunched stems
Typically sold as weighted bunches. Remove any bands, foam, or weights, strip the lower leaves, and plant stems individually or in small groups. Bunched stems from the store are often already transitioning — check for new submersed growth at the tips, which tells you the plant is mid-adaptation and will settle quickly.
Hobbyist cuttings
Already submersed-grown and the fastest to establish — often showing new growth within days. The main acclimation factor is water-parameter difference between the two tanks. Float to temperature-match, plant promptly, and they’ll usually take off with minimal melt. This is why experienced hobbyists prefer trading cuttings over buying potted plants.
Frequently Asked Questions
Should I use a “plant starter” or transplant fertilizer?
Products marketed for transplant shock are mostly B-vitamins and mild hormones. They don’t hurt, but there’s no strong evidence they help aquarium plants specifically. Stable conditions and patience outperform any bottle. Save the money for more plants.
My new plant melted completely — bare crown, no leaves. Is it dead?
Probably not, if the crown or rhizome is firm. Crypts and swords routinely lose 100% of their leaves and regrow from the base within a month. The test is firmness: firm and pale/green means alive; mushy and brown/black means rot. Give firm-but-leafless plants a full 4 weeks before declaring them dead.
Can I speed up acclimation with extra light or CO2?
No — and trying usually backfires. A melting plant can’t use extra light; the excess just grows algae on its dying leaves. Keep light moderate and CO2 stable (not boosted) during acclimation. Growth speed comes from the plant’s own adaptation timeline, which you can’t rush, only avoid delaying.
Should new plants go straight into my main display tank?
After quarantine/dipping, yes — there’s no benefit to a separate “growing-in” tank for most plants. They acclimate to your water fastest in the tank they’ll live in. The exception is very delicate species going into a tank with boisterous fish; give those a few weeks in a calm corner or breeder box first.
The Patience Rule
The single most important acclimation skill is restraint: plant it right, set gentle conditions, remove decay, and then leave it alone for a month. The hobbyists with the best plant growth aren’t doing something clever in week one — they’re simply not interfering in weeks two through four while the plants do what they’ve evolved to do. Melt looks like failure and feels like failure, but in most cases it’s the visible part of a plant successfully becoming yours.