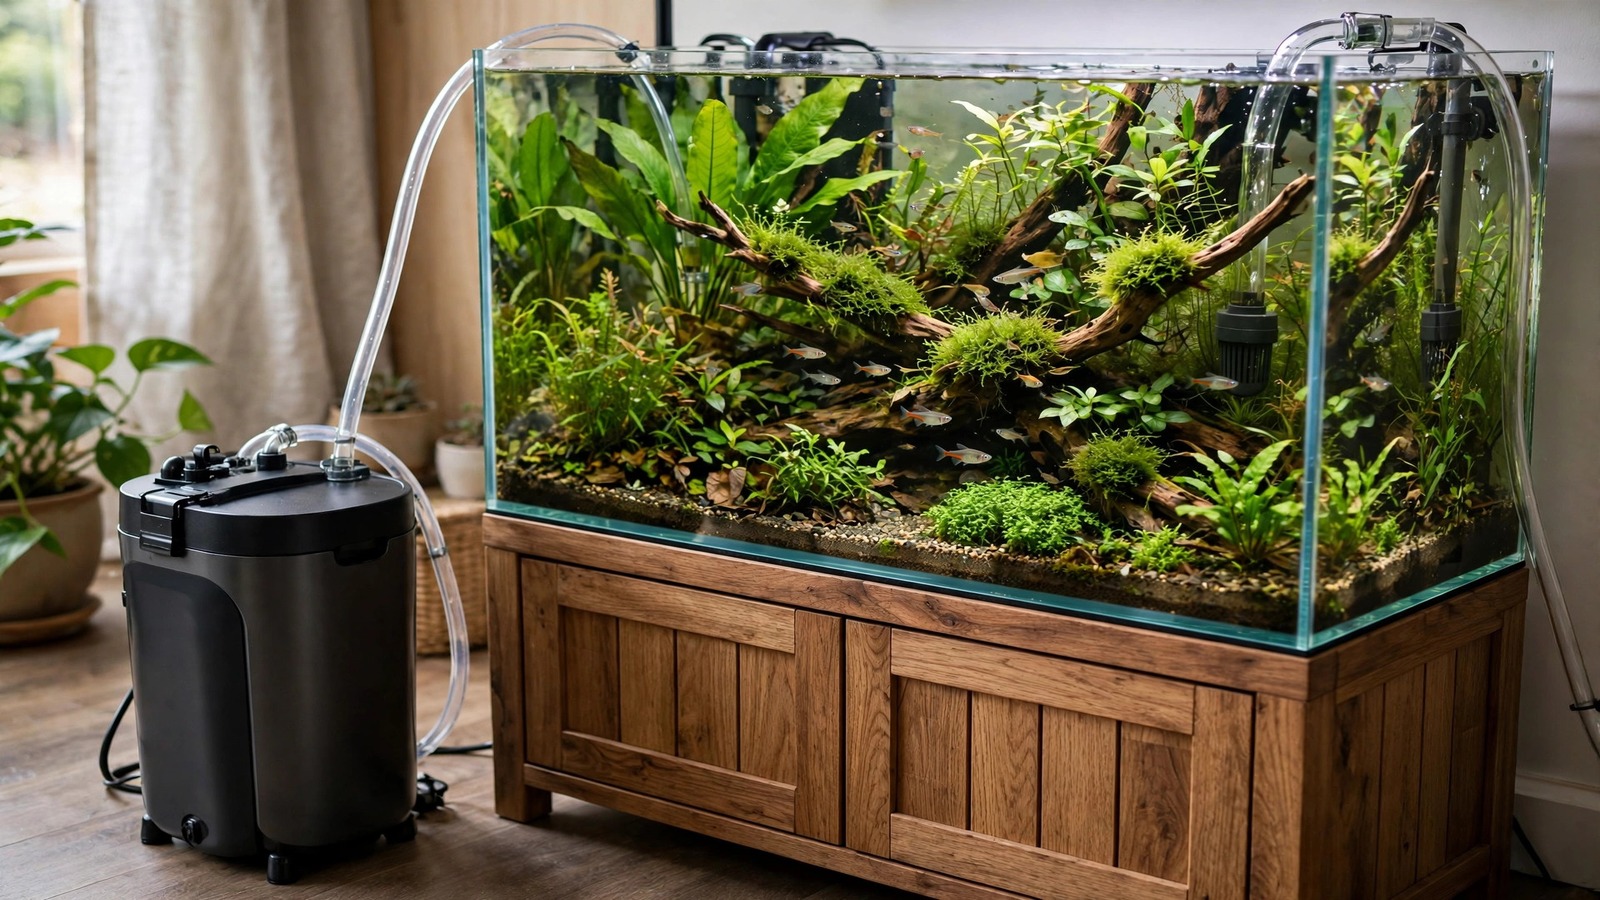
If you are upgrading a planted tank and keep hearing that a canister filter for your planted tank is the single biggest improvement you can make, you are hearing right. Canister filters combine high flow rates, generous media capacity, and clean in-tank aesthetics — no bulky box hanging off the back glass — which makes them the go-to choice for aquascapes from 20 gallons all the way to large show tanks. In this guide you will learn how to size a canister filter for a planted aquarium, how to set it up without nuking your CO2, and exactly how to stack your filter media for crystal-clear water.
Why a Canister Filter Planted Tank Setup Works So Well
A planted tank asks more of a filter than a fish-only tank does. The filter must keep ammonia and nitrite at zero for sensitive livestock, polish the water so it does not mute your lighting, and deliver that water evenly through dense plant growth. Internal power filters and hang-on-back filters do this adequately at small scales, but they fall short in three ways that matter to plant keepers.
First, media volume. A canister holds liters of biological and mechanical media instead of milliliters, so the bacterial colony is large and stable. Second, flow control. Quality canisters throttle down for delicate stems or crank up for carpeting runs, and the flow enters through a return pipe you can aim precisely.
There is one real trade-off to understand: canisters are sealed systems, and their vigorous circulation drives off dissolved CO2. If you inject CO2 — and in a high-tech planted tank you should — you will use slightly more gas than with a sponge-filtered setup, and you will place your CO2 diffuser carefully (more on that below). For low-tech tanks without CO2, this concern disappears entirely.
Sizing a Canister Filter for Your Planted Tank
The old rule of "turn over the tank 4–6 times per hour" comes from fish-only keeping and understates what a planted tank needs. Plants love flow: it delivers nutrients and CO2 to leaf surfaces and prevents debris from settling into the carpet. Aim for 6–10 times hourly turnover of the rated flow, knowing that once the canister is loaded with media and plumbed with hoses, real-world output is typically 40–60% of the number on the box.
Use this table to size your filter by tank volume. All figures assume a planted tank with normal stocking:
| Tank volume | Rated flow to buy | Typical canister class | Notes |
|---|---|---|---|
| 10–20 gal (40–75 L) | 80–200 GPH | Small / nano canister | Often paired with a spray bar for gentle, even flow |
| 30–40 gal (115–150 L) | 200–350 GPH | Medium canister | The sweet spot; one unit usually suffices |
| 55–75 gal (210–285 L) | 350–550 GPH | Large canister | Consider dual intakes or a second filter for long tanks |
| 90–125 gal (340–475 L) | 550–900 GPH | Extra-large or twin canisters | Run one at each end for dead-spot-free circulation |
Do not be afraid of "too much" filter. A canister rated for 75 gallons on a 40-gallon planted tank is not overkill; it is headroom. You throttle the output, and the oversized media bed keeps parameters rock-steady between water changes. Where overkill becomes a real problem is velocity, not filtration: a fire-hose return will uproot hairgrass and batter bettas. Solve that with a spray bar or a flow-control valve — never by under-sizing the filter itself.
Watch the actual head height
Canister flow ratings are measured at zero head. In practice the canister sits in a cabinet 2–3 feet below the tank, and every bend in the hose costs flow. Shorten hoses to the minimum that still reaches comfortably, avoid tight 90-degree kinks, and budget a 40–50% haircut off the rated GPH when estimating what your tank actually receives.
Canister Filter Media Layout for Planted Tanks
Water enters the canister, passes through media in layers, and returns to the tank. The universal order is mechanical first, biological second, chemical last (chemical being optional). Stacking trays in the right order keeps the biological media from clogging and protects your pump.
Here is a proven tray layout, from the bottom tray (where water enters most canisters) upward:
| Tray (bottom → top) | Media | Job |
|---|---|---|
| 1 (bottom) | Coarse foam pads | Catches large debris and mulm before it reaches fine media |
| 2 | Medium foam + filter floss or polishing pad | Removes fine particles for crystal-clear water |
| 3 | Porous biological media (ceramic rings, sintered glass) | Houses the nitrifying bacteria that convert ammonia and nitrite |
| 4 (top) | Bio-media top-up or chemical (optional) | Extra biological capacity; add activated carbon or Purigen only if removing tannins or meds |
Planted-tank-specific media notes
- Skip chemical filtration by default. Activated carbon absorbs trace nutrients and liquid fertilizers along with tannins, which works against your dosing. Use it only for a few days to clear medication or severe discoloration, then remove it.
- Biological media matters most. Porous sintered-glass media offers far more surface area per liter than smooth plastic bio-balls. Fill every spare tray with it.
- Rinse, don't replace. Swish mechanical pads in old tank water at water changes. Biological media should almost never be replaced — replacing it crashes your cycle. For a refresher on establishing that cycle quickly, see our guide to cycling a planted tank faster.
- Leave room for a pre-filter sponge. A coarse sponge over the intake stretches the time between canister cleanings from weeks to months and protects shrimp and fry.
Step-by-Step: Setting Up a Canister Filter on a Planted Tank
- Position the canister in the cabinet. It must sit below the waterline of the tank — gravity feeds the siphon. A canister at tank level will not prime properly.
- Cut hoses to length. Run intake and return lines with gentle curves and no kinks. Shorter is better for flow; leave just enough slack to pull the canister out for servicing.
- Load the media trays. Bottom-up: coarse foam, fine foam/floss, biological media, optional top tray. Make sure trays seat fully — bypass channels around trays are a common cause of cloudy water.
- Install intake and return in the tank. Place the intake low and in an open area (not buried in the plant mass). Position the return — lily pipe, spray bar, or jet nozzle — so flow sweeps across the tank. Opposite corners give the best gyre; test with a pinch of fish food and watch the drift pattern.
- Prime the canister. Fill it with tank water before sealing if your model allows, then use the primer pump. A canister that runs dry even briefly can burn out the impeller.
- Start up and check for leaks. Run for 15 minutes, dry every connection with a paper towel, and check the cabinet floor. Re-seat any dripping O-rings.
- Dial in the flow. Start at full output and observe. If stems bow sideways or substrate ripples, throttle the return valve or switch to a spray bar. Plants should sway gently, not stream horizontally.
- Place the CO2 diffuser. In high-tech setups, put the diffuser under the return flow so the current carries fine CO2 mist deep into the plant mass. Inline CO2 reactors plumbed into the return hose are even more efficient and keep the tank glassware-free. Our high-tech planted tank setup guide walks through CO2 plumbing in detail.
Matching the Filter to Your Setup
Nano planted tanks (5–10 gallons)
Small canisters exist, but on a 5-gallon scape the hoses and hardware can overwhelm the layout. If you do go canister on nano, choose a nano-class model and throttle hard. Many keepers instead run a quality hang-on-back or sponge on these sizes — see our planted tank setup for 5 gallons for a full equipment list at that scale.
Mid-size community tanks (20–55 gallons)
This is where canisters shine brightest. A single medium canister with a lily pipe return keeps a 40-gallon aquascape pristine, and the media volume handles the bioload of schooling fish like rainbows without breaking a sweat — our planted rainbowfish tank guide assumes exactly this filtration. Add a pre-filter sponge and you can stretch canister servicing to every 2–3 months.
Large or heavily stocked tanks (75+ gallons)
Consider twin canisters or one large canister plus a powerhead for dead spots. Goldfish and cichlids are bioload monsters that overwhelm small filters fast; pairing a canister with a second filter also gives you redundancy if one unit fails. Species-specific setups like our planted goldfish tank setup and best plants for cichlid tanks both assume robust, oversized filtration for exactly this reason.
Shrimp and fry tanks
Canisters are excellent for shrimp tanks because the sealed body keeps parameters stable, but the intake will eat shrimplets without a fine pre-filter sponge. Check the sponge weekly — a clogged pre-filter silently throttles your flow.
Maintenance Schedule That Actually Gets Done
The number one mistake with canisters is the "set and forget" trap. They are so quiet and hidden that months pass without a thought — and then flow collapses, anaerobic pockets form in the trays, and algae explodes. Put this schedule in your phone:
- Weekly: glance at return flow strength; rinse the intake pre-filter sponge in old tank water if output looks weak.
- Monthly: check hose connections for drips and listen for impeller rattle (usually trapped air or a worn impeller).
- Every 6–12 weeks: open the canister. Rinse coarse and fine pads in old tank water, replace polishing floss, swish biological media gently — never scrub it, never use tap water (chlorine kills the bacteria). Reassemble, check O-rings, re-prime.
- Yearly: inspect impeller, shaft, and all O-rings; replace worn parts and keep a spare impeller on hand.
Specialty setups follow the same rhythm with small tweaks: pea puffer tanks, for example, are messy eaters, so clean the pre-filter more often — our planted pea puffer tank guide covers their feeding mess in detail.
Troubleshooting Common Canister Filter Problems
Weak flow after a few weeks
Almost always a clogged pre-filter or polishing pad. Rinse them. If flow stays weak, check for air trapped in the head (tilt the canister while running to burp it out) and inspect the impeller for hair or debris.
Noisy rattling or grinding
Stop the filter, pull the impeller, and clean the shaft and impeller well. A worn ceramic shaft is the usual culprit on older units — replacements are cheap. Running a canister half-full of air will also rattle; re-prime fully.
Water leaking from the head seal
Power off, open the canister, remove and clean the main O-ring and its groove, apply a thin smear of silicone grease (sold for filter maintenance), and re-seat. A pinched or dried-out O-ring causes most leaks.
Persistent fine cloudiness
Add a fresh polishing pad or filter floss layer and check that media trays seat without bypass gaps. If cloudiness survives that, the cause is usually bacterial bloom from an unstable cycle rather than the filter — test ammonia and nitrite.
Algae outbreak after installing the canister
The new flow pattern changed nutrient and CO2 distribution, not necessarily the amounts. Re-observe your drop checker, confirm CO2 mist reaches the whole tank, and trim plants so flow penetrates the mass. Give the tank two weeks before changing anything else.
Canister vs. Sump vs. Hang-on-Back for Planted Tanks
Quick comparison so you can choose with eyes open. Hang-on-back filters are cheap and easy to service but hold little media and clutter the back glass. Sumps offer enormous media capacity and hide equipment beautifully, but they cost more, need drilling or overflow boxes, and the open sump surface strips CO2 aggressively — a real drawback for high-tech setups (see our planted tank with sump breakdown). Canisters sit in the middle: sealed (CO2-friendly), spacious, affordable, and invisible in the tank. For most planted tanks from 20 to 120 gallons, the canister is the sweet spot.
For broader reading on filter choice backed by aquarium science, the University of Florida IFAS Extension article on aquarium filtration explains the biological principles behind mechanical, chemical, and biological filtration in detail.
Frequently Asked Questions
Do I need a canister filter for a planted tank, or is a hang-on-back enough?
You do not strictly need one. A hang-on-back or sponge filter can keep a lightly stocked, low-tech planted tank healthy. A canister becomes the better choice as tanks get larger, stocking gets heavier, or aquascaping aesthetics matter — it offers far more media volume, stronger and aimable flow, and nothing visible in the tank except slim intake and return pipes.
Will a canister filter remove too much CO2 from my planted tank?
Canisters do increase surface agitation and gas exchange, which drives off some dissolved CO2, but the effect is modest and manageable. Run the return slightly below the surface to limit splashing, place your diffuser in the return current for better dissolution, and bump your bubble rate up a touch while watching the drop checker. Most high-tech keepers happily run canisters.
How often should I clean a canister filter on a planted tank?
Plan on a full clean every 6 to 12 weeks, depending on stocking and whether you run a pre-filter sponge. Rinse mechanical media in old tank water and swish — never scrub — biological media. The pre-filter sponge gets rinsed weekly or biweekly. If return flow visibly drops before your scheduled clean, open it up early rather than waiting.
Can I use a canister filter on a 10-gallon planted tank?
Yes, with a nano-class canister and careful flow control. Throttle the output or use a spray bar so the current stays gentle enough for small fish and delicate stems. That said, the hoses and hardware can visually dominate a small scape, so weigh the clean-glass benefit against simpler options like a quality hang-on-back at that size.
Should I run activated carbon in a planted tank canister?
Generally no. Carbon strips dissolved organics indiscriminately, including the trace nutrients and fertilizers your plants need. Use it only short-term to remove medications or heavy tannin staining, then take it out. For day-to-day planted tank filtration, mechanical plus biological media is all you need.
Why is my canister filter so loud?
Most canister noise comes from trapped air or a dirty impeller. Re-prime the unit to purge air, clean the impeller and shaft, and make sure the canister sits level on a solid surface. A persistent rattle after cleaning usually means a worn impeller shaft, which is an inexpensive replacement part.
Final Thoughts
A properly sized canister filter on a planted tank gives you three things that are hard to get any other way: a huge, stable biological filter bed, strong controllable circulation that feeds every leaf, and a tank that looks like it has no equipment at all. Size for 6–10x rated turnover, stack mechanical before biological media, skip the carbon, and service it on a schedule you will actually keep. Do that, and the filter disappears into the background — exactly where it belongs — while your plants do all the talking.
Tissue-culture plants are the exception — they’re grown in sterile gel and adapt with minimal melting, which is part of what you’re paying for. Plants bought submersed from another hobbyist’s tank also transition with little melt, since they’re already in the right form.
Which Plants Melt Most (and Least)
Heavy melters (expect significant leaf loss)
- Cryptocorynes — infamous for “crypt melt,” sometimes dropping every leaf after any disturbance. They almost always recover from the roots within weeks.
- Stem plants grown emersed — rotala, ludwigia, and hygrophila often shed lower emersed leaves while the growing tips transition.
- Amazon swords — emersed-grown swords typically lose their broad oval aerial leaves and replace them with longer submersed ribbon leaves.
Light melters
- Anubias, java fern, bucephalandra — slow-growing rhizome plants transition gradually; occasional old-leaf melt but rarely dramatic.
- Vallisneria — usually transitions well, though it dislikes the move itself and may sulk for a week.
- Floating plants — minimal melt since their leaves were already at the air-water interface.
The Acclimation Protocol
Step 1: Quarantine or dip first
Before acclimating to your tank’s conditions, make sure you’re not acclimating pests along with the plant. Run new arrivals through our quarantine and dip protocol — it adds days upfront but prevents months of regret.
Step 2: Float to temperature-match (30 minutes)
Float the bag or container in your tank for 20–30 minutes to equalize temperature. Plants are less temperature-sensitive than fish, but a 10°F shock on top of transplant stress is an avoidable insult.
Step 3: Trim before planting
Remove any leaves that are already damaged, yellowing, or heavily algae-covered — they won’t recover and they’ll rot in your tank, feeding algae. For stem plants, trim off the bottom inch and any emersed leaves that look unlikely to adapt; the plant wastes energy maintaining leaves it’s going to shed anyway. Keep the healthy growing tips — that’s where recovery starts.
Step 4: Plant correctly the first time
Follow our planting guide — right depth, crown exposed on rosettes, rhizomes unburied on epiphytes. Every uprooting and replanting restarts the acclimation clock, so get placement right on the first attempt. Decide where each plant goes before it goes in the water.
Step 5: Run a gentle first week
For the first 7 days after planting:
- Moderate light — run your normal photoperiod but consider dropping intensity 20–30% if your light is dimmable. Blast-level light on a melting plant grows algae on the dying leaves, not recovery.
- Stable CO2 — if you inject CO2, keep it consistent. Fluctuating CO2 during acclimation is a melt accelerator. If you’re low-tech, this doesn’t apply — see growing without CO2.
- Half-strength fertilizer — new plants with damaged leaves can’t use full dosing, and the excess feeds algae. Ramp to full strength over 2–3 weeks per our fertilizer schedule.
- No disturbance — don’t move, trim, or “check on” new plants for at least two weeks. Every touch resets root establishment. This is especially critical for crypts.
Step 6: Remove melt, keep the base
As emersed leaves melt, remove the mushy material promptly — decaying leaves release ammonia and grow fungus that can spread to healthy tissue. But never discard the plant while the crown, rhizome, or roots are firm and alive. A crypt that’s lost every leaf but has firm roots is a plant that’s about to recover, not a dead plant. Give it 3–4 weeks before judging.
Telling Normal Melt From Real Problems
Normal transition melt:
- Affects oldest/emersed leaves first, newest growth last
- New submersed leaves emerge even as old ones dissolve
- Roots and crown stay firm and white/green
- Timeline: 1–4 weeks, then obvious new growth
Concerning melt (see our full melting diagnosis guide):
- New growth also melts or emerges deformed
- Rhizome or crown turns mushy and brown — this is rot, not transition
- Entire plant dissolves within days with no new growth after 4+ weeks
- Melting spreads to established plants that weren’t recently moved
Buying Tips to Minimize Melt
- Buy submersed-grown when available — hobbyist-grown cuttings transition with almost no melt.
- Choose tissue culture for sensitive species — crypts and delicate stems establish far more reliably from sterile cups.
- Avoid plants already melting in the store tank — some melt is normal, but a plant that’s mostly mush at purchase has less energy for recovery.
- Transport carefully — keep plants damp and out of direct sun/heat. A plant that dries out or cooks in a hot car melts far worse than one transported properly.
The First-Month Timeline: What to Expect Week by Week
Knowing what’s normal when removes most acclimation anxiety. Here’s the typical timeline for a healthy plant adapting to a new tank:
Week 1: The quiet week
Almost nothing visible happens. The plant is growing roots you can’t see and assessing its new environment. Some species (vallisneria, stem plants) may start shedding their lowest leaves. This is normal. Resist the urge to “help” — no moving, no extra fertilizer, no light changes. The most common beginner mistake is intervening during a week when the correct action is nothing.
Week 2: Melt peaks
This is when emersed leaves give up in earnest. Crypts may drop everything; swords shed their broad aerial leaves; stem plants lose lower foliage. It looks catastrophic and it’s usually fine. Keep removing mushy material, keep conditions stable, and watch the crown and growing tips — if those are firm and green, recovery is already underway.
Week 3: The turn
New submersed-adapted leaves emerge — smaller, thinner, often a slightly different shade of green than the emersed foliage. Stem plant tips start growing visibly; crypts push tiny curled leaves from the crown; swords unfurl narrow ribbon leaves. This is the moment most beginners exhale for the first time.
Week 4+: Established
New growth outpaces melt, and the plant is functionally yours. You can resume full-strength fertilizer, normal trimming, and stop treating it as fragile. Some slow growers (anubias, bucephalandra) take 6–8 weeks to show obvious progress — that’s their normal speed, not a problem.
Acclimating Different Plant Formats
Tissue-culture cups
Sterile, pest-free, and already adapted to high-humidity (not emersed) growth — tissue cultures melt the least of any format. Rinse the agar gel off gently (leftover gel rots and feeds fungus), split the portion into small plantlets, and plant per our planting guide. They establish slowly for the first two weeks, then accelerate. No dip needed, minimal acclimation stress — this is the premium experience you’re paying for.
Potted plants
Remove the pot and strip away the rockwool completely — leftover rockwool traps debris and rots. Tease the root mass apart gently; if it’s a dense mat, splitting it into 2–3 smaller portions actually establishes faster than planting one big clump (more growing points, better water flow around roots). Potted plants are usually emersed-grown, so expect the standard 2–4 week melt cycle.
Bare-root / bunched stems
Typically sold as weighted bunches. Remove any bands, foam, or weights, strip the lower leaves, and plant stems individually or in small groups. Bunched stems from the store are often already transitioning — check for new submersed growth at the tips, which tells you the plant is mid-adaptation and will settle quickly.
Hobbyist cuttings
Already submersed-grown and the fastest to establish — often showing new growth within days. The main acclimation factor is water-parameter difference between the two tanks. Float to temperature-match, plant promptly, and they’ll usually take off with minimal melt. This is why experienced hobbyists prefer trading cuttings over buying potted plants.
Frequently Asked Questions
Should I use a “plant starter” or transplant fertilizer?
Products marketed for transplant shock are mostly B-vitamins and mild hormones. They don’t hurt, but there’s no strong evidence they help aquarium plants specifically. Stable conditions and patience outperform any bottle. Save the money for more plants.
My new plant melted completely — bare crown, no leaves. Is it dead?
Probably not, if the crown or rhizome is firm. Crypts and swords routinely lose 100% of their leaves and regrow from the base within a month. The test is firmness: firm and pale/green means alive; mushy and brown/black means rot. Give firm-but-leafless plants a full 4 weeks before declaring them dead.
Can I speed up acclimation with extra light or CO2?
No — and trying usually backfires. A melting plant can’t use extra light; the excess just grows algae on its dying leaves. Keep light moderate and CO2 stable (not boosted) during acclimation. Growth speed comes from the plant’s own adaptation timeline, which you can’t rush, only avoid delaying.
Should new plants go straight into my main display tank?
After quarantine/dipping, yes — there’s no benefit to a separate “growing-in” tank for most plants. They acclimate to your water fastest in the tank they’ll live in. The exception is very delicate species going into a tank with boisterous fish; give those a few weeks in a calm corner or breeder box first.
The Patience Rule
The single most important acclimation skill is restraint: plant it right, set gentle conditions, remove decay, and then leave it alone for a month. The hobbyists with the best plant growth aren’t doing something clever in week one — they’re simply not interfering in weeks two through four while the plants do what they’ve evolved to do. Melt looks like failure and feels like failure, but in most cases it’s the visible part of a plant successfully becoming yours.