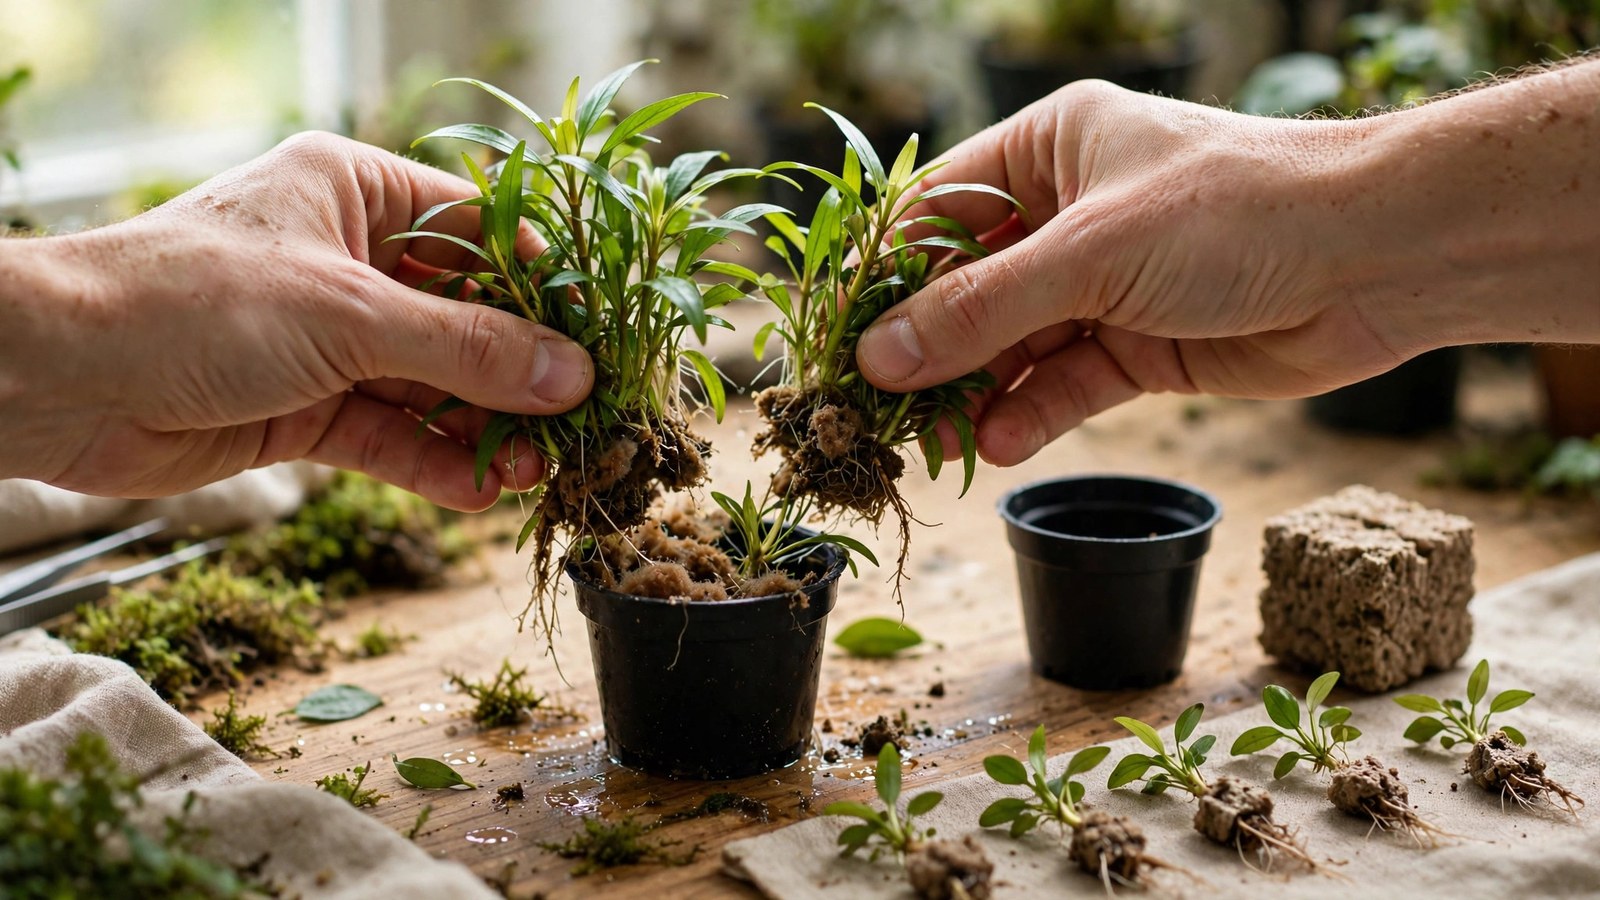
Most new aquascapers make the same quiet mistake: they drop the plastic nursery pot straight into the substrate, roots and all, then wonder why the plant melts within a fortnight. Those pots are transport containers, not planters — and the dense rockwool plug inside them suffocates roots while hiding fertilizer salts and pest eggs. Learning how to plant potted aquarium plants properly takes about fifteen minutes, and it's the highest-return ritual in a beginner's toolkit.
Why the pot and rockwool have to go
Nursery pots exist to get a farm-grown plant to your door alive. The slotted sleeve keeps stems upright in transit, and the rockwool — a spun mineral-fiber plug — holds moisture around the roots on the shelf. In your aquarium, both become liabilities.
Rockwool creates a compacted core where roots circle instead of spreading, and nurseries dose the plugs with fertilizer salts far too rich for an aquarium — leave them in and you're inviting algae before the scape even establishes. The fibrous structure is also an ideal hiding place for snail eggs and algae spores that survive farm rinses. Rinsing roots bare in a bowl is your one clean chance to intercept them — pair this ritual with the full quarantine routine for new aquarium plants for anything going into a prized tank.
Your guide to how to plant potted aquarium plants, step by step
Fill a small bowl with tank water, and have sharp scissors and planting tweezers ready:
- Unpot. Squeeze the nursery pot gently and slide the plug out. If roots have grown through the slots, trim the offending root tips rather than yanking the plant.
- Strip the rockwool. Pull the plug apart in layers from the crown outward. Swish stubborn plugs in the bowl and tease fibers loose — tweezers help with the last clumps. Aim for zero visible fibers.
- Rinse and inspect. Snip black, mushy, or translucent roots, plus melted leaves — decaying tissue in the substrate is an ammonia source you don't need.
- Divide into plantlets. Most pots contain several stems or rosettes fused by the plug. Tease them into 3–6 plantlets, each with its own roots or a healthy base — plants regrow roots fast from there.
- Sort by size. Keep the strongest plantlets for the focal area and smaller ones for background gaps — one pot covers 8–12 cm of foreground once spread out.
- Plant with tweezers. Grip each plantlet low, push it into the substrate at a slight angle, release, and pinch substrate around the base. The motion is identical to planting stem plant bunches one stem at a time.
- Mist and wait. For dry-start layouts, mist divisions immediately. In a filled tank, give the water a few hours to clear before judging your work.
Know your pot type
Not every "potted" plant arrives in the same packaging. Match your prep to what you bought:
| Pot type | What you'll find inside | What to do |
|---|---|---|
| Slotted nursery pot | Rockwool plug around roots | Remove pot; strip all rockwool; divide into plantlets |
| Mesh pot with weight or foam | Stems bundled through foam or a lead weight | Pull stems out individually; discard foam and weight |
| Tissue-culture cup | Gel medium around tiny plantlets | Rinse gel thoroughly; divide; see planting tissue-culture cups |
| Potted rhizome plants (Anubias, Java fern) | Roots packed in pot, rhizome visible | Remove pot; keep the rhizome fully above the substrate |
| Moss or carpet mat | Plant woven into a coconut or foam mat | Peel off the mat; cut into 2–3 cm patches |
The rhizome rule catches more beginners than anything else in this table: a buried rhizome rots. If you bought Anubias or Java fern in a pot, free the roots, then tie or glue the plant to hardscape instead of planting it.
Depth and spacing that actually work
Stem plants and rosettes want their bases just buried — 1–2 cm of substrate over the root crown is plenty. Go deeper and buried nodes rot; go shallower and the first water change floats your layout.
Set plantlets 2–3 cm apart in a staggered grid so each division gets light and flow on all sides — that's what turns a packed nursery cluster into a spreading carpet within weeks.
If your divisions include runners (Vallisneria, Sagittaria), leave them attached and plant the whole chain at 3–4 cm intervals so the runner feeds the new shoots. For deliberately multiplying stock long-term, the companion skill is dividing aquarium plants.
Aftercare: the first two weeks
Newly divided plantlets are rebuilding roots, so the first fortnight decides how fast they take off. Keep lighting moderate for 3–5 days — full blast on stressed divisions feeds algae before plants can use the energy. If you run CO2, start it immediately; consistent CO2 matters more to recovery than anything else, per the freshwater aquarium plants complete guide.
Expect some transition melt: farm-grown leaves adapted to humid air die back as submerged-form leaves replace them. Trim melting leaves promptly — each dead leaf is algae fertilizer. New growth usually appears within 7–14 days. If a plantlet hasn't rooted by week two, lift it, re-trim the base, and replant. Once established, fold plants into your regular grooming and maintenance routine.
Frequently Asked Questions
Can I plant potted aquarium plants without removing the rockwool?
You can, but you shouldn't. Rockwool compacts around roots, blocks them spreading into your substrate, traps fertilizer salts and debris, and hides snail eggs. Stripping it removes one of the most common causes of early melt and algae in new tanks.
Is rockwool harmful to fish or shrimp?
Rockwool itself is chemically inert, but trapped fertilizer salts leach into the water and rotting debris in a compacted plug raises ammonia locally. Removing the plug eliminates the risk entirely.
How many plantlets should I get from one pot?
Most pots divide into 3–6 plantlets: dense stems like Rotala often yield six or more, while a single rosette such as Cryptocoryne may only split into two or three. Don't force a division that lacks roots or a healthy base.
My plants keep floating up after planting. What am I doing wrong?
Three usual causes: planting too shallow, skipping rockwool removal (the plug is buoyant), or releasing tweezers too slowly so the stem rides back up. Plant at a slight angle 1–2 cm deep, strip all rockwool first, and flick tweezers open while pinching substrate around the base.
Should I trim the roots before planting?
Trim only dead, black, or mushy roots. Very long farm roots can be shortened to 2–3 cm to ease planting and encourage new fine roots — but never trim slow growers like Anubias more than strictly necessary.
How long before divided plantlets start growing?
Most stems and rosettes show new submerged-form growth within 7–14 days; expect some transition melt of farm leaves first. If nothing happens by week three, check lighting, CO2, and burial depth.
The fifteen minutes you spend unpotting, stripping rockwool, and dividing plantlets is the cheapest insurance in aquascaping. Every pot arrives ready to become three to six plants — give each division clean roots, real spacing, and the right depth, and your layout starts from strength instead of recovering from a mistake.