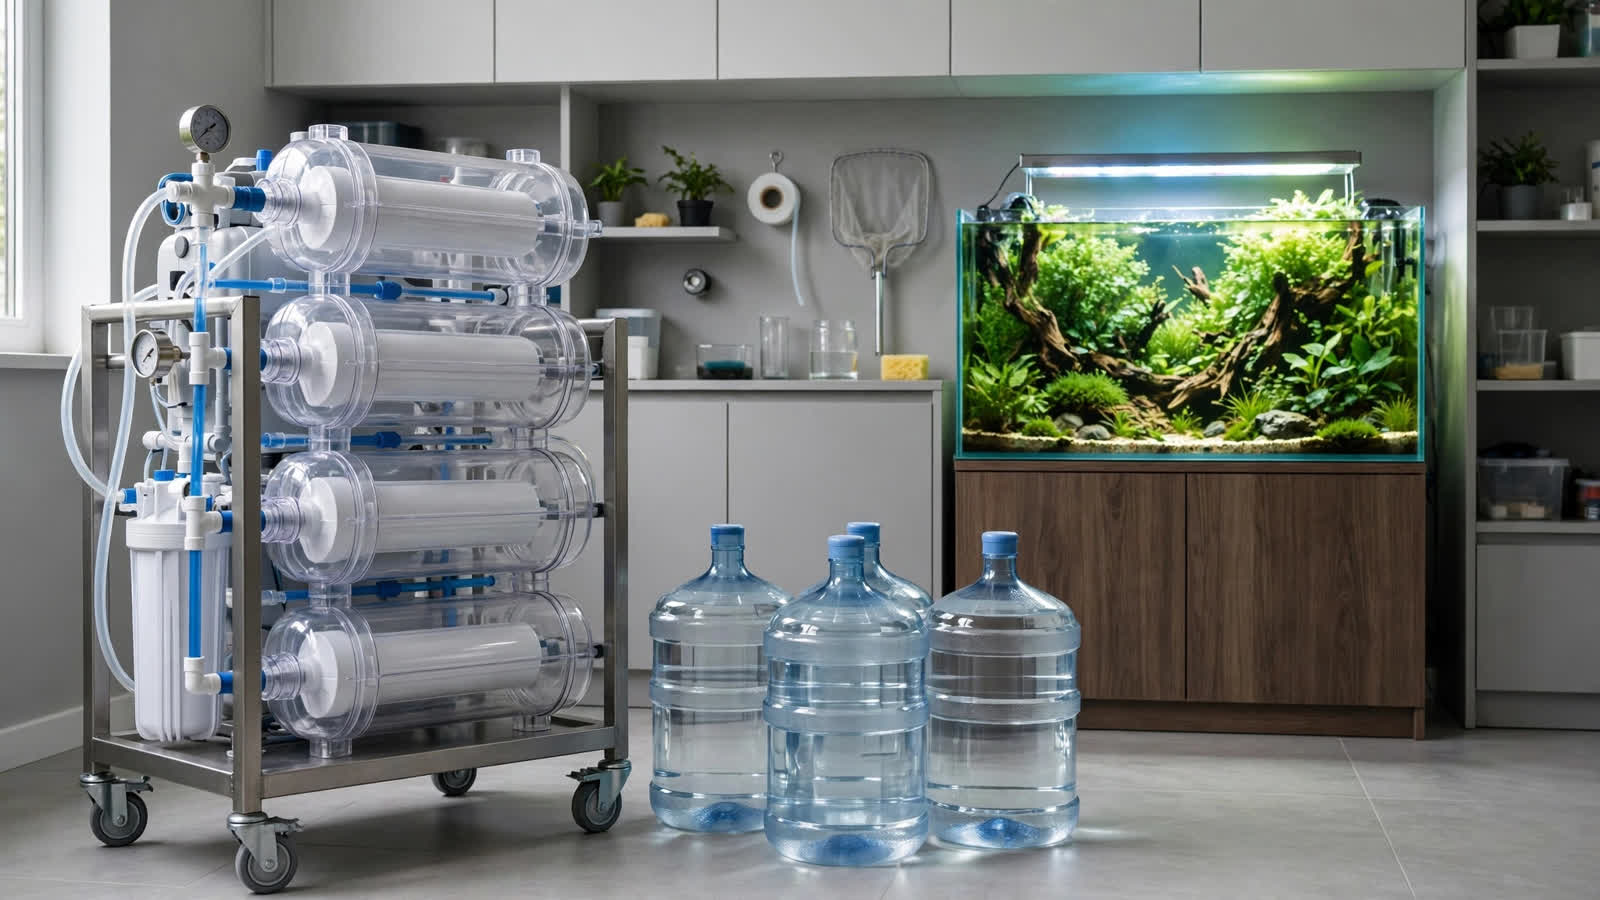
Reverse osmosis water promises a clean slate: zero minerals, zero unknowns, total control over your tank's chemistry. For some planted aquariums, RO water is the single upgrade that turns a struggling, algae-ridden box into a thriving aquascape. For others, it is an expensive gadget that quietly starves their plants while adding a weekly chore to their hobby. The difference is not the water — it is whether your tap water actually needs replacing. This guide draws the line honestly on the RO water planted aquarium debate: when reverse osmosis is genuinely worth the cost, when it is a waste, how to do the remineralizing math correctly, and the beginner mistake that kills more plants than bad lighting ever has.
Why Planted Tank Owners Reach for RO Water
Tap water is a local weather report: it changes with the season, the reservoir, and your city's treatment schedule. Most aquarists first consider RO water after one of three frustrations. First, rock-hard tap water — GH above 12 dGH and KH above 8 dKH — which locks pH at 8+ and makes soft-water species like Rotala macrandra or Eriocaulon melt within weeks. Second, tap water loaded with silicates, phosphates, or agricultural runoff that fuels stubborn algae no water-change schedule can defeat. Third, the desire for precision dosing: you cannot run a tight fertilizer program when your starting water already contains unknown quantities of calcium, magnesium, sodium, and carbonate.
RO filtration strips nearly everything — typically 95–99% of dissolved solids — leaving water with a TDS (total dissolved solids) of 0–10 ppm. That blank canvas is the entire point. It also creates the entire risk, because a blank canvas is not a habitat. Whether that risk pays off depends entirely on what your tap water looks like now.
When RO Is Genuinely Worth It
There are clear-cut cases where RO water is not a luxury but the foundation of the tank.
1. Hard, alkaline tap water with sensitive livestock or plants
If your tap tests above 12 dGH and 8 dKH, or TDS over 400 ppm, and you want to keep caridina shrimp (Taiwan bees, crystal reds), wild-caught discus, altums, or soft-water stem plants, RO is the practical path. No amount of peat, aquasoil, or wishful thinking reliably tames liquid rock for these species — the soil exhausts itself fighting the hardness, and parameters swing.
2. Tap water with problematic contaminants
Chloramine and copper can be neutralized with conditioner, but chronic nitrate (common in agricultural regions, sometimes 20–40 ppm straight from the tap), phosphate, silicate, or traces of heavy metals cannot be filtered by conditioner. If diatom or dust algae persists despite good maintenance and your tap silicate test reads high, RO removes the fuel source at the root.
3. Breeding or competition-grade scapes
Sensitive breeding setups and showcase tanks need repeatable parameters. RO plus a consistent remineralizer means every water change restores the exact same GH, KH, and TDS — no seasonal drift from the municipal supply. If you run a precise nutrient regime like Estimative Index dosing, starting from zero TDS lets you calculate exactly what is in the water.
4. Active aquasoil longevity
Aquasoils like ADA Amazonia buffer KH to near zero and soften water, but hard tap water exhausts that buffering capacity in months rather than a year or more. Remineralized RO with near-zero KH lets the soil do its job longer, keeping pH in the 6.0–6.8 sweet spot that most plants prefer. Pair this with the right start-up routine in our guide to fertilizing a new aquasoil tank.
When RO Is a Waste of Time and Money
Here is the uncomfortable truth the filter sellers will not lead with: most planted tanks do not need RO water.
Your tap water is already moderate
If your tap sits at 4–10 dGH, 2–5 dKH, and TDS of 100–250 ppm, that water grows the vast majority of aquarium plants beautifully. Anubias, Java fern, crypts, swords, most stem plants, and even many red plants thrive in it. Installing an RO unit to replace perfectly good water is solving a problem you do not have.
Low-tech and community tanks
A low-tech planted community tank has enormous chemical tolerance. Plants adapt, bacteria stabilize, and weekly water changes keep things balanced. The minerals in your tap are free fertilizer — calcium, magnesium, and often a little potassium — that remineralized RO would require you to buy and dose back in.
You will not remineralize consistently
This is the disqualifier that matters most. RO water is a tool, not a product: it only works if every batch is remineralized before it touches the tank. If you are honest that you will skip the dosing step on a busy week — or that a roommate or partner doing water changes will — tap water with conditioner is safer for your livestock and plants than intermittently pure RO.
RO Water vs Tap Water: Side-by-Side
| Factor | Remineralized RO | Treated Tap |
|---|---|---|
| Parameter control | Full — you set GH, KH, TDS exactly | Limited — you get what the city delivers |
| Consistency | Excellent, year-round | Drifts seasonally, especially after heavy rain |
| Contaminant risk | Near zero (silicate, nitrate, metals removed) | Present — check your local water report |
| Plant nutrition | Only what you dose back in — nothing is free | Free Ca/Mg and trace minerals included |
| Setup cost | $60–$200 for a unit | $0 (conditioner ~$10/year) |
| Waste water | 3–4 gallons wasted per gallon produced | None |
| Effort per water change | Produce, heat, remineralize, verify — 30–60 min | Condition and pour — 10 min |
| Best for | Hard-water regions, caridina, discus, breeders, precision dosing | Moderate tap, low-tech, community, most beginners |
The Remineralizing Math: GH and KH Targets
Pure RO water has roughly 0 dGH and 0 dKH. Aquatic life cannot live in it long-term — it is osmotically violent, leaching minerals from fish and starving plants of calcium and magnesium. You must add minerals back. The targets depend on the tank's purpose:
| Tank type | Target GH | Target KH | Target TDS (ppm) |
|---|---|---|---|
| General planted community | 4–8 dGH | 2–4 dKH | 150–250 |
| Soft-water showcase (with aquasoil) | 4–6 dGH | 0–2 dKH | 100–180 |
| Caridina shrimp + plants | 4–6 dGH | 0–1 dKH | 100–150 |
| Neocaridina shrimp + plants | 6–10 dGH | 3–6 dKH | 180–280 |
| High-tech Dutch style | 5–8 dGH | 2–4 dKH | 180–250 |
One degree of GH equals roughly 17.9 ppm of calcium carbonate equivalent. So raising 10 gallons of pure RO to 6 dGH means adding about 4,100 mg (roughly 4 grams) of CaCO₃-equivalent hardness — but do not dose pure calcium carbonate, because plants and shrimp need both calcium and magnesium in roughly a 3:1 to 4:1 ratio. This is why commercial remineralizers exist: they pre-balance Ca:Mg plus trace elements so you do not have to.
The per-gallon rule of thumb
Most commercial remineralizers list dosing per gallon or per 20 liters to reach a stated GH. A common spec: ~1 gram per 5 gallons raises GH by about 3 dGH, though this varies by product — always follow the label, then verify with a drop test kit. The workflow is always the same: dose the concentrate into the fresh RO water in your change bucket, stir, wait five minutes, and test GH and TDS before the water goes in the tank. Never trust the scoop alone; scoops drift, and a doubled dose is an osmotic shock to shrimp.
For KH, a separate alkaline buffer (sodium or potassium bicarbonate based) is used only when you want carbonate hardness — neocaridina and community tanks, typically 1–2 dKH per water change dose. Soft-water and caridina setups usually run zero added KH, relying on the aquasoil to hold pH down. Remember that KH and pH are linked: adding KH to a CO₂-injected tank raises the pH floor, so high-tech scapers generally keep KH low and let the CO₂ drive pH down during the photoperiod.
Remineralizer Products Compared
| Product | What it sets | Best for | Notes |
|---|---|---|---|
| SaltyShrimp GH+ | GH only (Ca/Mg) | Caridina shrimp, soft-water planted tanks | The caridina standard; pairs with aquasoil; no KH |
| SaltyShrimp GH/KH+ | GH + KH | Neocaridina, community planted tanks | One scoop sets both; less fine-tuning |
| Seachem Equilibrium | GH (Ca/Mg/K) | Planted tanks, all tech levels | Also adds potassium; the planted-tank favorite — see Seachem's Equilibrium dosing reference |
| NilocG Thrive GH booster | GH (Ca/Mg) | Planted tanks already dosing macros | Designed to pair with all-in-one fertilizers |
| DIY (gypsum + Epsom salt + baking soda) | GH + optional KH | Budget large-volume setups | Cheapest per gallon; requires a scale and Ca:Mg math; baking soda adds sodium — potassium bicarbonate is kinder |
Avoid using tap water as a remineralizer ("cutting" RO with tap). It seems clever, but it reintroduces exactly the unknowns — silicate, phosphate, seasonal drift — that RO was bought to eliminate, and the ratio drifts with every municipal change. If you must stretch RO, blend at a fixed measured ratio and test TDS every time.
The Beginner Killer: Pure RO Starves Plants
The single most common RO disaster in planted tanks looks like this: an enthusiastic beginner installs an RO unit, does gleaming pure-water changes for three weeks, and watches their plants develop twisted new growth and pale, stunted tips — classic calcium deficiency — while older leaves yellow from magnesium shortage. They assume a nutrient deficiency in their fertilizer and start dumping in more iron and macros. The real problem is the water itself: pure RO contains zero calcium and zero magnesium, and no fertilizer fully replaces them at the scale RO removes them.
The fix is blunt: never put unremineralized RO water in a planted tank. Not once, not "just this water change." Every gallon must be brought to target GH before it enters the aquarium. Keep a dedicated TDS meter next to your change bucket and make the test a ritual — if the reading is under 50 ppm, that water is not ready. When plants show deficiency symptoms after RO use, our guide to potassium and macro deficiencies helps distinguish mineral starvation from fertilizer gaps, and remineralizing RO water for plants walks through the dosing math in depth.
Running Costs: The Honest Ledger
RO is not just the unit. Budget the full year:
| Cost item | Typical annual cost (USD) | Notes |
|---|---|---|
| RO unit (amortized over 3 years) | $20–$70 | 50–100 GPD units are the sweet spot for hobbyists |
| Prefilter + carbon cartridges | $25–$50 | Replace every 6–12 months, sooner with hard tap |
| RO membrane | $15–$40 | Every 2–3 years depending on feed water TDS |
| Remineralizer | $30–$80 | Scales with tank size and water-change volume |
| Waste water | $10–$60 | 3:1 to 4:1 waste ratio on most units; check your water bill |
| Total | $100–$300/year | Plus 30–60 minutes per water change |
If your tap grows plants well already, RO is a $100–300 annual subscription to a hobby chore.
Running RO the Right Way: Step by Step
- Test your tap first. Get GH, KH, TDS, nitrate, and silicate readings — and pull your municipal water quality report. Decide with data, not forum hype. The USGS water hardness explainer is a solid primer on what those numbers mean.
- Size the unit to your routine. A 50 GPD unit makes roughly 2 gallons per hour in practice. For a 40-gallon tank with 50% weekly changes, that is a 10-hour production run — start it the night before.
- Collect and temper. Store RO in a food-grade brute can or barrel, heat to tank temperature, and add a small pump for circulation.
- Remineralize in the barrel, not the tank. Dose per the product label, circulate five minutes, then verify GH with a drop test and TDS with a meter. Adjust before a single drop enters the aquarium.
- Match temperature and parameters. New water should be within 2°F and 0.5 dGH of tank water. Pour slowly or drip it in for shrimp tanks.
- Log every batch. A notebook line — date, TDS, GH, grams dosed — catches drift before livestock does. Review it alongside your water-change technique and water-change schedule so the whole maintenance loop stays consistent.
- Consider rainwater as a complement. In clean-air areas, collected rainwater is nature's RO — free and soft. Our rainwater for planted aquariums guide covers safe collection and the same remineralizing rules.
Frequently Asked Questions
Can I use 100% RO water without remineralizing if I dose liquid fertilizer?
No. Liquid fertilizers supply nitrogen, phosphorus, potassium, and traces, but almost none provide meaningful calcium and magnesium — the two elements RO strips out. Plants will develop calcium-deficiency symptoms (twisted new leaves, stunted tips) within weeks, and shrimp and snails cannot build shells. Every gallon of RO must be remineralized to target GH before it enters the tank.
How long does an RO membrane last for aquarium use?
Typically two to three years, depending on your feed water's TDS and how diligently you replace prefilters. High-TDS tap (over 500 ppm) shortens membrane life, while a sediment prefilter and carbon block changed on schedule protect it. Watch your product-water TDS: when it climbs past 10–15 ppm despite fresh prefilters, the membrane is done.
Will RO water fix my algae problem?
Only if the algae is fueled by something in your tap water, like silicate (diatoms) or chronic nitrate. Most algae outbreaks come from light, CO₂, and nutrient imbalances inside the tank, not the source water. Fix lighting duration, CO₂ stability, and dosing first; RO is a source-water solution, not an algae cure.
Can I mix RO and tap water instead of buying remineralizer?
You can, but it defeats most of RO's purpose. Blending reintroduces the unknown minerals, silicates, and seasonal swings you bought the unit to escape, and the ratio shifts whenever your tap does. If you blend, use a fixed measured ratio and test TDS every batch — and consider that a $25 tub of remineralizer buys a year of exact, repeatable parameters.
Is RO water better for plant growth than tap water?
Not inherently. Plants do not care about purity; they care about available calcium, magnesium, potassium, and stable pH. Good tap water already provides Ca and Mg for free. RO only grows better plants when your tap is genuinely hostile (extreme hardness, contaminants) and you remineralize correctly. Badly managed RO grows worse plants than average tap.
Do I need RO for a low-tech planted tank?
Almost never. Low-tech tanks thrive on moderate tap water because plants adapt and the system buffers itself. The extra minerals in tap are a benefit here, not a flaw. Reserve RO for hard-water regions, sensitive species like caridina shrimp, or situations where your tap tests reveal real contaminants.
The Bottom Line
RO water is a precision instrument, not a magic upgrade. Buy it when your tap water gives you a real, measured reason — hardness over 12 dGH, caridina shrimp, breeding goals, or contaminants you cannot condition away — and commit to remineralizing every single batch. Skip it when your tap is moderate and your tank is thriving, because the best water for your plants is often the free stuff already coming out of your faucet. Either way, let a test kit make the decision, not a forum thread.
Tissue-culture plants are the exception — they’re grown in sterile gel and adapt with minimal melting, which is part of what you’re paying for. Plants bought submersed from another hobbyist’s tank also transition with little melt, since they’re already in the right form.
Which Plants Melt Most (and Least)
Heavy melters (expect significant leaf loss)
- Cryptocorynes — infamous for “crypt melt,” sometimes dropping every leaf after any disturbance. They almost always recover from the roots within weeks.
- Stem plants grown emersed — rotala, ludwigia, and hygrophila often shed lower emersed leaves while the growing tips transition.
- Amazon swords — emersed-grown swords typically lose their broad oval aerial leaves and replace them with longer submersed ribbon leaves.
Light melters
- Anubias, java fern, bucephalandra — slow-growing rhizome plants transition gradually; occasional old-leaf melt but rarely dramatic.
- Vallisneria — usually transitions well, though it dislikes the move itself and may sulk for a week.
- Floating plants — minimal melt since their leaves were already at the air-water interface.
The Acclimation Protocol
Step 1: Quarantine or dip first
Before acclimating to your tank’s conditions, make sure you’re not acclimating pests along with the plant. Run new arrivals through our quarantine and dip protocol — it adds days upfront but prevents months of regret.
Step 2: Float to temperature-match (30 minutes)
Float the bag or container in your tank for 20–30 minutes to equalize temperature. Plants are less temperature-sensitive than fish, but a 10°F shock on top of transplant stress is an avoidable insult.
Step 3: Trim before planting
Remove any leaves that are already damaged, yellowing, or heavily algae-covered — they won’t recover and they’ll rot in your tank, feeding algae. For stem plants, trim off the bottom inch and any emersed leaves that look unlikely to adapt; the plant wastes energy maintaining leaves it’s going to shed anyway. Keep the healthy growing tips — that’s where recovery starts.
Step 4: Plant correctly the first time
Follow our planting guide — right depth, crown exposed on rosettes, rhizomes unburied on epiphytes. Every uprooting and replanting restarts the acclimation clock, so get placement right on the first attempt. Decide where each plant goes before it goes in the water.
Step 5: Run a gentle first week
For the first 7 days after planting:
- Moderate light — run your normal photoperiod but consider dropping intensity 20–30% if your light is dimmable. Blast-level light on a melting plant grows algae on the dying leaves, not recovery.
- Stable CO2 — if you inject CO2, keep it consistent. Fluctuating CO2 during acclimation is a melt accelerator. If you’re low-tech, this doesn’t apply — see growing without CO2.
- Half-strength fertilizer — new plants with damaged leaves can’t use full dosing, and the excess feeds algae. Ramp to full strength over 2–3 weeks per our fertilizer schedule.
- No disturbance — don’t move, trim, or “check on” new plants for at least two weeks. Every touch resets root establishment. This is especially critical for crypts.
Step 6: Remove melt, keep the base
As emersed leaves melt, remove the mushy material promptly — decaying leaves release ammonia and grow fungus that can spread to healthy tissue. But never discard the plant while the crown, rhizome, or roots are firm and alive. A crypt that’s lost every leaf but has firm roots is a plant that’s about to recover, not a dead plant. Give it 3–4 weeks before judging.
Telling Normal Melt From Real Problems
Normal transition melt:
- Affects oldest/emersed leaves first, newest growth last
- New submersed leaves emerge even as old ones dissolve
- Roots and crown stay firm and white/green
- Timeline: 1–4 weeks, then obvious new growth
Concerning melt (see our full melting diagnosis guide):
- New growth also melts or emerges deformed
- Rhizome or crown turns mushy and brown — this is rot, not transition
- Entire plant dissolves within days with no new growth after 4+ weeks
- Melting spreads to established plants that weren’t recently moved
Buying Tips to Minimize Melt
- Buy submersed-grown when available — hobbyist-grown cuttings transition with almost no melt.
- Choose tissue culture for sensitive species — crypts and delicate stems establish far more reliably from sterile cups.
- Avoid plants already melting in the store tank — some melt is normal, but a plant that’s mostly mush at purchase has less energy for recovery.
- Transport carefully — keep plants damp and out of direct sun/heat. A plant that dries out or cooks in a hot car melts far worse than one transported properly.
The First-Month Timeline: What to Expect Week by Week
Knowing what’s normal when removes most acclimation anxiety. Here’s the typical timeline for a healthy plant adapting to a new tank:
Week 1: The quiet week
Almost nothing visible happens. The plant is growing roots you can’t see and assessing its new environment. Some species (vallisneria, stem plants) may start shedding their lowest leaves. This is normal. Resist the urge to “help” — no moving, no extra fertilizer, no light changes. The most common beginner mistake is intervening during a week when the correct action is nothing.
Week 2: Melt peaks
This is when emersed leaves give up in earnest. Crypts may drop everything; swords shed their broad aerial leaves; stem plants lose lower foliage. It looks catastrophic and it’s usually fine. Keep removing mushy material, keep conditions stable, and watch the crown and growing tips — if those are firm and green, recovery is already underway.
Week 3: The turn
New submersed-adapted leaves emerge — smaller, thinner, often a slightly different shade of green than the emersed foliage. Stem plant tips start growing visibly; crypts push tiny curled leaves from the crown; swords unfurl narrow ribbon leaves. This is the moment most beginners exhale for the first time.
Week 4+: Established
New growth outpaces melt, and the plant is functionally yours. You can resume full-strength fertilizer, normal trimming, and stop treating it as fragile. Some slow growers (anubias, bucephalandra) take 6–8 weeks to show obvious progress — that’s their normal speed, not a problem.
Acclimating Different Plant Formats
Tissue-culture cups
Sterile, pest-free, and already adapted to high-humidity (not emersed) growth — tissue cultures melt the least of any format. Rinse the agar gel off gently (leftover gel rots and feeds fungus), split the portion into small plantlets, and plant per our planting guide. They establish slowly for the first two weeks, then accelerate. No dip needed, minimal acclimation stress — this is the premium experience you’re paying for.
Potted plants
Remove the pot and strip away the rockwool completely — leftover rockwool traps debris and rots. Tease the root mass apart gently; if it’s a dense mat, splitting it into 2–3 smaller portions actually establishes faster than planting one big clump (more growing points, better water flow around roots). Potted plants are usually emersed-grown, so expect the standard 2–4 week melt cycle.
Bare-root / bunched stems
Typically sold as weighted bunches. Remove any bands, foam, or weights, strip the lower leaves, and plant stems individually or in small groups. Bunched stems from the store are often already transitioning — check for new submersed growth at the tips, which tells you the plant is mid-adaptation and will settle quickly.
Hobbyist cuttings
Already submersed-grown and the fastest to establish — often showing new growth within days. The main acclimation factor is water-parameter difference between the two tanks. Float to temperature-match, plant promptly, and they’ll usually take off with minimal melt. This is why experienced hobbyists prefer trading cuttings over buying potted plants.
Frequently Asked Questions
Should I use a “plant starter” or transplant fertilizer?
Products marketed for transplant shock are mostly B-vitamins and mild hormones. They don’t hurt, but there’s no strong evidence they help aquarium plants specifically. Stable conditions and patience outperform any bottle. Save the money for more plants.
My new plant melted completely — bare crown, no leaves. Is it dead?
Probably not, if the crown or rhizome is firm. Crypts and swords routinely lose 100% of their leaves and regrow from the base within a month. The test is firmness: firm and pale/green means alive; mushy and brown/black means rot. Give firm-but-leafless plants a full 4 weeks before declaring them dead.
Can I speed up acclimation with extra light or CO2?
No — and trying usually backfires. A melting plant can’t use extra light; the excess just grows algae on its dying leaves. Keep light moderate and CO2 stable (not boosted) during acclimation. Growth speed comes from the plant’s own adaptation timeline, which you can’t rush, only avoid delaying.
Should new plants go straight into my main display tank?
After quarantine/dipping, yes — there’s no benefit to a separate “growing-in” tank for most plants. They acclimate to your water fastest in the tank they’ll live in. The exception is very delicate species going into a tank with boisterous fish; give those a few weeks in a calm corner or breeder box first.
The Patience Rule
The single most important acclimation skill is restraint: plant it right, set gentle conditions, remove decay, and then leave it alone for a month. The hobbyists with the best plant growth aren’t doing something clever in week one — they’re simply not interfering in weeks two through four while the plants do what they’ve evolved to do. Melt looks like failure and feels like failure, but in most cases it’s the visible part of a plant successfully becoming yours.