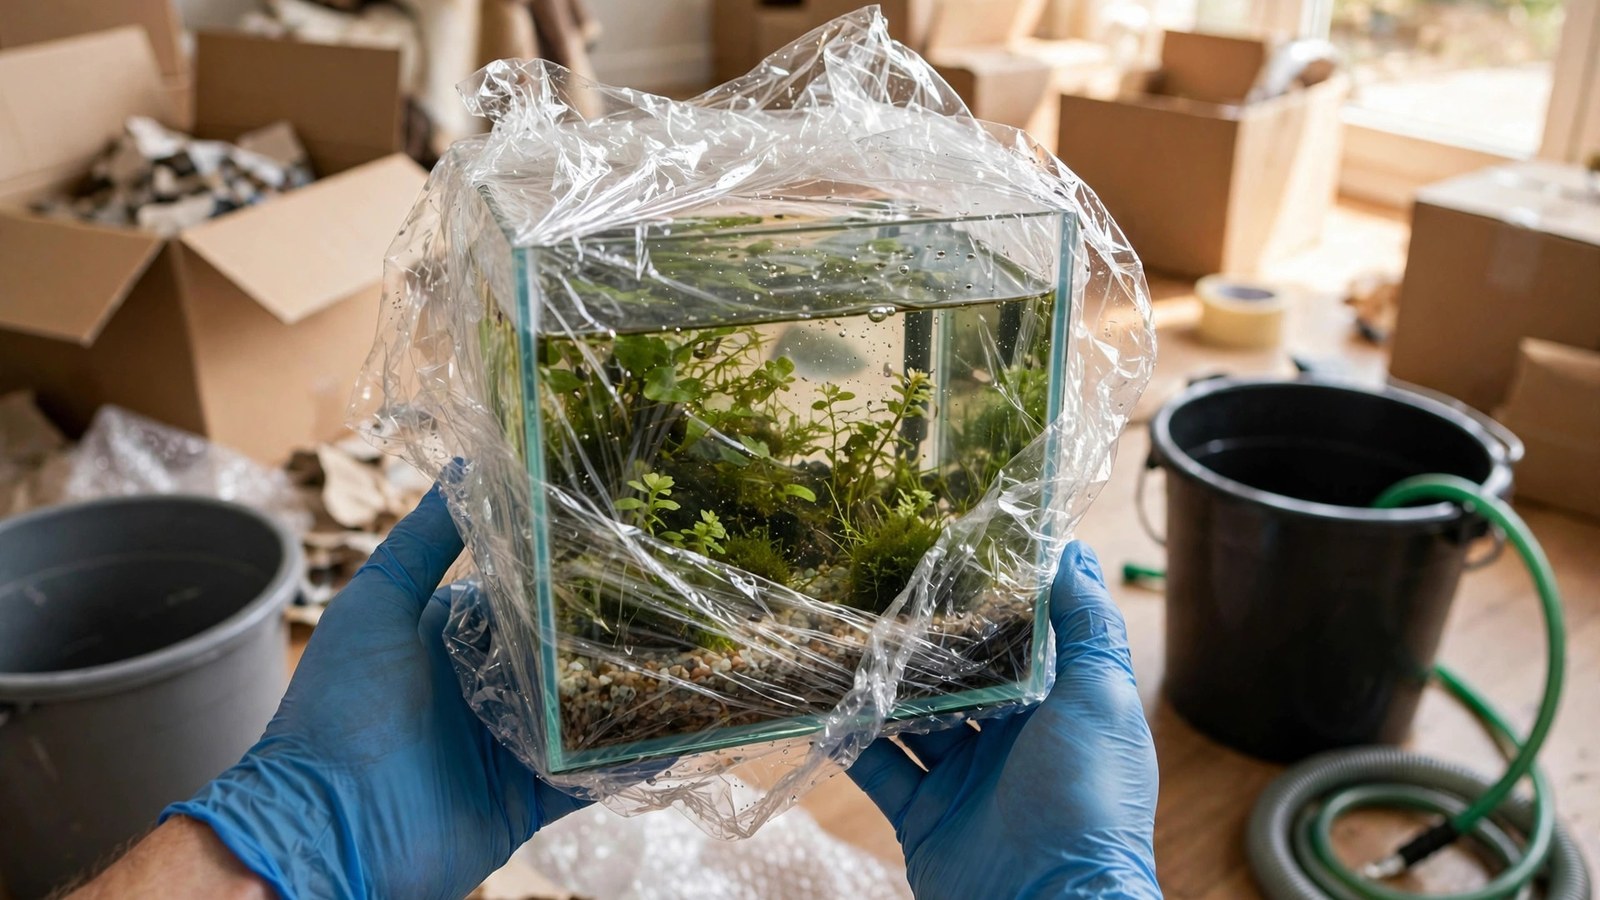
Moving a planted tank feels like defusing a bomb. You have a living, balanced little ecosystem — rooted plants, a bacterial colony in the filter, fish that are finally settled — and moving day threatens to scramble all of it at once. The good news is that with the right prep work and a drain-down method that keeps substrate wet and plants in place, most planted aquariums survive a move with their scape (and their livestock) intact.
Whether you're moving across the room or across the state, the principles are the same — never move a full tank, keep your filter media wet and oxygenated, transport livestock in proper containers, and refill slowly at the destination.
Start Preparing One to Two Weeks Out
The biggest mistake people make with a planted-tank move is treating it as a one-day event. The moves that go smoothly are won in the week or two before, while everything is still stable.
Trim plants and tidy the scape
About a week before moving day, give your plants a thorough trim. Loose, overgrown growth gets knocked around in transit, and trimmed plants handle jostling far better than leggy ones. Remove any dead or rotting leaves while you're at it, using the same technique you'd use for routine cleanup (see our guide to removing dead plant leaves).
Skip the heavy rescape
This is not the time to rearrange the hardscape or rip up half the carpet. Any plant you uproot now will be a stressed plant on moving day. If you must fix something, do it at least ten days out so the plants can re-root. A quick pass with the method in how to trim aquarium plants is all the pre-move grooming you need.
Prepare water at the destination
If you're moving to a new home, get water ready there in advance. Test the new tap water's pH, hardness (GH/KH), and chlorine/chloramine treatment needs — a big chemistry difference is a shock you want to catch before moving day, not during it. If it differs a lot, plan a slower acclimation at the destination, similar to the process used when you acclimate new aquarium plants or livestock.
Gather supplies early
Moving day always runs long, so buy or borrow the awkward supplies now rather than scrambling mid-crisis. Your supply list should include:
- Food-grade buckets with tight lids — for livestock, filter media, and a reserve of old tank water.
- Fish bags or heavy-duty polyethylene bags — for individual bagging of delicate fish.
- Battery-powered air pumps with airstones — one per livestock bucket; essential beyond about 30 minutes.
- Plastic cling film (stretch wrap) — to wrap the tank and hold humidity over exposed plants.
- Old towels and blankets — padding for the tank and drip protection at both ends.
- A sturdy hand truck or dolly — your back will thank you.
- Dechlorinator, water test kit, and fertilizer — packed where you can find them first at the destination.
The Night Before Moving Day
Do a partial water change the evening before — using the technique from our water changes for planted tanks guide — so the water the fish travel in is as clean as possible. Lightly fast the fish — a 24-hour fast is standard practice and keeps ammonia down in the transport buckets. Double-check the batteries in your air pumps, and stage everything by the tank.
The Golden Rule: Never Move a Full Tank
A tank full of water is extraordinarily heavy and the sloshing load puts enormous, uneven stress on the glass panels and silicone seams. Moving a full tank, even a few feet, is the single most common way aquarists crack a tank or blow out a seam.
Instead, use the drain-down method. Siphon water out until only 10–20% of the water remains — just enough that the substrate stays wet and the plants stay planted. The substrate must never dry out: drying kills the beneficial bacteria living in it and stresses rooted plants. With most of the water gone, the tank is light enough to carry safely.
The nano-tank exception
For very small tanks (roughly 5 gallons / 19 liters and under), move the whole setup nearly as-is, with substrate and plants intact and a couple of inches of water. The weight is manageable and the tiny ecosystem stays undisturbed. Wrap the top in cling film, keep it level, and go.
Protecting Your Filter Media (Your Bacteria Colony)
The beneficial bacteria that process ammonia live mostly in your filter media, and they are the single most valuable thing in the tank — more valuable than any single fish. A crashed cycle after a move causes the ammonia spike that kills livestock in the days following.
The rule is simple: keep all filter media submerged in old tank water, and keep that water oxygenated. Transfer sponges, ceramic rings, and bio-media into a bucket or sealed bag of tank water. Never rinse media in tap water — chlorine wipes out the bacteria you're trying to save. If the filter will be off for more than an hour or two, drop a battery air pump into the bucket. Canister filters can be carried with water inside (valves closed); keep them upright and out of direct sun.
Transporting Fish, Shrimp, and Snails
Catch livestock before you drain the tank — it's far easier to net fish in full water.
Move fish into lidded buckets of old tank water, or into double-bagged fish bags filled one-third water, two-thirds air. Don't overcrowd: one five-gallon bucket comfortably holds a community of small fish for a few hours. Run a battery air pump in every bucket on trips longer than half an hour.
Shrimp and snails travel well in bags with plant material for cover. Label each container with what's inside —.
Wrapping the Tank and Securing Equipment
Once drained to the transport level, wrap the entire tank tightly in plastic cling film, lid on if you have one. This holds humidity over the exposed plants so they don't dry out in transit, and keeps substrate from spilling if the tank tips.
Remove anything that can shift and damage glass: large rocks, heavy driftwood pieces, heaters, and CO2 equipment all come out. Wrap equipment separately in towels — a loose heater banging against the glass is a classic way to crack a tank in transit. Keep screws and small fittings in a labeled bag taped to the equipment.
The Drive: Loading, Padding, and Temperature
Load the tank last and unload it first. It rides on a level surface — the floor of the car or a flat spot in the truck bed — never on its side, and never with anything stacked on top. Pad it with blankets or foam on all sides so it can't slide.
Temperature control matters more than most people expect. On a hot day, a wrapped tank in a car trunk can cook plants; on a cold day, everything can chill. Keep the vehicle climate reasonable, and in extreme weather consider riding with the tank in the passenger compartment. For livestock buckets, aim to keep water within a few degrees of tank temperature.
Reassembly at the New Location: Order Matters
Position the stand first, then the tank. A second pair of hands is wise for anything over 20 gallons.
- Level the stand and tank. Shim it now; a leaning tank stresses seams long-term.
- Reinstall hardscape and equipment. Put rocks, wood, heater, and filter back in place while the tank is still mostly empty.
- Refill slowly. Siphon new (dechlorinated, temperature-matched) water in gently, pouring over a plate, a plastic bag, or your hand to break the flow. Blasting water directly into the substrate craters it and unearths plants — the same slow-fill discipline described in our guide to water change technique for planted tanks applies here.
- Replant anything uprooted. Some stems will have floated loose. Replant them promptly while the water is low — it's far easier than reaching through a full tank. Use the deep-planting method from how to plant aquarium plants so they stay anchored.
- Restart the filter, heater, and CO2. Confirm flow, temperature, and (if you run it) your CO2 schedule before adding livestock.
- Acclimate and release livestock. Float bags or drip-acclimate bucket fish, especially if the new water chemistry differs — the same steady approach covered in our vacation plant care guide for keeping livestock stable through disruption applies here.
Tank Size vs. Method: Which Approach Fits?
The right method depends on tank size and move distance.
| Tank size | Recommended method | What to do |
|---|---|---|
| Nano (≤ 5 gal / 19 L) | Move as-is | Drain to a few inches, wrap in cling film, carry level with substrate, plants, and bacteria intact. |
| Small–medium (10–40 gal / 40–150 L) | Drain-down (partial) | Drain to 10–20%, keep plants planted and substrate wet, livestock in buckets, reassemble on arrival. |
| Large (50–75 gal / 190–280 L) | Partial teardown | Drain down; remove tall plants and hardscape, bag plants damp, keep livestock in multiple aerated buckets. |
| Extra large / long-distance (75+ gal / 280+ L, or 4+ hours) | Full teardown | Remove everything; plants in damp paper/bags, substrate in buckets, livestock in insulated containers with air pumps. |
Aftercare: The First Week in the New Home
Think of the week after the move like the settling-in period of a new tank — the first 90 days guide for planted tanks covers the same patience-and-observation principles, just compressed.
Expect some melting — don't panic
Replanted or substrate-disturbed plants very often melt in the days after a move. Crypts are notorious for it, but stems and hardy plants can drop leaves too. This is normal transplant shock, not failure. Leave the roots in place and keep conditions stable — most plants push out new growth within one to two weeks. Pull off fully mushy leaves so they don't rot and foul the water.
Monitor ammonia closely
Disturbed substrate releases trapped organic waste and can trigger a mini ammonia spike. Test ammonia and nitrite daily for the first three to five days, and keep a water conditioner that detoxifies ammonia on hand. A filter that kept its bacteria wet will usually rebound quickly.
Resume fertilizing gradually
Don't dump a full dose of fertilizer into a freshly moved tank on day one — resume your aquarium plant fertilizer schedule at half dose — stressed plants aren't taking up nutrients at full rate, and excess nutrients feed algae. If you run CO2, restart it on your normal schedule, but watch your drop checker; the new water chemistry may shift your pH baseline.
Rescape lightly if needed
Once everything has settled for a few days, do a gentle pass: re-anchor floaters (see managing floating plants), straighten leaning stems, smooth out substrate drifts. Resist the urge to fully rescape — the plants need stability right now, not another upheaval.
When a Full Teardown Is the Better Call
Sometimes the drain-down method isn't enough, and a clean teardown and rebuild is genuinely the safer option:
- Very large tanks — at 75+ gallons, even drained-down the glass alone is dangerously heavy to carry.
- Long moves — beyond about four hours, plants dry despite wrapping and livestock buckets become high-maintenance.
- Fragile or rimless tanks — rimless glass is far less forgiving of flexing than a braced tank.
- A fresh start is wanted — if you were already unhappy with the scape, a move is the perfect excuse.
For a full teardown: bag plants in damp paper towels or sealed bags with a little water (keep them dark and cool), put substrate in lidded buckets (keep it damp — never let it dry out), and transport livestock exactly as described above. Rebuild at the destination like a new setup, and cycle-check the filter before restocking. Moving day is also an excellent time to inspect plants closely for hitchhiking pests like snails or planaria — a quick look now saves a planaria removal battle later.
Frequently Asked Questions
Can I move a planted tank with the substrate and plants still in it?
Yes — for nano tanks up to about 5 gallons, moving everything intact with just a few inches of water is the lowest-stress option. For larger tanks, drain down to 10–20% so the substrate stays wet and plants stay planted, but the tank is light enough to carry safely. The key is that the substrate never dries out, because drying kills the beneficial bacteria and stresses roots.
How long can fish stay in buckets during a move?
With a battery-powered air pump and stable temperatures, most small community fish handle 4–8 hours in a bucket comfortably; many aquarists manage 12 hours on long moves with water changes along the way. Without aeration, keep it under 2–3 hours. Don't overcrowd, fast the fish for 24 hours beforehand, and keep the temperature steady.
Why are my plants melting after the move?
Melting after a move is almost always transplant shock — disturbed plants shed old leaves and regrow ones adapted to current conditions. It's most common in crypts, stem plants, and anything recently replanted. Don't tear the plants out; remove mushy leaves, keep parameters stable, and wait. New growth typically appears within one to two weeks.
Should I keep my filter media wet during the move?
Absolutely. Your beneficial bacteria die quickly when media dries out or sits stagnant and oxygen-starved. Keep all media submerged in old tank water, add a battery air pump for trips over an hour or two, and never rinse media in untreated tap water. Preserving the bacteria colony is what prevents the post-move ammonia spike that kills livestock.
How do I refill the tank without destroying the scape?
Refill slowly, pouring or siphoning water over a plate, plastic bag, or your hand so the flow breaks up before hitting the substrate. Pouring directly into the substrate craters it and unearths plants. Get a few inches in first, replant anything that floated loose while you can still reach easily, then continue filling.
When should I fully tear down instead of moving the tank partially assembled?
Choose a full teardown for tanks of 75 gallons or more, moves longer than about four hours, or fragile rimless tanks where any flexing risks the glass. It also makes sense if you wanted to rescape anyway. Bag plants damp, keep substrate moist in lidded buckets, and treat reassembly like a new setup with a cycle check.
Move Slowly, and Your Scape Will Survive
A planted tank is tougher than it looks — What they can't survive is rushing: a full tank lifted by the rim, filter media left to dry on a towel, fish dumped into new water chemistry without acclimation. Budget the time, drain the water, keep everything wet and oxygenated, and refill with patience.
Tissue-culture plants are the exception — they’re grown in sterile gel and adapt with minimal melting, which is part of what you’re paying for. Plants bought submersed from another hobbyist’s tank also transition with little melt, since they’re already in the right form.
Which Plants Melt Most (and Least)
Heavy melters (expect significant leaf loss)
- Cryptocorynes — infamous for “crypt melt,” sometimes dropping every leaf after any disturbance. They almost always recover from the roots within weeks.
- Stem plants grown emersed — rotala, ludwigia, and hygrophila often shed lower emersed leaves while the growing tips transition.
- Amazon swords — emersed-grown swords typically lose their broad oval aerial leaves and replace them with longer submersed ribbon leaves.
Light melters
- Anubias, java fern, bucephalandra — slow-growing rhizome plants transition gradually; occasional old-leaf melt but rarely dramatic.
- Vallisneria — usually transitions well, though it dislikes the move itself and may sulk for a week.
- Floating plants — minimal melt since their leaves were already at the air-water interface.
The Acclimation Protocol
Step 1: Quarantine or dip first
Before acclimating to your tank’s conditions, make sure you’re not acclimating pests along with the plant. Run new arrivals through our quarantine and dip protocol — it adds days upfront but prevents months of regret.
Step 2: Float to temperature-match (30 minutes)
Float the bag or container in your tank for 20–30 minutes to equalize temperature. Plants are less temperature-sensitive than fish, but a 10°F shock on top of transplant stress is an avoidable insult.
Step 3: Trim before planting
Remove any leaves that are already damaged, yellowing, or heavily algae-covered — they won’t recover and they’ll rot in your tank, feeding algae. For stem plants, trim off the bottom inch and any emersed leaves that look unlikely to adapt; the plant wastes energy maintaining leaves it’s going to shed anyway. Keep the healthy growing tips — that’s where recovery starts.
Step 4: Plant correctly the first time
Follow our planting guide — right depth, crown exposed on rosettes, rhizomes unburied on epiphytes. Every uprooting and replanting restarts the acclimation clock, so get placement right on the first attempt. Decide where each plant goes before it goes in the water.
Step 5: Run a gentle first week
For the first 7 days after planting:
- Moderate light — run your normal photoperiod but consider dropping intensity 20–30% if your light is dimmable. Blast-level light on a melting plant grows algae on the dying leaves, not recovery.
- Stable CO2 — if you inject CO2, keep it consistent. Fluctuating CO2 during acclimation is a melt accelerator. If you’re low-tech, this doesn’t apply — see growing without CO2.
- Half-strength fertilizer — new plants with damaged leaves can’t use full dosing, and the excess feeds algae. Ramp to full strength over 2–3 weeks per our fertilizer schedule.
- No disturbance — don’t move, trim, or “check on” new plants for at least two weeks. Every touch resets root establishment. This is especially critical for crypts.
Step 6: Remove melt, keep the base
As emersed leaves melt, remove the mushy material promptly — decaying leaves release ammonia and grow fungus that can spread to healthy tissue. But never discard the plant while the crown, rhizome, or roots are firm and alive. A crypt that’s lost every leaf but has firm roots is a plant that’s about to recover, not a dead plant. Give it 3–4 weeks before judging.
Telling Normal Melt From Real Problems
Normal transition melt:
- Affects oldest/emersed leaves first, newest growth last
- New submersed leaves emerge even as old ones dissolve
- Roots and crown stay firm and white/green
- Timeline: 1–4 weeks, then obvious new growth
Concerning melt (see our full melting diagnosis guide):
- New growth also melts or emerges deformed
- Rhizome or crown turns mushy and brown — this is rot, not transition
- Entire plant dissolves within days with no new growth after 4+ weeks
- Melting spreads to established plants that weren’t recently moved
Buying Tips to Minimize Melt
- Buy submersed-grown when available — hobbyist-grown cuttings transition with almost no melt.
- Choose tissue culture for sensitive species — crypts and delicate stems establish far more reliably from sterile cups.
- Avoid plants already melting in the store tank — some melt is normal, but a plant that’s mostly mush at purchase has less energy for recovery.
- Transport carefully — keep plants damp and out of direct sun/heat. A plant that dries out or cooks in a hot car melts far worse than one transported properly.
The First-Month Timeline: What to Expect Week by Week
Knowing what’s normal when removes most acclimation anxiety. Here’s the typical timeline for a healthy plant adapting to a new tank:
Week 1: The quiet week
Almost nothing visible happens. The plant is growing roots you can’t see and assessing its new environment. Some species (vallisneria, stem plants) may start shedding their lowest leaves. This is normal. Resist the urge to “help” — no moving, no extra fertilizer, no light changes. The most common beginner mistake is intervening during a week when the correct action is nothing.
Week 2: Melt peaks
This is when emersed leaves give up in earnest. Crypts may drop everything; swords shed their broad aerial leaves; stem plants lose lower foliage. It looks catastrophic and it’s usually fine. Keep removing mushy material, keep conditions stable, and watch the crown and growing tips — if those are firm and green, recovery is already underway.
Week 3: The turn
New submersed-adapted leaves emerge — smaller, thinner, often a slightly different shade of green than the emersed foliage. Stem plant tips start growing visibly; crypts push tiny curled leaves from the crown; swords unfurl narrow ribbon leaves. This is the moment most beginners exhale for the first time.
Week 4+: Established
New growth outpaces melt, and the plant is functionally yours. You can resume full-strength fertilizer, normal trimming, and stop treating it as fragile. Some slow growers (anubias, bucephalandra) take 6–8 weeks to show obvious progress — that’s their normal speed, not a problem.
Acclimating Different Plant Formats
Tissue-culture cups
Sterile, pest-free, and already adapted to high-humidity (not emersed) growth — tissue cultures melt the least of any format. Rinse the agar gel off gently (leftover gel rots and feeds fungus), split the portion into small plantlets, and plant per our planting guide. They establish slowly for the first two weeks, then accelerate. No dip needed, minimal acclimation stress — this is the premium experience you’re paying for.
Potted plants
Remove the pot and strip away the rockwool completely — leftover rockwool traps debris and rots. Tease the root mass apart gently; if it’s a dense mat, splitting it into 2–3 smaller portions actually establishes faster than planting one big clump (more growing points, better water flow around roots). Potted plants are usually emersed-grown, so expect the standard 2–4 week melt cycle.
Bare-root / bunched stems
Typically sold as weighted bunches. Remove any bands, foam, or weights, strip the lower leaves, and plant stems individually or in small groups. Bunched stems from the store are often already transitioning — check for new submersed growth at the tips, which tells you the plant is mid-adaptation and will settle quickly.
Hobbyist cuttings
Already submersed-grown and the fastest to establish — often showing new growth within days. The main acclimation factor is water-parameter difference between the two tanks. Float to temperature-match, plant promptly, and they’ll usually take off with minimal melt. This is why experienced hobbyists prefer trading cuttings over buying potted plants.
Frequently Asked Questions
Should I use a “plant starter” or transplant fertilizer?
Products marketed for transplant shock are mostly B-vitamins and mild hormones. They don’t hurt, but there’s no strong evidence they help aquarium plants specifically. Stable conditions and patience outperform any bottle. Save the money for more plants.
My new plant melted completely — bare crown, no leaves. Is it dead?
Probably not, if the crown or rhizome is firm. Crypts and swords routinely lose 100% of their leaves and regrow from the base within a month. The test is firmness: firm and pale/green means alive; mushy and brown/black means rot. Give firm-but-leafless plants a full 4 weeks before declaring them dead.
Can I speed up acclimation with extra light or CO2?
No — and trying usually backfires. A melting plant can’t use extra light; the excess just grows algae on its dying leaves. Keep light moderate and CO2 stable (not boosted) during acclimation. Growth speed comes from the plant’s own adaptation timeline, which you can’t rush, only avoid delaying.
Should new plants go straight into my main display tank?
After quarantine/dipping, yes — there’s no benefit to a separate “growing-in” tank for most plants. They acclimate to your water fastest in the tank they’ll live in. The exception is very delicate species going into a tank with boisterous fish; give those a few weeks in a calm corner or breeder box first.
The Patience Rule
The single most important acclimation skill is restraint: plant it right, set gentle conditions, remove decay, and then leave it alone for a month. The hobbyists with the best plant growth aren’t doing something clever in week one — they’re simply not interfering in weeks two through four while the plants do what they’ve evolved to do. Melt looks like failure and feels like failure, but in most cases it’s the visible part of a plant successfully becoming yours.