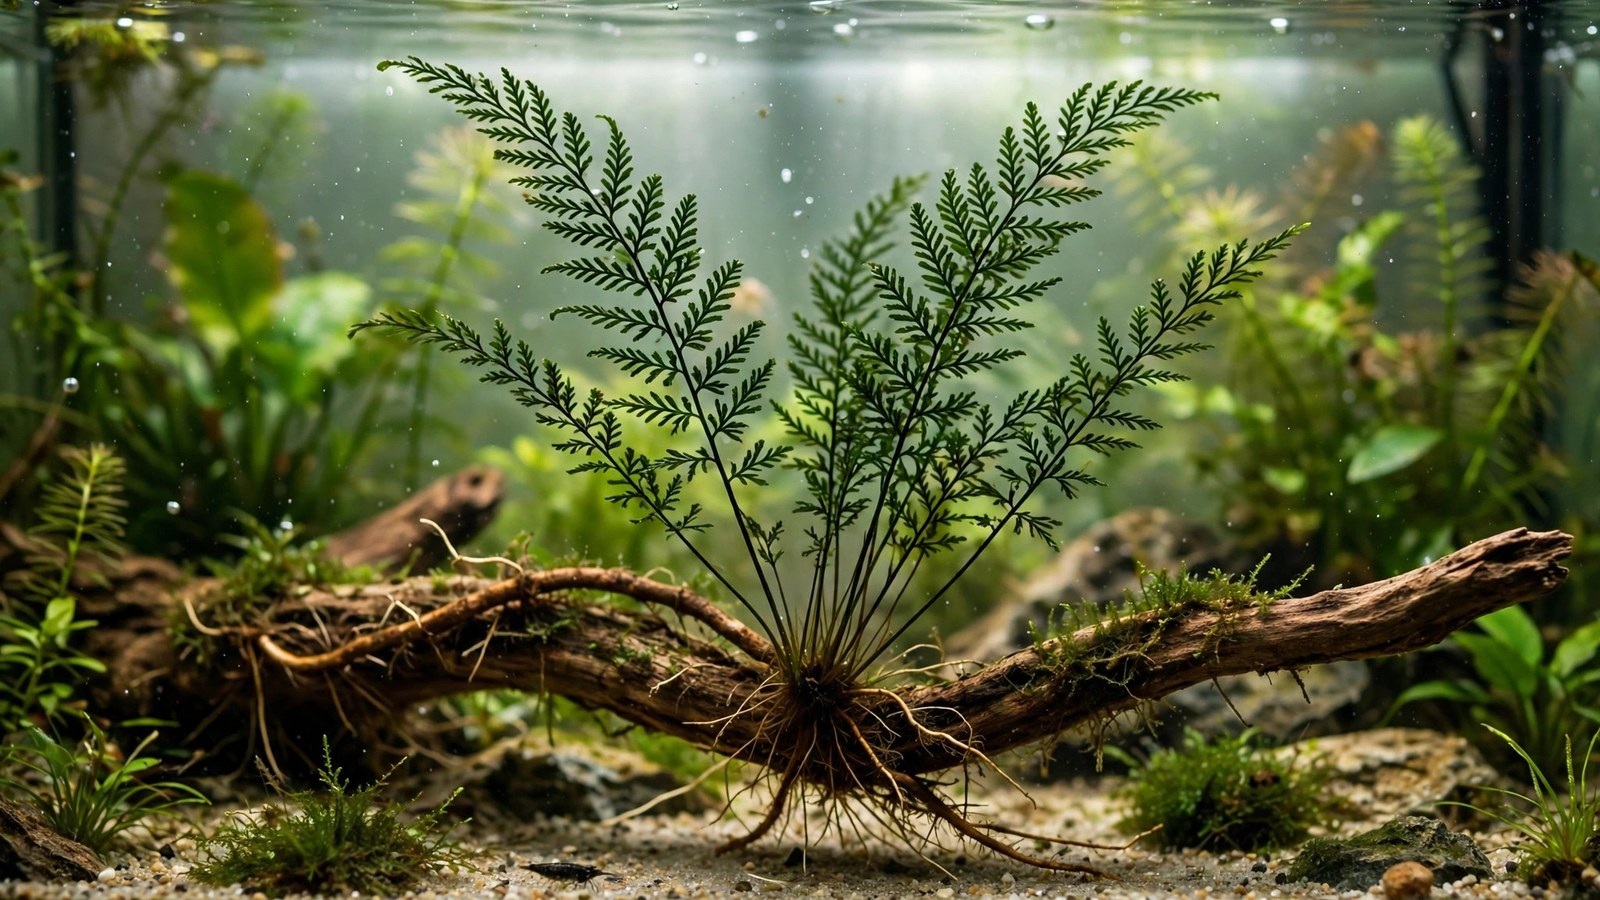
Most people kill their African Water Fern the first time they try to make more of it — not from a bad cut, but by burying the rhizome in the substrate afterward, where it quietly rots. If you want to know how to propagate bolbitis, the whole skill is one clean cut: split the horizontal rhizome, keep every section exposed, and anchor it to wood or stone instead of planting it like a stem plant. For the full picture of this plant's needs, see our African Water Fern (Bolbitis) care guide.
Why Rhizome Division Works on Bolbitis
Bolbitis is an epiphyte: every leaf and root sprouts from a single creeping rhizome, the thick horizontal stem at the plant's base, which doubles as its energy battery. Division works because each split piece keeps enough stored energy to regrow on its own.
Spore propagation in a home aquarium is effectively a myth — it demands emersed conditions and microscopic handling no home setup can sustain. Rhizome division is the only method worth your time: cut between leaf clusters, give each piece leaves plus roots, and never bury the rhizome afterward. The broader principles in our guide to how to propagate aquarium plants apply here too.
When Your Fern Is Ready to Divide
Don't divide on a schedule — divide on size. A mother plant is ready when its rhizome reaches 7–10 cm with 12 or more leaves, so each half keeps 6 leaves after the cut, and the donor is healthy: firm, dark green leaves, no algae or melt. A stressed plant recovers poorly — you'd end up trying to revive a dying aquarium plant instead of propagating a thriving one.
Divide during a water-change session, when your hands are already wet and tools are out. If dense fronds shade the rhizome, trim older leaves a week beforehand — less canopy means less transplant stress and a clearer view of where to cut.
What You'll Need
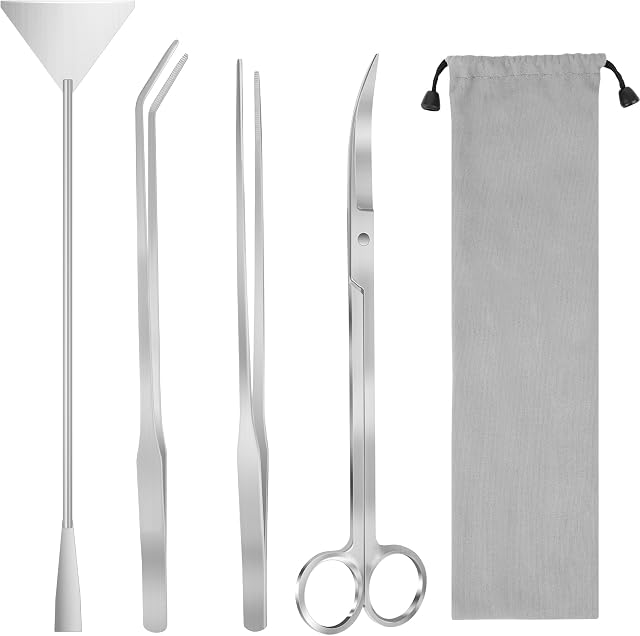
- Curved aquascaping scissors — the right tool for this job; a sharp pair slides under the rhizome and slices cleanly. Dull scissors crush the rhizome instead of cutting, and crushed tissue is where rot starts.
- Clean tweezers — for positioning small divisions on their mounts.
- Thread or fishing line — to tie divisions to hardscape.
- Super glue gel (plain cyanoacrylate, no additives) — optional, but faster than thread.
- A shallow bowl of tank water — to hold divisions so they never dry out.
Sterilize the scissors with boiling water or rubbing alcohol before cutting. Cross-contaminating between tanks is a real risk — new plants you bring home should also go through proper aquarium plant quarantine first.
 ★4.7
Liveek 4-in-1 Aquascaping Tool Kit
Check Price on Amazon ★4.7How to Propagate Bolbitis: Rhizome Division, Step by Step
- Remove the mother plant gently. If it's on hardscape, detach the whole mount from the tank. Working outside the tank is far easier than fumbling with scissors underwater, and every division goes into the bowl of tank water immediately.
- Inspect the rhizome. Rinse off debris and find natural gaps between leaf clusters — bare spots where the rhizome shows for a centimeter or so. These are your cutting lanes; cutting through a leaf cluster removes leaves you wanted to keep.
- Trim damaged material first. Cut away any black, mushy, or rotten leaves or rhizome sections. Don't let infected tissue hitch a ride onto a fresh division.
- Make the cut. Position the curved scissors at the gap, one blade under the rhizome, and slice in a single motion. Each division should be at least 4–5 cm of rhizome carrying 4–6 healthy leaves and a tuft of roots. When in doubt, cut fewer, larger pieces — oversized divisions recover noticeably faster.
- Trim the roots lightly. Cut the root mass back to about 3–4 cm — fresh cuts regrow faster and sit easier against a mount than tangled old roots, as our root pruning before replanting guide explains.
- Keep divisions wet. A Bolbitis rhizome dries out in minutes on the counter, and desiccated tissue does not recover.
- Mount immediately. Attach each division to driftwood or rock right away using one of the methods below, then return the mounts to the tank.
Attaching Your New Divisions
A division with nothing to grip will drift, tumble, and stress itself to death, so anchoring is not optional. You have three good options.
Thread or fishing line
Lay the rhizome against the wood or rock and wrap thread around both in an X pattern, tied firmly but not cutting into the tissue. Cotton thread rots away on its own in 3–4 weeks, once the roots have gripped. For more on keeping things in place, see how to anchor aquarium plants.
Super glue gel
Apply a pea-sized dab of plain cyanoacrylate gel to the dry mount and press the rhizome onto it for 30 seconds — gel, not runny liquid, so it stays put and doesn't wick onto the leaves.
Wedge method
Tuck the rhizome into a natural crevice in driftwood or between two rocks. No materials needed — but confirm it's genuinely snug. A piece that looks secure and floats free overnight will sulk for weeks.
Aftercare: The Recovery Timeline
Treat divisions like any newly acclimated aquarium plant: stable, clean water matters more than heavy feeding in the first weeks.
| Week | What you'll see | What to do |
|---|---|---|
| 1 | Division looks unchanged; cut end seals over | Stable light (6–8 hours), no fertilizer spikes, keep the cut end off the substrate |
| 2–3 | White root hairs reach toward the mount | Resume normal all-in-one fertilizer dosing at half strength |
| 4–8 | First tiny new frond unfurls from the rhizome tip | Full dosing, trim any melted old leaves so energy goes to new growth |
| 8–16 | Division looks like a small, independent fern | Remove any remaining thread or line; treat it like the mother plant |
Some older leaves will melt during the first month — that's normal transplant shock, not failure. Remove them as they yellow so they don't fuel algae, and apply the same patience you'd give replanted aquarium plant trimmings settling into a new spot.
Frequently Asked Questions
Can you propagate Bolbitis from a single leaf?
No. A Bolbitis leaf alone has no growing point — all new growth emerges from the rhizome, never from a cut leaf. A successful division must include a section of rhizome with its own leaves and roots attached. Leaf cuttings will simply decay.
How big should each Bolbitis division be?
Larger pieces — half a mother plant or more — recover noticeably faster because the rhizome carries more stored energy. Splitting a plant into tiny one- or two-leaf fragments is the most common reason divisions stall.
How long until a divided Bolbitis starts growing?
Plan on 4–8 weeks before you see the first new frond. Bolbitis is a slow grower, and a divided plant spends its first month sealing the cut and gripping its mount. CO2 injection and stable soft, slightly acidic water speed things up, but patience is the real accelerator here.
Why is my Bolbitis rhizome turning brown after dividing?
A light brown seal over the cut itself is normal healing. Spreading brown or black softness is rot — usually from a buried rhizome, a crushed end, or stagnant water around the cut. Trim back to firm tissue, sterilize your scissors, and remount the remainder unburied with good flow.
Can I propagate Bolbitis emersed, in tissue culture style?
You can divide the rhizome the same way for emersed setups — the cutting method doesn't change. But emersed propagation offers no real advantage; divisions heal just as well submerged with clean water. For sterile culture starts, see planting tissue culture cups.
One Cut, More Ferns
Propagating Bolbitis isn't a technical feat — it's a discipline check. Wait for a strong mother plant, make one clean cut between leaf clusters, and keep the rhizome off the substrate. Each division repays you with a slow, steady fern that eventually becomes a donor itself.