You have just spent an hour carefully planting your new aquarium, every stem placed exactly where the layout demands it — and the next morning, half of them are bobbing at the surface like tiny buoys. If you have ever wondered how to anchor aquarium plants so they actually stay put, you are dealing with one of the most universal beginner frustrations in the hobby. The good news is that floating plants are rarely a plant problem; they are a technique problem, and technique can be fixed in a single planting session. This guide covers why plants float, the planting depth and angle methods that professionals use, the tweezers technique, plant weights and their lead-free alternatives, how to anchor in sand versus gravel versus aquasoil, and how to attach epiphytes to hardscape so they never move at all.
Why Aquarium Plants Float Up in the First Place
Before fixing the problem, it helps to understand the physics working against you. Aquarium plants are naturally buoyant. Leaves and stems contain internal air spaces called aerenchyma — hollow channels the plant uses to move oxygen down to its roots. In a brand-new planting, the roots are too short or nonexistent to counteract that upward push, so the plant behaves like a tiny balloon until its root system develops.
Beyond buoyancy, four factors make floating worse:
- Loose or fine substrates. Very fine sand shifts easily and holds stems poorly; coarse gravel lets stems slide between the gaps. Both are plantable, but each demands its own technique.
- Shallow planting. Pushing a stem only a centimeter into the substrate is the single most common cause of floaters. New plantings need surprising depth.
- Fish and invertebrates. Corydoras, loaches, goldfish, and large cichlids all root around in the substrate; even a busy school of tetras swirling near fresh plantings can loosen them.
- Water movement. A strong filter outflow aimed across a newly planted foreground will lift stems right out of the bed. New scapes should run with gentler flow for the first week or two.
Understanding this list is genuinely empowering, because each cause has a direct countermeasure. Floaters are not a sign that your plants are unhealthy — most new plantings go through a wobbly phase, especially delicate arrivals from tissue culture cups that need special planting.
The Fundamentals: Depth and Angle
Ninety percent of successful anchoring comes down to two variables: how deep the plant goes, and the angle it enters the substrate. Get these right and you will barely need any of the gadgets covered later.
Planting depth
Bury stem plants with at least 2–4 cm of bare stem below the substrate surface, and push rooted rosette plants (swords, crypts, sagittaria) down until the crown — the point where leaves emerge from the roots — sits just at or slightly above the substrate line. For carpeting plants and tiny foreground species, press the base of each cluster at least 1.5 cm deep. It always feels like too much; it never is.
The angled-planting technique
Instead of pushing the stem straight down, tilt it to roughly 45 degrees as it enters the substrate, then let the top bend back upright. This simple trick doubles the length of stem buried below the surface and creates a bend that resists straight upward pull. It also points the growth tip toward the light, so the plant straightens itself within days. Combined with a gentle "wiggle" of the substrate closed around the stem after insertion, the angled method is how experienced aquascapers plant whole tanks with no weights at all.
The Tweezers Method, Step by Step
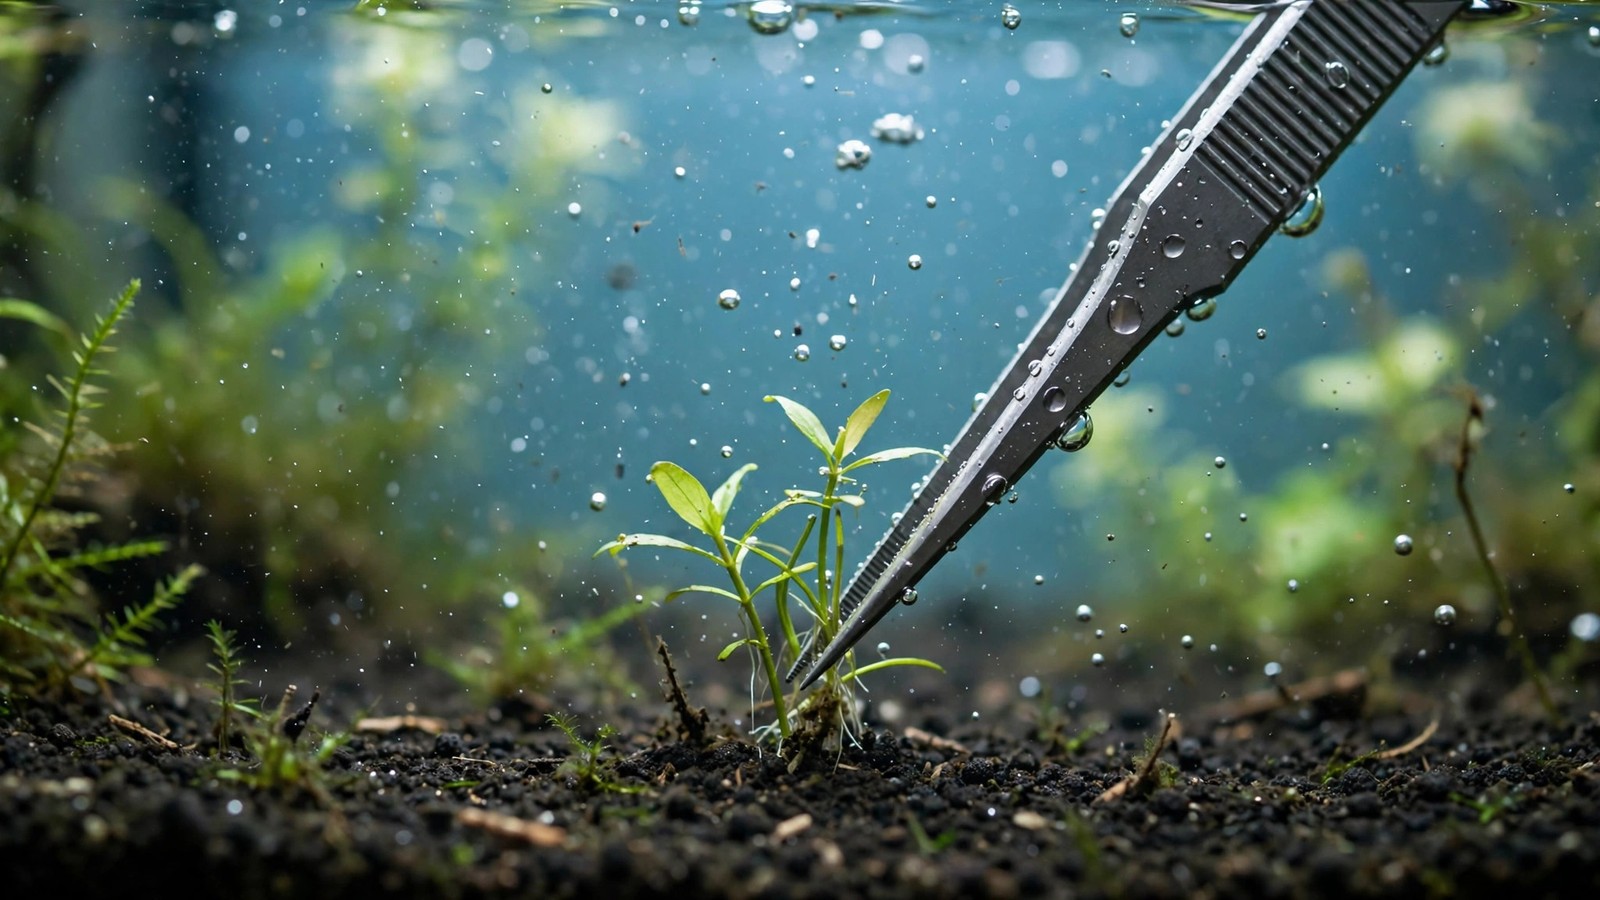
Planting tweezers (often sold as aquascaping tweezers or pinsettes) are the single most useful tool for anchoring. Fingers are too blunt for most substrates — tweezers let you push stems deep without disturbing the surrounding bed.
- Prepare the stem. Strip leaves from the bottom 3–4 cm of the stem so no foliage is buried (buried leaves rot and foul the substrate). Make a clean diagonal cut on the stem end if it is damaged.
- Grip low. Hold the stem with the tweezers near its base, a centimeter or two above the cut end.
- Push deep at an angle. Drive the tweezers into the substrate to your target depth — go deeper than feels necessary — tilting to about 45 degrees.
- Open slightly and withdraw. Release the stem with a small open-close motion, then pull the tweezers straight back out. The substrate should collapse around the stem as you withdraw.
- Close the hole. With the tweezers' tips (or a finger in fine sand), gently push the substrate together over the planting point and firm it around the base.
Do this while the tank is half-filled during the initial scape if you can — planting in a full tank against water resistance is noticeably harder. If you are planting an already-filled tank, slow your movements; fast withdrawal is what pulls stems back out. Many beginners also find planting easier right after properly acclimating new aquarium plants, when the plants are hydrated and pliable rather than wilted from the bag.
How to Anchor Aquarium Plants With Weights
Plant weights are small rings, strips, or spiral coils that wrap around a stem's base to hold it down until roots take over. They are genuinely useful for stubborn floaters, strong current, or very buoyant, thin-stemmed species like Rotala or Limnophila.
Choose lead-free weights
Traditional plant weights were made of soft lead, which is malleable and heavy. However, lead dissolves slowly in aquarium water and is toxic to livestock, so lead weights have no place in a modern tank. Look instead for lead-free plant weights made from zinc alloys, ceramic-coated metals, or stainless steel. Many retailers now specifically label them "lead-free" or "shrimp-safe."
How to apply them
Wrap the weight snugly but not tightly around 2–4 stems at a time near their base — grouping several stems in one weight is more stable than one weight per stem. Bury the weighted base 2–3 cm deep. Avoid crushing the stems: if the tissue looks pinched or turns translucent, the weight is too tight and will rot the stems it was meant to save. Remove weights after 3–4 weeks once roots have established; leaving them on permanently can constrict the stem as it thickens. Weights are a temporary cast, not a permanent fixture.
Anchoring by Substrate: Sand vs Gravel vs Aquasoil
Each substrate type fights you in its own way, so match your technique to the bed you have.
| Substrate | Challenge | Best approach |
|---|---|---|
| Fine sand | Shifts and slides; stems lose grip easily | Plant deep (3–4 cm), use the 45-degree angle, firm sand over the base with tweezers; consider weights for the first weeks |
| Gravel (2–5 mm) | Stems slide between grains; hard to get purchase | Push stems down until they reach the bottom layer or glass, wedge between grains; weights help here more than in any other substrate |
| Aquasoil | Granules are light and shift when disturbed | Aquasoil is the easiest to plant in once you plant deep enough — the granules pack well; keep at least 4–5 cm of soil depth in planted areas and avoid stirring near fresh plantings |
Whichever substrate you use, keep the planted zones deep enough. Thin substrate — under 3 cm — gives roots nothing to grab and is the most common scape-design cause of chronic floaters.
Epiphytes: Tie or Glue Them to Hardscape
Some of the hobby's most popular plants — Anubias, Java fern, Bucephalandra, and mosses — are epiphytes that grow attached to wood or stone in nature. Burying their rhizomes in substrate is actually harmful: a buried rhizome rots, and the plant floats free or dies. For these species, anchoring means attachment to hardscape, not burial.
Thread and fishing line
The classic method is tying the rhizome to driftwood or rock with cotton thread or clear fishing line. Cotton thread eventually dissolves — by then the plant has usually attached itself with its own roots. Fishing line is stronger but should be removed once the plant is self-attached. Wrap firmly around both rhizome and hardscape, avoiding the rhizome's growing tip.
Cyanoacrylate super glue
The fastest professional method is gluing. Plain cyanoacrylate gel (the thick gel type) is aquarium-safe once cured — it polymerizes almost instantly in water. Dab a small amount on the hardscape, press the rhizome or moss into it for a few seconds, and it sets immediately. Many aquascapers glue while the hardscape is still dry, which is easiest. Use plain, uncolored gel with no additives.
Wedging
For rocks and driftwood with natural cracks, simply wedge the rhizome into a crevice. No thread, no glue — the plant's own rootlets will lock it in within weeks. This works beautifully for Bucephalandra and Anubias nana in rocky scapes.
When Fish Keep Uprooting Everything
Sometimes your technique is perfect and the livestock is the problem. Goldfish, large cichlids, loaches, and corydoras schools can all uproot new plantings daily. Your options, in order of practicality: give plants a head start by keeping diggers in another tank for the first 3–4 weeks while roots establish; use protective rings or a ring of larger pebbles around new plantings; combine deep angled planting with lead-free weights; choose digger-proof species like swords, vallisneria, and well-attached epiphytes; and keep bottom feeders well fed on sinking foods so they forage less aggressively.
Aftercare: The First Two Weeks
Fresh plantings are vulnerable until roots grow in, which typically takes one to three weeks. During this window, re-anchor anything that floats immediately — every day a stem spends at the surface is a day it is not rooting. Check plantings after every water change, keep filter outflow gentle, and never "check" root growth by tugging stems upward; a gentle sideways wiggle tells you whether the plant has purchase. Once stems have settled, the next skill is trimming them properly, because replanted tops — covered in our guide to propagating aquarium plants from cuttings and our stem plant trimming walkthrough — all start life as fresh plantings that need exactly these anchoring techniques.
Frequently Asked Questions
How long does it take for aquarium plants to anchor themselves?
Most stem plants develop functional anchor roots within one to three weeks, with fast growers like Hygrophila and Rotala often gripping in under ten days. Slow growers such as Anubias and Bucephalandra may take six to eight weeks to attach firmly to hardscape. Until roots form, keep weights and ties in place and re-anchor floaters promptly rather than waiting for nature to take its course.
Can I use super glue to attach all aquarium plants?
Super glue works for epiphytes that attach to hardscape — Anubias, Java fern, Bucephalandra, and mosses — but it is not appropriate for rooted stem or rosette plants, which must go into the substrate. Use plain cyanoacrylate gel with no additives, apply a small dab, and press the rhizome to the surface for a few seconds. It cures on contact with water and is considered aquarium-safe by the hobby's long experience.
Why do my plants keep floating even though I planted them deep?
Three usual suspects: the substrate is too shallow overall (under 3 cm gives roots nothing to grip), buried leaves are rotting and loosening the stem base, or fish and current are working the plant free. Strip lower leaves before planting, make sure planted zones are deep enough, angle stems at 45 degrees, and check whether livestock is the real culprit before blaming the plant.
Are lead plant weights safe for aquariums?
No — lead slowly leaches into aquarium water and is toxic to fish and invertebrates, particularly shrimp and snails. Always choose lead-free alternatives such as zinc-alloy, ceramic-coated, or stainless steel plant weights. If you find old lead weights in a used tank or bundled plant purchase, replace them rather than reusing them.
Should I remove plant weights after the plants root?
Yes. Remove weights after three to four weeks once the plants show new growth and resist a gentle sideways tug. Weights left on permanently can constrict thickening stems and trap detritus against the stem base, which encourages rot. Think of them as a temporary cast that comes off once the "bone" has healed.
How do I plant carpeting plants so they don't float up?
Divide carpeting species into small portions of a few plantlets each and press each portion at least 1.5 cm deep with tweezers, spacing portions about 2–3 cm apart. In fine sand this is the trickiest planting job in the hobby — planting in a half-drained tank helps enormously. Fine sand shifts easily, so firm it gently over each portion and keep flow low for the first two weeks while runners spread.
Anchoring Is a Skill, Not a Product
Gadgets help — tweezers, lead-free weights, and gel glue all earn their place — but the heart of anchoring aquarium plants is technique: plant deeper than feels right, angle stems into the substrate, match the method to the substrate, and attach epiphytes to hardscape instead of burying them. Master these habits and floating plants stop being a recurring crisis and become a rare, easily fixed event. For deeper species-specific context, the Tropica plant database notes each species' preferred planting style, and the Aquarium Co-Op blog carries practical planting walkthroughs worth a look.
Tissue-culture plants are the exception — they’re grown in sterile gel and adapt with minimal melting, which is part of what you’re paying for. Plants bought submersed from another hobbyist’s tank also transition with little melt, since they’re already in the right form.
Which Plants Melt Most (and Least)
Heavy melters (expect significant leaf loss)
- Cryptocorynes — infamous for “crypt melt,” sometimes dropping every leaf after any disturbance. They almost always recover from the roots within weeks.
- Stem plants grown emersed — rotala, ludwigia, and hygrophila often shed lower emersed leaves while the growing tips transition.
- Amazon swords — emersed-grown swords typically lose their broad oval aerial leaves and replace them with longer submersed ribbon leaves.
Light melters
- Anubias, java fern, bucephalandra — slow-growing rhizome plants transition gradually; occasional old-leaf melt but rarely dramatic.
- Vallisneria — usually transitions well, though it dislikes the move itself and may sulk for a week.
- Floating plants — minimal melt since their leaves were already at the air-water interface.
The Acclimation Protocol
Step 1: Quarantine or dip first
Before acclimating to your tank’s conditions, make sure you’re not acclimating pests along with the plant. Run new arrivals through our quarantine and dip protocol — it adds days upfront but prevents months of regret.
Step 2: Float to temperature-match (30 minutes)
Float the bag or container in your tank for 20–30 minutes to equalize temperature. Plants are less temperature-sensitive than fish, but a 10°F shock on top of transplant stress is an avoidable insult.
Step 3: Trim before planting
Remove any leaves that are already damaged, yellowing, or heavily algae-covered — they won’t recover and they’ll rot in your tank, feeding algae. For stem plants, trim off the bottom inch and any emersed leaves that look unlikely to adapt; the plant wastes energy maintaining leaves it’s going to shed anyway. Keep the healthy growing tips — that’s where recovery starts.
Step 4: Plant correctly the first time
Follow our planting guide — right depth, crown exposed on rosettes, rhizomes unburied on epiphytes. Every uprooting and replanting restarts the acclimation clock, so get placement right on the first attempt. Decide where each plant goes before it goes in the water.
Step 5: Run a gentle first week
For the first 7 days after planting:
- Moderate light — run your normal photoperiod but consider dropping intensity 20–30% if your light is dimmable. Blast-level light on a melting plant grows algae on the dying leaves, not recovery.
- Stable CO2 — if you inject CO2, keep it consistent. Fluctuating CO2 during acclimation is a melt accelerator. If you’re low-tech, this doesn’t apply — see growing without CO2.
- Half-strength fertilizer — new plants with damaged leaves can’t use full dosing, and the excess feeds algae. Ramp to full strength over 2–3 weeks per our fertilizer schedule.
- No disturbance — don’t move, trim, or “check on” new plants for at least two weeks. Every touch resets root establishment. This is especially critical for crypts.
Step 6: Remove melt, keep the base
As emersed leaves melt, remove the mushy material promptly — decaying leaves release ammonia and grow fungus that can spread to healthy tissue. But never discard the plant while the crown, rhizome, or roots are firm and alive. A crypt that’s lost every leaf but has firm roots is a plant that’s about to recover, not a dead plant. Give it 3–4 weeks before judging.
Telling Normal Melt From Real Problems
Normal transition melt:
- Affects oldest/emersed leaves first, newest growth last
- New submersed leaves emerge even as old ones dissolve
- Roots and crown stay firm and white/green
- Timeline: 1–4 weeks, then obvious new growth
Concerning melt (see our full melting diagnosis guide):
- New growth also melts or emerges deformed
- Rhizome or crown turns mushy and brown — this is rot, not transition
- Entire plant dissolves within days with no new growth after 4+ weeks
- Melting spreads to established plants that weren’t recently moved
Buying Tips to Minimize Melt
- Buy submersed-grown when available — hobbyist-grown cuttings transition with almost no melt.
- Choose tissue culture for sensitive species — crypts and delicate stems establish far more reliably from sterile cups.
- Avoid plants already melting in the store tank — some melt is normal, but a plant that’s mostly mush at purchase has less energy for recovery.
- Transport carefully — keep plants damp and out of direct sun/heat. A plant that dries out or cooks in a hot car melts far worse than one transported properly.
The First-Month Timeline: What to Expect Week by Week
Knowing what’s normal when removes most acclimation anxiety. Here’s the typical timeline for a healthy plant adapting to a new tank:
Week 1: The quiet week
Almost nothing visible happens. The plant is growing roots you can’t see and assessing its new environment. Some species (vallisneria, stem plants) may start shedding their lowest leaves. This is normal. Resist the urge to “help” — no moving, no extra fertilizer, no light changes. The most common beginner mistake is intervening during a week when the correct action is nothing.
Week 2: Melt peaks
This is when emersed leaves give up in earnest. Crypts may drop everything; swords shed their broad aerial leaves; stem plants lose lower foliage. It looks catastrophic and it’s usually fine. Keep removing mushy material, keep conditions stable, and watch the crown and growing tips — if those are firm and green, recovery is already underway.
Week 3: The turn
New submersed-adapted leaves emerge — smaller, thinner, often a slightly different shade of green than the emersed foliage. Stem plant tips start growing visibly; crypts push tiny curled leaves from the crown; swords unfurl narrow ribbon leaves. This is the moment most beginners exhale for the first time.
Week 4+: Established
New growth outpaces melt, and the plant is functionally yours. You can resume full-strength fertilizer, normal trimming, and stop treating it as fragile. Some slow growers (anubias, bucephalandra) take 6–8 weeks to show obvious progress — that’s their normal speed, not a problem.
Acclimating Different Plant Formats
Tissue-culture cups
Sterile, pest-free, and already adapted to high-humidity (not emersed) growth — tissue cultures melt the least of any format. Rinse the agar gel off gently (leftover gel rots and feeds fungus), split the portion into small plantlets, and plant per our planting guide. They establish slowly for the first two weeks, then accelerate. No dip needed, minimal acclimation stress — this is the premium experience you’re paying for.
Potted plants
Remove the pot and strip away the rockwool completely — leftover rockwool traps debris and rots. Tease the root mass apart gently; if it’s a dense mat, splitting it into 2–3 smaller portions actually establishes faster than planting one big clump (more growing points, better water flow around roots). Potted plants are usually emersed-grown, so expect the standard 2–4 week melt cycle.
Bare-root / bunched stems
Typically sold as weighted bunches. Remove any bands, foam, or weights, strip the lower leaves, and plant stems individually or in small groups. Bunched stems from the store are often already transitioning — check for new submersed growth at the tips, which tells you the plant is mid-adaptation and will settle quickly.
Hobbyist cuttings
Already submersed-grown and the fastest to establish — often showing new growth within days. The main acclimation factor is water-parameter difference between the two tanks. Float to temperature-match, plant promptly, and they’ll usually take off with minimal melt. This is why experienced hobbyists prefer trading cuttings over buying potted plants.
Frequently Asked Questions
Should I use a “plant starter” or transplant fertilizer?
Products marketed for transplant shock are mostly B-vitamins and mild hormones. They don’t hurt, but there’s no strong evidence they help aquarium plants specifically. Stable conditions and patience outperform any bottle. Save the money for more plants.
My new plant melted completely — bare crown, no leaves. Is it dead?
Probably not, if the crown or rhizome is firm. Crypts and swords routinely lose 100% of their leaves and regrow from the base within a month. The test is firmness: firm and pale/green means alive; mushy and brown/black means rot. Give firm-but-leafless plants a full 4 weeks before declaring them dead.
Can I speed up acclimation with extra light or CO2?
No — and trying usually backfires. A melting plant can’t use extra light; the excess just grows algae on its dying leaves. Keep light moderate and CO2 stable (not boosted) during acclimation. Growth speed comes from the plant’s own adaptation timeline, which you can’t rush, only avoid delaying.
Should new plants go straight into my main display tank?
After quarantine/dipping, yes — there’s no benefit to a separate “growing-in” tank for most plants. They acclimate to your water fastest in the tank they’ll live in. The exception is very delicate species going into a tank with boisterous fish; give those a few weeks in a calm corner or breeder box first.
The Patience Rule
The single most important acclimation skill is restraint: plant it right, set gentle conditions, remove decay, and then leave it alone for a month. The hobbyists with the best plant growth aren’t doing something clever in week one — they’re simply not interfering in weeks two through four while the plants do what they’ve evolved to do. Melt looks like failure and feels like failure, but in most cases it’s the visible part of a plant successfully becoming yours.