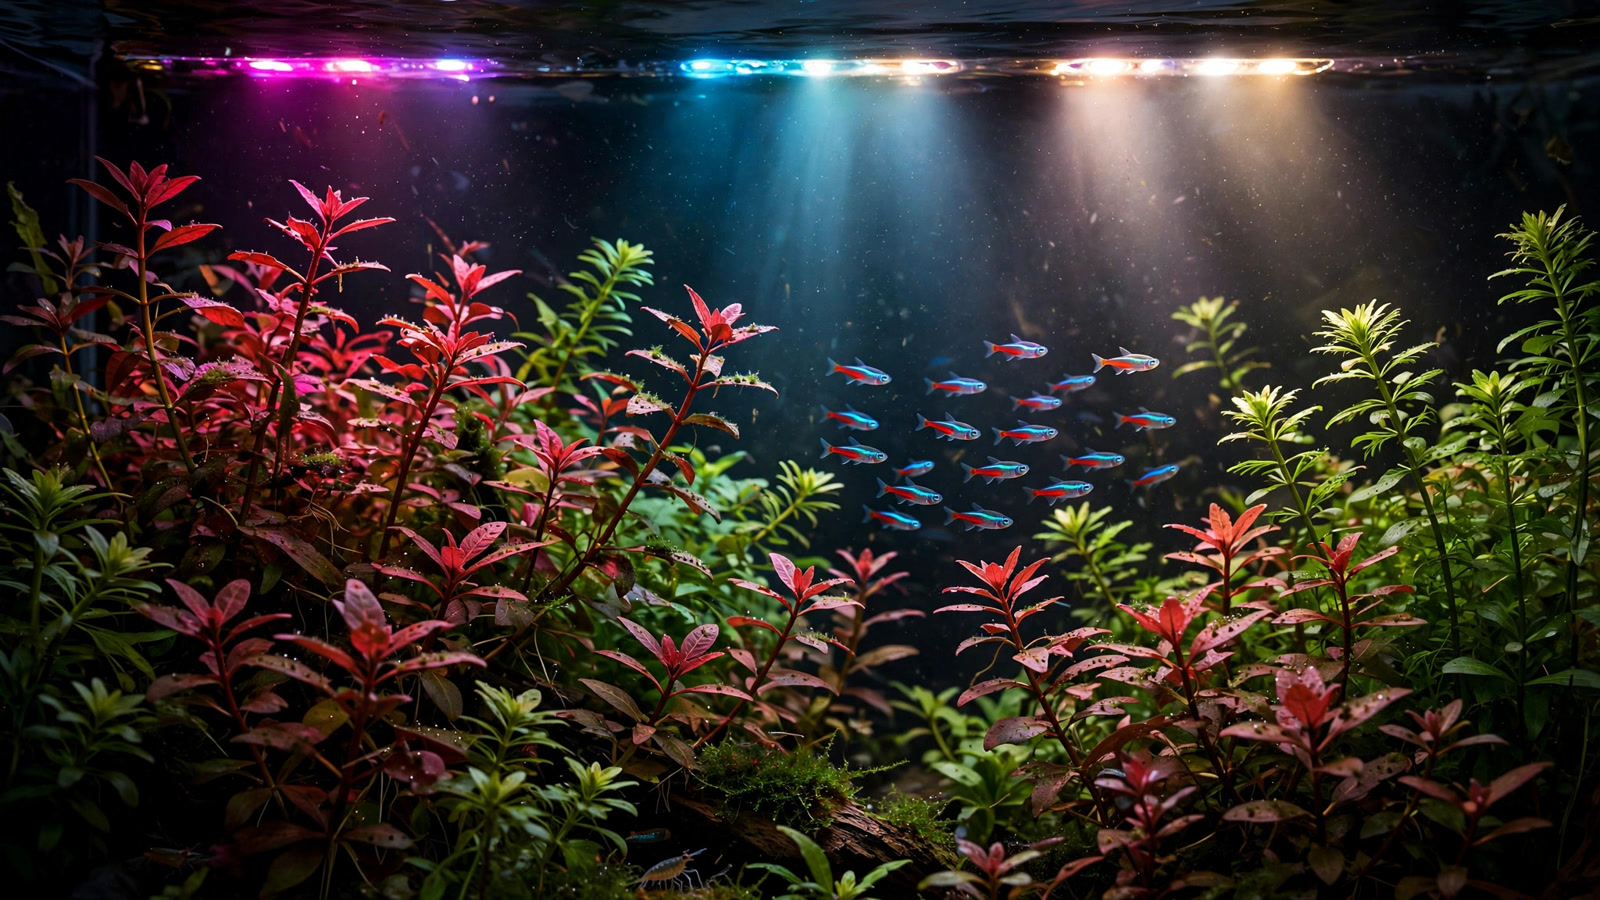
Scroll through any planted-tank showcase in 2026 and you will notice something: the reds look almost electric. Deep crimson rotala tips, cherry-red ludwigia stems, scarlet alternanthera carpets — they glow in a way white-light photos never quite capture. That look is usually made by an rgb aquarium light for plants, and it has sparked a lively debate: is RGB lighting actually better for growing plants, or is it just a display trick? This guide breaks down how RGB and WRGB lights really work, what they do for plant growth versus full-spectrum white LEDs, how to set one up without inviting algae, and when the upgrade is genuinely worth your money.
What Is an RGB (and WRGB) Aquarium Light?
Most conventional aquarium LEDs are built from phosphor-converted white LEDs: a blue diode coated in a yellow phosphor that produces a fixed, white-looking light. An RGB fixture works differently. It uses separate banks of red, green and blue diodes, and the fixture (or its app) mixes them to create the light your tank receives.
Separate red, green and blue channels
The key advantage of true RGB hardware is independent channel control. You can dim the red channel to 80 percent, push blue to 60 percent, and leave green at 40 percent — the color balance of the light is adjustable, not just its brightness. Shift the mix toward warm reds for a sunset tone, or toward cool blue-white for a crisp midday look, all from your phone. Because the diodes emit at narrow wavelengths rather than through a phosphor, the saturated colors stay punchy: a pure red diode produces red that a white LED with a filter cannot match.
WRGB: the white channel that fixes the flaws
Pure RGB fixtures had a problem. Red plus green plus blue mixes to white, but it is a narrow, incomplete white — fish and pale-green plants can look flat or slightly artificial under it. The industry answer is WRGB: the same red, green and blue diode banks, plus a dedicated set of white diodes (usually neutral-white 6500K). The white channel fills the gaps in the spectrum, restoring natural rendering of anything that is not strongly colored, while the RGB channels stay available to boost color pop. Most hobbyists in 2026 buy WRGB fixtures, and in practice "RGB light" has become shorthand for this WRGB category. For a broader look at the fixture landscape, see our overview of the best aquarium lighting for planted tanks.
Will an RGB Aquarium Light for Plants Grow Them Well?
This is the question that matters most, and the answer is more reassuring than the debate suggests: yes, modern RGB and WRGB lights grow plants very well, as long as total intensity is adequate. The reasons come down to plant biology and honest measurement, not marketing.
What plants actually absorb
Chlorophyll a and chlorophyll b — the pigments driving photosynthesis — absorb light most strongly in the red (~660 nm) and blue (~430–450 nm) regions. That is precisely where RGB fixtures concentrate their output. A white LED spreads its energy across the whole visible spectrum including green, which chlorophyll reflects rather than absorbs (which is why leaves look green). So per watt, an RGB fixture can deliver more photosynthetically usable light than a white LED of the same wattage — standard plant physiology, explored in depth in the UK Aquatic Plant Society's discussion of light spectrum and aquatic plants.
PAR beats presets: measuring what the plants get
The catch is that a rich spectrum means nothing without enough PAR (photosynthetically active radiation) reaching the substrate. Some RGB fixtures are tuned for display rather than growth, running dimmer than their wattage suggests once you dial down channels for aesthetics. Before judging a light by its marketing claims, check its PAR readings at the depth of your tank — many manufacturers now publish them. If yours does not, borrowing or renting a PAR meter for an afternoon removes all guesswork. Pair those readings with how much light aquarium plants need, and you will know whether the fixture is a growth machine or a mood lamp.
RGB vs Full-Spectrum White LEDs
Both technologies grow healthy plants in the hands of a competent keeper. They differ in color control, convenience and cost. Here is the honest side-by-side:
| Feature | RGB / WRGB fixture | Full-spectrum white LED |
|---|---|---|
| Plant growth potential | Excellent — red/blue peaks align with chlorophyll absorption | Excellent — broad spectrum covers all wavelengths |
| Color control | Full per-channel control; tune the mood in seconds | Fixed output; only brightness and sometimes color temperature steps |
| Red plants "pop" | Dramatic — dedicated red diodes make crimson plants glow | Good with high-CRI 6500K fixtures, but less punch |
| White balance / natural look | Good on WRGB; pure RGB can look theatrical | Excellent — the benchmark for a natural daylight look |
| Smart features | Usually app-controlled: ramps, schedules, presets, weather effects | Often simpler timers/dimmers; smart models exist but are rarer |
| Efficiency (PAR per watt) | Often higher — output concentrated at absorption peaks | Slightly lower — energy spread into green that plants barely use |
| Price | Typically 30–80% more than an equivalent white LED bar | The value option, especially for low-tech setups |
| Best for | Display tanks, red-plant scapes, tech enthusiasts | Breeding racks, low-tech tanks, keepers who value simplicity |
The technology-generation angle matters too: today's LED bars are a world away from the T5 fluorescent tubes many old guides still assume. If you are weighing an older fixture against either modern option, our T5 vs LED comparison lays out where fluorescents still hold their own and where they do not.
Color Rendering: Why Red Plants "Pop" Under RGB
The color pop is the main reason most people buy these lights, and it is not an illusion — it is physics working in your favor.
How the "pop" actually works
You see a red plant because its pigments reflect red light and absorb the rest. A red leaf can only reflect red wavelengths that are actually hitting it. A white LED emits a broad smear of wavelengths, so only a modest slice of its output is deep red — the leaf has limited red light to reflect back at you. An RGB fixture with a dedicated red channel bathes the tank in abundant, narrow-band red: the same pigments now have far more red to reflect, so the reds look richer. This is also why red plants look their best under light with strong 660 nm output — that wavelength sits near chlorophyll's red absorption peak, serving growth and display at once.
Fish colors and the overall mood
Fish respond to channel control just as strongly. Neon tetras' blue stripes and cardinal tetras' red bellies sharpen under blue-boosted presets; golden and orange fish glow under warm mixes. Most keepers settle on a preset that leans slightly warm and saturated rather than running everything at maximum — pushing one channel to extremes can make the whole tank look staged. This is where the white channel earns its place: dialing white up to 40–60 percent keeps the scene believable while the RGB channels add the sparkle.
App-Controlled Smart Lighting in 2026
App control has moved from premium extra to near-standard on mid-range RGB fixtures. The features that actually matter for plant keeping are not the gimmicks (lightning storms, thunderstorm flicker — fun for a demo, stressful for fish if overused) but the quiet automation:
- Sunrise/sunset ramping: gradual intensity changes over 15–60 minutes instead of an abrupt on/off. Fish startle less, and algae gets no sudden high-light shock.
- Programmable photoperiods: set a consistent 6–8 hour high-light window and let the app hold it. Consistency beats intensity for plant health.
- Channel presets: save a "viewing" preset for evenings and a "growth" preset for the main photoperiod — a slightly dimmer, warmer evening preset is easier on fish after feeding.
- Acclimation modes: several 2026 fixtures include a new-tank mode that ramps total intensity up over 2–4 weeks — a thoughtful guardrail against the algae blooms that follow a sudden light upgrade.
Smart features are genuinely useful, but they do not replace fundamentals. An app cannot fix a fixture hung too high or a photoperiod that runs 12 hours — if you raise your light, check our hanging light height guide to keep PAR in the right range at the substrate.
Setting Up an RGB Light on a Planted Tank
Follow this order and you will skip the two classic mistakes — blasting a new tank at full power, and tuning the look before confirming the growth capacity:
- Match the fixture size to the tank. Light should cover the full footprint. A 60 cm fixture on a 90 cm tank leaves dim edges where plants stretch. Size up, or run two fixtures on longer tanks.
- Start at 60–70 percent intensity. Run the first 2–3 weeks at reduced power, especially in a new setup with immature plant mass. Ramp up only when plants are thriving and algae is absent.
- Set a 6–8 hour photoperiod. Keep it consistent with a timer or app schedule. Longer days rarely help plants much and reliably help algae.
- Tune the color after the growth. Once plants are established, play with channel mixes to find your display preset. Take phone photos of a few candidates — cameras exaggerate the differences, which makes choosing easier.
- Balance light with CO2 and nutrients. Strong light with lean CO2 and fertilization is the standard recipe for an algae farm. If you increase intensity, make sure carbon and nutrients rise to match.
- Re-check after changes. New hardscape, a big trim, or raised mounting all change the light field. Recheck PAR at the substrate after any significant change.
Low-tech keepers should not be scared off by the tech: an RGB fixture run at modest intensity is perfectly at home over a no-CO2 tank. For intensity targets that fit a lean setup, see our picks for the best LED lights for low-tech planted tanks.
Common RGB Lighting Problems (and Fixes)
- Algae bloom right after installing the light. Almost always too much intensity, too soon. Drop to 50–60 percent, shorten the photoperiod to 6 hours, and ramp back up over a month. For the spectrum angle, read our guide to the connection between light spectrum and algae.
- Plants look washed out or gray. The white channel is too dominant or the overall color temperature is too cool. Bring white down and add red and green channel strength until leaves look rich again.
- Red plants stay green. Spectrum helps, but intense light plus adequate iron and CO2 is what actually builds red pigments in most species. If your reds stay stubborn, check intensity at the plant tops before blaming the fixture.
- Uneven brightness — bright center, dark corners. The fixture is too short for the tank, or hung too low. Raise it (widening the spread) or add a second unit; do not just crank intensity to fix coverage.
- The "disco effect." Separate colored diodes can project distinct red, green and blue shadows on hardscape, especially with rippling surface water. Raising the fixture, adding the white channel, or choosing a fixture with a diffuser solves it.
- Fish hide when the light is on. Too bright, too sudden, or too blue. Lengthen the sunrise ramp, lower peak intensity, and make sure shaded retreats exist among the plants.
The Honest Verdict: When RGB Is Worth Buying
Buy an RGB/WRGB fixture if your tank is a display piece — if you keep red plants, photograph your scape, or enjoy tuning the room's mood from your phone. The color control is real, growth performance is genuinely good, and the premium buys features you will use every day. Skip it for breeding racks, quarantine tanks, or low-tech setups where a simple white LED already does the job. Either way, the fixture is only one leg of the triangle: spectrum means little without matching CO2 and fertilization. Our guide to light spectrum and aquarium plants ties the whole picture together if you want to go deeper.
Frequently Asked Questions
Do RGB lights grow aquarium plants as well as white LEDs?
Yes — wattage for wattage, and sometimes better. Chlorophyll absorbs red and blue light most efficiently, and RGB fixtures concentrate output at exactly those peaks, while white LEDs spread energy into green wavelengths plants barely use. The deciding factor is always total PAR at the substrate, not the diode type. Choose a fixture with published PAR data and size it to your tank footprint, and either option will grow plants well.
Why do red plants look redder under RGB lighting?
Red leaves look red because their pigments reflect red wavelengths. A white LED emits only a modest slice of deep red, so leaves have little red light to reflect back at your eyes. An RGB fixture's dedicated red channel floods the tank with narrow-band red light, giving those pigments far more to reflect — so the reds look richer and more saturated. The plant itself has not changed; you are simply illuminating its pigments with the light they are built to bounce back.
Will an RGB light cause more algae than a white LED?
Not by itself. Algae responds to total light energy, photoperiod length and nutrient imbalance far more than to spectrum. A new RGB fixture often seems to cause algae because people install it at 100 percent intensity on day one — the same mistake causes blooms under any light. Start at 60–70 percent with a 6–8 hour photoperiod, ramp up gradually, and keep CO2 and fertilization matched to the light level.
Do I need CO2 injection to use an RGB light?
No. CO2 needs are set by light intensity and plant species, not by the fixture's color technology. An RGB light run at modest intensity works beautifully over low-tech tanks with easy plants. It only becomes relevant if you push intensity high enough to demand CO2 — which is equally true of a bright white LED. Match your intensity to your carbon source, not to the marketing of the fixture.
Are app-controlled RGB lights worth the extra money?
For a display tank you look at every day, usually yes. Sunrise/sunset ramping, consistent scheduled photoperiods and saved color presets are features you will use constantly, and they are hard to give up once you have them. For utility tanks — breeding, quarantine, grow-out racks — the premium buys little that a timer and dimmer cannot do. Buy the smart features for tanks you view, and save the money where you only need growth.
In the end, an rgb aquarium light for plants is neither magic nor marketing fluff — it is a genuinely capable growth light that also happens to be the best display light you can buy. Get the fundamentals right (right-sized fixture, measured PAR, consistent photoperiod, balanced CO2 and nutrients), and the RGB channels become what they were always meant to be: the finishing touch on a healthy, thriving planted tank.
Tissue-culture plants are the exception — they’re grown in sterile gel and adapt with minimal melting, which is part of what you’re paying for. Plants bought submersed from another hobbyist’s tank also transition with little melt, since they’re already in the right form.
Which Plants Melt Most (and Least)
Heavy melters (expect significant leaf loss)
- Cryptocorynes — infamous for “crypt melt,” sometimes dropping every leaf after any disturbance. They almost always recover from the roots within weeks.
- Stem plants grown emersed — rotala, ludwigia, and hygrophila often shed lower emersed leaves while the growing tips transition.
- Amazon swords — emersed-grown swords typically lose their broad oval aerial leaves and replace them with longer submersed ribbon leaves.
Light melters
- Anubias, java fern, bucephalandra — slow-growing rhizome plants transition gradually; occasional old-leaf melt but rarely dramatic.
- Vallisneria — usually transitions well, though it dislikes the move itself and may sulk for a week.
- Floating plants — minimal melt since their leaves were already at the air-water interface.
The Acclimation Protocol
Step 1: Quarantine or dip first
Before acclimating to your tank’s conditions, make sure you’re not acclimating pests along with the plant. Run new arrivals through our quarantine and dip protocol — it adds days upfront but prevents months of regret.
Step 2: Float to temperature-match (30 minutes)
Float the bag or container in your tank for 20–30 minutes to equalize temperature. Plants are less temperature-sensitive than fish, but a 10°F shock on top of transplant stress is an avoidable insult.
Step 3: Trim before planting
Remove any leaves that are already damaged, yellowing, or heavily algae-covered — they won’t recover and they’ll rot in your tank, feeding algae. For stem plants, trim off the bottom inch and any emersed leaves that look unlikely to adapt; the plant wastes energy maintaining leaves it’s going to shed anyway. Keep the healthy growing tips — that’s where recovery starts.
Step 4: Plant correctly the first time
Follow our planting guide — right depth, crown exposed on rosettes, rhizomes unburied on epiphytes. Every uprooting and replanting restarts the acclimation clock, so get placement right on the first attempt. Decide where each plant goes before it goes in the water.
Step 5: Run a gentle first week
For the first 7 days after planting:
- Moderate light — run your normal photoperiod but consider dropping intensity 20–30% if your light is dimmable. Blast-level light on a melting plant grows algae on the dying leaves, not recovery.
- Stable CO2 — if you inject CO2, keep it consistent. Fluctuating CO2 during acclimation is a melt accelerator. If you’re low-tech, this doesn’t apply — see growing without CO2.
- Half-strength fertilizer — new plants with damaged leaves can’t use full dosing, and the excess feeds algae. Ramp to full strength over 2–3 weeks per our fertilizer schedule.
- No disturbance — don’t move, trim, or “check on” new plants for at least two weeks. Every touch resets root establishment. This is especially critical for crypts.
Step 6: Remove melt, keep the base
As emersed leaves melt, remove the mushy material promptly — decaying leaves release ammonia and grow fungus that can spread to healthy tissue. But never discard the plant while the crown, rhizome, or roots are firm and alive. A crypt that’s lost every leaf but has firm roots is a plant that’s about to recover, not a dead plant. Give it 3–4 weeks before judging.
Telling Normal Melt From Real Problems
Normal transition melt:
- Affects oldest/emersed leaves first, newest growth last
- New submersed leaves emerge even as old ones dissolve
- Roots and crown stay firm and white/green
- Timeline: 1–4 weeks, then obvious new growth
Concerning melt (see our full melting diagnosis guide):
- New growth also melts or emerges deformed
- Rhizome or crown turns mushy and brown — this is rot, not transition
- Entire plant dissolves within days with no new growth after 4+ weeks
- Melting spreads to established plants that weren’t recently moved
Buying Tips to Minimize Melt
- Buy submersed-grown when available — hobbyist-grown cuttings transition with almost no melt.
- Choose tissue culture for sensitive species — crypts and delicate stems establish far more reliably from sterile cups.
- Avoid plants already melting in the store tank — some melt is normal, but a plant that’s mostly mush at purchase has less energy for recovery.
- Transport carefully — keep plants damp and out of direct sun/heat. A plant that dries out or cooks in a hot car melts far worse than one transported properly.
The First-Month Timeline: What to Expect Week by Week
Knowing what’s normal when removes most acclimation anxiety. Here’s the typical timeline for a healthy plant adapting to a new tank:
Week 1: The quiet week
Almost nothing visible happens. The plant is growing roots you can’t see and assessing its new environment. Some species (vallisneria, stem plants) may start shedding their lowest leaves. This is normal. Resist the urge to “help” — no moving, no extra fertilizer, no light changes. The most common beginner mistake is intervening during a week when the correct action is nothing.
Week 2: Melt peaks
This is when emersed leaves give up in earnest. Crypts may drop everything; swords shed their broad aerial leaves; stem plants lose lower foliage. It looks catastrophic and it’s usually fine. Keep removing mushy material, keep conditions stable, and watch the crown and growing tips — if those are firm and green, recovery is already underway.
Week 3: The turn
New submersed-adapted leaves emerge — smaller, thinner, often a slightly different shade of green than the emersed foliage. Stem plant tips start growing visibly; crypts push tiny curled leaves from the crown; swords unfurl narrow ribbon leaves. This is the moment most beginners exhale for the first time.
Week 4+: Established
New growth outpaces melt, and the plant is functionally yours. You can resume full-strength fertilizer, normal trimming, and stop treating it as fragile. Some slow growers (anubias, bucephalandra) take 6–8 weeks to show obvious progress — that’s their normal speed, not a problem.
Acclimating Different Plant Formats
Tissue-culture cups
Sterile, pest-free, and already adapted to high-humidity (not emersed) growth — tissue cultures melt the least of any format. Rinse the agar gel off gently (leftover gel rots and feeds fungus), split the portion into small plantlets, and plant per our planting guide. They establish slowly for the first two weeks, then accelerate. No dip needed, minimal acclimation stress — this is the premium experience you’re paying for.
Potted plants
Remove the pot and strip away the rockwool completely — leftover rockwool traps debris and rots. Tease the root mass apart gently; if it’s a dense mat, splitting it into 2–3 smaller portions actually establishes faster than planting one big clump (more growing points, better water flow around roots). Potted plants are usually emersed-grown, so expect the standard 2–4 week melt cycle.
Bare-root / bunched stems
Typically sold as weighted bunches. Remove any bands, foam, or weights, strip the lower leaves, and plant stems individually or in small groups. Bunched stems from the store are often already transitioning — check for new submersed growth at the tips, which tells you the plant is mid-adaptation and will settle quickly.
Hobbyist cuttings
Already submersed-grown and the fastest to establish — often showing new growth within days. The main acclimation factor is water-parameter difference between the two tanks. Float to temperature-match, plant promptly, and they’ll usually take off with minimal melt. This is why experienced hobbyists prefer trading cuttings over buying potted plants.
Frequently Asked Questions
Should I use a “plant starter” or transplant fertilizer?
Products marketed for transplant shock are mostly B-vitamins and mild hormones. They don’t hurt, but there’s no strong evidence they help aquarium plants specifically. Stable conditions and patience outperform any bottle. Save the money for more plants.
My new plant melted completely — bare crown, no leaves. Is it dead?
Probably not, if the crown or rhizome is firm. Crypts and swords routinely lose 100% of their leaves and regrow from the base within a month. The test is firmness: firm and pale/green means alive; mushy and brown/black means rot. Give firm-but-leafless plants a full 4 weeks before declaring them dead.
Can I speed up acclimation with extra light or CO2?
No — and trying usually backfires. A melting plant can’t use extra light; the excess just grows algae on its dying leaves. Keep light moderate and CO2 stable (not boosted) during acclimation. Growth speed comes from the plant’s own adaptation timeline, which you can’t rush, only avoid delaying.
Should new plants go straight into my main display tank?
After quarantine/dipping, yes — there’s no benefit to a separate “growing-in” tank for most plants. They acclimate to your water fastest in the tank they’ll live in. The exception is very delicate species going into a tank with boisterous fish; give those a few weeks in a calm corner or breeder box first.
The Patience Rule
The single most important acclimation skill is restraint: plant it right, set gentle conditions, remove decay, and then leave it alone for a month. The hobbyists with the best plant growth aren’t doing something clever in week one — they’re simply not interfering in weeks two through four while the plants do what they’ve evolved to do. Melt looks like failure and feels like failure, but in most cases it’s the visible part of a plant successfully becoming yours.