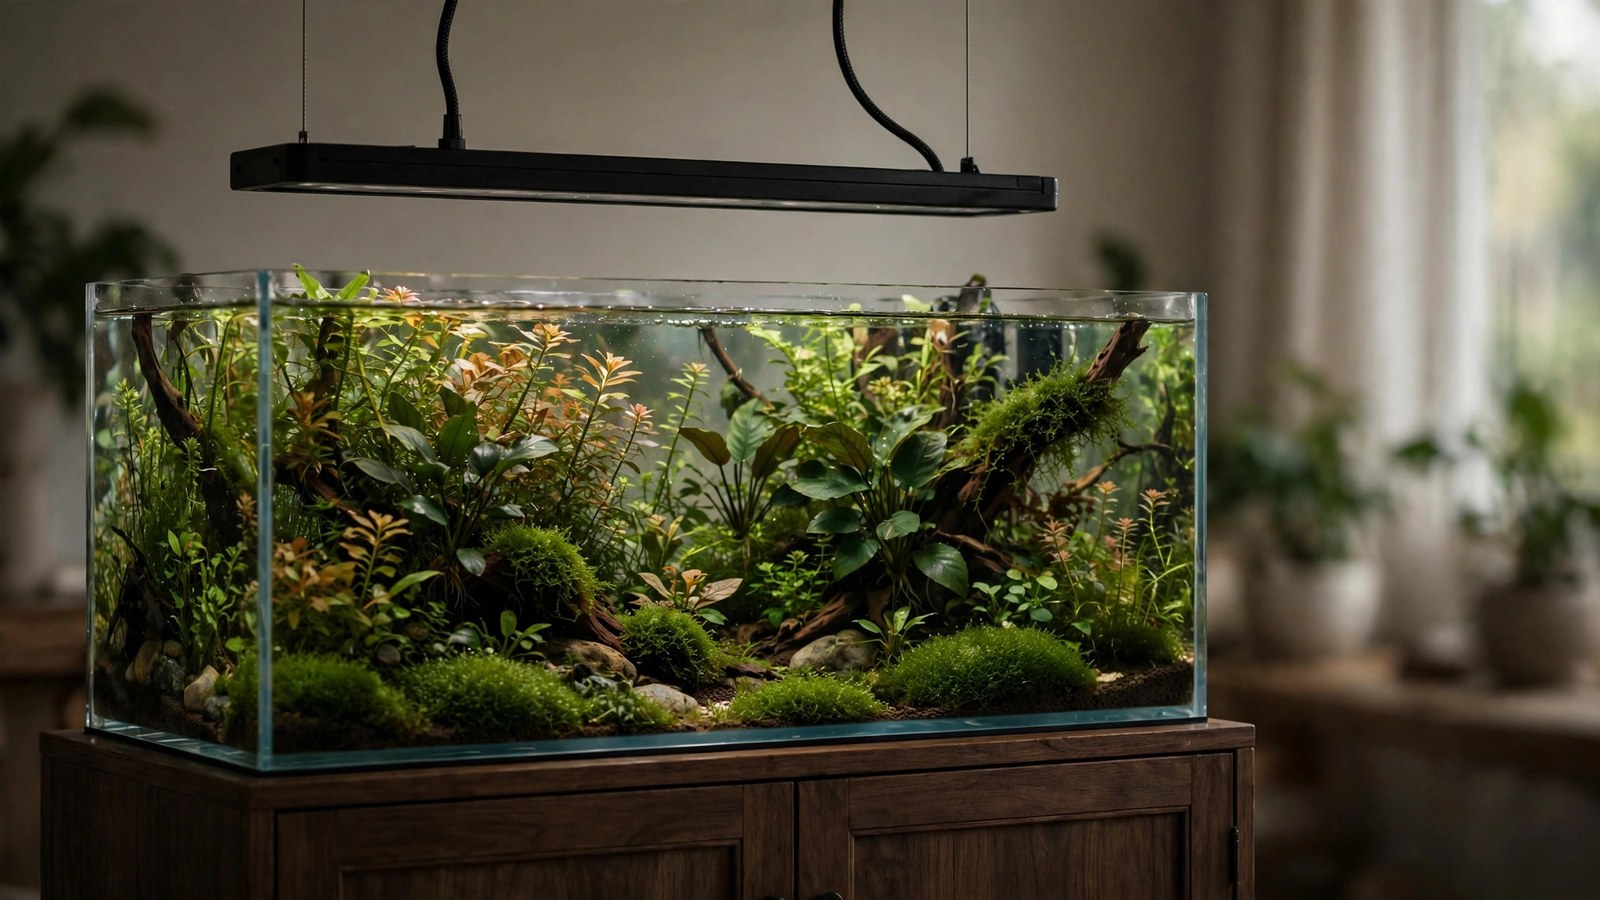
Your light has no dimmer, but it's too bright — algae on the glass, stressed plants, fish hiding. Before you buy a new fixture, look up: raising your light higher above the tank is a free dimmer you already own. Light intensity falls fast with distance, and hanging height is one of the most underused tuning tools in the hobby. This guide covers aquarium light hanging height: the physics, the practical numbers, and how to use height as a precision instrument.
The Physics: Why Height Works as a Dimmer
Light spreads as it travels. Double the distance from the fixture, and intensity at a given point drops to roughly a quarter (the inverse-square law — real aquarium fixtures with reflectors and lenses don't follow it perfectly, but the direction and rough magnitude hold). In practical terms:
- Raising a fixture from 4 inches to 8 inches above the water cuts substrate PAR substantially — often 30–50%.
- From 8 to 16 inches, another large drop, plus dramatically more even coverage.
- Small height changes near the tank make big intensity differences; the same change high up matters less.
The second effect is just as valuable: higher mounting evens out the light field. A fixture sitting on the rim blasts the center and starves the corners; raised a foot up, the same fixture covers the whole footprint far more uniformly. Height trades peak intensity for evenness — usually an excellent trade.
Practical Height Ranges
| Mounting height above water | Typical effect | Best for |
|---|---|---|
| On the rim / 2–4 in (tank mounts) | Maximum intensity, strong center hotspot, weak corners | Low-power lights that need every photon; shallow nanos |
| 6–10 in (risers / short hanging kit) | Moderate reduction, noticeably better spread | The sweet spot for most medium tanks — tames hot fixtures |
| 12–18 in (pendant hanging) | Large reduction, very even coverage | Powerful fixtures on medium tanks; deep tanks needing spread |
| 18–24+ in | Low intensity even from strong lights | Low-tech tanks with overpowered lights; very tall suspensions for aesthetics |
These are starting points, not prescriptions — fixture power, optics, and tank depth all shift the numbers. A PAR meter reading at the substrate turns guesses into data: measure, adjust height, remeasure.
Using Height to Solve Real Problems
"My light is too strong and I get algae"
The classic case. Before reducing the photoperiod or buying a dimmer, raise the fixture 4–6 inches and observe for two weeks. You've reduced intensity while keeping the full photoperiod (which plants prefer — see photoperiod duration). If algae was driven by excess intensity, it fades; if it persists, the problem lies elsewhere (CO2, nutrients, maintenance).
"The center thrives but corners melt"
Uneven field, not insufficient light. Raising the fixture is the direct fix — height is the primary control for uniformity. Alternatively, add a second smaller fixture for the dark zones, but try height first; it's free.
"I upgraded to a stronger light and everything went wrong"
New-fixture shock is real: plants adapted to old light levels get blasted, and algae colonizes the stressed tissue. Mount the new light high, then lower it gradually over 3–4 weeks as plants adapt — height gives you a smooth ramp that a fixed rim mount can't. This pairs with our light acclimation protocol.
"I want high-tech intensity but my fixture overshoots"
Some fixtures at full power deliver 150+ PAR at substrate on medium tanks — more than needed even for demanding plants, and firmly in algae territory without perfect CO2. Hanging at 10–14 inches brings many such fixtures into the 80–100 PAR sweet spot while improving spread. Height lets you use an overpowered light instead of replacing it.
Hanging Hardware Options
- Manufacturer hanging kits — cables and ceiling/wall mounts designed for your fixture. Cleanest look, guaranteed fit, moderate cost.
- DIY cable hanging — stainless cable, ceiling hooks, and adjustable grippers from a hardware store. Cheap, fully adjustable, and strong enough for any fixture. The adjustable grippers are the key part — they let you change height in seconds.
- Tank-mounted risers/legs — brackets that lift rim-mounted fixtures 4–8 inches. Less dramatic than hanging, but no ceiling work required — ideal for renters.
- Shelving/rack mounting — for fish rooms: mount the fixture to the shelf above the tank. Height is whatever the shelf spacing gives you; choose spacing accordingly.
- Wall-mounted arms — swing-arm brackets that hold the fixture over the tank from behind. Great adjustability, no ceiling holes.
Whatever you use, ensure it's secure against the fixture's weight plus a safety margin — a falling light into a tank is an electrical and glass hazard. Use a GFCI outlet for all aquarium electrics, keep cables drip-looped, and never hang a fixture from a ceiling anchor you wouldn't trust with a heavy picture.
Height vs Dimmer: Which to Use?
If your light has a dimmer, you have two intensity controls — use them for different jobs:
- Height for the coarse setting: set the mounting height to get the field even and the maximum intensity in the right neighborhood.
- Dimmer for fine-tuning: dial the exact intensity, and use the dimmer's ramping for sunrise/sunset effects.
- Height for acclimation ramps: when breaking in a new tank or new light, changing height weekly is easier than reprogramming dimmer curves — then lock height and fine-tune with the dimmer.
If your light has no dimmer, height is your only intensity control (besides photoperiod) — which makes it essential, not optional, to get right.
Special Cases
Deep tanks (24"+)
Depth already eats intensity (see PAR and depth), so deep tanks usually need fixtures closer, not higher — or simply more powerful fixtures. Don't compound depth loss with extra height unless you're deliberately taming an overpowered light. This is also where published PAR data earns its keep: compare your fixture's depth-attenuation figures — for example, the worked examples in the 2Hr Aquarist planted-tank lighting guide — against your tank's actual depth before buying. A fixture delivering 120 PAR at 12 inches of water may deliver barely 60 at 24 inches, and knowing that in advance determines whether you need one fixture or two, and how close it must sit.
Open-top vs lidded tanks
Hanging works best open-top. With a glass lid, you can still raise the fixture above the lid — just account for the lid's ~10–15% light loss (keep it clean) and ensure ventilation so heat doesn't build up between light and lid.
Multiple fixtures
On long tanks with two or three fixtures, hang them all at the same height for an even field, and overlap their coverage slightly rather than spacing them edge-to-edge (which creates dim seams). Measure the seams with a PAR meter if you have one.
Frequently Asked Questions
How high should I hang my light above the tank?
Start at 8–12 inches above the water for a medium-powered fixture on a standard tank, then adjust based on results: algae and stressed plants mean higher (or dimmed); leggy, pale growth means lower. A PAR meter at the substrate removes the guesswork — aim for your target range (30–50 low-tech, 60–100 high-tech) and set height to hit it.
Will raising the light increase my electricity bill?
No — the fixture draws the same power regardless of height. You're "spending" photons on spread instead of peak intensity, which is usually a better use of them. If anything, height lets you run a powerful fixture instead of buying a second one for coverage.
Can I hang a light not designed for hanging?
Often yes, with care: many rim-mounted fixtures have mounting points or can sit in a DIY cradle hung from cables. Ensure the hanging method is secure, the fixture stays level, and any ventilation slots aren't blocked. Check the manufacturer's guidance — some fixtures rely on tank-rim contact for heat dissipation.
Does raising the light help with algae on the glass?
Often, yes — glass algae thrives in the high-intensity blast zone near a rim-mounted fixture. Raising the light reduces peak intensity at the glass while keeping total illumination adequate for plants. Combine with consistent photoperiod and good maintenance for best results.
What's better: hanging high or using a dimmer?
They're complementary, not competing. Height controls spread and coarse intensity; a dimmer controls fine intensity and enables ramping. If you must choose one, height is free and fixes unevenness (which dimmers can't); dimmers are more convenient for daily fine control. Most well-set-up tanks eventually use both.
My ceiling is too high to hang a light — what are my options?
Wall-mounted swing arms, tall floor-standing light racks behind the tank, tank-mounted riser legs (4–8 inches of lift with no ceiling involvement), or a shelf above the tank. Even 6 inches of elevation from riser legs makes a meaningful difference — you don't need pendant-from-the-ceiling drama to benefit.
Look Up Before You Buy
Hanging height is the most overlooked control in aquarium lighting: free, infinitely adjustable, and fixing two problems (excess intensity and uneven coverage) at once. Before spending money on a dimmer, a weaker light, or algae chemicals, try four inches of altitude. Your plants, your fish, and your algae situation may all improve — courtesy of the dimmer you already owned.
Tissue-culture plants are the exception — they’re grown in sterile gel and adapt with minimal melting, which is part of what you’re paying for. Plants bought submersed from another hobbyist’s tank also transition with little melt, since they’re already in the right form.
Which Plants Melt Most (and Least)
Heavy melters (expect significant leaf loss)
- Cryptocorynes — infamous for “crypt melt,” sometimes dropping every leaf after any disturbance. They almost always recover from the roots within weeks.
- Stem plants grown emersed — rotala, ludwigia, and hygrophila often shed lower emersed leaves while the growing tips transition.
- Amazon swords — emersed-grown swords typically lose their broad oval aerial leaves and replace them with longer submersed ribbon leaves.
Light melters
- Anubias, java fern, bucephalandra — slow-growing rhizome plants transition gradually; occasional old-leaf melt but rarely dramatic.
- Vallisneria — usually transitions well, though it dislikes the move itself and may sulk for a week.
- Floating plants — minimal melt since their leaves were already at the air-water interface.
The Acclimation Protocol
Step 1: Quarantine or dip first
Before acclimating to your tank’s conditions, make sure you’re not acclimating pests along with the plant. Run new arrivals through our quarantine and dip protocol — it adds days upfront but prevents months of regret.
Step 2: Float to temperature-match (30 minutes)
Float the bag or container in your tank for 20–30 minutes to equalize temperature. Plants are less temperature-sensitive than fish, but a 10°F shock on top of transplant stress is an avoidable insult.
Step 3: Trim before planting
Remove any leaves that are already damaged, yellowing, or heavily algae-covered — they won’t recover and they’ll rot in your tank, feeding algae. For stem plants, trim off the bottom inch and any emersed leaves that look unlikely to adapt; the plant wastes energy maintaining leaves it’s going to shed anyway. Keep the healthy growing tips — that’s where recovery starts.
Step 4: Plant correctly the first time
Follow our planting guide — right depth, crown exposed on rosettes, rhizomes unburied on epiphytes. Every uprooting and replanting restarts the acclimation clock, so get placement right on the first attempt. Decide where each plant goes before it goes in the water.
Step 5: Run a gentle first week
For the first 7 days after planting:
- Moderate light — run your normal photoperiod but consider dropping intensity 20–30% if your light is dimmable. Blast-level light on a melting plant grows algae on the dying leaves, not recovery.
- Stable CO2 — if you inject CO2, keep it consistent. Fluctuating CO2 during acclimation is a melt accelerator. If you’re low-tech, this doesn’t apply — see growing without CO2.
- Half-strength fertilizer — new plants with damaged leaves can’t use full dosing, and the excess feeds algae. Ramp to full strength over 2–3 weeks per our fertilizer schedule.
- No disturbance — don’t move, trim, or “check on” new plants for at least two weeks. Every touch resets root establishment. This is especially critical for crypts.
Step 6: Remove melt, keep the base
As emersed leaves melt, remove the mushy material promptly — decaying leaves release ammonia and grow fungus that can spread to healthy tissue. But never discard the plant while the crown, rhizome, or roots are firm and alive. A crypt that’s lost every leaf but has firm roots is a plant that’s about to recover, not a dead plant. Give it 3–4 weeks before judging.
Telling Normal Melt From Real Problems
Normal transition melt:
- Affects oldest/emersed leaves first, newest growth last
- New submersed leaves emerge even as old ones dissolve
- Roots and crown stay firm and white/green
- Timeline: 1–4 weeks, then obvious new growth
Concerning melt (see our full melting diagnosis guide):
- New growth also melts or emerges deformed
- Rhizome or crown turns mushy and brown — this is rot, not transition
- Entire plant dissolves within days with no new growth after 4+ weeks
- Melting spreads to established plants that weren’t recently moved
Buying Tips to Minimize Melt
- Buy submersed-grown when available — hobbyist-grown cuttings transition with almost no melt.
- Choose tissue culture for sensitive species — crypts and delicate stems establish far more reliably from sterile cups.
- Avoid plants already melting in the store tank — some melt is normal, but a plant that’s mostly mush at purchase has less energy for recovery.
- Transport carefully — keep plants damp and out of direct sun/heat. A plant that dries out or cooks in a hot car melts far worse than one transported properly.
The First-Month Timeline: What to Expect Week by Week
Knowing what’s normal when removes most acclimation anxiety. Here’s the typical timeline for a healthy plant adapting to a new tank:
Week 1: The quiet week
Almost nothing visible happens. The plant is growing roots you can’t see and assessing its new environment. Some species (vallisneria, stem plants) may start shedding their lowest leaves. This is normal. Resist the urge to “help” — no moving, no extra fertilizer, no light changes. The most common beginner mistake is intervening during a week when the correct action is nothing.
Week 2: Melt peaks
This is when emersed leaves give up in earnest. Crypts may drop everything; swords shed their broad aerial leaves; stem plants lose lower foliage. It looks catastrophic and it’s usually fine. Keep removing mushy material, keep conditions stable, and watch the crown and growing tips — if those are firm and green, recovery is already underway.
Week 3: The turn
New submersed-adapted leaves emerge — smaller, thinner, often a slightly different shade of green than the emersed foliage. Stem plant tips start growing visibly; crypts push tiny curled leaves from the crown; swords unfurl narrow ribbon leaves. This is the moment most beginners exhale for the first time.
Week 4+: Established
New growth outpaces melt, and the plant is functionally yours. You can resume full-strength fertilizer, normal trimming, and stop treating it as fragile. Some slow growers (anubias, bucephalandra) take 6–8 weeks to show obvious progress — that’s their normal speed, not a problem.
Acclimating Different Plant Formats
Tissue-culture cups
Sterile, pest-free, and already adapted to high-humidity (not emersed) growth — tissue cultures melt the least of any format. Rinse the agar gel off gently (leftover gel rots and feeds fungus), split the portion into small plantlets, and plant per our planting guide. They establish slowly for the first two weeks, then accelerate. No dip needed, minimal acclimation stress — this is the premium experience you’re paying for.
Potted plants
Remove the pot and strip away the rockwool completely — leftover rockwool traps debris and rots. Tease the root mass apart gently; if it’s a dense mat, splitting it into 2–3 smaller portions actually establishes faster than planting one big clump (more growing points, better water flow around roots). Potted plants are usually emersed-grown, so expect the standard 2–4 week melt cycle.
Bare-root / bunched stems
Typically sold as weighted bunches. Remove any bands, foam, or weights, strip the lower leaves, and plant stems individually or in small groups. Bunched stems from the store are often already transitioning — check for new submersed growth at the tips, which tells you the plant is mid-adaptation and will settle quickly.
Hobbyist cuttings
Already submersed-grown and the fastest to establish — often showing new growth within days. The main acclimation factor is water-parameter difference between the two tanks. Float to temperature-match, plant promptly, and they’ll usually take off with minimal melt. This is why experienced hobbyists prefer trading cuttings over buying potted plants.
Frequently Asked Questions
Should I use a “plant starter” or transplant fertilizer?
Products marketed for transplant shock are mostly B-vitamins and mild hormones. They don’t hurt, but there’s no strong evidence they help aquarium plants specifically. Stable conditions and patience outperform any bottle. Save the money for more plants.
My new plant melted completely — bare crown, no leaves. Is it dead?
Probably not, if the crown or rhizome is firm. Crypts and swords routinely lose 100% of their leaves and regrow from the base within a month. The test is firmness: firm and pale/green means alive; mushy and brown/black means rot. Give firm-but-leafless plants a full 4 weeks before declaring them dead.
Can I speed up acclimation with extra light or CO2?
No — and trying usually backfires. A melting plant can’t use extra light; the excess just grows algae on its dying leaves. Keep light moderate and CO2 stable (not boosted) during acclimation. Growth speed comes from the plant’s own adaptation timeline, which you can’t rush, only avoid delaying.
Should new plants go straight into my main display tank?
After quarantine/dipping, yes — there’s no benefit to a separate “growing-in” tank for most plants. They acclimate to your water fastest in the tank they’ll live in. The exception is very delicate species going into a tank with boisterous fish; give those a few weeks in a calm corner or breeder box first.
The Patience Rule
The single most important acclimation skill is restraint: plant it right, set gentle conditions, remove decay, and then leave it alone for a month. The hobbyists with the best plant growth aren’t doing something clever in week one — they’re simply not interfering in weeks two through four while the plants do what they’ve evolved to do. Melt looks like failure and feels like failure, but in most cases it’s the visible part of a plant successfully becoming yours.