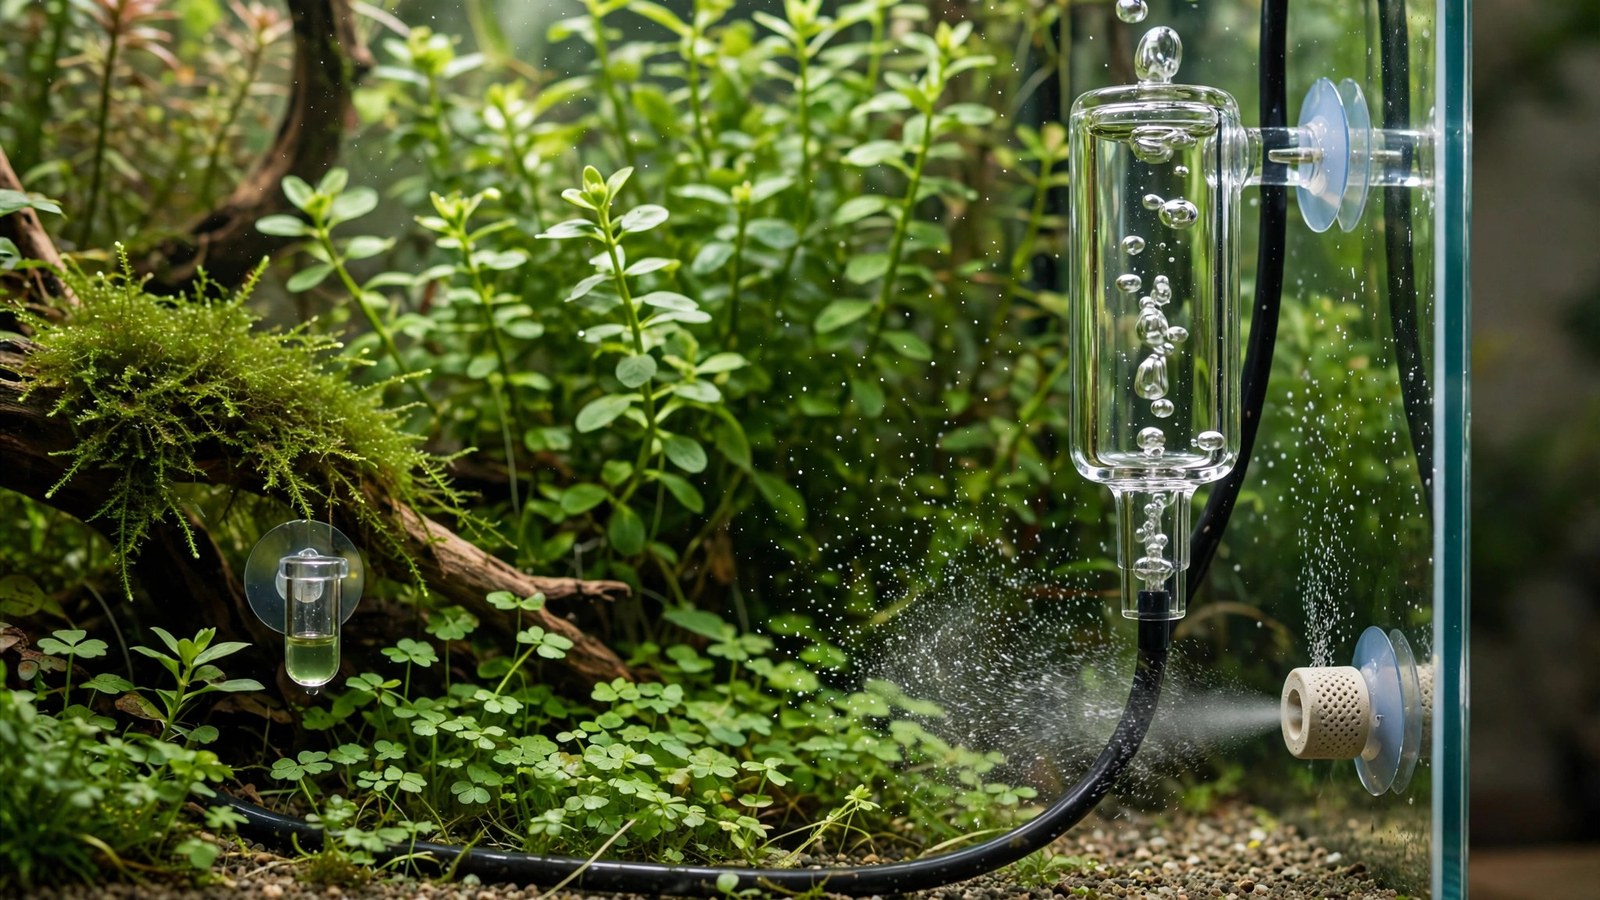
The bubble counter is the speedometer of your CO2 system — a small chamber of fluid where each bubble of gas is visible as it heads for the tank. "Two bubbles per second" means nothing without one, and misreading one is behind a surprising number of CO2 problems. This guide covers CO2 bubble counter setup, filling, placement, and reading so the number you see is the number you're actually injecting.
What a Bubble Counter Does (and Doesn't Do)
A bubble counter sits in the gas line between your regulator and the tank, giving you a visual count of injection rate. That's all it does — it does not measure dissolved CO2 in the tank. Two tanks at "2 bubbles per second" can have wildly different dissolved CO2 levels depending on tank size, diffusion efficiency, and surface agitation.
Think of it correctly: the bubble counter is a repeatability tool, not a measurement tool. Its job is letting you return to the same injection rate day after day and notice when something changes. The drop checker tells you whether that rate is right; the bubble counter tells you whether it's stable.
Types of Bubble Counters
Inline (in-line) bubble counters
A small transparent chamber spliced into the tubing run. Cheap, simple, works with any regulator. Downsides: an extra pair of tubing joints (two more potential leak points), and cheap plastic ones can weep at the caps.
Regulator-mounted bubble counters
Screw directly onto the regulator body or needle valve outlet. Fewer joints, cleaner look, usually better-sealed. Most quality regulators include one or offer it as an accessory. Preferred when available.
Built-in/combo units
Some regulators integrate the counter into the body itself. Cleanest option, zero extra joints. If you're buying a new regulator, this is a nice-to-have worth prioritizing.
Setup and Filling
- Mount vertically. Bubble counters only work upright — gas must bubble up through the fluid. A tilted counter gives erratic counts. Regulator-mounted units are vertical by design; inline units need a secure mounting point (a suction cup or clip on the stand).
- Fill to the indicated line — usually 1/2 to 3/4 full. Overfilling risks fluid being pushed into the tubing toward the tank; underfilling makes bubbles hard to see and count.
- Choose the right fluid:
- Mineral oil or glycerin — best choice. Doesn't evaporate, so the counter stays filled for months; bubbles form cleanly and are easy to count.
- Plain water — works but evaporates in days to weeks, requiring constant refilling. Fine in a pinch.
- Never use soapy water or anything that foams — foam makes counting impossible.
- Placement in the chain: regulator → solenoid → needle valve → bubble counter → check valve → tank. The counter goes after the needle valve (so you're counting the regulated rate) and before the check valve (so tank water can't back-siphon into it).
- Keep it accessible. You'll look at this daily. Don't bury it behind the cylinder where you need a flashlight and yoga to read it.
How to Read It Properly
Counting technique
Watch for a full 15 seconds, count bubbles, multiply by 4 — this is more accurate than trying to count "per second" in real time, especially above 2 bps where bubbles blur together. At high rates (4+ bps), count for 10 seconds and multiply by 6, or just note the visual rhythm and compare day to day.
What "bubbles per second" actually means
Here's the uncomfortable truth: a bubble is not a standardized unit. Bubble size depends on the counter's orifice diameter, the fluid's viscosity, and working pressure. Your "2 bps" and another aquarist's "2 bps" can differ by 2–3x in actual gas volume. This is why copying someone else's bubble rate from a forum is meaningless — it's only useful as your reference point on your equipment.
Rule of thumb for calibration: at typical working pressures, 1 bps through a standard counter ≈ 1–1.5 grams of CO2 per hour. Use this only for rough cylinder-life estimates (see cylinder sizes), never for dosing decisions.
The reading that matters: consistency
The valuable observation isn't the absolute number — it's change. You set 2 bps on Monday; on Thursday it's 3 bps without you touching anything. That drift is information: temperature change, cylinder pressure dropping (single-stage regulator), a developing leak downstream, or a needle valve settling. Investigate drift; don't just re-adjust blindly.
Setting Your Initial Bubble Rate
Since bubble counts aren't transferable, start from tank size and tune with the drop checker:
| Tank size | Starting rate | Notes |
|---|---|---|
| Nano (≤10 gal) | 1 bubble per 2–3 sec | Tiny volumes swing fast; adjust in small steps |
| Small (10–20 gal) | ~1 bps | Common starting point |
| Medium (30–55 gal) | 2–3 bps | Adjust for diffusion efficiency |
| Large (75+ gal) | 4–6 bps | Consider dual diffusion points |
Then: set the rate, wait 2–3 hours, read the drop checker. Blue = increase slightly; yellow = decrease immediately; green = hold and observe for a few days. Adjust no more than ~25% at a time, and give each change at least a day to stabilize before judging. This start-low-and-creep approach matches the 2Hr Aquarist CO2 system guide, which recommends conservative starting rates and gradual adjustments while watching livestock. Patience here prevents the oscillation (too high → algae/fish stress → too low → algae from instability) that plagues new CO2 users.
Maintenance
- Top up fluid when it drops below half — monthly check is plenty with mineral oil.
- Clean the chamber if bubbles start looking irregular or the fluid clouds — biofilm and mineral deposits change bubble formation. Rinse with warm water; never use soap inside (residue foams).
- Check the seals — cap O-rings on inline counters dry out and weep. A counter that constantly needs topping up has a seal problem, which is also a gas leak.
- Replace cracked plastic counters promptly — a cracked counter under pressure can fail suddenly. Brass or aluminum counters last indefinitely.
Troubleshooting
Bubbles are irregular or sputtering
Usually low fluid, a partially clogged needle valve, or the counter not being vertical. Also check for water that has back-siphoned past a failed check valve — water in the counter changes bubble behavior and corrodes brass units.
Fluid gets pushed into the tubing
Overfilled counter, or a pressure spike (e.g., solenoid snapping open against a closed needle valve). Fill only to the line, and open the needle valve before energizing the solenoid after maintenance.
Counter shows flow but drop checker never greens
The gas isn't reaching/dissolving in the tank: check for a major leak downstream, a disconnected diffuser line, or a completely clogged diffuser disc. The counter only confirms gas left the regulator — everything downstream is unverified until the drop checker responds.
Rate drifts upward over days
Classic single-stage regulator behavior as cylinder pressure falls, or a needle valve still breaking in. Also possible: room warming up (gas expands, flow increases at fixed valve setting). Note the pattern — drift correlated with time-of-day points to temperature; steady multi-day creep points to the regulator.
Frequently Asked Questions
Do I need a bubble counter if I have a drop checker?
Yes — they do different jobs. The drop checker tells you the tank's CO2 level with a ~2-hour lag; the bubble counter tells you the injection rate right now. Without a counter, you can't tell whether a yellow drop checker means "rate too high" or "rate fine but something changed" — and you can't reliably return to a known-good setting after adjustments.
Can I use the bubble counter to copy someone's setup exactly?
No — bubble size varies between counters, so their "2 bps" isn't your "2 bps." Use others' rates only as a rough starting neighborhood, then tune with your own drop checker. The counter's value is repeatability on your own system, not portability between systems.
What fluid is best for a bubble counter?
Mineral oil or vegetable glycerin — neither evaporates meaningfully, so a fill lasts months, and bubbles form cleanly. Plain water works but needs refilling every week or two. Avoid anything that foams, anything corrosive, and anything you'd mind getting into the tank in trace amounts.
Why did my bubble rate change overnight?
Overnight changes usually mean temperature (cool night → contracting gas → lower rate, or the reverse) or cylinder pressure crossing a threshold on a single-stage regulator. Sudden large changes mean something mechanical: a bumped needle valve, a tubing kink, or a failing check valve. Investigate before just re-adjusting.
Where exactly does the check valve go relative to the bubble counter?
Check valve goes after (downstream of) the bubble counter, between the counter and the tank. This protects the counter and everything upstream from tank water back-siphoning when the solenoid closes. A check valve before the counter leaves the counter itself unprotected.
My counter is built into the regulator — any special care?
Same principles: keep it filled with mineral oil/glycerin, keep the unit vertical (it will be, mounted on the cylinder), and watch the cap seal. The main advantage is fewer leak points — enjoy it, and spend the saved maintenance time watching your plants instead.
Count Bubbles, Trust the Drop Checker
The bubble counter's job is humble but essential: tell you, at a glance, that today looks like yesterday. Set your rate from tank size, tune it with the drop checker until it's green, then let the counter be your early-warning system for drift, leaks, and regulator behavior. It's a $10 part that protects a $500 scape — treat it as the instrument it is, not decoration.
Tissue-culture plants are the exception — they’re grown in sterile gel and adapt with minimal melting, which is part of what you’re paying for. Plants bought submersed from another hobbyist’s tank also transition with little melt, since they’re already in the right form.
Which Plants Melt Most (and Least)
Heavy melters (expect significant leaf loss)
- Cryptocorynes — infamous for “crypt melt,” sometimes dropping every leaf after any disturbance. They almost always recover from the roots within weeks.
- Stem plants grown emersed — rotala, ludwigia, and hygrophila often shed lower emersed leaves while the growing tips transition.
- Amazon swords — emersed-grown swords typically lose their broad oval aerial leaves and replace them with longer submersed ribbon leaves.
Light melters
- Anubias, java fern, bucephalandra — slow-growing rhizome plants transition gradually; occasional old-leaf melt but rarely dramatic.
- Vallisneria — usually transitions well, though it dislikes the move itself and may sulk for a week.
- Floating plants — minimal melt since their leaves were already at the air-water interface.
The Acclimation Protocol
Step 1: Quarantine or dip first
Before acclimating to your tank’s conditions, make sure you’re not acclimating pests along with the plant. Run new arrivals through our quarantine and dip protocol — it adds days upfront but prevents months of regret.
Step 2: Float to temperature-match (30 minutes)
Float the bag or container in your tank for 20–30 minutes to equalize temperature. Plants are less temperature-sensitive than fish, but a 10°F shock on top of transplant stress is an avoidable insult.
Step 3: Trim before planting
Remove any leaves that are already damaged, yellowing, or heavily algae-covered — they won’t recover and they’ll rot in your tank, feeding algae. For stem plants, trim off the bottom inch and any emersed leaves that look unlikely to adapt; the plant wastes energy maintaining leaves it’s going to shed anyway. Keep the healthy growing tips — that’s where recovery starts.
Step 4: Plant correctly the first time
Follow our planting guide — right depth, crown exposed on rosettes, rhizomes unburied on epiphytes. Every uprooting and replanting restarts the acclimation clock, so get placement right on the first attempt. Decide where each plant goes before it goes in the water.
Step 5: Run a gentle first week
For the first 7 days after planting:
- Moderate light — run your normal photoperiod but consider dropping intensity 20–30% if your light is dimmable. Blast-level light on a melting plant grows algae on the dying leaves, not recovery.
- Stable CO2 — if you inject CO2, keep it consistent. Fluctuating CO2 during acclimation is a melt accelerator. If you’re low-tech, this doesn’t apply — see growing without CO2.
- Half-strength fertilizer — new plants with damaged leaves can’t use full dosing, and the excess feeds algae. Ramp to full strength over 2–3 weeks per our fertilizer schedule.
- No disturbance — don’t move, trim, or “check on” new plants for at least two weeks. Every touch resets root establishment. This is especially critical for crypts.
Step 6: Remove melt, keep the base
As emersed leaves melt, remove the mushy material promptly — decaying leaves release ammonia and grow fungus that can spread to healthy tissue. But never discard the plant while the crown, rhizome, or roots are firm and alive. A crypt that’s lost every leaf but has firm roots is a plant that’s about to recover, not a dead plant. Give it 3–4 weeks before judging.
Telling Normal Melt From Real Problems
Normal transition melt:
- Affects oldest/emersed leaves first, newest growth last
- New submersed leaves emerge even as old ones dissolve
- Roots and crown stay firm and white/green
- Timeline: 1–4 weeks, then obvious new growth
Concerning melt (see our full melting diagnosis guide):
- New growth also melts or emerges deformed
- Rhizome or crown turns mushy and brown — this is rot, not transition
- Entire plant dissolves within days with no new growth after 4+ weeks
- Melting spreads to established plants that weren’t recently moved
Buying Tips to Minimize Melt
- Buy submersed-grown when available — hobbyist-grown cuttings transition with almost no melt.
- Choose tissue culture for sensitive species — crypts and delicate stems establish far more reliably from sterile cups.
- Avoid plants already melting in the store tank — some melt is normal, but a plant that’s mostly mush at purchase has less energy for recovery.
- Transport carefully — keep plants damp and out of direct sun/heat. A plant that dries out or cooks in a hot car melts far worse than one transported properly.
The First-Month Timeline: What to Expect Week by Week
Knowing what’s normal when removes most acclimation anxiety. Here’s the typical timeline for a healthy plant adapting to a new tank:
Week 1: The quiet week
Almost nothing visible happens. The plant is growing roots you can’t see and assessing its new environment. Some species (vallisneria, stem plants) may start shedding their lowest leaves. This is normal. Resist the urge to “help” — no moving, no extra fertilizer, no light changes. The most common beginner mistake is intervening during a week when the correct action is nothing.
Week 2: Melt peaks
This is when emersed leaves give up in earnest. Crypts may drop everything; swords shed their broad aerial leaves; stem plants lose lower foliage. It looks catastrophic and it’s usually fine. Keep removing mushy material, keep conditions stable, and watch the crown and growing tips — if those are firm and green, recovery is already underway.
Week 3: The turn
New submersed-adapted leaves emerge — smaller, thinner, often a slightly different shade of green than the emersed foliage. Stem plant tips start growing visibly; crypts push tiny curled leaves from the crown; swords unfurl narrow ribbon leaves. This is the moment most beginners exhale for the first time.
Week 4+: Established
New growth outpaces melt, and the plant is functionally yours. You can resume full-strength fertilizer, normal trimming, and stop treating it as fragile. Some slow growers (anubias, bucephalandra) take 6–8 weeks to show obvious progress — that’s their normal speed, not a problem.
Acclimating Different Plant Formats
Tissue-culture cups
Sterile, pest-free, and already adapted to high-humidity (not emersed) growth — tissue cultures melt the least of any format. Rinse the agar gel off gently (leftover gel rots and feeds fungus), split the portion into small plantlets, and plant per our planting guide. They establish slowly for the first two weeks, then accelerate. No dip needed, minimal acclimation stress — this is the premium experience you’re paying for.
Potted plants
Remove the pot and strip away the rockwool completely — leftover rockwool traps debris and rots. Tease the root mass apart gently; if it’s a dense mat, splitting it into 2–3 smaller portions actually establishes faster than planting one big clump (more growing points, better water flow around roots). Potted plants are usually emersed-grown, so expect the standard 2–4 week melt cycle.
Bare-root / bunched stems
Typically sold as weighted bunches. Remove any bands, foam, or weights, strip the lower leaves, and plant stems individually or in small groups. Bunched stems from the store are often already transitioning — check for new submersed growth at the tips, which tells you the plant is mid-adaptation and will settle quickly.
Hobbyist cuttings
Already submersed-grown and the fastest to establish — often showing new growth within days. The main acclimation factor is water-parameter difference between the two tanks. Float to temperature-match, plant promptly, and they’ll usually take off with minimal melt. This is why experienced hobbyists prefer trading cuttings over buying potted plants.
Frequently Asked Questions
Should I use a “plant starter” or transplant fertilizer?
Products marketed for transplant shock are mostly B-vitamins and mild hormones. They don’t hurt, but there’s no strong evidence they help aquarium plants specifically. Stable conditions and patience outperform any bottle. Save the money for more plants.
My new plant melted completely — bare crown, no leaves. Is it dead?
Probably not, if the crown or rhizome is firm. Crypts and swords routinely lose 100% of their leaves and regrow from the base within a month. The test is firmness: firm and pale/green means alive; mushy and brown/black means rot. Give firm-but-leafless plants a full 4 weeks before declaring them dead.
Can I speed up acclimation with extra light or CO2?
No — and trying usually backfires. A melting plant can’t use extra light; the excess just grows algae on its dying leaves. Keep light moderate and CO2 stable (not boosted) during acclimation. Growth speed comes from the plant’s own adaptation timeline, which you can’t rush, only avoid delaying.
Should new plants go straight into my main display tank?
After quarantine/dipping, yes — there’s no benefit to a separate “growing-in” tank for most plants. They acclimate to your water fastest in the tank they’ll live in. The exception is very delicate species going into a tank with boisterous fish; give those a few weeks in a calm corner or breeder box first.
The Patience Rule
The single most important acclimation skill is restraint: plant it right, set gentle conditions, remove decay, and then leave it alone for a month. The hobbyists with the best plant growth aren’t doing something clever in week one — they’re simply not interfering in weeks two through four while the plants do what they’ve evolved to do. Melt looks like failure and feels like failure, but in most cases it’s the visible part of a plant successfully becoming yours.