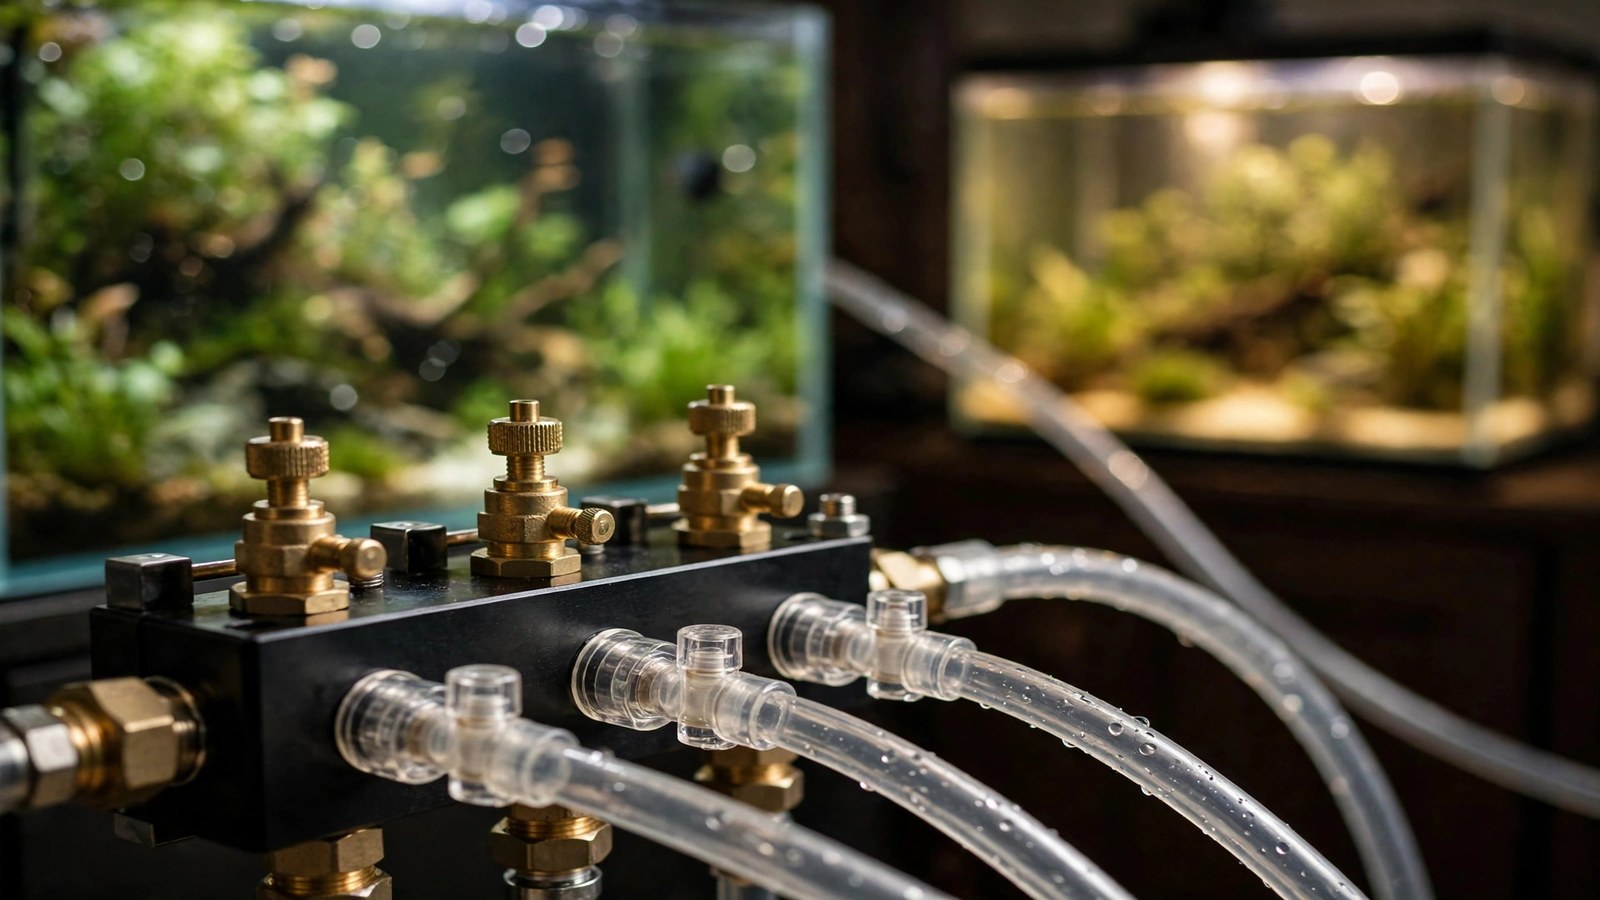
If you've ever eyed a second planted tank and thought "I'd inject CO2 in that one too, if only I had a second setup," a co2 splitter multiple tanks configuration is probably your best answer. Instead of buying a second cylinder, regulator, and solenoid, a splitter manifold divides your existing CO2 system's output across two or more aquariums — each branch with its own needle valve for independent tuning. It's cheaper and tidier than running parallel cylinders, but only if you plumb it in the right order and treat every branch as its own small CO2 system. This guide covers how manifolds work, correct installation, balancing tanks of different sizes, and the safety checks that matter when livestock in two tanks depends on one gas source.
What a CO2 Splitter Manifold Actually Does
A splitter — usually called a manifold or distribution block — is a metal block with one gas inlet and two, three, or more outlets. It mounts on the low-pressure side of your regulator, typically after the solenoid, and gives each tank its own dedicated needle valve. Gas enters from the regulator, fills the manifold at a single working pressure, and each needle valve bleeds off only what its tank needs. Manufacturers like CO2Art sell expandable manifold blocks designed for multi-aquarium use, which illustrates the standard design: per-branch needle valves with integrated bubble counters and check valves.
The two common styles are the integrated block, a single machined manifold with built-in valves per branch (compact, fewest leak points), and the modular tee assembly, built from individual tees and separate needle valves (easy to expand later, but more threaded joints to seal). The block style is the safer default for beginners.
Why not just use a Y-splitter in the tubing?
A plastic Y in the airline splits gas but gives you no per-branch adjustment — both tanks share whatever the single upstream needle valve decides, divided unevenly by backpressure. One tank ends up gassing while the other starves. A proper manifold with individual needle valves per branch is the difference between "splitting gas" and "running two tanks."
Where the Manifold Fits in the CO2 Chain
Plumbing order matters more than hardware brand. From cylinder to tank, the sequence should be:
- Cylinder → regulator: drops cylinder pressure to a low working pressure.
- Regulator → solenoid: the master on/off switch, timed with your lights.
- Solenoid → manifold/splitter: divides flow at the set working pressure.
- Each branch, duplicated per tank: needle valve → check valve → bubble counter → tubing → diffuser.
The cylinder, regulator, and solenoid are shared — one timer, one master shutoff. Everything from the needle valve onward is duplicated per tank. Set working pressure with all branch valves open (typically 25–40 psi for inline diffusers, 20–30 psi for in-tank ceramic discs), then dial each branch back to its target rate. If any component's role is unclear, review our CO2 solenoid and timer setup guide and bubble counter guide before buying parts.
Installing the Splitter, Step by Step
- Depressurize first. Close the cylinder valve, vent the regulator by briefly opening a needle valve, and unplug the solenoid. Never thread fittings onto a pressurized manifold.
- Remove the old single needle valve from the regulator or solenoid outlet; keep it as a spare.
- Thread the manifold onto the solenoid outlet with PTFE tape on every male thread — two to three wraps, wound in the direction of the threads.
- Cap every unused port with the supplied plugs, sealed with PTFE tape. An uncapped port is a wide-open leak you'll discover only after the cylinder empties.
- Attach a check valve to every branch, after the needle valve and before the bubble counter. Non-negotiable — see below.
- Route tubing to each tank, keeping runs short and unkinked. Use true CO2-resistant polyurethane tubing — cheap silicone airline bleeds CO2 through its walls over long runs.
- Pressurize and leak-check before powering the solenoid. Open the cylinder, confirm working pressure holds with all needle valves closed, then soap-test every joint.
- Set bubble rates tank by tank, starting from zero and increasing slowly over several days.
One Check Valve Per Line: Non-Negotiable
The classic manifold failure is backflow between tanks. When CO2 pressure dips — during a power outage, for example — a canister filter's siphon suction can pull water up one line, through the manifold, and into the other tank's tubing or the solenoid itself. Corrosion and diaphragm failure follow, and you discover it when a tank has quietly stopped receiving CO2.
A check valve on each branch stops flow in one direction only — from tank toward manifold. Install with the arrow pointing toward the aquarium, and test before fitting by blowing through (air passes one way, blocks the other). Replace check valves yearly; the internal diaphragm stiffens with age. Brass-bodied CO2 check valves outlast thin plastic air-pump ones.
Balancing Flow Between Tanks of Different Sizes
Each needle valve tunes independently — the manifold doesn't care what the neighboring branches are doing, as long as working pressure stays stable. A 60-liter display tank at 2 bubbles per second and a 20-liter nano at half a bubble per second each simply get their own setting.
| Tank volume | Typical starting bubble rate | Notes |
|---|---|---|
| 10–20 L nano | 0.5–1 bubble/sec | Most sensitive to overshoot; make the smallest adjustments |
| 30–60 L standard | 1–2 bubbles/sec | Set this tank first as your reference |
| 100–150 L large | 2–4 bubbles/sec | May need a high-flow needle valve |
Practical balancing procedure:
- Start with all branches at zero and working pressure correctly set.
- Dial the largest tank's needle valve to its target rate using its bubble counter.
- Open the second branch and set its rate. Opening another branch can slightly drop working pressure — recheck the first tank and nudge it back.
- Repeat for extra tanks, rechecking earlier ones once.
- Confirm with a drop checker in each tank over 2–3 hours; both should settle in the same target range.
Diffuser type changes effective flow: inline diffusers atomize finer but demand more pressure than in-tank ceramic discs. Our CO2 diffusion methods compared guide explains which suits each tank — mismatched diffusers across branches are fine as long as each needle valve compensates.
Buy one port more than you need
A two-tank setup on a 3-port manifold leaves room for the inevitable third tank — properly sealed, capped spare ports lose no gas. Expanding a capped manifold later is a five-minute job; replacing a 2-port block with a 3-port one is a full depressurize-and-replumb afternoon. Also note: if you shut a branch fully (for a rescape), manifold pressure can momentarily rise and surge the remaining branches — recheck open tanks' bubble rates afterward.
Solenoid Placement and Photoperiod Timing
One solenoid feeds the whole manifold, so all tanks share the same on/off schedule. That's perfect when every tank's lights run identical hours — apply the standard practice of timing CO2 with the light schedule (gas on an hour before lights, off an hour before lights-out) to the entire system at once.
Different photoperiods are the complication. If the nano's light runs 10:00–18:00 and the display tank runs 14:00–22:00, a single shared solenoid can't serve both. Your options: align the photoperiods (simplest — shift one tank's timer to match); add a per-branch solenoid on the differently scheduled branch, keeping the master solenoid as the shared shutoff; or, as a last resort, run the odd tank at a very low 24/7 rate — risky, since CO2 at night depletes oxygen.
Keep the master solenoid before the manifold (regulator → solenoid → manifold) so one valve cuts gas to everything in an emergency.
Gas Consumption Math: What a 5 lb Cylinder Feeds
Consumption scales roughly with total injected bubbles per second across all tanks. For the classic two-tank setup on a 5 lb (2.3 kg) cylinder — a 60 L tank at ~2 bubbles/sec plus a 20 L nano at ~1 bubble/sec, 8 hours daily — that's about 3 bubbles/sec × 28,800 seconds ≈ 86,000 bubbles per day.
As a rule of thumb, a 5 lb cylinder lasts 4–6 months on a single medium tank (~2 bubbles/sec), so adding a second tank at 1 bubble/sec brings that to roughly 3–4 months. For capacity versus tank-count planning, see our CO2 cylinder sizes guide. Log your refill dates — the first cylinder after adding the splitter is your calibration run. Weigh the cylinder monthly on a bathroom scale: a sudden drop between weigh-ins signals a leak, not consumption.
Leak-Checking a Manifold System
Every added fitting is a potential leak, and a manifold multiplies your joint count — a 3-branch system can carry 12–15 threaded joints. The soap-water method is the same as any CO2 setup, just more thorough; our CO2 leak detection guide covers the full procedure. The manifold-specific checklist:
- With all needle valves closed and the system pressurized, brush soapy water over every joint: cylinder-to-regulator, solenoid threads, manifold inlet, each manifold port and plug, every needle valve stem, and each check-valve connection.
- A leak shows as a bubble that inflates over 10–20 seconds — not the foam from brushing.
- Open each needle valve one at a time and recheck its branch joints under flow.
- Note the high-pressure gauge, close the cylinder, and recheck in 24 hours. Any drop with everything closed means a leak upstream of the needle valves.
Don't forget the tubing connections at the manifold barbs — the most overlooked leak point. Tubing seats over the first days, so re-push each tube fully onto its barb and re-tighten clamps a day after installation.
Splitter vs. a Second CO2 System: Which Makes Sense?
| Factor | Splitter manifold | Second (cheap) CO2 system |
|---|---|---|
| Upfront cost | Low — manifold + needle valves + tubing | Higher — regulator, solenoid, cylinder |
| Running cost | One cylinder, shared consumption | Two refill streams, usually pricier |
| Independent schedules | No shared solenoid schedule (unless per-branch solenoids added) | Yes — fully independent |
| End-of-tank-dump risk | All tanks affected at once | Only one tank affected |
| Failure blast radius | Regulator/solenoid failure hits every tank | Failures isolated per tank |
| Space | One cylinder, cleaner stand | Two cylinders to house and secure |
The splitter wins when tanks sit near each other, share a photoperiod, and you accept one system as a single point of failure. A second system wins when tanks are in different rooms, run different light schedules, or hold sensitive livestock that justifies isolated failure domains. A DIY yeast or citric-acid setup as the "second system" is cheaper still but far less stable — acceptable for a low-demand nano, a poor match for a high-light carpeted tank.
Safety: The Conservative Approach
When one gas source serves multiple tanks, a mistake multiplies. These conservative rules keep both tanks safe:
- Start low on every branch. Begin each tank at roughly half the target bubble rate, increase slowly over a week, and confirm with a drop checker in each tank. Never chase a target rate in one session.
- Observe livestock on every tank, daily. Fish gasping at the surface, shrimp climbing out of the water, or sudden post-lights-on lethargy are early CO2-excess warnings — cut gas to that branch and increase surface agitation. See our CO2 fish safety guide for the full warning-sign list.
- Respect end-of-tank dump. As a cylinder nears empty, single-stage regulators can dump excess pressure downstream, flooding every branch at once. When the high-pressure gauge starts falling from its normal full reading, refill within days. A dual-stage regulator largely eliminates this risk and is worth the premium on a multi-tank system.
- One emergency shutoff for everything. Know which valve kills gas to all tanks — the cylinder valve — and make sure anyone who feeds your fish knows it too. Keep it reachable, not buried behind the stand.
- Secure the cylinder. A cylinder feeding two tanks sees double the maintenance traffic. Strap it to the stand or wall; a falling cylinder can shear its valve.
Frequently Asked Questions
Can I run a 5 lb CO2 cylinder on two tanks?
Yes — a 5 lb cylinder comfortably feeds two small-to-medium tanks, typically lasting about 3–4 months at a combined rate around 3 bubbles per second for 8 hours daily. Refill cadence depends on total bubble rate, daily hours, and diffuser efficiency, so log your first cylinder's lifespan after adding the splitter to learn your actual consumption before scheduling refills.
How many tanks can one CO2 splitter feed?
Practically, 2–4 tanks per manifold, depending on total gas demand and how many needle valves you're willing to balance. Each branch needs its own needle valve, check valve, and bubble counter, so cost and tubing clutter grow with every tank. Beyond 3–4 tanks, most hobbyists find a second regulator or cylinder cleaner and easier to troubleshoot than a sprawling manifold.
Do I need a separate solenoid for each tank on a splitter?
Not usually. One master solenoid before the manifold switches all branches on the same schedule, which works perfectly when tanks share a photoperiod. You only need per-branch solenoids for tanks on different light schedules — add a 2-way solenoid on the odd branch while keeping the shared master solenoid as your emergency shutoff.
Why is one tank on my splitter getting more CO2 than the other?
Uneven flow almost always comes from backpressure differences — a clogged or finer diffuser on one branch, different tubing lengths, or an inline diffuser versus an in-tank disc. Clean or replace the diffusers first, then rebalance each needle valve against its bubble counter with working pressure steady. If one branch can never reach its target, your working pressure may be too low for that diffuser type.
Can water backflow from one tank reach the other through a splitter?
Only if a branch lacks a working check valve — which is exactly why every branch needs its own. During a power outage or pressure drop, siphon suction can pull water up a line, through the manifold, and into another tank's tubing or the solenoid. Test each check valve's one-way function at installation and replace them yearly, since aging diaphragms are the silent failure point.
Is a CO2 splitter safe for shrimp tanks?
Shrimp are more sensitive to CO2 swings than most fish, so apply the conservative rules with extra margin: start at very low bubble rates, raise them over a week or more, and keep a drop checker in the shrimp tank to confirm safe levels. Avoid pairing a shrimp tank with a high-demand plant tank on the same manifold, and observe livestock on every tank daily during the first two weeks.
One System, Two Gardens
A well-plumbed splitter turns a single CO2 cylinder into a quiet utility serving every tank in the room — one refill schedule, one timer, one tidy stand. The price is discipline: a check valve on every line, per-branch needle valves you actually calibrate, a leak check covering every joint, and the conservative habit of starting low and watching your livestock. If you're still choosing hardware, our best CO2 regulators for planted tanks roundup notes which regulators are manifold-ready.
Tissue-culture plants are the exception — they’re grown in sterile gel and adapt with minimal melting, which is part of what you’re paying for. Plants bought submersed from another hobbyist’s tank also transition with little melt, since they’re already in the right form.
Which Plants Melt Most (and Least)
Heavy melters (expect significant leaf loss)
- Cryptocorynes — infamous for “crypt melt,” sometimes dropping every leaf after any disturbance. They almost always recover from the roots within weeks.
- Stem plants grown emersed — rotala, ludwigia, and hygrophila often shed lower emersed leaves while the growing tips transition.
- Amazon swords — emersed-grown swords typically lose their broad oval aerial leaves and replace them with longer submersed ribbon leaves.
Light melters
- Anubias, java fern, bucephalandra — slow-growing rhizome plants transition gradually; occasional old-leaf melt but rarely dramatic.
- Vallisneria — usually transitions well, though it dislikes the move itself and may sulk for a week.
- Floating plants — minimal melt since their leaves were already at the air-water interface.
The Acclimation Protocol
Step 1: Quarantine or dip first
Before acclimating to your tank’s conditions, make sure you’re not acclimating pests along with the plant. Run new arrivals through our quarantine and dip protocol — it adds days upfront but prevents months of regret.
Step 2: Float to temperature-match (30 minutes)
Float the bag or container in your tank for 20–30 minutes to equalize temperature. Plants are less temperature-sensitive than fish, but a 10°F shock on top of transplant stress is an avoidable insult.
Step 3: Trim before planting
Remove any leaves that are already damaged, yellowing, or heavily algae-covered — they won’t recover and they’ll rot in your tank, feeding algae. For stem plants, trim off the bottom inch and any emersed leaves that look unlikely to adapt; the plant wastes energy maintaining leaves it’s going to shed anyway. Keep the healthy growing tips — that’s where recovery starts.
Step 4: Plant correctly the first time
Follow our planting guide — right depth, crown exposed on rosettes, rhizomes unburied on epiphytes. Every uprooting and replanting restarts the acclimation clock, so get placement right on the first attempt. Decide where each plant goes before it goes in the water.
Step 5: Run a gentle first week
For the first 7 days after planting:
- Moderate light — run your normal photoperiod but consider dropping intensity 20–30% if your light is dimmable. Blast-level light on a melting plant grows algae on the dying leaves, not recovery.
- Stable CO2 — if you inject CO2, keep it consistent. Fluctuating CO2 during acclimation is a melt accelerator. If you’re low-tech, this doesn’t apply — see growing without CO2.
- Half-strength fertilizer — new plants with damaged leaves can’t use full dosing, and the excess feeds algae. Ramp to full strength over 2–3 weeks per our fertilizer schedule.
- No disturbance — don’t move, trim, or “check on” new plants for at least two weeks. Every touch resets root establishment. This is especially critical for crypts.
Step 6: Remove melt, keep the base
As emersed leaves melt, remove the mushy material promptly — decaying leaves release ammonia and grow fungus that can spread to healthy tissue. But never discard the plant while the crown, rhizome, or roots are firm and alive. A crypt that’s lost every leaf but has firm roots is a plant that’s about to recover, not a dead plant. Give it 3–4 weeks before judging.
Telling Normal Melt From Real Problems
Normal transition melt:
- Affects oldest/emersed leaves first, newest growth last
- New submersed leaves emerge even as old ones dissolve
- Roots and crown stay firm and white/green
- Timeline: 1–4 weeks, then obvious new growth
Concerning melt (see our full melting diagnosis guide):
- New growth also melts or emerges deformed
- Rhizome or crown turns mushy and brown — this is rot, not transition
- Entire plant dissolves within days with no new growth after 4+ weeks
- Melting spreads to established plants that weren’t recently moved
Buying Tips to Minimize Melt
- Buy submersed-grown when available — hobbyist-grown cuttings transition with almost no melt.
- Choose tissue culture for sensitive species — crypts and delicate stems establish far more reliably from sterile cups.
- Avoid plants already melting in the store tank — some melt is normal, but a plant that’s mostly mush at purchase has less energy for recovery.
- Transport carefully — keep plants damp and out of direct sun/heat. A plant that dries out or cooks in a hot car melts far worse than one transported properly.
The First-Month Timeline: What to Expect Week by Week
Knowing what’s normal when removes most acclimation anxiety. Here’s the typical timeline for a healthy plant adapting to a new tank:
Week 1: The quiet week
Almost nothing visible happens. The plant is growing roots you can’t see and assessing its new environment. Some species (vallisneria, stem plants) may start shedding their lowest leaves. This is normal. Resist the urge to “help” — no moving, no extra fertilizer, no light changes. The most common beginner mistake is intervening during a week when the correct action is nothing.
Week 2: Melt peaks
This is when emersed leaves give up in earnest. Crypts may drop everything; swords shed their broad aerial leaves; stem plants lose lower foliage. It looks catastrophic and it’s usually fine. Keep removing mushy material, keep conditions stable, and watch the crown and growing tips — if those are firm and green, recovery is already underway.
Week 3: The turn
New submersed-adapted leaves emerge — smaller, thinner, often a slightly different shade of green than the emersed foliage. Stem plant tips start growing visibly; crypts push tiny curled leaves from the crown; swords unfurl narrow ribbon leaves. This is the moment most beginners exhale for the first time.
Week 4+: Established
New growth outpaces melt, and the plant is functionally yours. You can resume full-strength fertilizer, normal trimming, and stop treating it as fragile. Some slow growers (anubias, bucephalandra) take 6–8 weeks to show obvious progress — that’s their normal speed, not a problem.
Acclimating Different Plant Formats
Tissue-culture cups
Sterile, pest-free, and already adapted to high-humidity (not emersed) growth — tissue cultures melt the least of any format. Rinse the agar gel off gently (leftover gel rots and feeds fungus), split the portion into small plantlets, and plant per our planting guide. They establish slowly for the first two weeks, then accelerate. No dip needed, minimal acclimation stress — this is the premium experience you’re paying for.
Potted plants
Remove the pot and strip away the rockwool completely — leftover rockwool traps debris and rots. Tease the root mass apart gently; if it’s a dense mat, splitting it into 2–3 smaller portions actually establishes faster than planting one big clump (more growing points, better water flow around roots). Potted plants are usually emersed-grown, so expect the standard 2–4 week melt cycle.
Bare-root / bunched stems
Typically sold as weighted bunches. Remove any bands, foam, or weights, strip the lower leaves, and plant stems individually or in small groups. Bunched stems from the store are often already transitioning — check for new submersed growth at the tips, which tells you the plant is mid-adaptation and will settle quickly.
Hobbyist cuttings
Already submersed-grown and the fastest to establish — often showing new growth within days. The main acclimation factor is water-parameter difference between the two tanks. Float to temperature-match, plant promptly, and they’ll usually take off with minimal melt. This is why experienced hobbyists prefer trading cuttings over buying potted plants.
Frequently Asked Questions
Should I use a “plant starter” or transplant fertilizer?
Products marketed for transplant shock are mostly B-vitamins and mild hormones. They don’t hurt, but there’s no strong evidence they help aquarium plants specifically. Stable conditions and patience outperform any bottle. Save the money for more plants.
My new plant melted completely — bare crown, no leaves. Is it dead?
Probably not, if the crown or rhizome is firm. Crypts and swords routinely lose 100% of their leaves and regrow from the base within a month. The test is firmness: firm and pale/green means alive; mushy and brown/black means rot. Give firm-but-leafless plants a full 4 weeks before declaring them dead.
Can I speed up acclimation with extra light or CO2?
No — and trying usually backfires. A melting plant can’t use extra light; the excess just grows algae on its dying leaves. Keep light moderate and CO2 stable (not boosted) during acclimation. Growth speed comes from the plant’s own adaptation timeline, which you can’t rush, only avoid delaying.
Should new plants go straight into my main display tank?
After quarantine/dipping, yes — there’s no benefit to a separate “growing-in” tank for most plants. They acclimate to your water fastest in the tank they’ll live in. The exception is very delicate species going into a tank with boisterous fish; give those a few weeks in a calm corner or breeder box first.
The Patience Rule
The single most important acclimation skill is restraint: plant it right, set gentle conditions, remove decay, and then leave it alone for a month. The hobbyists with the best plant growth aren’t doing something clever in week one — they’re simply not interfering in weeks two through four while the plants do what they’ve evolved to do. Melt looks like failure and feels like failure, but in most cases it’s the visible part of a plant successfully becoming yours.